How to Enable the Clipboard Shortcut in Excel
Steps
- Go to the Home tab on the ribbon.
- Select the dialog launcher arrow from the Clipboard group.
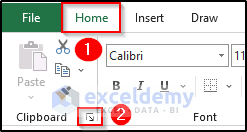
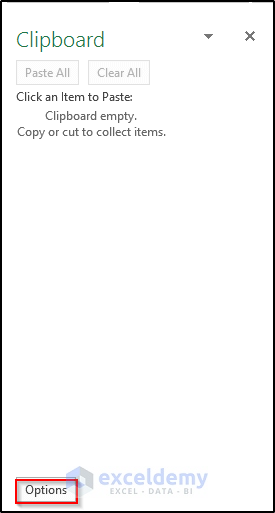
- A Clipboard dialog box will appear.
- Select Options.
- Enable Show Office Clipboard When Ctrl + C Pressed Twice.
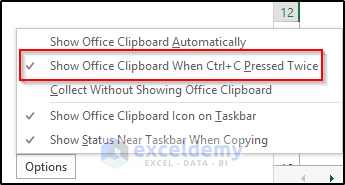
- The Clipboard will open by pressing Ctrl + C Twice as a keyboard shortcut.
Copy a Range to the Clipboard with Excel VBA: 7 Suitable Examples
Example 1 – Copy a Specific Range to the Clipboard
Steps
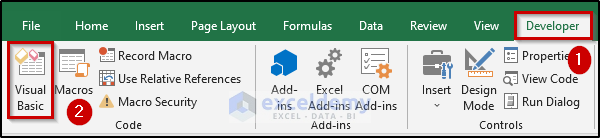
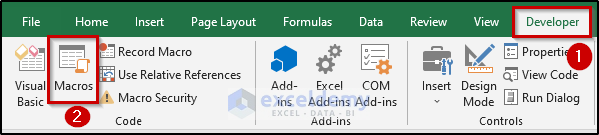
- Go to the Developer tab on the ribbon.
- Select the Visual Basic option from the Code group.
- It will open up the Visual Basic window.
- Go to the Insert tab at the top.
- Select the Module option.
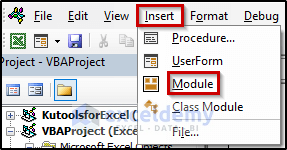
- A Module code window will appear.
- Enter the following code.
Sub Copy_Range_To_Clipboard1()
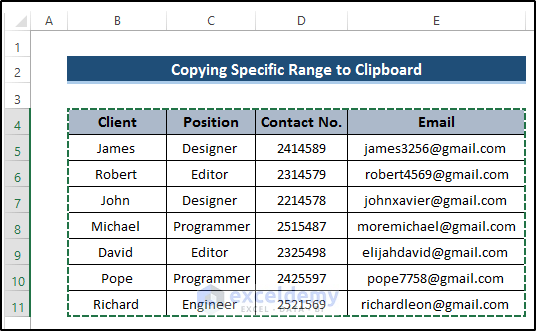
Range("B4:E11").Copy
Range("G4").Select
ActiveSheet.Paste
End Sub- Close the Visual Basic window.
- Go to the Developer tab on the ribbon.
- Select the Macros option from the Code group.
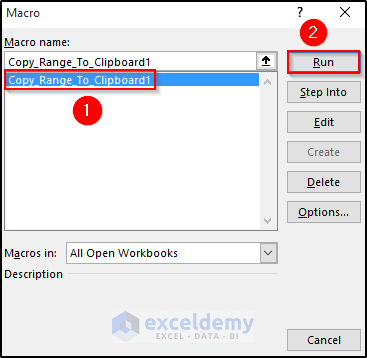
- The Macro dialog box will appear.
- Select Copy_Range_To_Clipboard1 from the Macro name section.
- Click on Run.
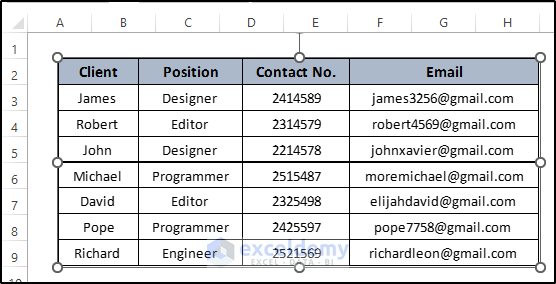
- This will copy the range of cells in your dataset. See the screenshot.
- To confirm that the range is copied to the Clipboard, you need to go to the Home tab on the ribbon.
- Select the dialog launcher from the Clipboard group.
- You can see the copied range in the Clipboard.

VBA Code Explanation
Sub Copy_Range_To_Clipboard1()Provides a name for the sub-procedure of the macro
Range("B4:E11").CopyDefines the range of cells to copy.
Range("G4").Select
ActiveSheet.Paste
Selects the specific cell and pastes the copied range of cells.
End SubEnds the sub-procedure of the macro.
Read More: Excel VBA Copy Cell Value to Clipboard
Example 2 – Copy the Range from an Active Sheet to the Clipboard
Steps
- Go to the Developer tab on the ribbon.
- Select the Visual Basic option from the Code group.
- This will open the Visual Basic window.
- Go to the Insert tab at the top.
- Select the Module option.
- A Module code window will appear.
- Enter the following code.
Sub Copy_Range_To_Clipboard2()
ActiveSheet.Range("B4:E11").Copy
End Sub- Close the Visual Basic window.
- Go to the Developer tab on the ribbon.
- Select the Macros option from the Code group.
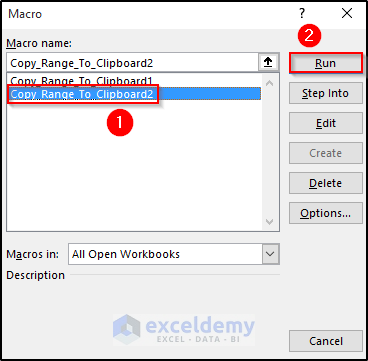
- The Macro dialog box will appear.
- Select Copy_Range_To_Clipboard2 from the Macro name section.
- Click on Run.
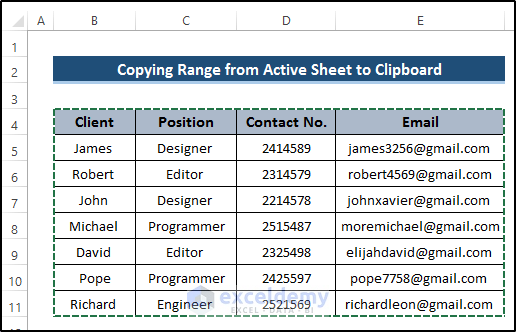
- This will copy the range of cells in your dataset.
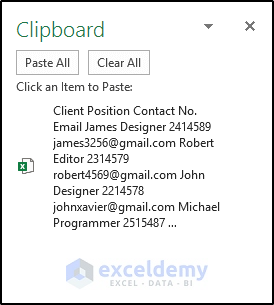
- Confirm that the range is copied to the Clipboard.
- You can see the copied range in the Clipboard.
VBA Code Explanation
Sub Copy_Range_To_Clipboard2()Provides a name for the sub-procedure of the macro
ActiveSheet.Range("B4:E11").CopyDefines the active sheet range of cells to copy.
End SubEnds the sub-procedure of the macro
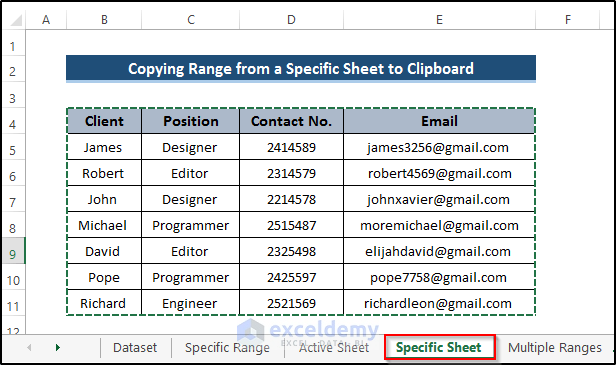
Example 3 – Copy a Range from a Specific Sheet to the Clipboard
Steps
- Go to the Developer tab on the ribbon.
- Select the Visual Basic option from the Code group.
- It will open up the Visual Basic window.
- Go to the Insert tab at the top.
- Select the Module option.
- A Module code window will appear.
- Insert the following code.
Sub Copy_Range_To_Clipboard3()
Worksheets("Specific Sheet").Range("B4:E11").Copy
End Sub- Close the Visual Basic window.
- Go to the Developer tab on the ribbon.
- Select the Macros option from the Code group.
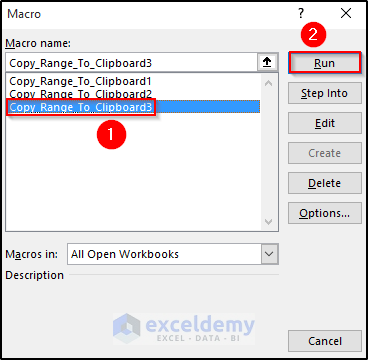
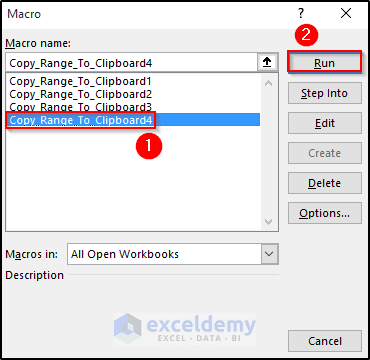
- The Macro dialog box will appear.
- Select Copy_Range_To_Clipboard3 from the Macro name section.
- Click on Run.
- This will copy the range of cells in your dataset.
- Confirm that the range is copied to the Clipboard. Use the dialog launcher or the shortcut if you’ve enabled it.
- Here’s Clipboard.

VBA Code Explanation
Sub Copy_Range_To_Clipboard3()Provides a name for the sub-procedure of the macro
Worksheets("Specific Sheet").Range("B4:E11").CopyDefines the worksheet name and the range of cells to copy.
End SubEnds the sub-procedure of the macro.
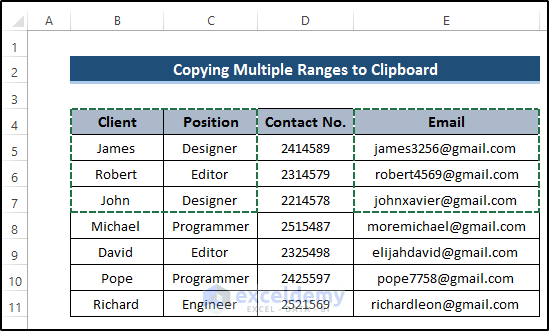
Example 4 – Copy Multiple Ranges to the Clipboard
Steps
- Go to the Developer tab on the ribbon.
- Select the Visual Basic option from the Code group.
- It will open up the Visual Basic window.
- Go to the Insert tab at the top.
- Select the Module option.
- A Module code window will appear.
- Insert the following code.
Sub Copy_Range_To_Clipboard4()
Range("B4:C7,E4:E7").Copy
Set newbook = Workbooks.Add
Range("A1").PasteSpecial
End Sub- Close the Visual Basic window.
- Go to the Developer tab on the ribbon.
- Select the Macros option from the Code group.
- The Macro dialog box will appear.
- Select Copy_Range_To_Clipboard4 from the Macro name section.
- Click on Run.
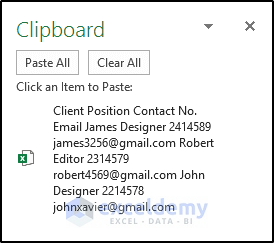
- This will copy multiple ranges in your dataset. See the screenshot.
- Confirm that the range is copied to the Clipboard. Use the dialog launcher or the shortcut if you’ve enabled it.
- You can see the copied range in the Clipboard.
VBA Code Explanation
Sub Copy_Range_To_Clipboard4()Provides a name for the sub-procedure of the macro
Range("B4:C7,E4:E7").CopyDefines the multiple ranges to copy.
Set newbook = Workbooks.Add
Range("A1").PasteSpecial
Sets a new book to add a new workbook and defines the range to apply the paste special.
End SubEnds the sub-procedure of the macro.
Example 5 – Enable Auto-Copy Range with Single Click
Steps
- Go to the Developer tab on the ribbon.
- Select the Visual Basic option from the Code group.
- It will open up the Visual Basic window.
- Insert the following code on the sheet’s code window.
Private Sub Worksheet_SelectionChange(ByVal cTarget As Range)
If Not Intersect(cTarget, Range("B4:E11")) Is Nothing Then
cTarget.Copy
End If
End Sub- Close the Visual Basic window.
- Go to the specific worksheet and Excel executes the macro automatically.
- Select the range of cells by dragging the mouse.
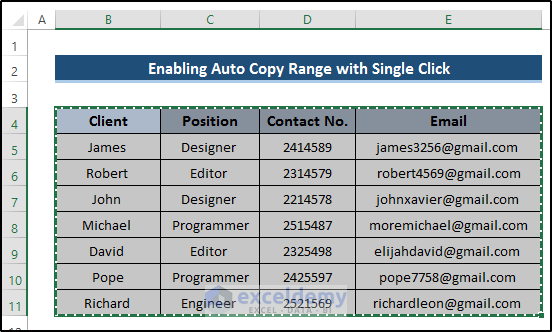
- Confirm that the range is copied to the Clipboard. Use the dialog launcher or the shortcut if you’ve enabled it.
- You can see the copied range in the Clipboard.

VBA Code Explanation
Private Sub Worksheet_SelectionChange(ByVal cTarget As Range)Provides a private sub name of the macro
If Not Intersect(cTarget, Range("B4:E11")) Is Nothing Then
cTarget.Copy
End If
Uses VBA Intersect to return a range upon the assigned Arg’s intersection. Here, the VBA If condition implements and performs Copy after its affirmation.
End SubEnds the sub-procedure of the macro.
Example 6 – Utilizing a VBA Button
Steps
- Go to the Developer tab on the ribbon.
- Go to the Insert drop-down option.
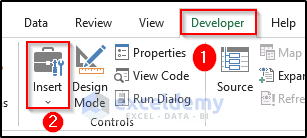
- Select the Button option from the Insert drop-down option.
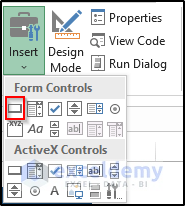
- The mouse cursor will turn into a plus (+) icon.
- Draw the button shape by clicking, dragging, and releasing.
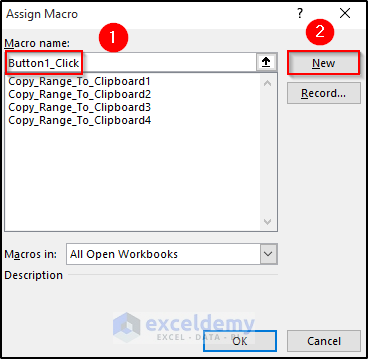
- The Assign Macro dialog box will appear.
- Insert the preferred Macro name.
- Click on New.
- This will open up a code window.
- Insert the following code in there.
Sub Button1_Click()
ActiveSheet.Range("B4:E11").Copy
End Sub- Close the window.
- Right-click on the button and a Content Menu will appear.
- Select Edit Text to edit the button name.
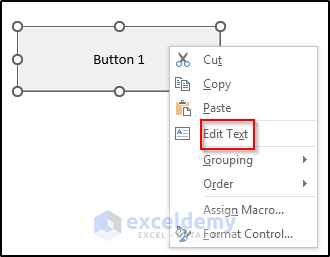
- Give your preferred name. We set the Copy range to Clipboard as the name.

- If you click on the button, it will copy the selected range of cells to the clipboard.

- Confirm that the range is copied to the Clipboard. Use the dialog launcher or the shortcut if you’ve enabled it.
- You can see the copied range in the Clipboard.

Example 7 – Copy a Range as a Picture to the Clipboard
Steps
- Go to the Developer tab on the ribbon.
- Select the Visual Basic option from the Code group.
- It will open up the Visual Basic window.
- Go to the Insert tab at the top.
- Select the Module option.
- A Module code window will appear.
- Insert the following code.
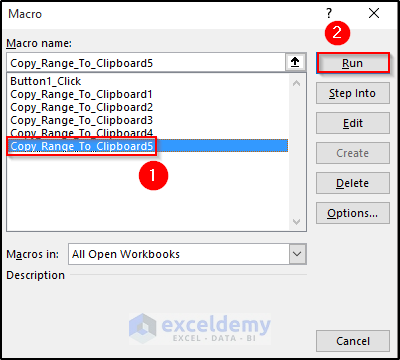
Sub Copy_Range_To_Clipboard5()
Worksheets("Copy as Picture").Range("B4:E11").CopyPicture Appearance:=xlScreen, Format:=xlPicture
End Sub- Close the Visual Basic window.
- Go to the Developer tab on the ribbon.
- Select the Macros option from the Code group.
- The Macro dialog box will appear.
- Select Copy_Range_To_Clipboard5 from the Macro name section.
- Click on Run.
- The assigned range is copied as a picture.
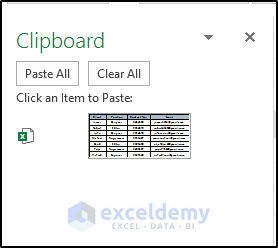
- If you press Ctrl + V, it will paste a picture. See the screenshot.
- Confirm that the range is copied to the Clipboard. Use the dialog launcher or the shortcut if you’ve enabled it.
- You can see the copied range as a picture on the Clipboard.
VBA Code Explanation
Sub Copy_Range_To_Clipboard5()Provides a name for the sub-procedure of the macro.
Worksheets("Copy as Picture").Range("B4:E11").CopyPicture Appearance:=xlScreen, Format:=xlPictureDefines the specific worksheet from where the range of cells is to copy them as a picture, then defines the format as well as appearance.
End SubEnds the sub-procedure of the macro.
Read More: How to Paste Image into Excel Cell from Clipboard
Download the Practice Workbook
Related Articles
- Excel VBA to Copy Without Clipboard
- [Solved:] There Is a Problem with Clipboard in Excel
- [Fixed!] Excel Clipboard Not Working

