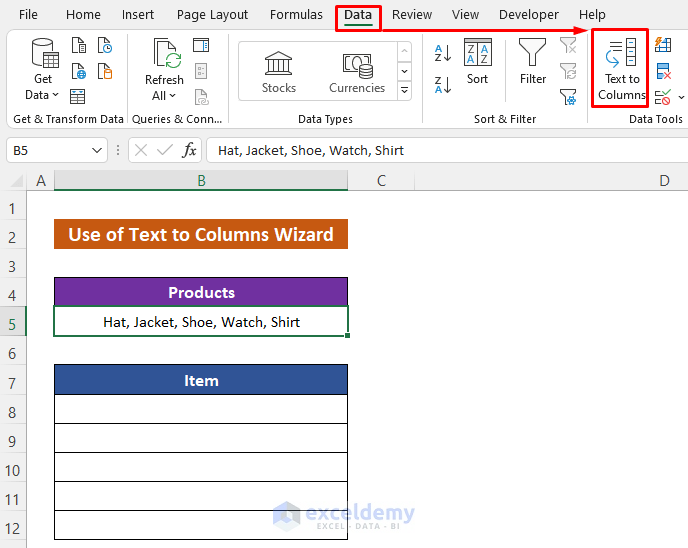
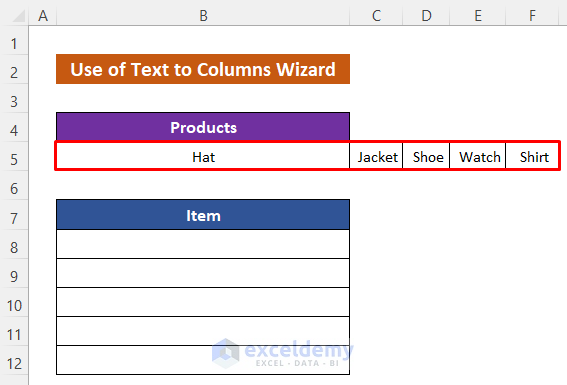
Method 1 – Apply the Text to Columns Wizard to Split Data from One Cell into Multiple Rows
We have placed five product names (separated by commas and spaces) in Cell B5. We’ll split them into multiple rows along cells B8:B12.
Steps:
- Select Cell B5.
- Go to the Data tab and select Text to Columns.
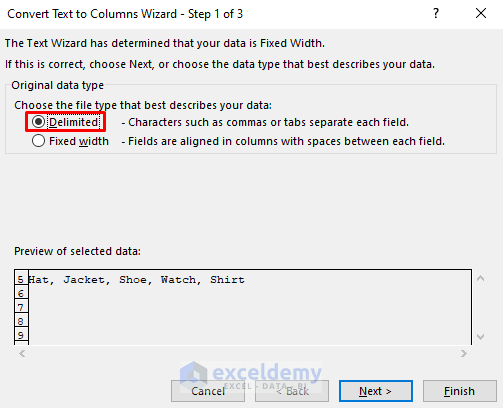
A three-step dialog wizard will open.
- Mark Delimited and press Next in the first step.
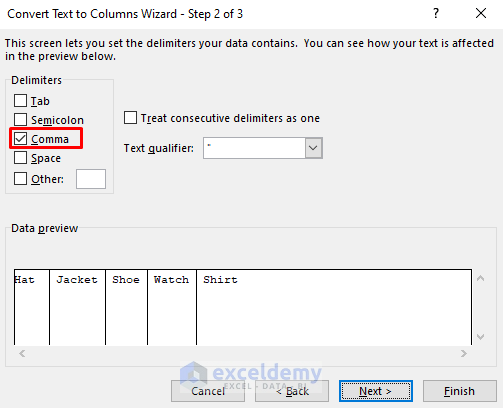
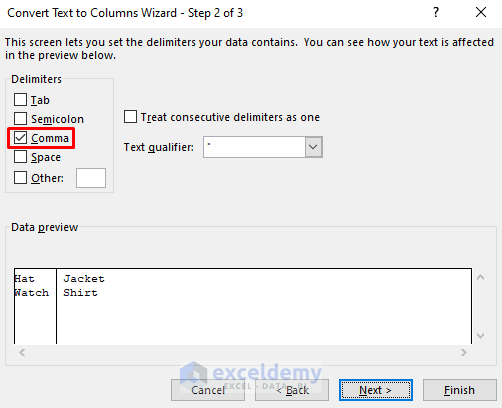
- Mark Comma as we want to split the data into columns separated by comma.
- Press Next.
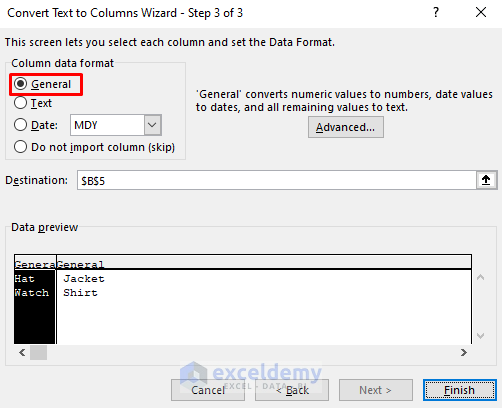
- Mark General.
- Press Finish.
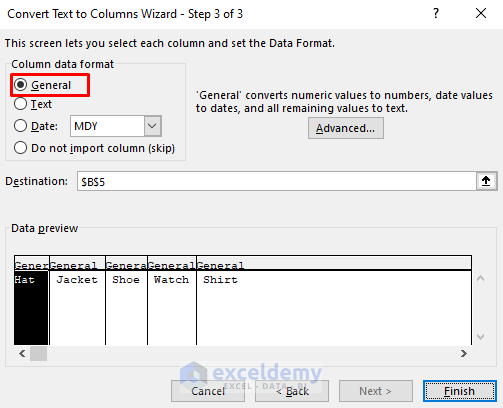
- The data is split into multiple columns along row 5.
- Select the cells B5:F5 and copy them.
- Right-click on the first row of the range where you want to paste them.
- Select Transpose from the Paste Options.
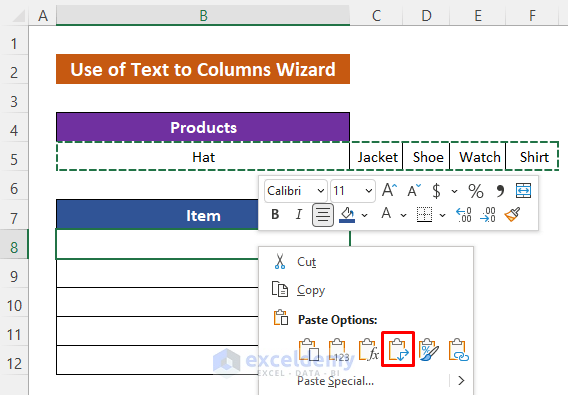
- You will get the split items into multiple rows.

Read More: How to Split Comma Separated Values into Rows or Columns in Excel
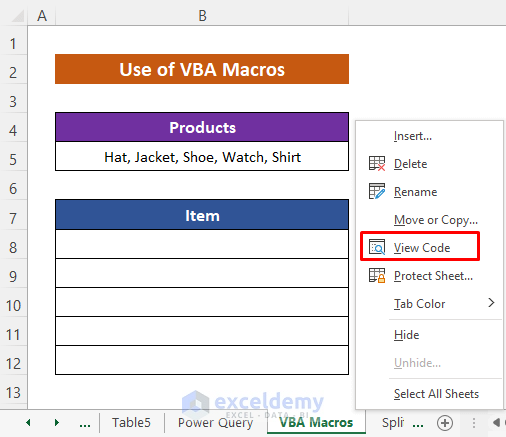
Method 2 – Embed VBA Macro to Split Data from One Cell into Multiple Rows in Excel\
Steps:
- Right-click on the sheet title.
- Select View Code from the Context menu.
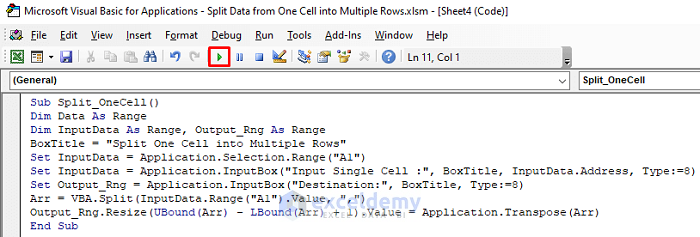
- When the VBA window appears, insert the following code in it:
Sub Split_OneCell()
Dim Data As Range
Dim InputData As Range, Output_Rng As Range
BoxTitle = "Split One Cell into Multiple Rows"
Set InputData = Application.Selection.Range("A1")
Set InputData = Application.InputBox("Input Single Cell :", BoxTitle, InputData.Address, Type:=8)
Set Output_Rng = Application.InputBox("Destination:", BoxTitle, Type:=8)
Arr = VBA.Split(InputData.Range("A1").Value, ",")
Output_Rng.Resize(UBound(Arr) - LBound(Arr) + 1).Value = Application.Transpose(Arr)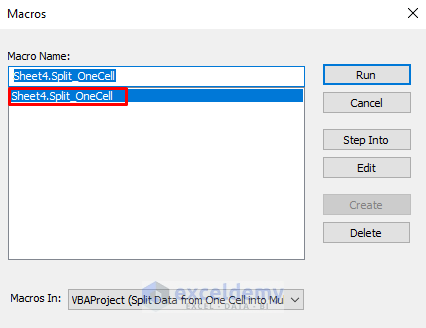
End Sub- Press the Run icon to run the code.
- Select the Macro name as specified in the code.
- Press Run.
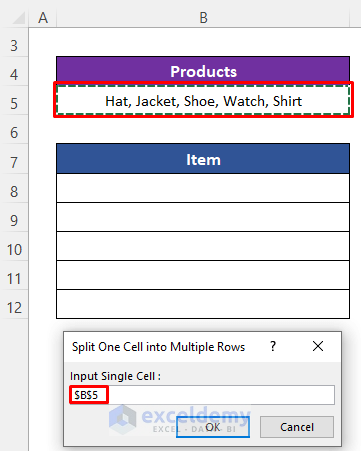
- You will get a dialog box to select the source cell.
- Select Cell B5 and press OK.
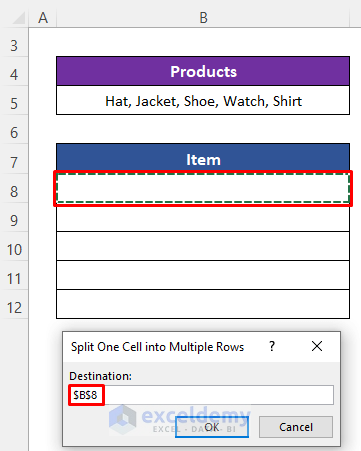
- Another dialog box will open up.
- Select the first cell of the destination range.
- Press OK.
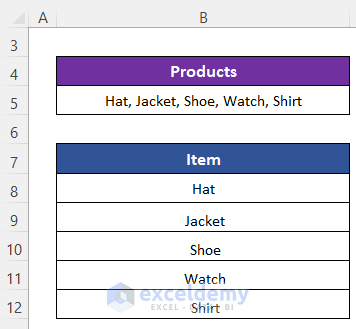
- Here’s the result.
Read More: Excel Macro to Split Data into Multiple Files
Method 3 – Use Excel Power Query to Divide Data from One Cell into Multiple Rows
Steps:
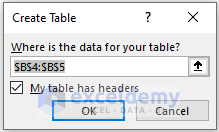
- Select the cell including the header.
- Go to Data and select From Table/Range.

- Press OK in the dialog box.
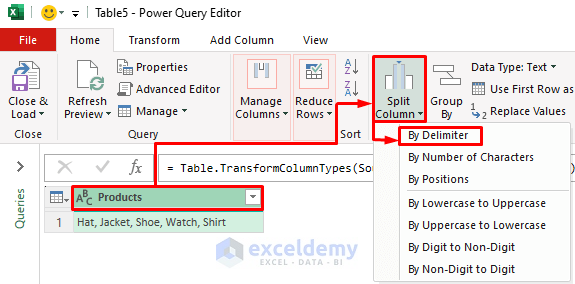
- A Power Query window will open.
- Click on the header.
- Go to Split Column and select By Delimiter.
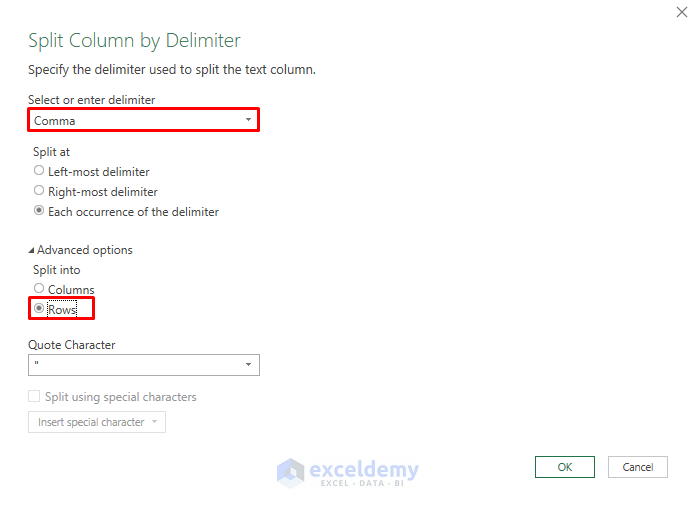
- Another dialog box will open.
- Select Comma from the Select or enter delimiter box.
- From the Advanced options, mark Rows.
- Press OK.
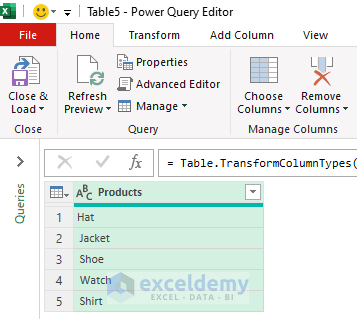
- The data is split into rows.
- Click Close & Load and select Close & Load To from the Home tab.
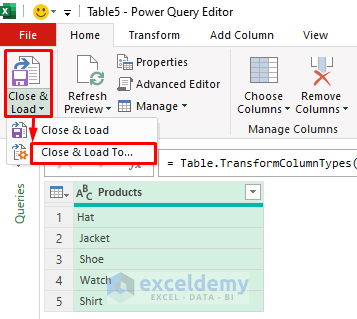
- Mark Table and New worksheet.
- Press OK.

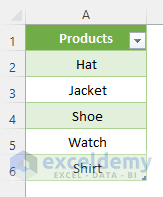
- You will get a new worksheet with the data split into multiple rows.
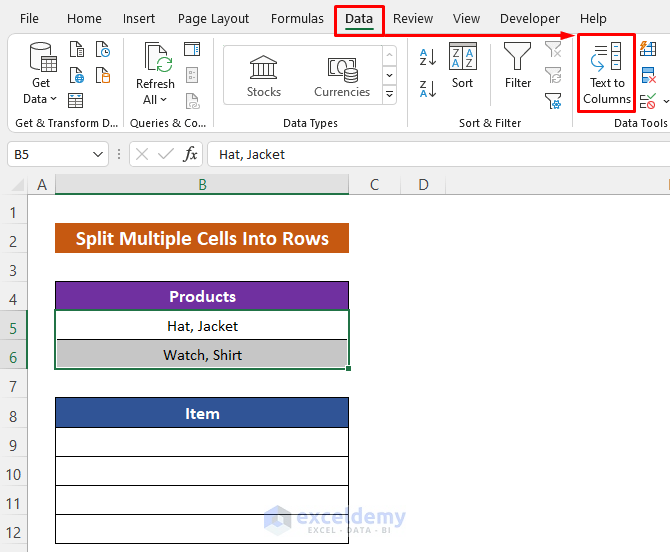
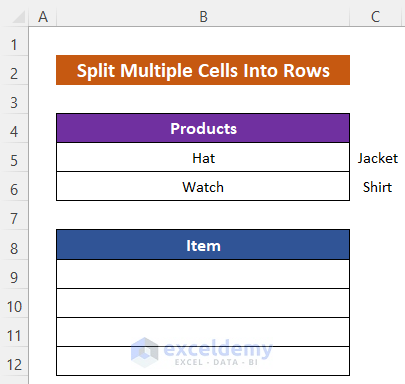
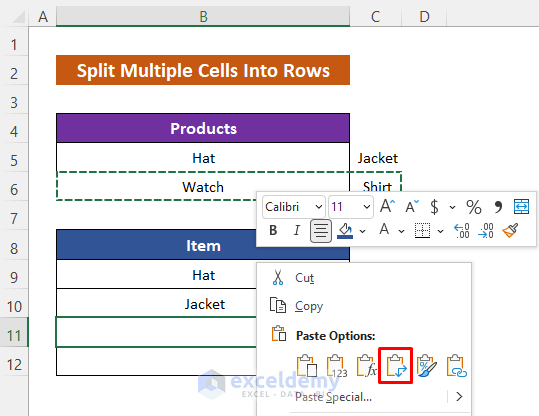
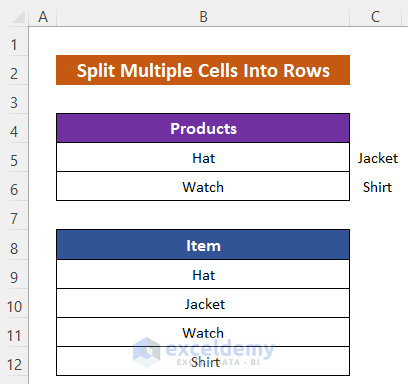
How to Split Multiple Cells into Rows
Steps:
- Select the cells.
- Go to Data and select Text to Columns.
- Mark Delimited and press Next.
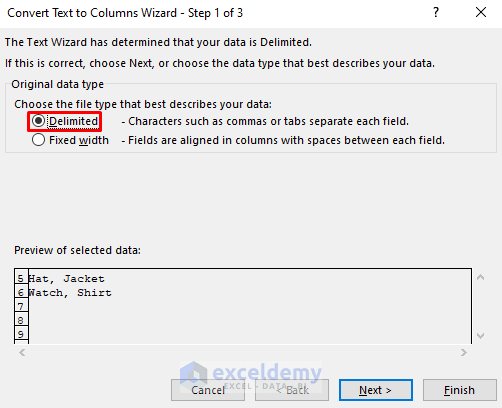
- Mark Comma and press Next.
- Mark General and press Finish.
- The data is split into Columns B and C.
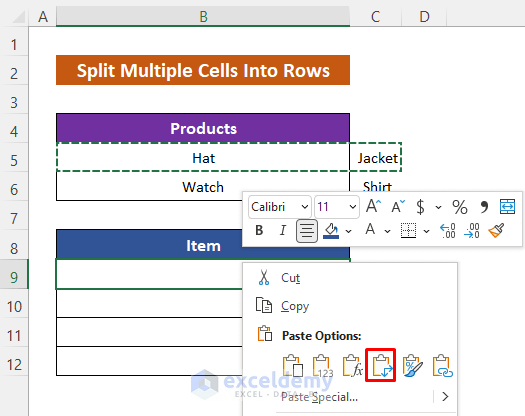
- Select the data in the first split row and copy it.
- In the first destination row, right-click and paste with Transpose.
- Repeat for the data of the second split row.
- You will get the output like the image below.
Notes:
If the data contains multiple delimiters, such as spaces, they will be transferred to the resulting cells. You may need to trim extra spaces from the values.
Download the Practice Workbook


This is exceptionally helpful, thank you!
Hello Mandy,
You are most welcome. Thanks for your feedback and appreciation. Glad to hear that our article is exceptionally helpful to you. Keep exploring Excel with ExcelDemy!
Regards
ExcelDemy