Method 1 – Separate Data into Rows/Columns by Comma Using Text to Columns in Excel
Case 1.1 – Split Values into Columns
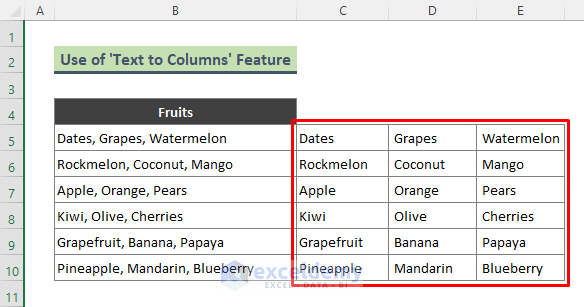
We have a dataset containing several fruits separated by a comma. There are 3 fruits in each cell. We will split the fruits of column B into 3 different columns (columns C, D, E).

Steps:
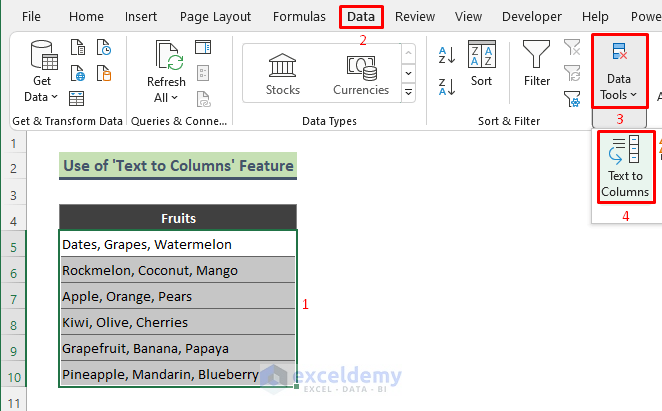
- Select the entire dataset and go to Data and choose Text to Columns.
- The Text to Columns Wizard appears. From the Original data type section, choose Delimited and click Next.

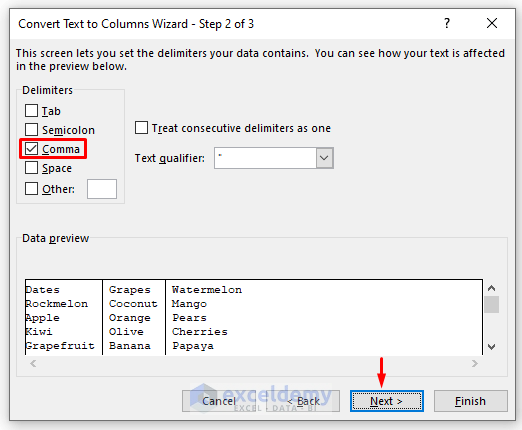
- From the Delimiters section, check Comma and press Next.
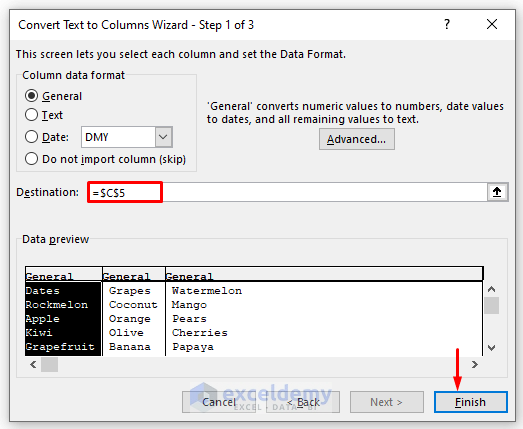
- Choose the Destination location (here, Cell C5) and press Finish.
- We will get the following result.
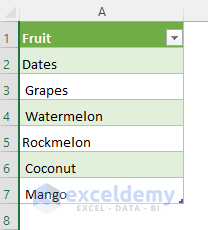
Case 1.2 – Split into Rows Using Text to Columns
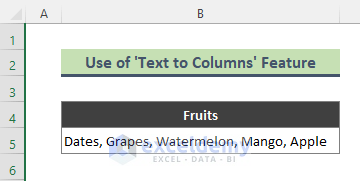
We have the following dataset containing some fruit names, which we’ll separate into rows.
Steps:
- Select Cell B5 then go to the Data tab and choose Text to Columns.
- From the Text to Columns Wizard, select Original Data Type: Delimited and click Next.
- Choose a Comma as the Delimiter and click Next.
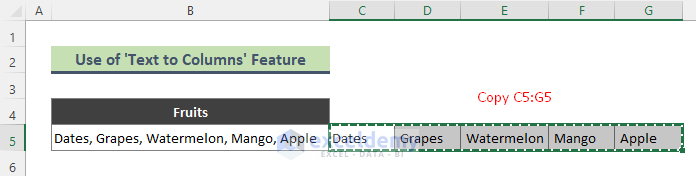
- Choose the Destination cell (here Cell C5) and press Finish.
- The data is separated into columns.
- Copy the range C5:G5.
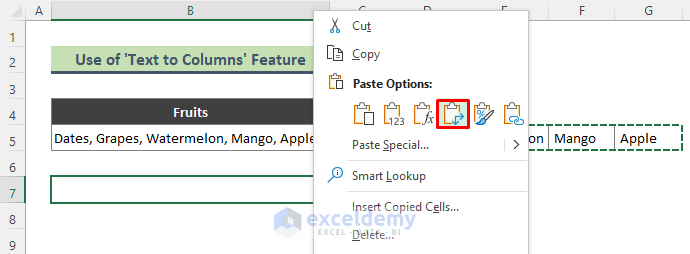
- Right-click on Cell B7 and choose Transpose from Paste Options (see screenshot).
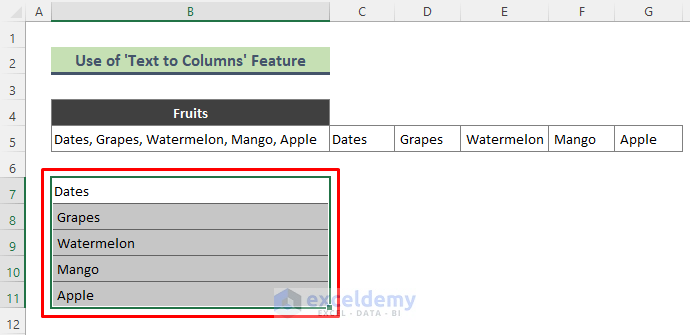
- Here’s the result.
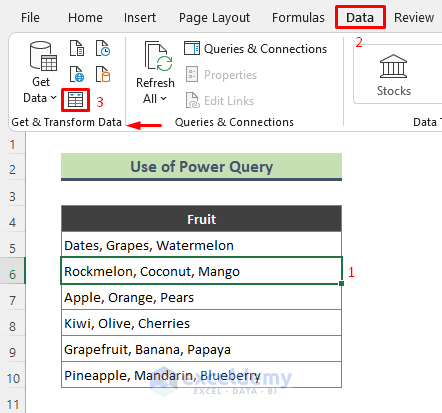
Method 2 – Excel Power Query to Split Comma-Separated Values into Columns or Rows
Case 2.1 – Power Query to Split Values into Columns
Steps:
- Select any cell.
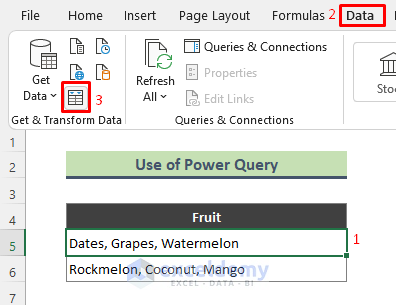
- Go to Data and choose From Table/Range (in the Get & Transform Data group).
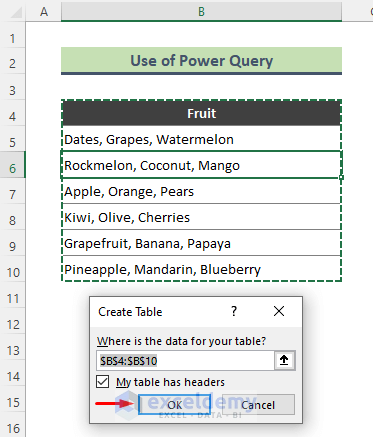
- Excel will ask you to convert the data range into a table. Check the data range and press OK to create the table.
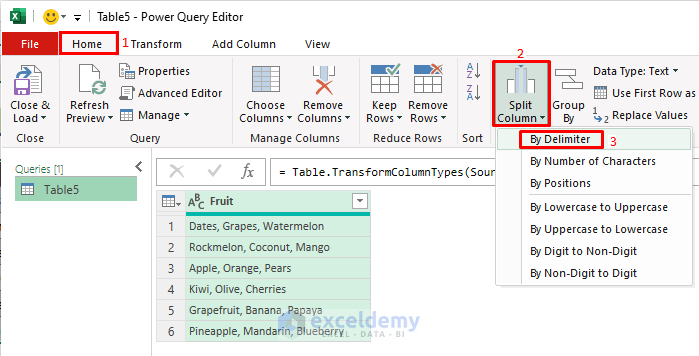
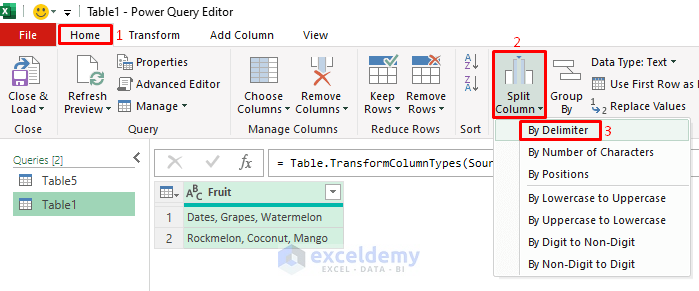
- The Power Query Editor window appears with a table. Go to Home and select Split Column, then choose By Delimiter.
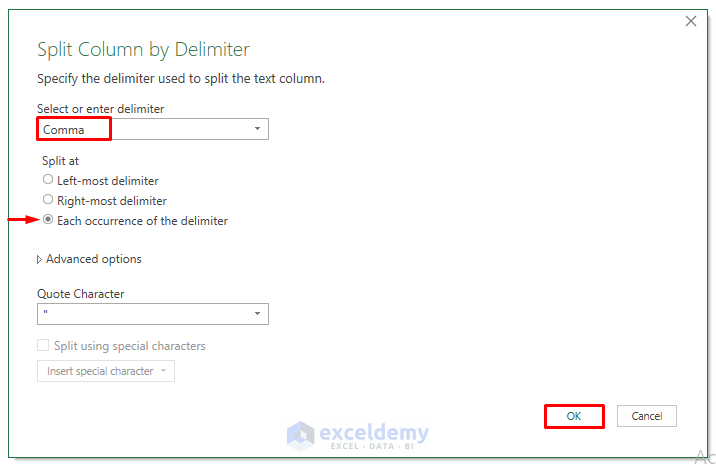
- The Split Column by Delimiter dialog shows up. Choose Comma from the Select or enter delimiter and press OK (see screenshot).
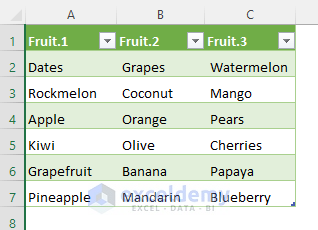
- Excel splits the table into 3 columns.
- Go to Home and select Close & Load, then choose Close & Load.
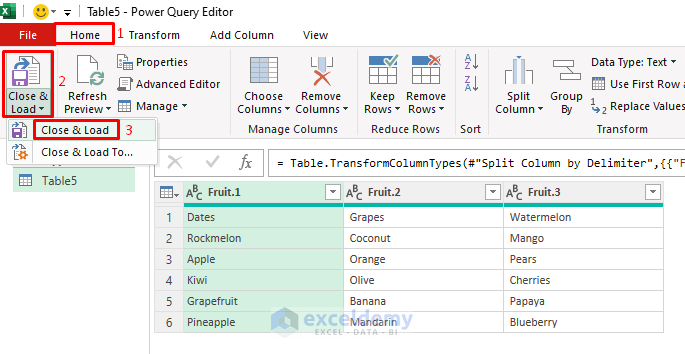
- All the comma-separated data are split into 3 columns of a table.
Case 2.2 – Split Data into Rows
Steps:
- We have some comma-separated fruits in Cell B5 and C5.
- Click on Cell B5 or C5, go to Data, then select From Table/Range.
- The Create Table dialog will show up.
- Check the table range and press OK.
- You’ll get a table in the Power Query Editor window.
- Select the table.
- Go to Home and choose Split Column, then select By Delimiter.
- The Split Column by Delimiter dialog appears.
- From the Select or enter delimiter section, choose Comma.
- Go to Advanced Options and click Rows from the field: Split into.
- Press OK.

- Go to Home and select Close & Load to display the result on the Excel worksheet.

- Here’s the result.
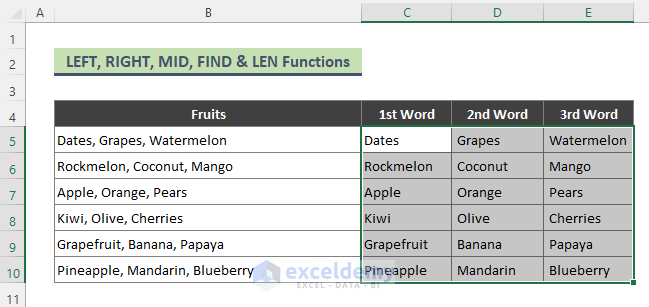
Method 3 – Combine LEFT, RIGHT, MID, FIND, and LEN Functions for Splitting Comma-Separated Values into Columns
Each cell in our dataset has three words separate by commas. We’ll extract them separately.
Part 3.1 – Extract the First Word
Steps:
- Use the following formula in Cell C5 and press Enter.
=LEFT(B5,FIND(",", B5)-1)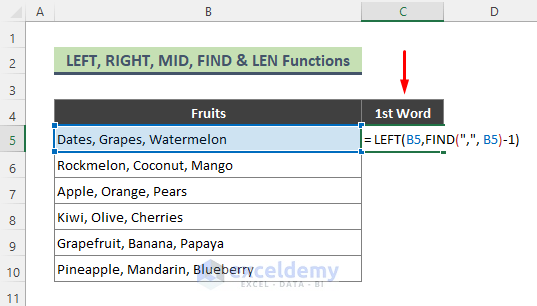
- Excel will return ‘Dates’ which is the first word of Cell B5.
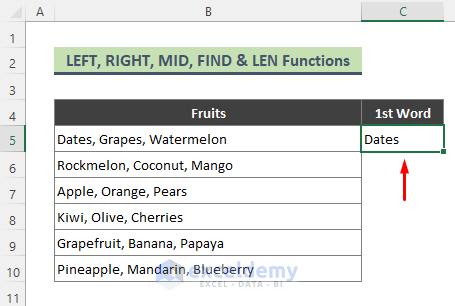
The FIND function returns the location of the 1st comma. The LEFT function extracts the first word before the first comma.
Part 3.2 – Extract 2nd Word
Steps:
- Use the following formula in Cell D5 and hit Enter.
=MID(B5,FIND(",",B5)+1,FIND(",",B5,FIND(",",B5)+1)-FIND(",",B5)-1)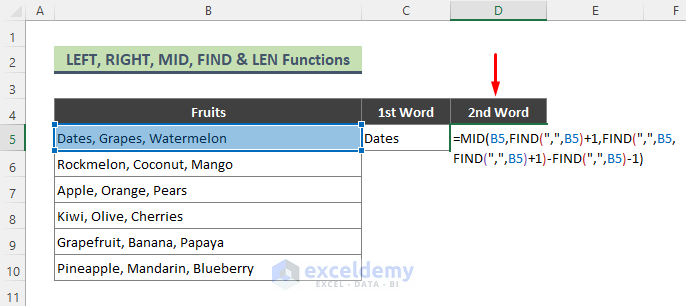
- The above formula returns Grapes, the 2nd word of Cell B5.
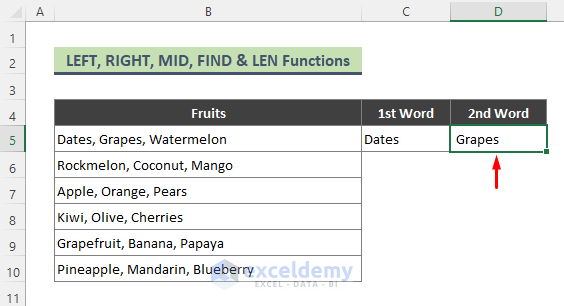
The MID function returns the characters from the middle of the text string in Cell B5. The FIND function returns the location of the 2nd string in Cell B5.
Part 3.3 – Find the Third Word
Steps:
- Use the following formula in Cell D5, then press Enter.
=RIGHT(B5, LEN(B5)-FIND(",", B5,FIND(",",B5)+1))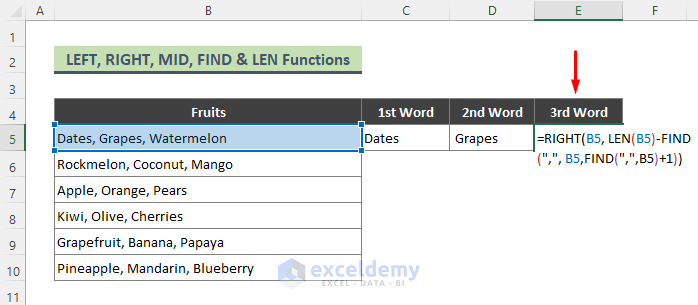
- Excel will return Watermelon which is the third word of our continuous data in Cell B5.
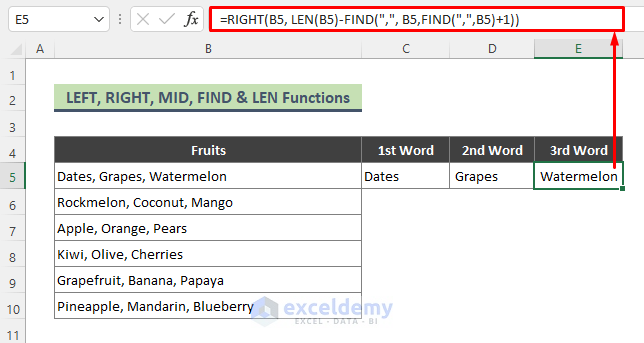
The LEN function returns the length of Cell B5. Then the FIND function returns the location of the comma in Cell B5. Later, depending on the result of the FIND and LEN functions the RIGHT function extracts the rightmost word from Cell B5.
- Select the range C5:D5 and drag the Fill Handle (+) tool down.
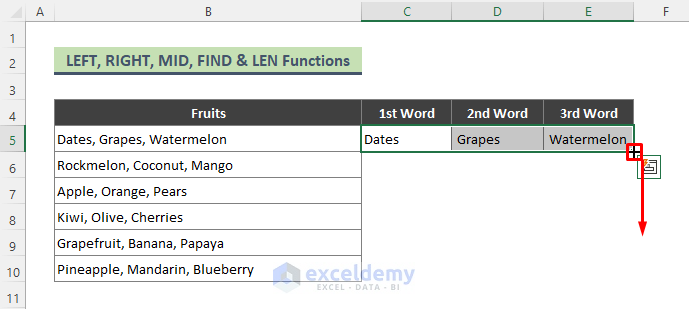
- Here’s the result.
Method 4 – Excel VBA to Split up Comma-Separated Values into Columns or Rows
Case 4.1 – VBA to Split Values into Columns
Steps:
- Go to the worksheet where you want to split the data.
- Right-click on the sheet name and click View Code to bring up the VBA window.
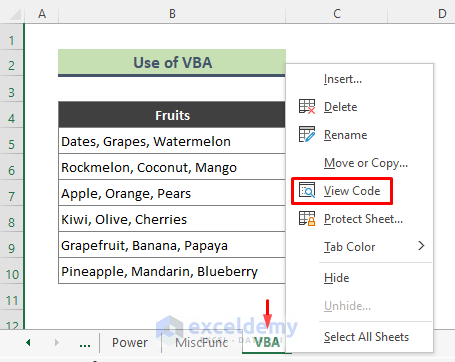
- Insert the following code in the Module and Run the code by using the F5 key.
Sub SplitData()

Dim Range() As String, Count As Long, x As Variant
For r = 5 To 10
Range = Split(Cells(r, 2), ",")
Count = 3
For Each x In Range
Cells(r, Count) = x
Count = Count + 1
Next x
Next r

End Sub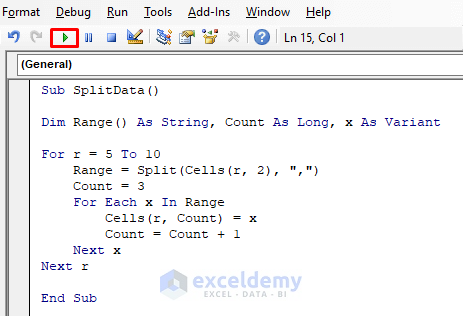
Here ‘r‘ indicates rows that contain data. On the other hand, ‘Count=3‘ indicates column C, which is the first column to display the split data.
- Data separated by commas in column B are split into columns C, D, and E as below:

Read More: Excel Macro to Split Data into Multiple Files
Case 4.2 – Split Values into Rows
Steps:
- Go to the worksheet where you have the data.
- Right-click on the sheet name and select View Code.
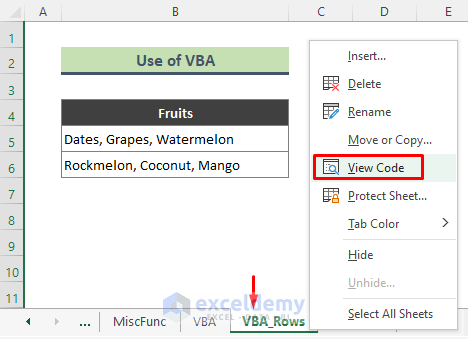
- The VBA window appears. Insert the following code in the Module and run it by pressing F5.
Sub SplitRows()

Dim rng As Range
Dim rng1 As Range
Dim cell As Range
Dim N As Long
Dim address As String
Dim update As Boolean
Dim ret As Variant
On Error Resume Next
address = Application.ActiveWindow.RangeSelection.address
Set rng = Application.InputBox("Please enter a range", "Input Box", address, , , , , 8)
Set rng = Application.Intersect(rng, rng.Worksheet.UsedRange)
If rng Is Nothing Then Exit Sub
If rng.Columns.Count > 1 Then
MsgBox "Cannot select more than one column"
Exit Sub
End If
Set rng1 = Application.InputBox("Destination Cell", "Input Box", , , , , , 8)
Set rng1 = rng1.Range("A1")
If rng1 Is Nothing Then Exit Sub
update = Application.ScreenUpdating
Application.ScreenUpdating = False
For Each cell In rng
ret = Split(cell.Value, ",")
rng1.Worksheet.Range(rng1.Offset(N, 0), rng1.Offset(N + UBound(ret, 1), 0)) = Application.WorksheetFunction.Transpose(ret)
N = N + UBound(ret, 1) + 1
Next
Application.ScreenUpdating = update

End Sub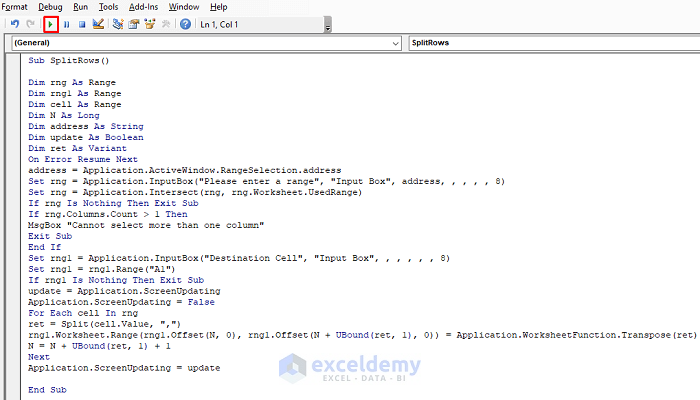
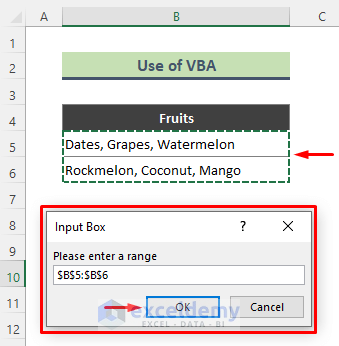
- An input box will appear. Enter the data range and press OK.
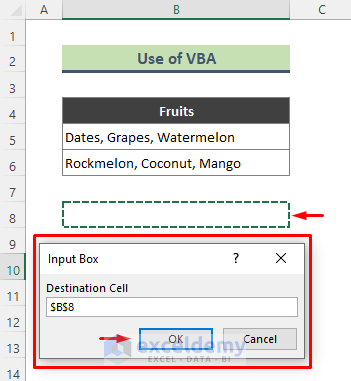
- Another input box will appear. Insert the destination cell and press OK.
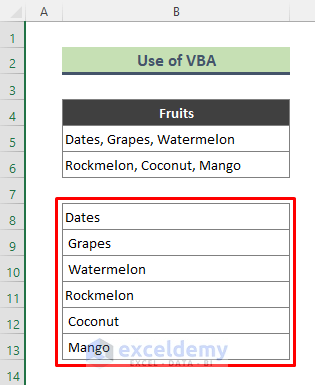
- All the comma-separated values of our dataset are split into rows 8 to 13.
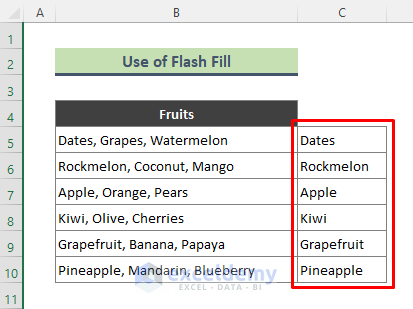
Method 5 – Use Excel Flash Fill to Split Comma-Separated Values into Different Columns
Steps:
- Type Dates in Cell C5. This is the first value from cell B5.
- When you start to type ‘R’ in Cell C6, Excel detects the pattern where you want fruits in the first position from all the rows.

- Press Enter to get the below result.
- Apply a similar method to split other comma-separated values into multiple columns, extracting the second and third entries from the first cell in their respective columns.
Read More: Split Data into Multiple Worksheets in Excel
Download the Practice Workbook


thank you!
Dear Duncan R Walk,
You are most welcome.
Regards
ExcelDemy