This is an overview:
Step 1 – Open the VBA Editor in Excel
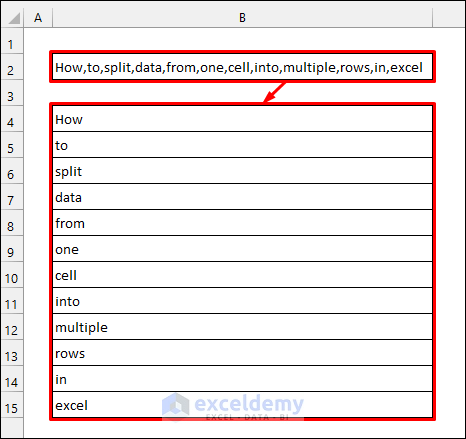
- Select the cell containing the data you want to split, here B2 .
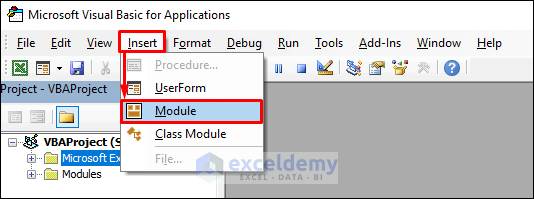
- Press ALT+F11 to open the VBA window.
- Select Insert >> Module.
Step 2 – Create a Sub Procedure
Sub SplitCell()

End Sub
Step 3 – Declare the Necessary Variables
Sub SplitCell()
Dim Cell, SplitCell() As String
End SubStep 3 – Copy the Data to a New Cell
Sub SplitCell()
Dim Cell, SplitCell() As String
ActiveCell.Copy ActiveCell.Offset(2, 0)
End Sub
ActiveCell.Copy copies the data from the currently active cell.
ActiveCell.Offset(2, 0) is the destination cell: 2 rows below the active cell.
Step 4 – Select the New Cell
Sub SplitCell()
Dim Cell, SplitCell() As String
ActiveCell.Copy ActiveCell.Offset(2, 0)
ActiveCell.Offset(2, 0).Select
End SubStep 5 – Set the Value of the Variables
Sub SplitCell()
Dim Cell, SplitCell() As String
ActiveCell.Copy ActiveCell.Offset(2, 0)
ActiveCell.Offset(2, 0).Select
Cell = ActiveCell.Value
SplitCell = Split(Cell, ",")
End Sub
Cell = ActiveCell.Value specifies that the Cell variable takes the value of the new active cell.
SplitCell = Split(Cell, “,”) splits the value stored in the Cell variable considering the comma (,) as the split criteria. You can use other delimiters (. ; / ) inside the double quotes (“ ”).
Step 6 – Using a For Loop to Split Data
Sub SplitCell()
Dim Cell, SplitCell() As String
ActiveCell.Copy ActiveCell.Offset(2, 0)
ActiveCell.Offset(2, 0).Select
Cell = ActiveCell.Value
SplitCell = Split(Cell, ",")
For i = 0 To UBound(SplitCell)
Next i
End Sub
The For Loop splits the data whenever a comma is found.
UBound(SplitCell) refers to the largest possible size of the SplitCell array.
Step 7 – Filling Rows with the Split Data
Sub SplitCell()
Dim Cell, SplitCell() As String
ActiveCell.Copy ActiveCell.Offset(2, 0)
ActiveCell.Offset(2, 0).Select
Cell = ActiveCell.Value
SplitCell = Split(Cell, ",")
For i = 0 To UBound(SplitCell)
ActiveCell.Offset(i, 0).Value = SplitCell(i)
Next i
End SubStep 8 – Run the VBA Code
- Keep the cursor in the code and press F5 to run it.
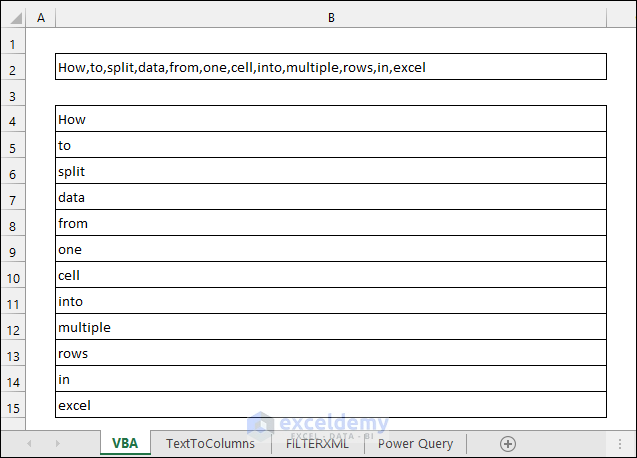
Data in B2 will split into multiple rows as shown below:
Read More: How to Split One Cell into Two in Excel
How to Split Data from One Cell into Multiple Rows in Excel – 2 Methods
Method 1 – Split a Cell into Multiple Rows using the Text to Columns & Paste Special in Excel
Steps
- Select B2 (the cell containing the data you want to split).
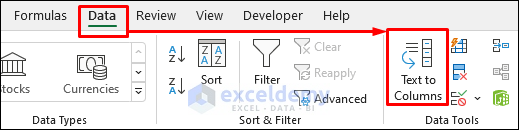
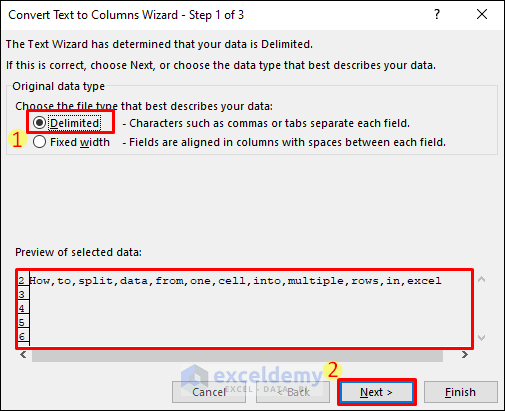
- Select Text to Columns in the Data tab.
- Select Delimited.
- Click Next.
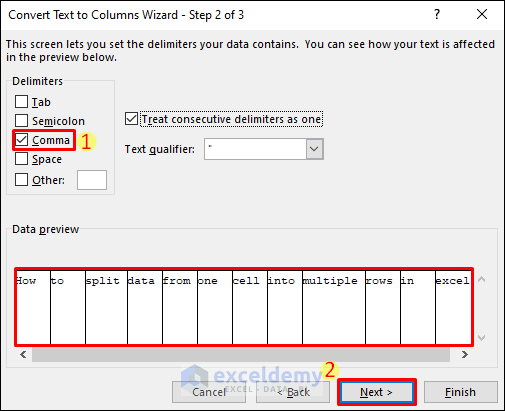
- Check Comma as Delimiters and click Next.
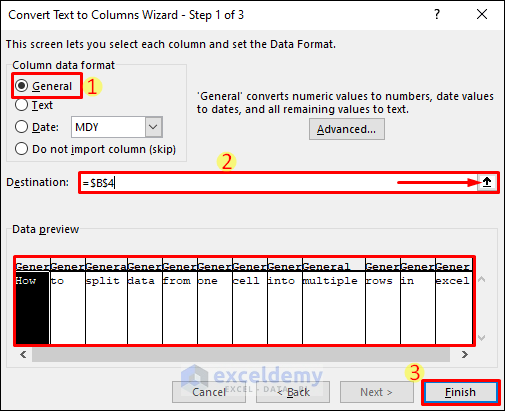
- Keep General in Column data format.
- Click the upward arrow in Destination and choose B4 (to get the split data).
- Click Finish.
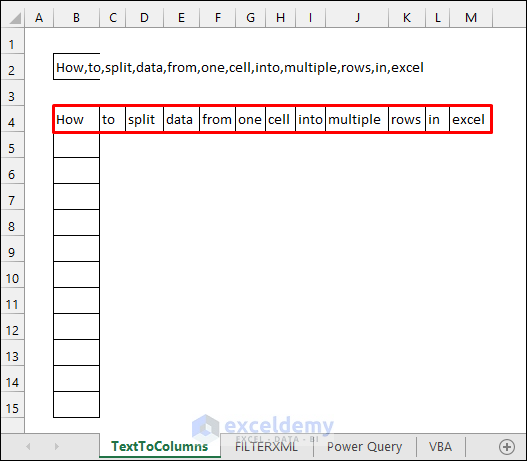
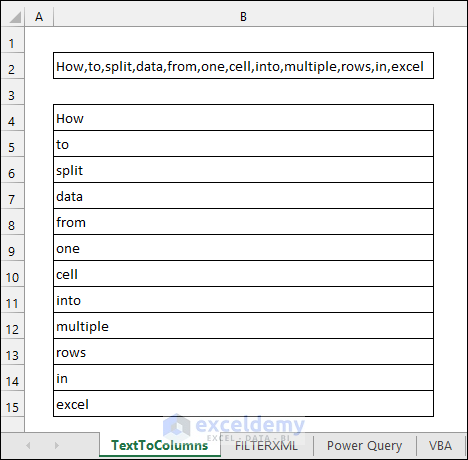
Data in B2 is split into multiple columns:
- Copy C4:M4 and paste it as Transpose in B5.
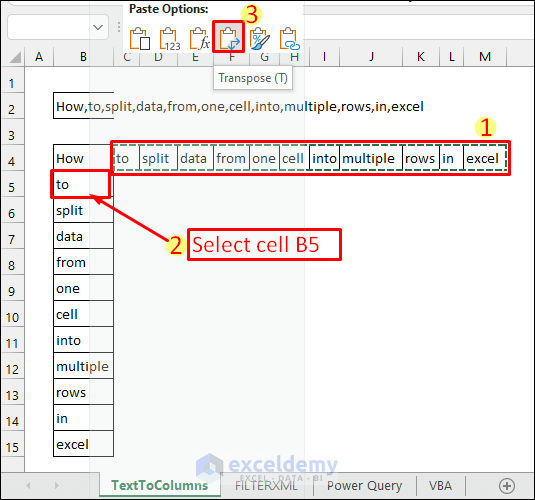
- Delete the helper cells.
This is the output.
Read More: How to Split a Single Cell in Half in Excel
Method 2 – Split a Cell into Multiple Rows using the Power Query in Excel
Steps
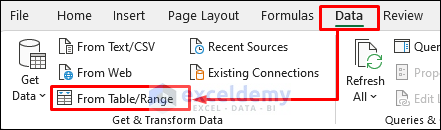
- Select the cell containing the data to split, here B2.
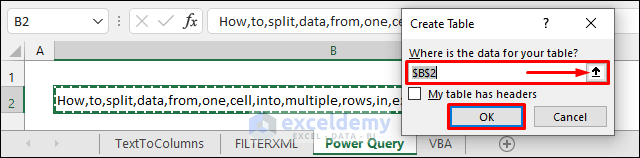
- Select Data >> From Table/Range.
- Click OK to create an Excel Table.
- In the Power Query Editor, select Split Column >> By Delimiter in the Home tab.
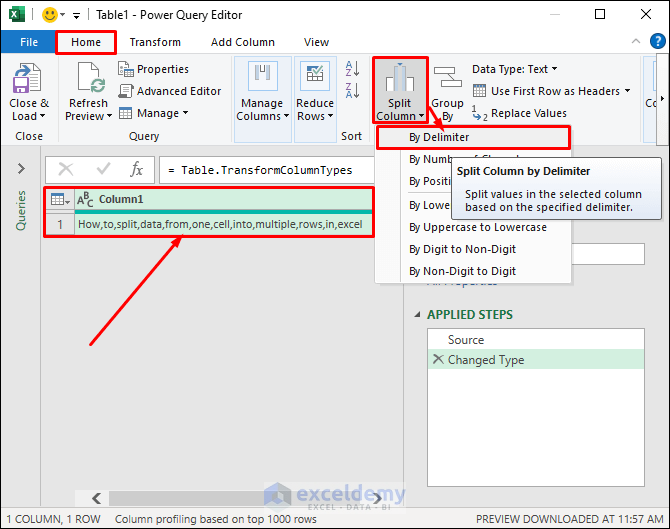
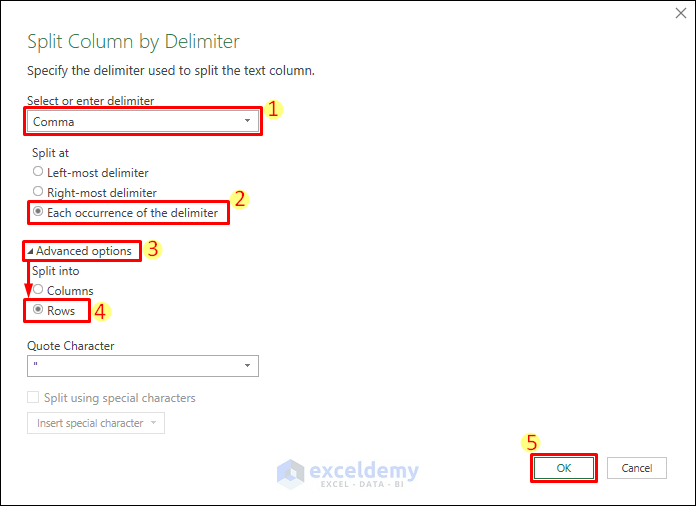
- Choose Comma as delimiter.
- Select Each occurrence of the delimiter.
- Choose Rows in Advanced options.
- Click OK.
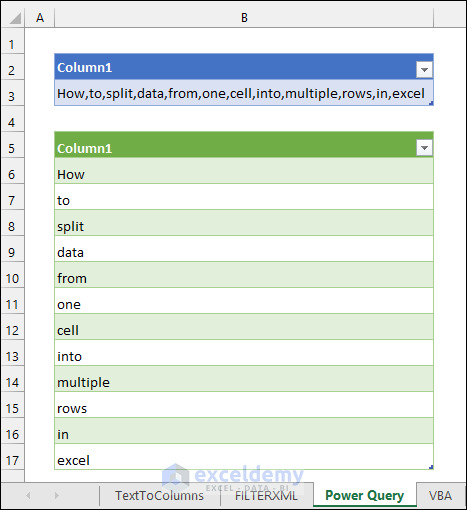
You will see a preview of the split data.
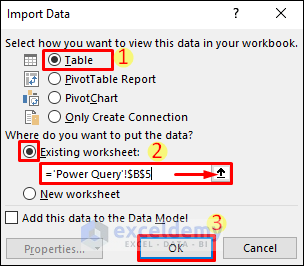
- Select Close & Load >> Close & Load To.

- Select Table and Existing Worksheet.
- Click the upward arrow to select B5 (to get the split data).
- Click OK.
The following image will be displayed.
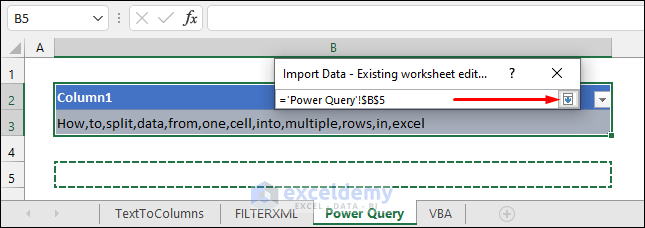
- Click OK.
This is the output.
Read More: How to Split Cell by Delimiter Using Excel Formula
Things to Remember
- You may need to press CTRL+SHIFT+Enter to apply the formula in the second method.
Download Practice Workbook
Download the practice workbook.
Further Readings
- How to Split Cell by Delimiter Using Excel Formula
- How to Split a Cell into Two Rows in Excel
- Excel Formula to Split String by Comma
- VBA to Split String into Multiple Columns in Excel
- Excel VBA: Split String by Character
- VBA to Split with Multiple Delimiters in Excel
- Excel VBA: Split String into Rows
- Excel VBA to Split String by Delimiter

