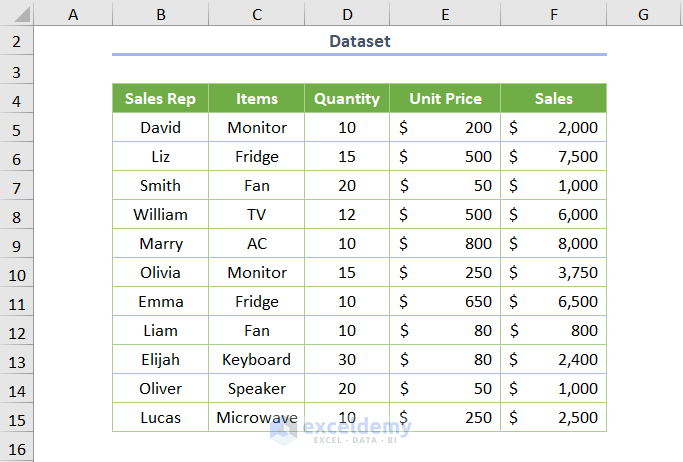
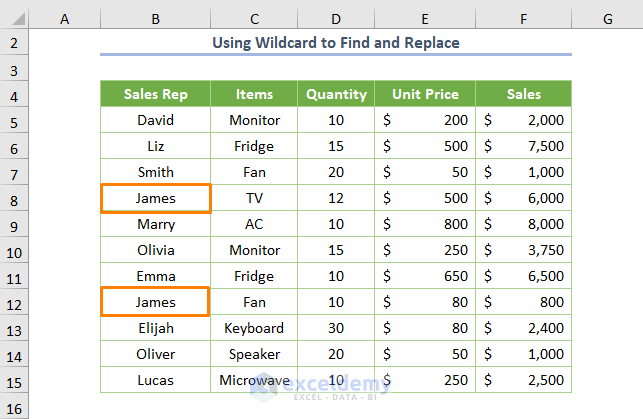
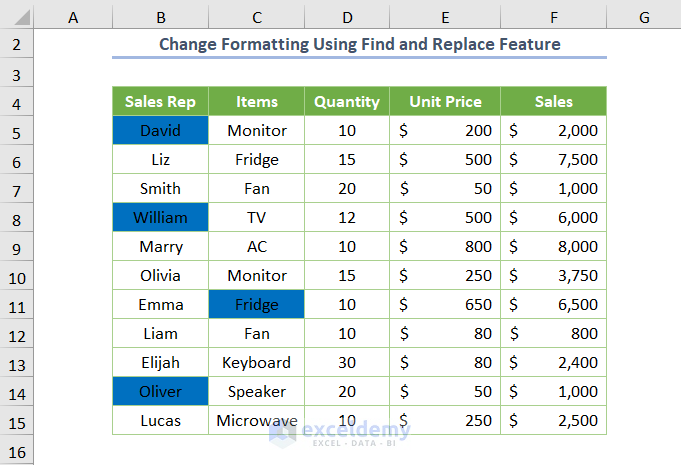
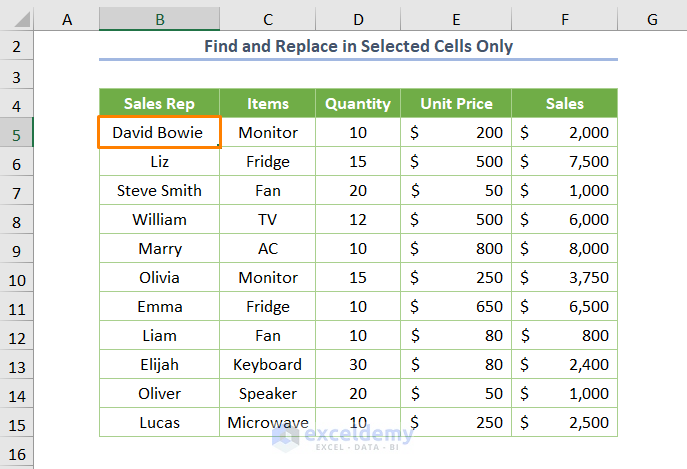
Our sample dataset contains the sales report of some Items along with the relevant Sales Rep. Quantity, Unit Price, and Sales for each item are also provided.
Method 1 – Find and Replace in Selected Cells Only
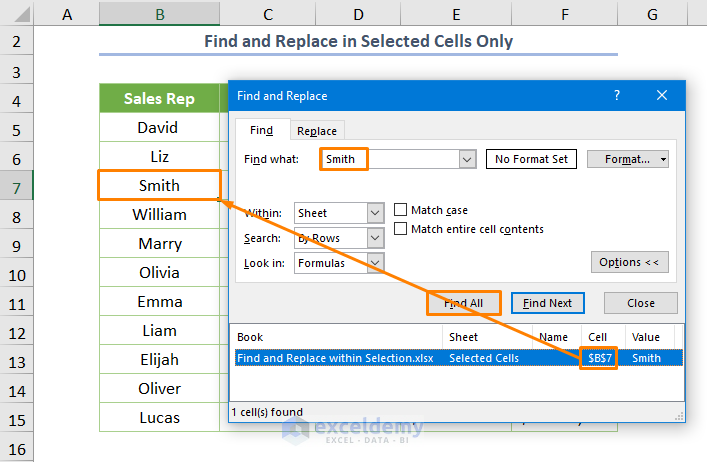
To demonstrate, let’s find and replace the value of cell B7 containing the text Smith.
Steps
- In the Find what box of the Find feature, type Smith as shown.
- Select the Find All
- The cell location $B$7 is returned.
- Select the Replace tab (or press CTRL + H) and type Steve Smith.
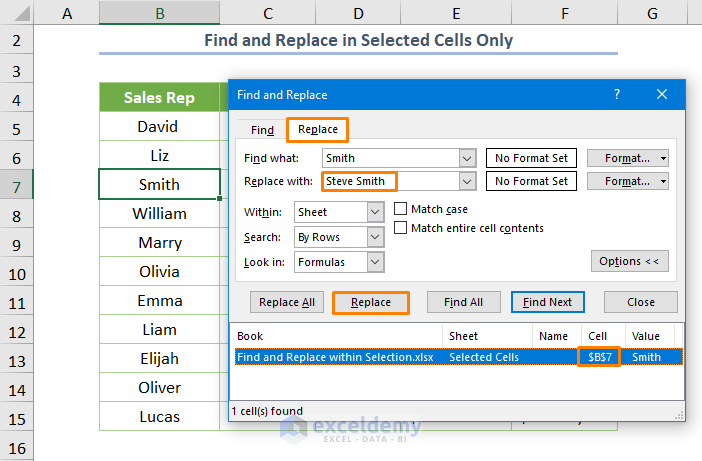
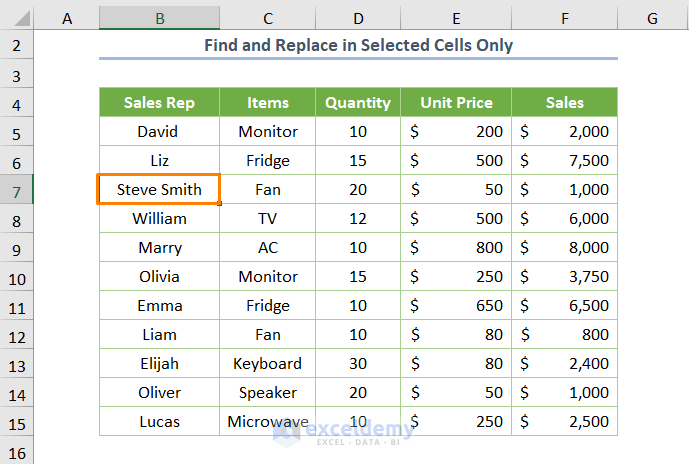
The string “Smith” is replaced by the string “Steve Smith”.
The same method can be used to Find and Replace Multiple Values .
Read More: Replace Text of a Cell Based on Condition in Excel
Method 2 – Using a Wildcard to Find and Replace within Selection
If you need to modify or delete data containing specific values, wildcards can be used to find and replace within the selection.
To demonstrate the use of the Asterisk (*) wildcard, we will find and modify all cells containing the text “lia”, which may be located in the middle of a string.
➦ Type the term *lia* in the Find what box, and select the Find All option.
The result – cells $B$8 and $B$12 cells are returned (ie they contain the text “lia” somewhere within the cell contents).
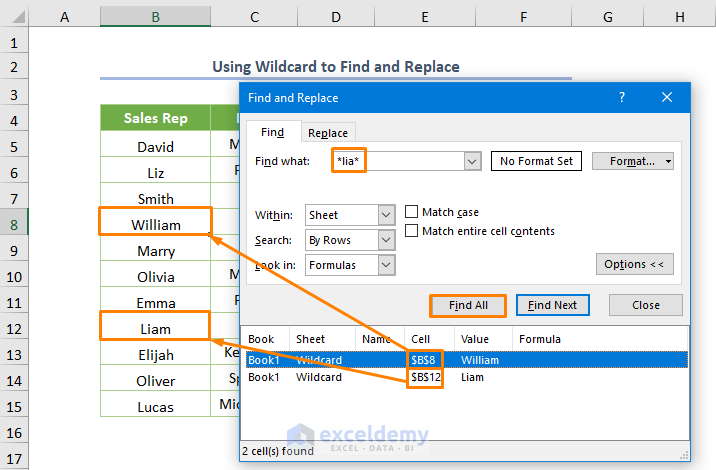
Note: To find text that begins with “lia”, the Find What string should be lia*. Conversely, use the string *lia to find cells with text that ends with “lia”.
➦ Specify the replacement text. To replace the string “lia” with the string James, simply enter “James” in the Replace with box.
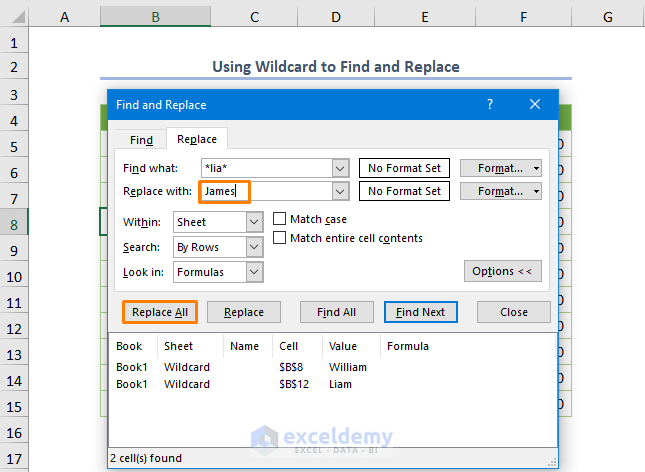
➦ Select the Replace All option.
A message appears that Excel performed the replacement in 2 cells.
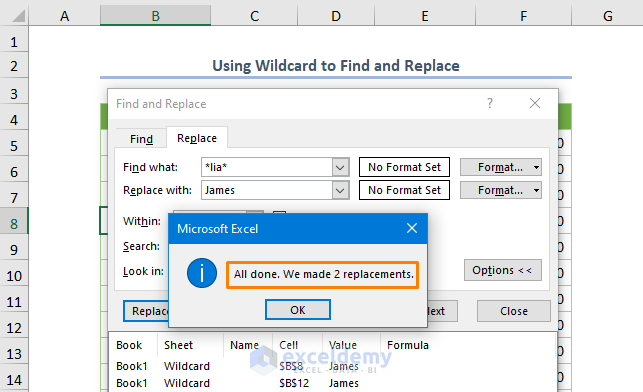
➦ A message is displayed, confirming that the contents of the two cells where “lia” was found have been replaced with the name James.
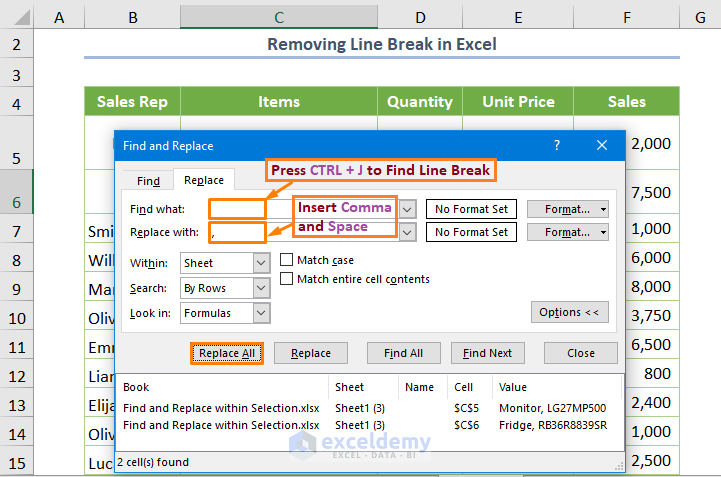
Method 3 – Add or Remove Line Breaks Using the Find and Replace Feature
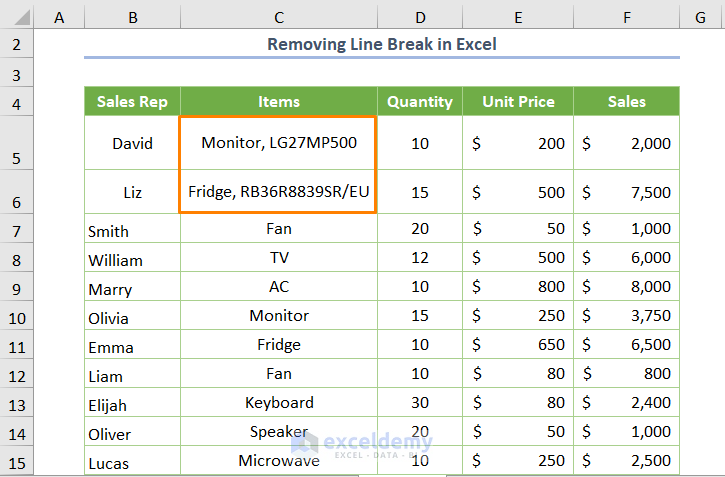
To illustrate, a single line break (adding their product model name) has been added to cells C5 and C6.

To remove the line breaks, press CTRL + J (the keyboard shortcut for a line break in ASCII code) in the Find what box. Insert the comma (,) and space characters in the Replace with option box.
The following output, with line breaks removed, is returned.
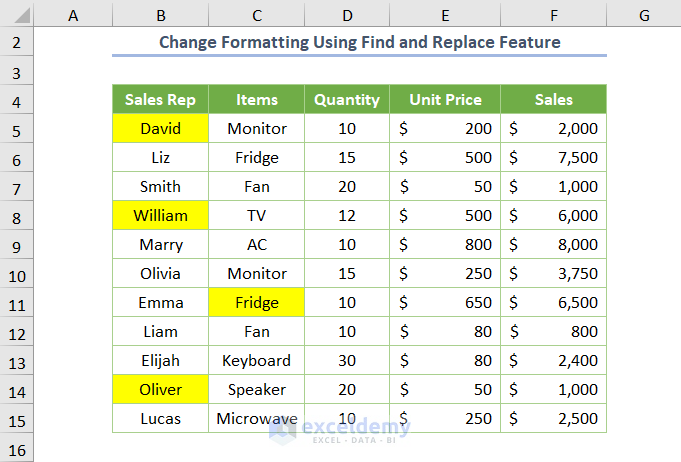
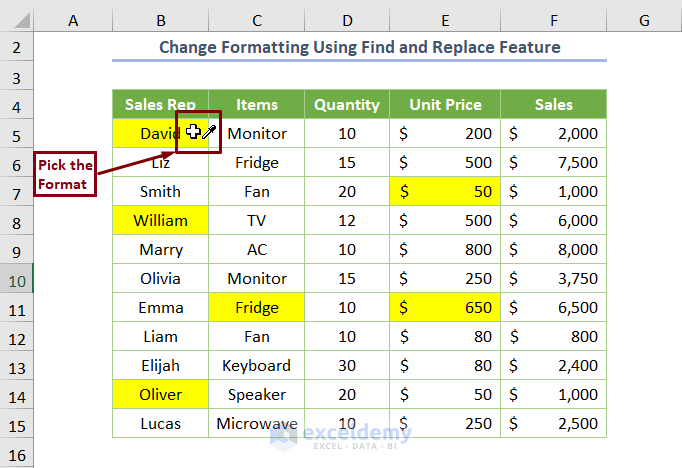
Method 4 – Changing Specific Formatting
Changing the formatting within a cell or multiple cells can also be performed using Find and Replace.
Let’s say you have yellow-colored formatting in some cells, but wish to change that to blue-colored formatting.
Steps
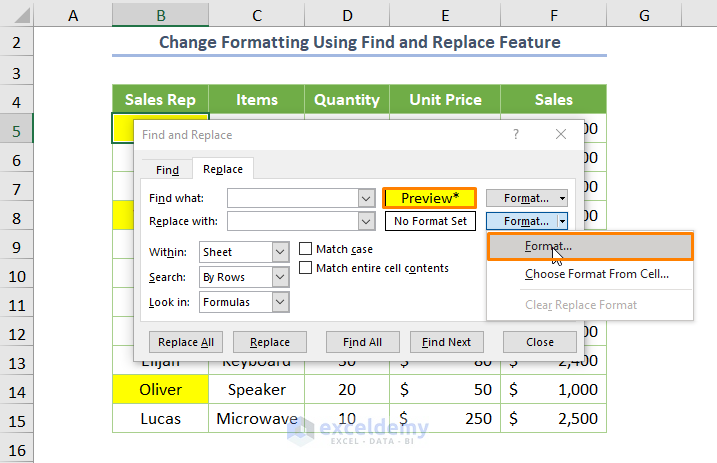
- Click the drop-down list of the Format option in the Find and Replace dialog box, and select Choose Format from Cell.
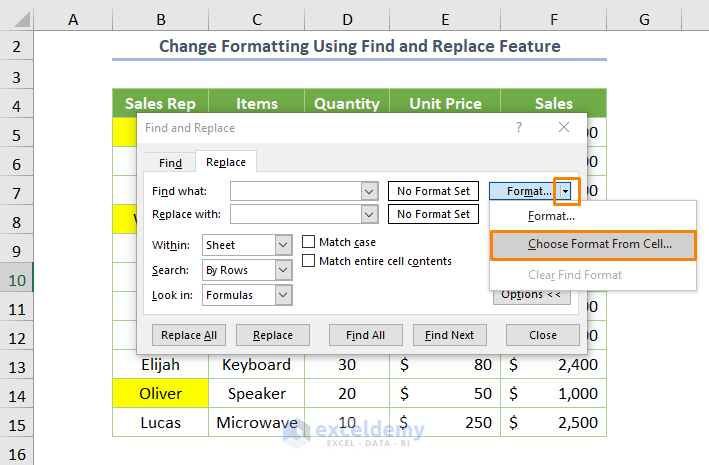
- Click on a cell containing the formatting you wish to replace.
- Click on the second “replacement” Format button and select the Format
- Select the blue color from the Fill
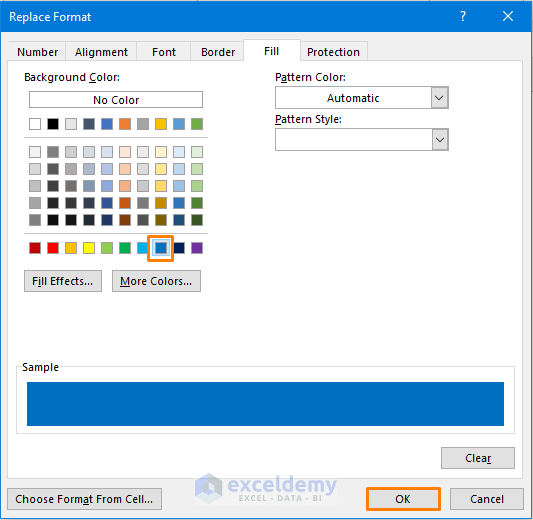
- After clicking OK, the following previews will open.
- Click on the Replace All
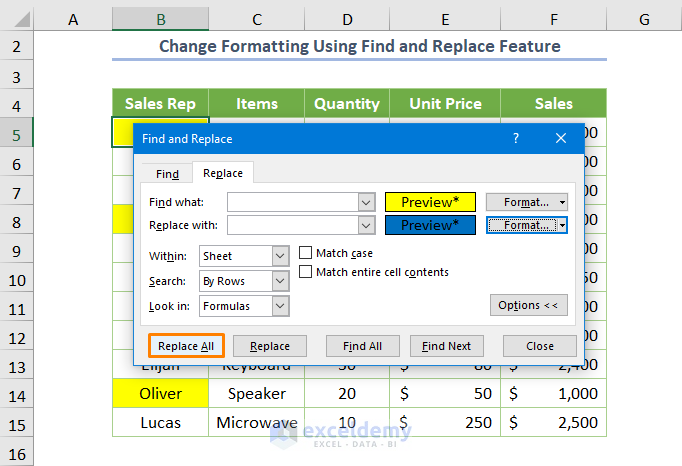
The result is the replacement of formatting in the relevant cells.
Read More: How to Find and Replace Text Color in Excel
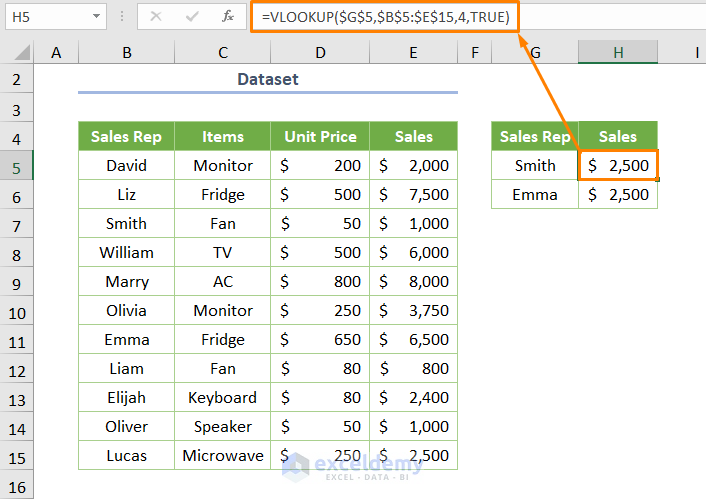
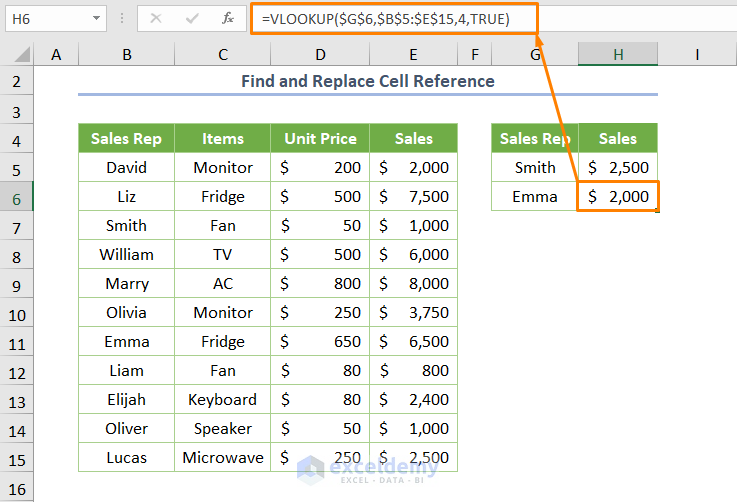
Method 5 – Changing Cell Reference
The formula in the H5 cell returns the output (Sales) for the corresponding Sales Rep. However, the same formula would not work for the below cells if you copy the formula, unless the cell reference is changed from $G$5 into $G$6.
This can be accomplished in two ways. Either you can remove the absolute reference ($) before the column number, or use the Find and Replace feature, simply inserting $G$5 in the Find what box and $G$6 in the Replace with box.
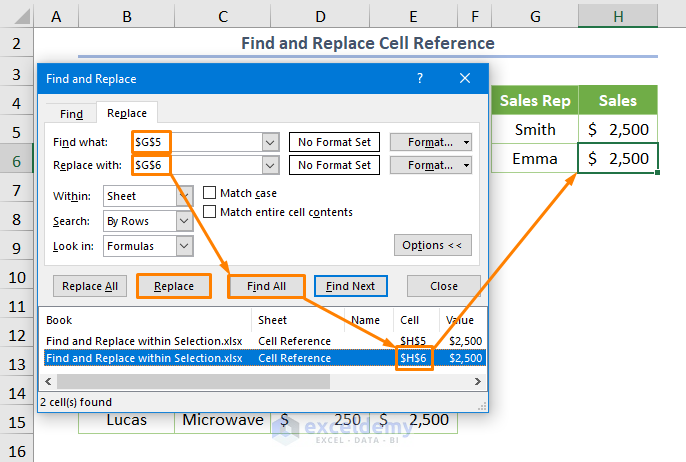
After clicking on the Replace option, the desired output will be returned.
Method 6 – Find and Replace across the Entire Workbook within Selection
You might find and replace the selected data in all the working sheets of any workbook.
For example, you may want to find the string David and replace it with David Bowie.
Steps
- Type David in the Find what box and David Bowie in the Replace with
- Select Workbook instead of Sheet from the drop-down list of the Within
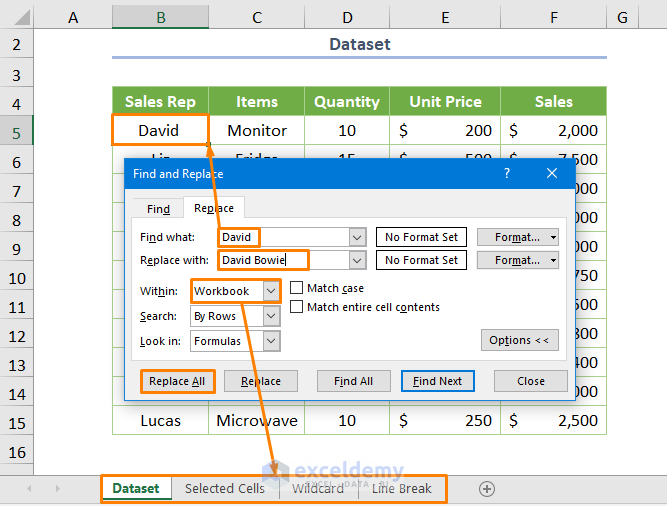
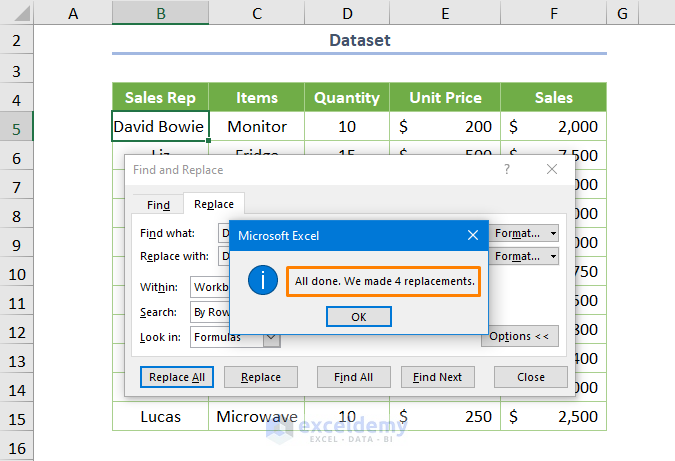
Click Replace All, Excel will display a message confirming 4 replacements within the entire workbook.
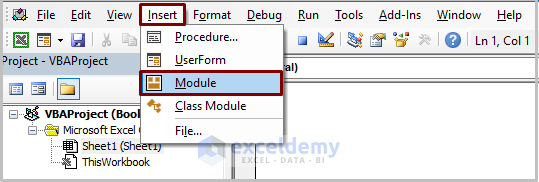
Method 7 – Using the VBA Code
The Find and Replace feaure may also be accessed using VBA code. However, a module to enter the VBA code must be inserted.
Steps
- Open a module by clicking Developer > Visual Basic.

- Select Insert > Module.
7.1. Find using VBA
- Copy the following code into the newly created module to find the string David.
Sub Find()
Dim Rng As Range

Set Rng = Sheets("Find&Replace_VBA").UsedRange.Find("David")
MsgBox Rng.Address

End Sub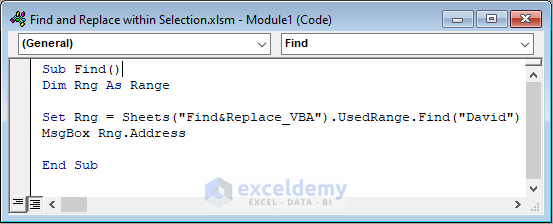
Rng is declared as Range. Then, Rng is set with the VBA Find function (which specifies the string “David” and the UsedRange property to find the specified string). The Sheets function along with the current sheet name are also declared.
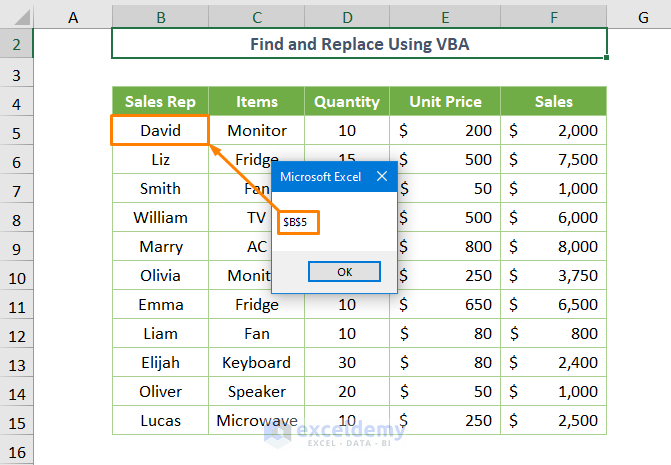
Run the code (the keyboard shortcut is F5 or Fn + F5), and the following output is returned:
7.2. Replace Using VBA
- Use the following code to replace the specified string.
Sub Replace()

Sheets("Find&Replace_VBA").UsedRange.Replace What:="David", Replacement:="Steve"

End Sub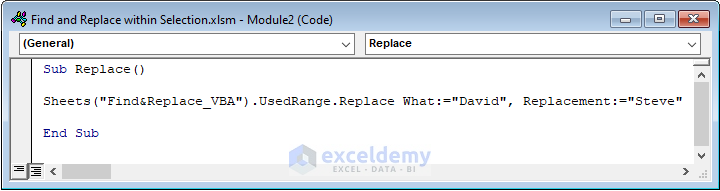
- In the above code, VBA Replace function is used. The string “David” is specified as the What option that needs to be replaced, and “Steve” is specified as the Replacement
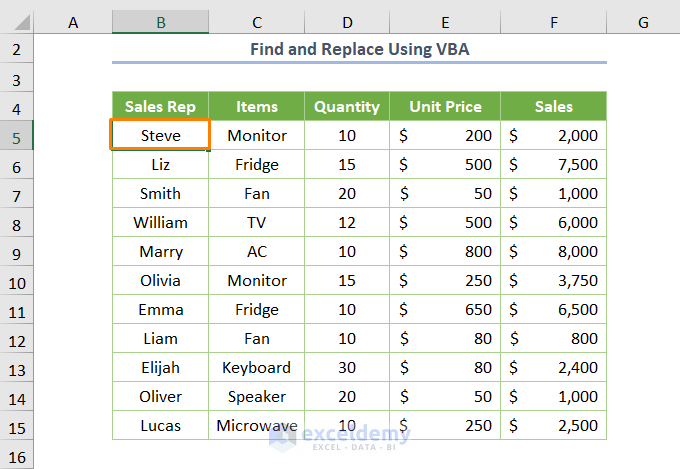
- After running the code, the following output is returned:
Note: Here, the basic VBA Find and Replace functions have been described. There are additional methods to Find and Replace using VBA.
Download Practice Workbook
Related Articles
- How to Show Dash Instead of Zero in Excel
- How to Find and Replace Using Formula in Excel
- How to Find and Replace Values in Multiple Excel Files
- How to Find and Replace Multiple Words from a List in Excel
- How to Replace Text in Excel Formula
<< Go Back to Find and Replace | Learn Excel
Get FREE Advanced Excel Exercises with Solutions!

How do you find and replace text in the middle of a range of cells.
Example: I have multiple cells in one column with values like ‘ABCD20250126 DEFG20250227 HIJK20250301’ and many repeat themselves. So I might have 10 instances of ‘ABCD20250126’ and 15 instances of DEFG20250227 and only 2 instances of ‘HIJK20250301′.
I want to replace the ’25’ portion of the year ‘2025’ with ’26’ so the outcome will be: ABCD20260126 DEFG20260227 HIJK20260301 everywhere they appear in that column.
The Find portion would simply be to highlight my range in the single column, click Replace and in the Find box, type: *2025* but what do I type in the Replace box so that it maintains the integrity of the characters preceding and following the desired portion I want to change?
Hello Bill,
You can do this with a formula-based or VBA approach, but directly in Find & Replace, wildcards won’t preserve the unchanged parts of the text. The safest method is to:
1. Select your column range.
2. Open Find & Replace (Ctrl+H).
3. In the Find what box, enter 2025.
4. In the Replace with box, enter 2026.
5. Click Replace All.
This will only replace the 2025 part of each string, leaving the other characters before and after intact. For your example,
ABCD20250126 → ABCD20260126
No need to use wildcards here since the exact 2025 substring is what you want to change.
If you later need to do more complex replacements (like replacing only part of a number while keeping the rest untouched),
then formulas like:
=SUBSTITUTE(A1,”2025″,”2026″)
Regards,
ExcelDemy