This is the an overview.
Download Practice Workbook
Download the workbook.
Method 1 – How to Insert a Line Break in Excel using Keyboard Shortcuts
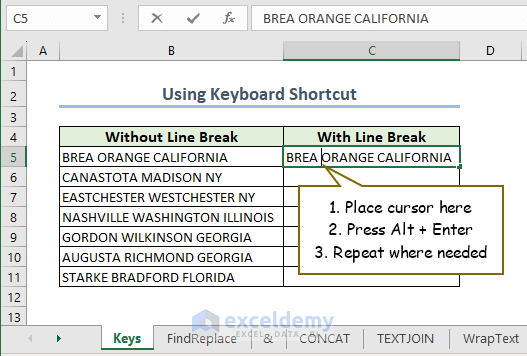
- Double-click the cell and place your cursor where you want to create the line break. For Windows, press Alt + Enter. For Mac, press Control + Option + Enter.
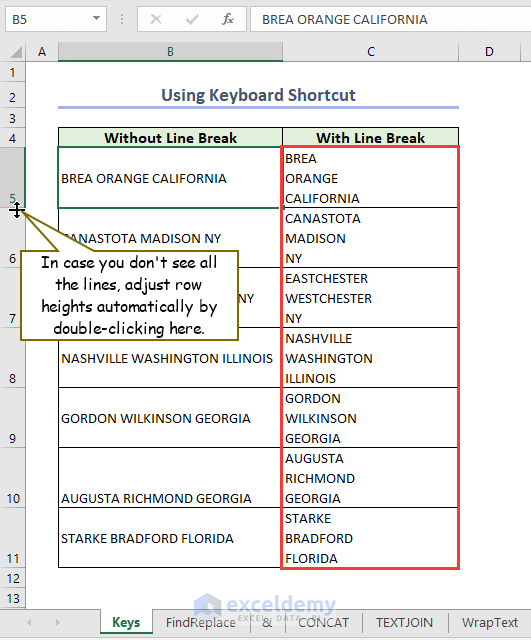
Repeat the process to create other line breaks.
Note:
If cell content is not fully displayed, adjust the row height manually. You can also double-click the row borders to adjust it automatically.
Method 2 – Use the Find and Replace Command to Add a Line Break After a Specific Character
Replace a particular character with a line break.
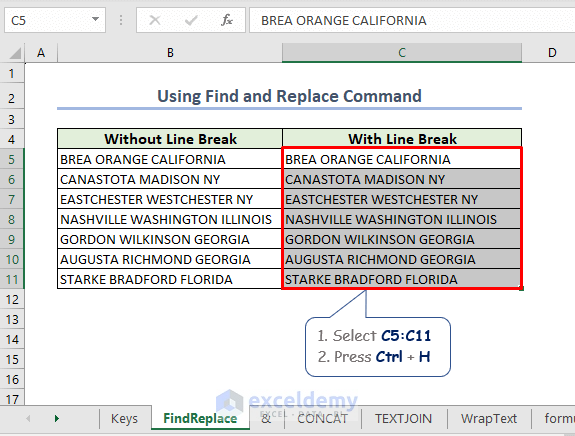
Select C5:C11 and press Ctrl+H.
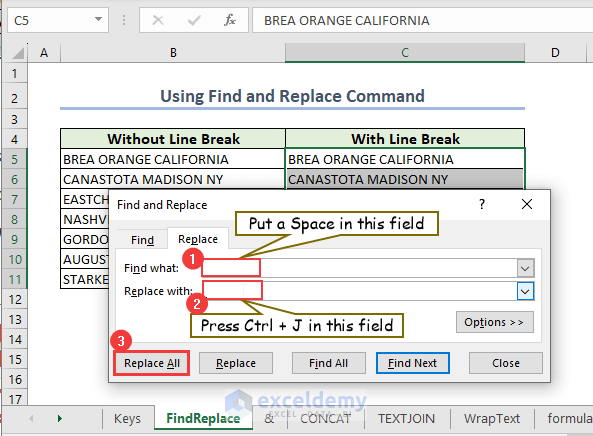
- In the Find and Replace dialog box, insert:
Find what >> A space
Replace with >> Press Ctrl + J (the shortcut for character 10, a line break, in the ASCII code).
- Click Replace All.
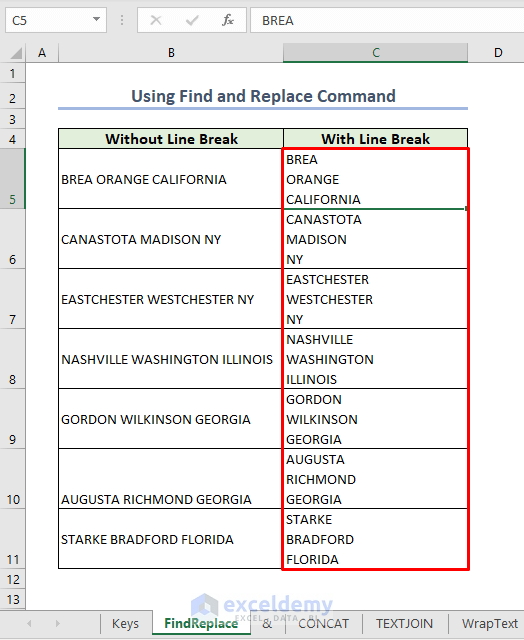
This is the output.
Read More: Find and Replace Line Breaks in Excel
Method 3 – Insert a Line Break with the CHAR Function in Excel
The CHAR function takes a numerical argument and returns the character. CHAR(10) indicates a line break in Excel formulas.
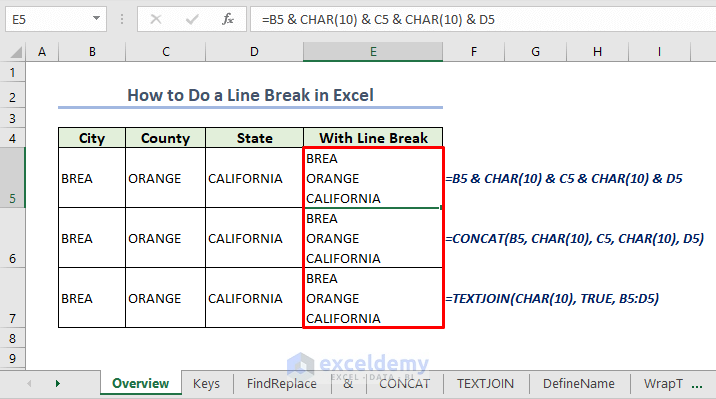
3.1 Use the Ampersand Sign to Start a New Line
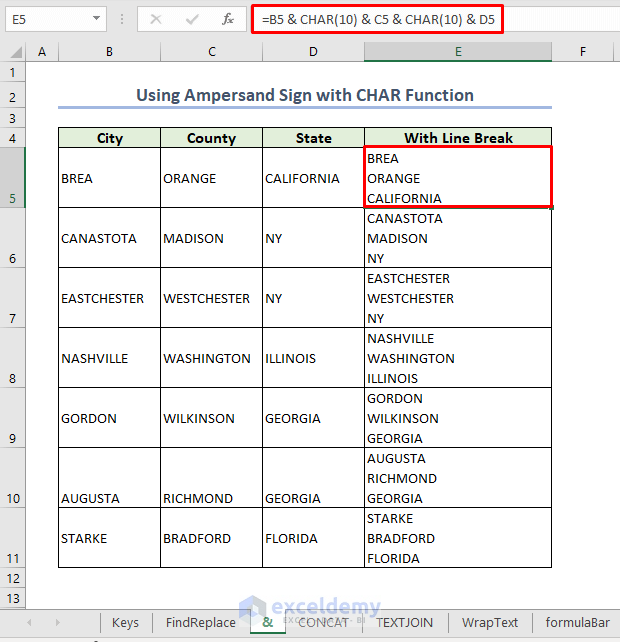
Use the formula in E5:
=B5 & CHAR(10) & C5 & CHAR(10) & D5Drag down the Fill Handle to see the result in the rest of the cells.
3.2 Use the CONCAT Function to insert a Line Break
The CONCAT function takes several arguments and concatenates all the values.
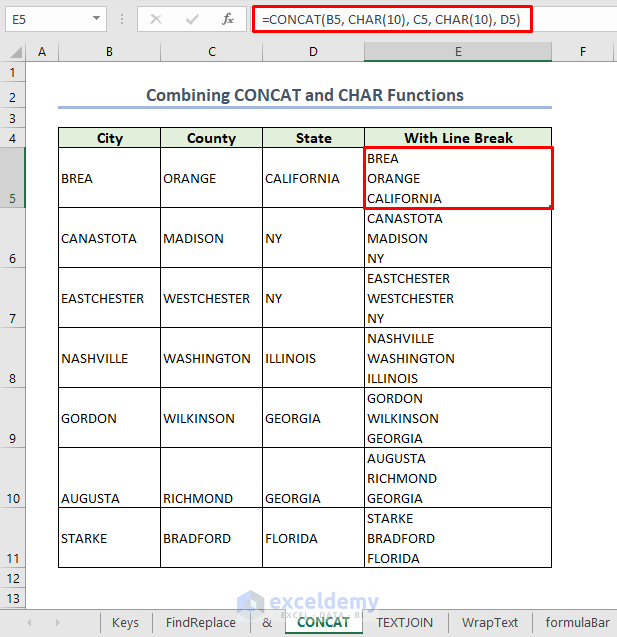
In cell E5, enter the formula:
=CONCAT(B5, CHAR(10), C5, CHAR(10), D5)Drag down the Fill Handle to see the result in the rest of the cells.
The formula concatenates the values in B5:D5 with a line break in between.
3.3 Add a Line Break with the TEXTJOIN Function
The TEXTJOIN function joins texts with a delimiter.
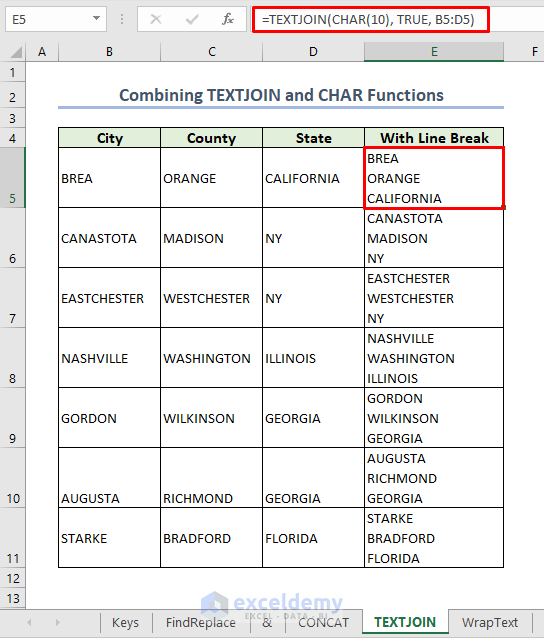
Use the formula in E5:
=TEXTJOIN(CHAR(10), TRUE, B5:D5)Drag down the Fill Handle to see the result in the rest of the cells.
The formula joins the values in B5:D5 with a line break after each cell value and ignores empty values.
Use a Defined Name Instead of CHAR(10) in Excel Formulas
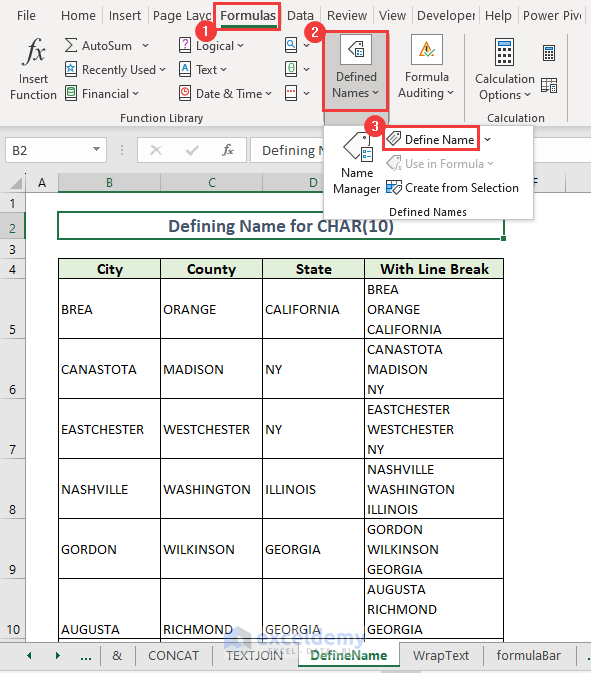
Go to the Formulas tab > click Defined Names > select Define Name.
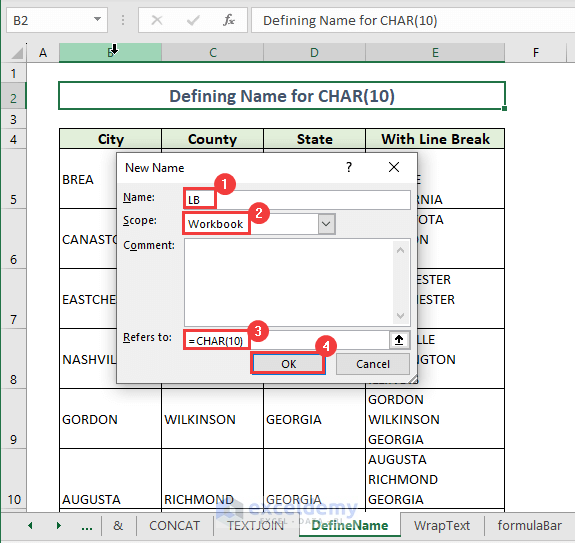
- In the dialog box, input:
Name > LB
Scope > Workbook
Refers to > =CHAR(10)
- Click OK.
LB is used instead of CHAR(10) in the formulas. For example:
=B5 & LB & C5 & LB & D5How to Enable the Wrap Text Feature in Excel (to insert a Line Break Automatically)
The Wrap Text feature inserts a line break at the point where the text exceeds the column width of the cell.
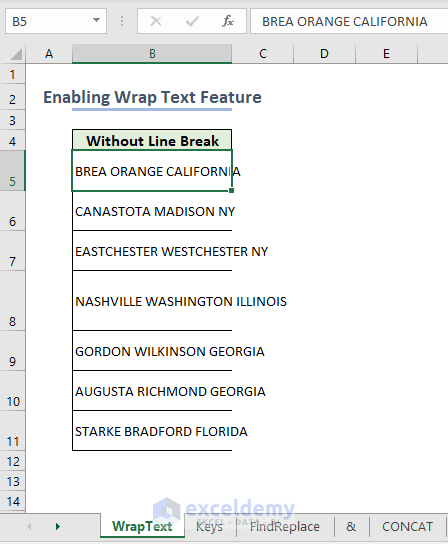
The above image shows the cell content in column B exceeding the cell width.
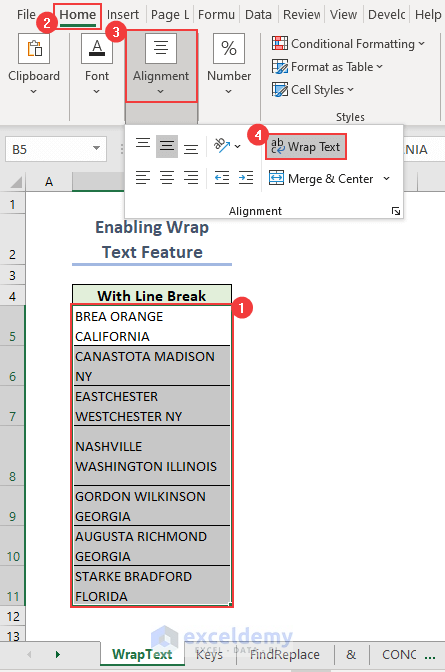
- Select B5:B11 and go to the Home tab.
- Click Argument > select Wrap Text.
Content is adjusted to fit the column width.
Read More: How to Make Excel Go to Next Line Automatically
How to Create a New Line in a Formula Bar in Excel
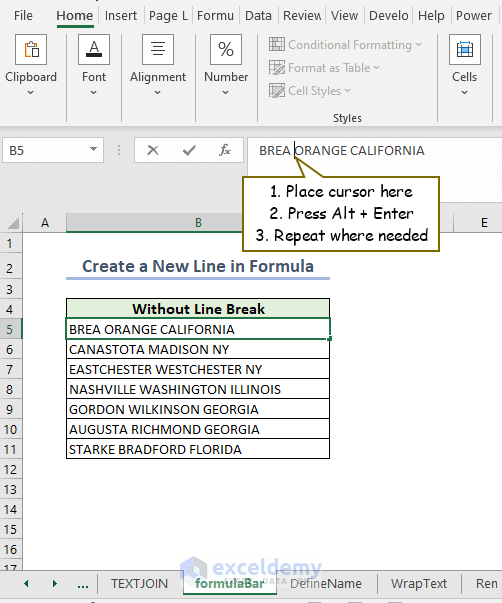
- Select the cell and go to the formula bar.
- Click and place the cursor where you need to insert a line break. For Windows, press Alt+Enter. For Mac, press Control + Option + Enter.
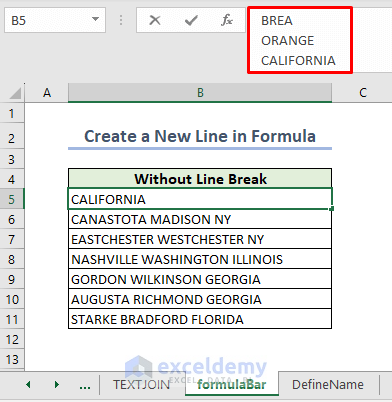
This is the output.
How to Remove Line Breaks in Excel
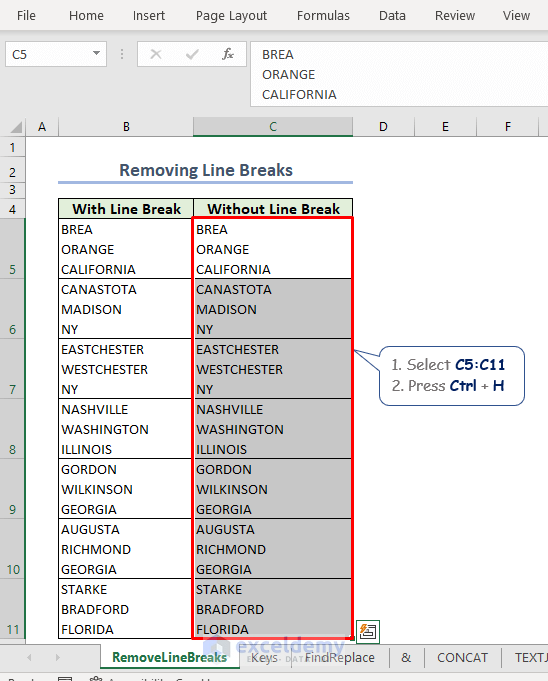
- To remove line breaks, select C5:C11 and press Ctrl+H.
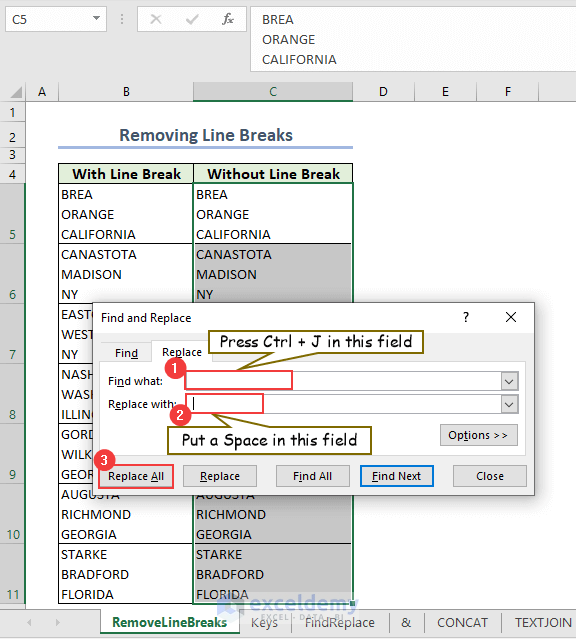
- In the Find and Replace dialog box, enter:
Find what >> Press Ctrl + J
Replace with >> A space
- Click Replace All.
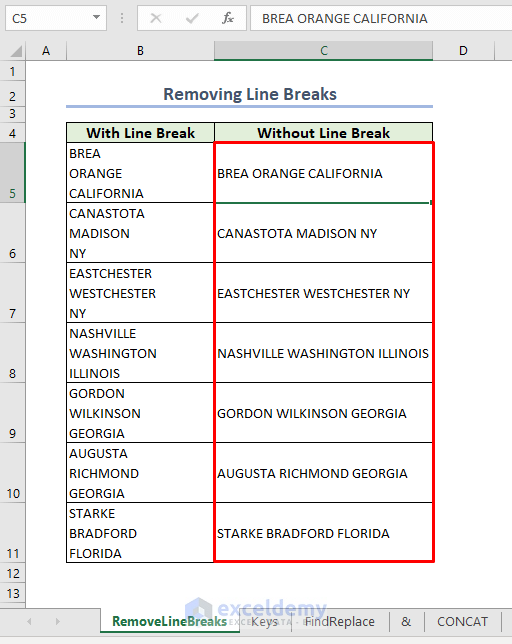
Adjust column width and you’ll see the cell content in a single line.
Things to Remember
- The code for a line break in Windows is 10, so use CHAR(10). For Mac, is 13, so use CHAR(13).
Related Articles
- How to Space Down in Excel
- How to Replace Line Break with Comma in Excel
- [Fixed!] Line Break in Cell Not Working in Excel
<< Go Back to Line Break in Excel | Text Formatting | Learn Excel
Get FREE Advanced Excel Exercises with Solutions!
