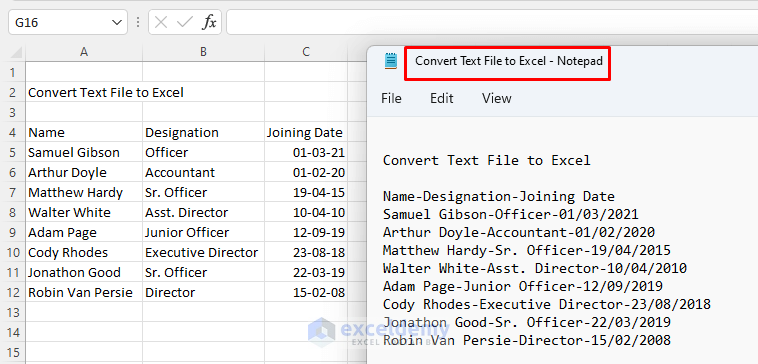
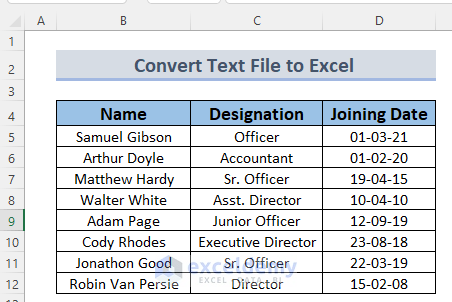
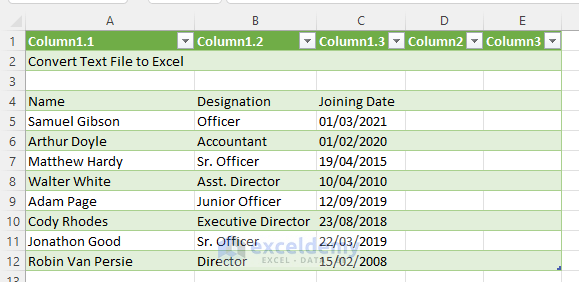
We will convert the following text file, which we named ‘Convert Text File’, to Excel. Here is a preview of how this text file will look after we convert it to an Excel spreadsheet.
Method 1 – Opening the Text File Directly in Excel to Convert It to Excel File
Steps:
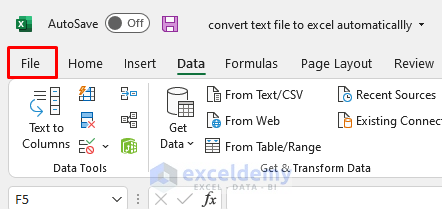
- Open an Excel File and then go to the File Tab.
- Select the option Open from the green bar.
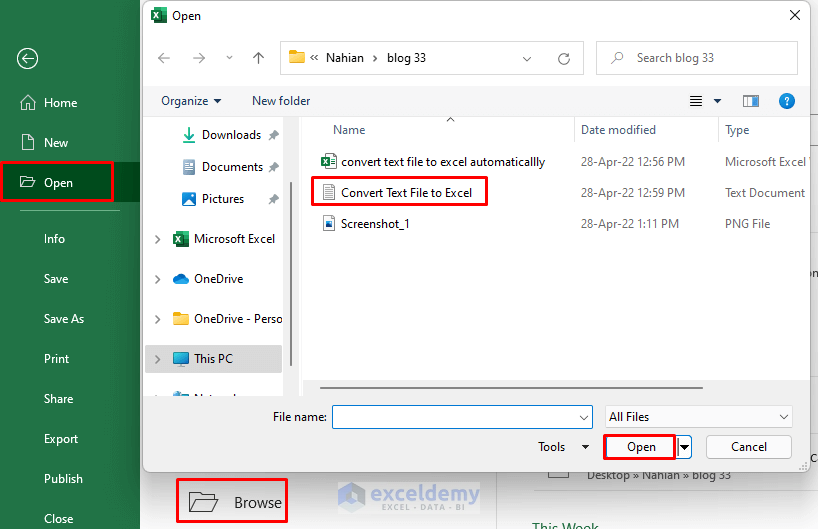
- Select Browse. You will see the Open window appear.
- Select the Text File from its location and click on Open in the Open.
- Make sure you have the option All Files.
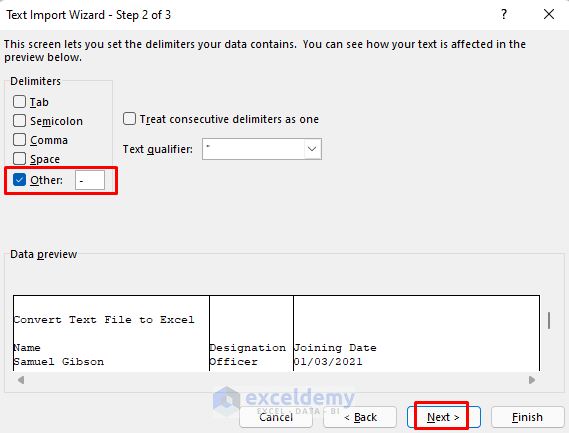
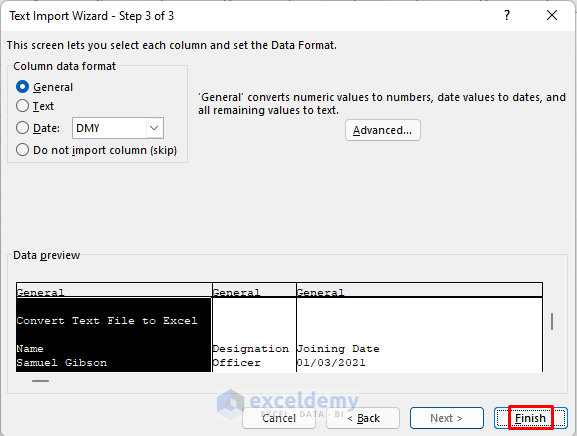
- The Text Import Wizard will show up. Since we separated our columns by a Delimiter (hyphens (—)), we selected Delimiter and went Next.

- Check Other, enter a Hyphen (–), and go Next.
- Click Finish.
You will see the data from the Text File appear in the current Excel File.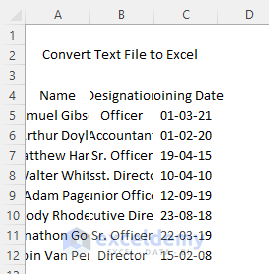
The data you see is messy, so I formatted the text according to my convenience.
Method 2 – Using the Text Import Wizard to Convert a Text File to Excel
Steps:
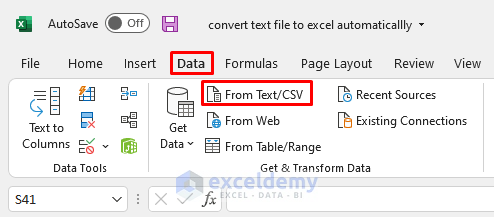
- Select Data >> From Text/CSV
- The Import Data window will open.
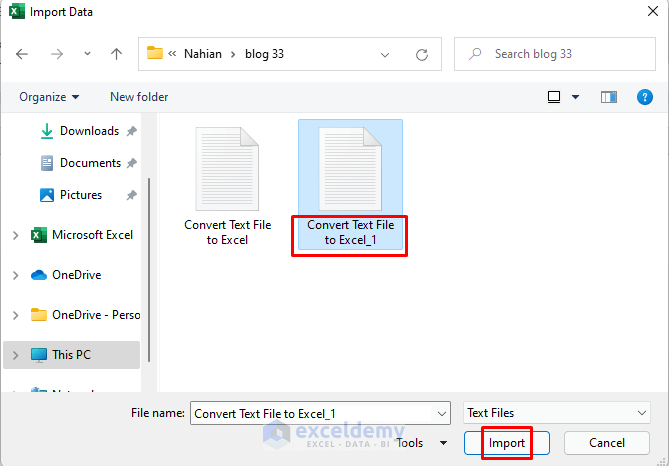
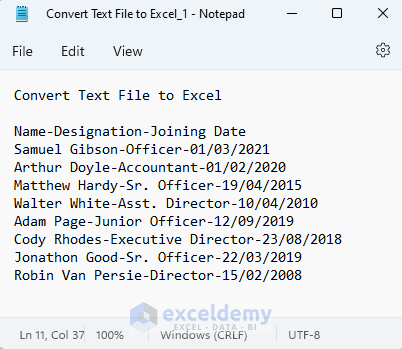
- Select the Text File you want to convert from the location and click on Import. In my case, it is Convert Text File to Excel_1.
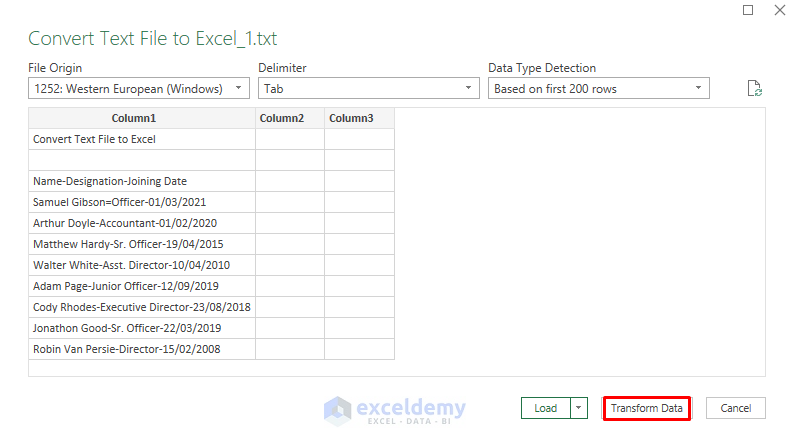
- You will see a Preview Box.
- Click on Transform.
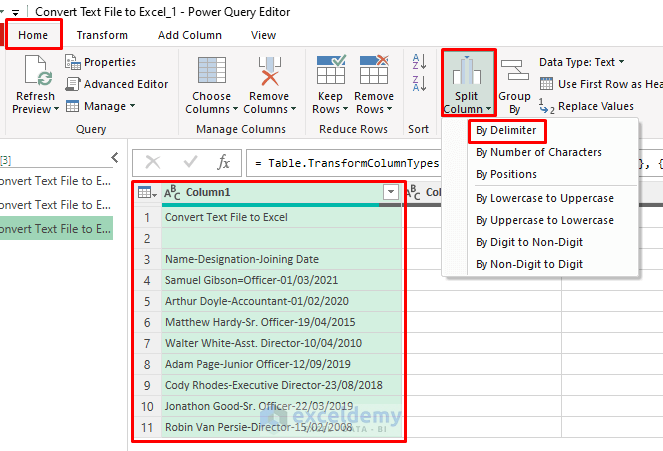
You will see your data from the Text File in a Power Query Editor.
- Select Home >> Split Column >> By Delimiter
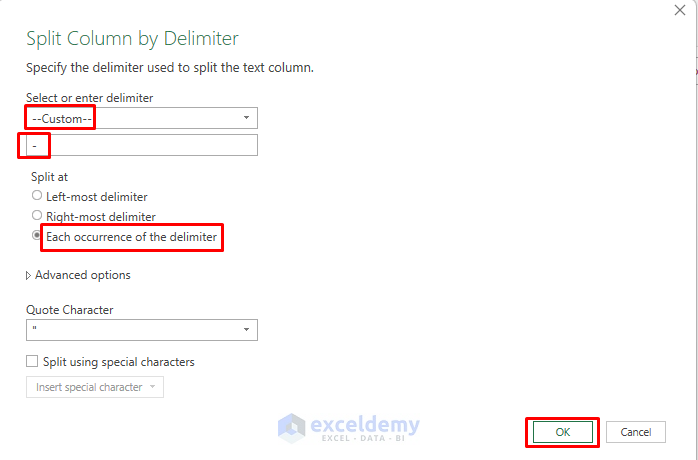
- In the following window, select the Delimiter on which these data from the Text File will split. In our case, it is hyphen (–).
- Select Each occurrence of the delimiter and click OK.
You will see the data split.

- To load this table in an Excel sheet, click on Close & Load.

You will see the information from the Text File as a table in a new Excel sheet. You can format the table according to your convenience.
Read More: How to Import Text File with Multiple Delimiters into Excel
Method 3 – Applying the Get Data Wizard to Convert Text a File to an Excel Table Automatically
Steps:
- Select Data >> Get Data >> From File >> From Text/CSV
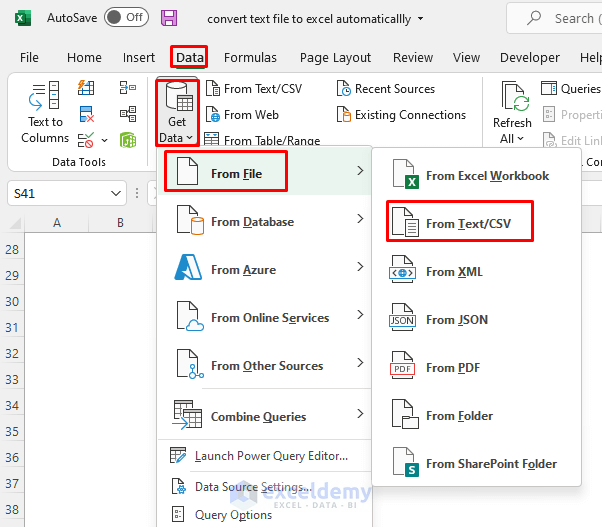
- The Import Data window will open.
- Select the Text File you want to convert from the location and click on Import. In my case, it is Convert Text File to Excel_1.
- You will see a Preview Box.
- Click on Transform.
- You will see your data from the Text File in a Power Query Editor.
- Select Home >> Split Column >> By Delimiter
- In the following window, select the Delimiter on which these data from the Text File will split. In our case, it is hyphen (–).
- Select Each occurrence of the delimiter and click OK.
You will see the data split.

- To load this table in an Excel sheet, click on Close & Load.
You will see the information from Text File as a table in a new Excel sheet. You can format the table according to your convenience.
Read More: VBA Code to Convert Text File to Excel
Practice Section
Here is the Text File data so you can create your own Text File and convert it to an Excel File.
Download the Practice Workbook
Related Articles
<< Go Back to Import Text File to Excel | Importing Data in Excel | Learn Excel
Get FREE Advanced Excel Exercises with Solutions!
