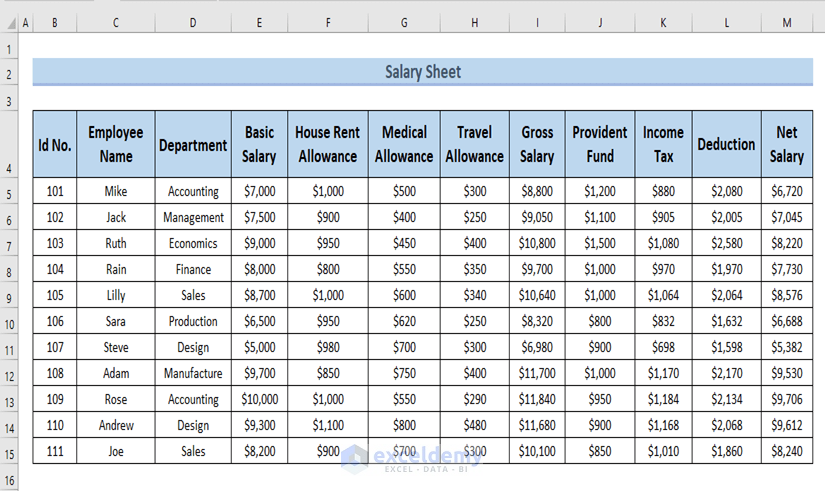
Overview of a Salary Sheet and the Automatic Salary Slip
In the following picture, you can see the overview of a Salary Sheet.
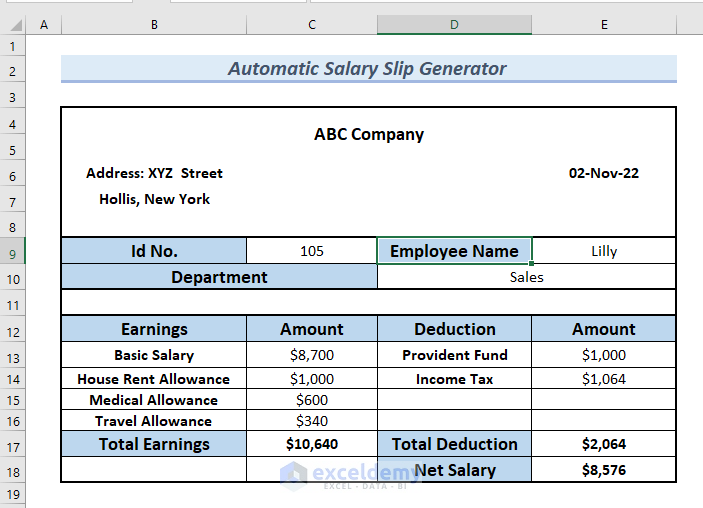
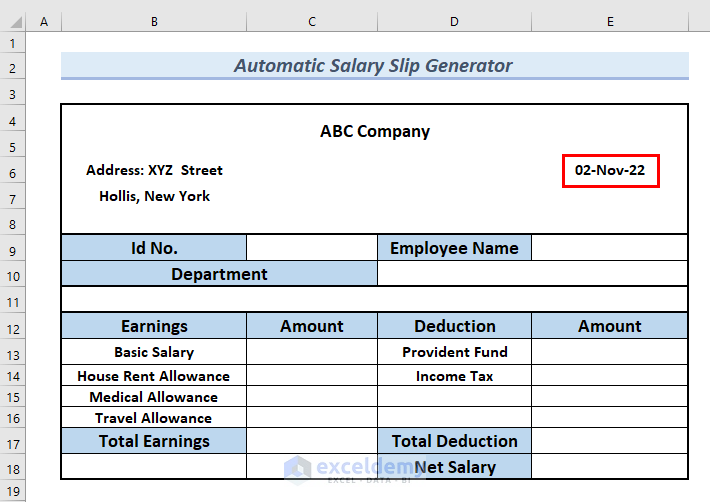
Using this Salary Sheet, we have created the following automatic salary slip.
Create an Automatic Salary Slip Generator Using Excel: 8 Steps
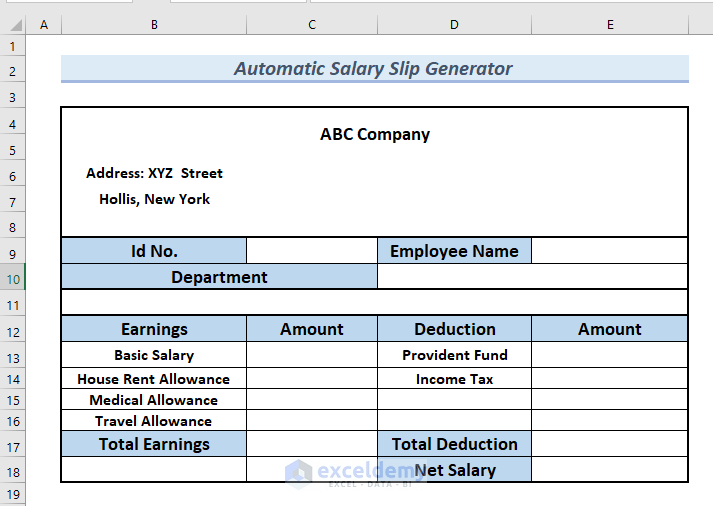
Step 1 – Creating an Outline for the Automatic Salary Slip
We have created the outline for the automatic salary slip. Use the image below as the guide if you’re making your own. We have used All Borders and Thick Outline Borders. Add the company name and address at the top.
Step 2 – Adding the Date to the Salary Slip
- Copy the following formula into cell F6.
=TODAY()The TODAY function returns the current day date. Whenever you print or use the slip the Date will be updated to the current date by itself.
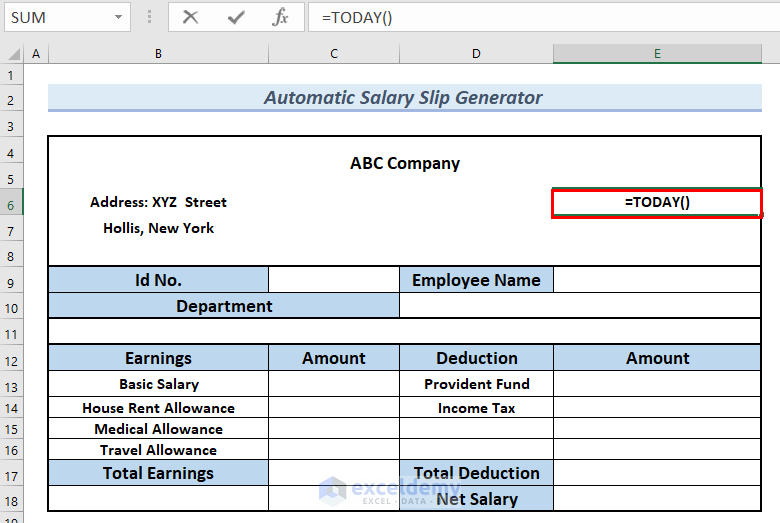
- Press Enter.
Step 3 – Inserting the Employee ID from the Salary Sheet to the Salary Slip
- Click on cell C9 and go to the Data tab.
- Click on the Data Validation icon and select Data Validation.
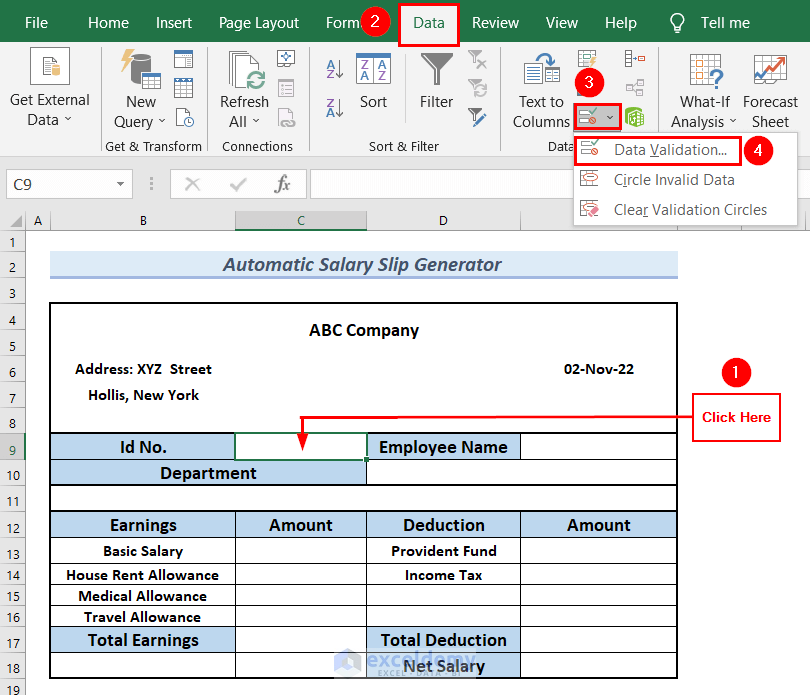
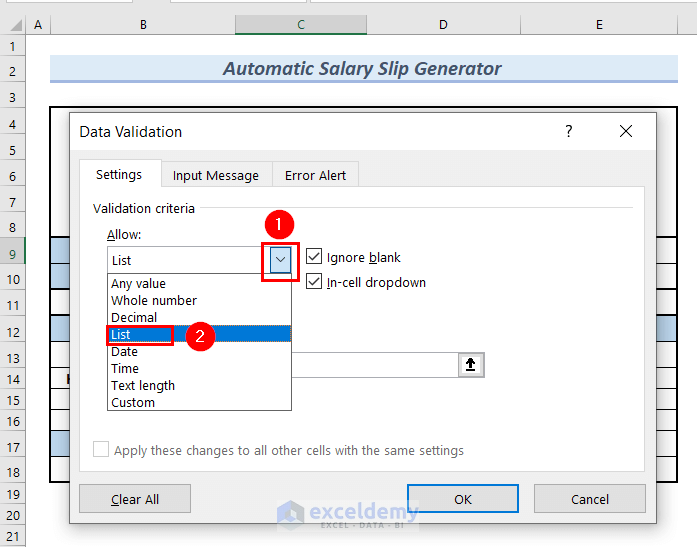
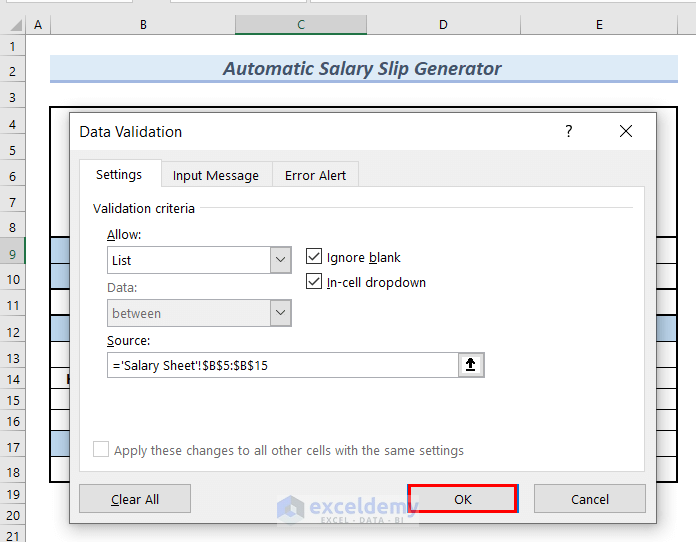
- A Data Validation dialog box will appear.
- From the Allow group, select List.
- Click on the upward arrow of the Source box to select the data source.
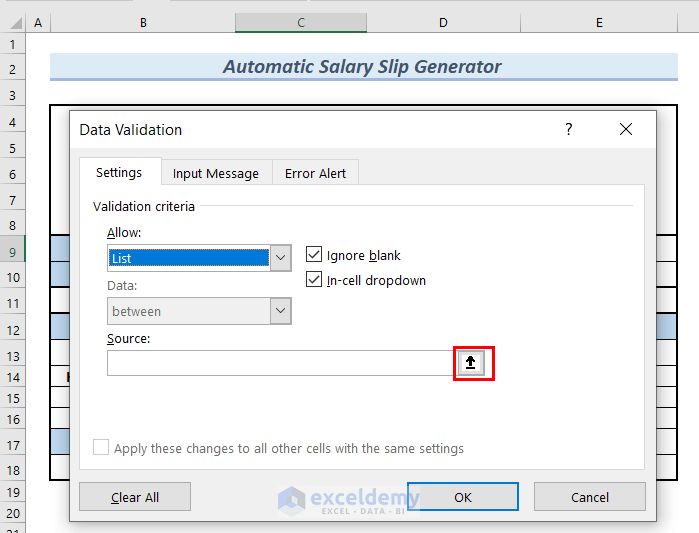
- Go to the Salary Sheet and select cells B5:B15 as source data.

- Click OK in the Data Validation dialog box.
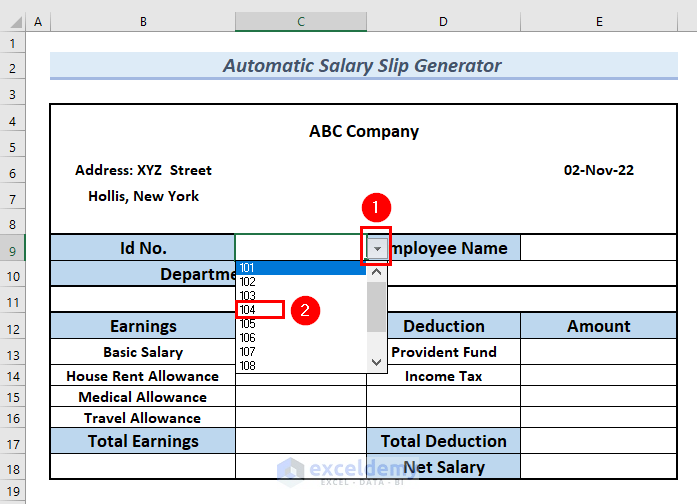
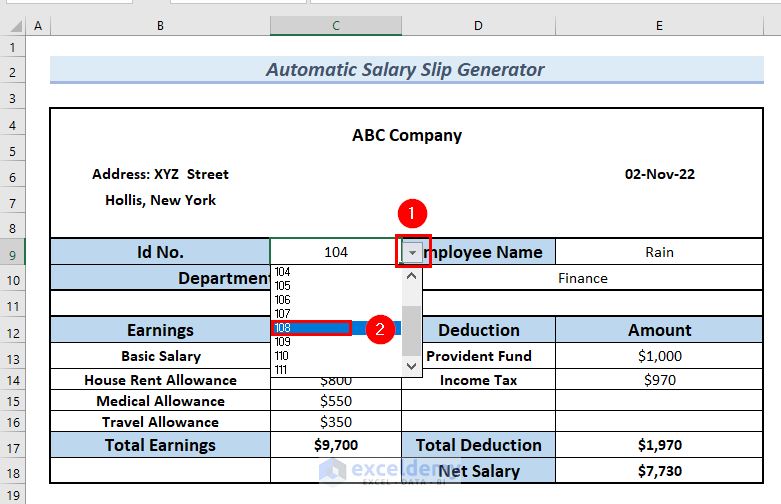
- You can see a drop-down arrow on the right side of cell C9.
- Click on that drop-down arrow and select an ID from the list. We selected 104.
Step 4 – Using a Named Range in the Main Salary Sheet
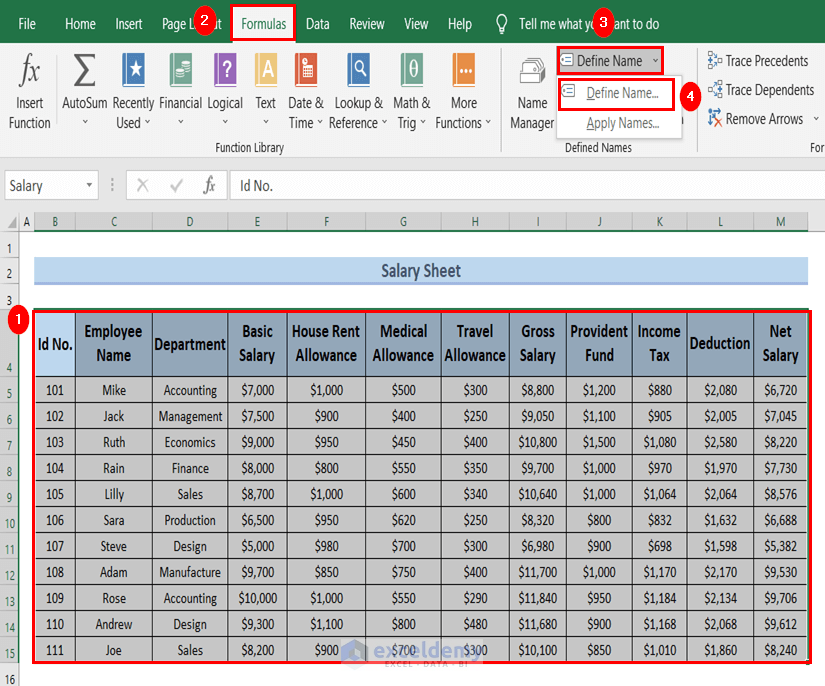
- Select the entire Salary Sheet from cells B4:M15.
- From the Formulas tab, select the Define Name group, and select the Define Name option.
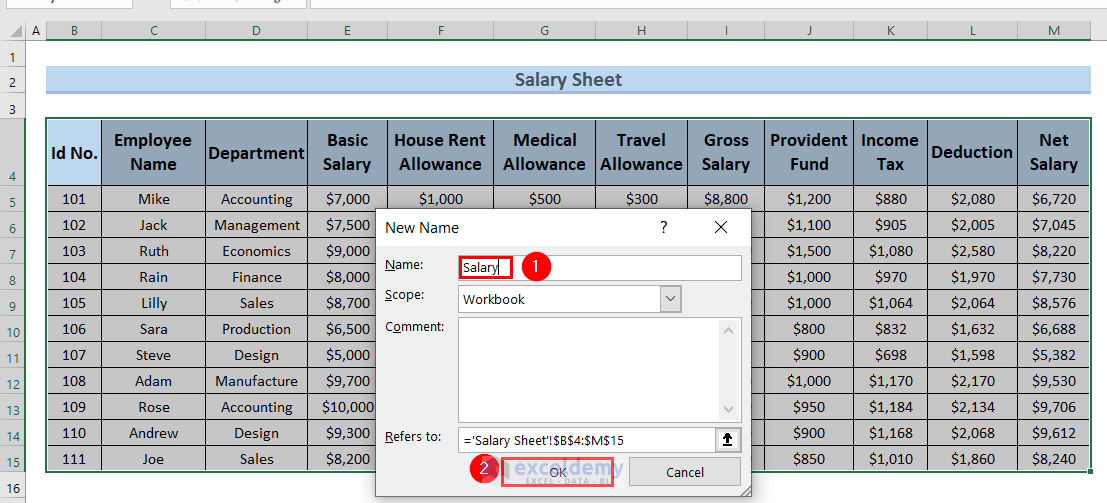
- At this point, a New Name dialog box will appear.
- Set the Name as Salary and click OK.
Step 5 – Using the VLOOKUP Function to Automate the Salary Slip
- To find out the Employee Name, insert the following formula in cell E9 and press Enter.
=VLOOKUP(C9,Salary,2,FALSE)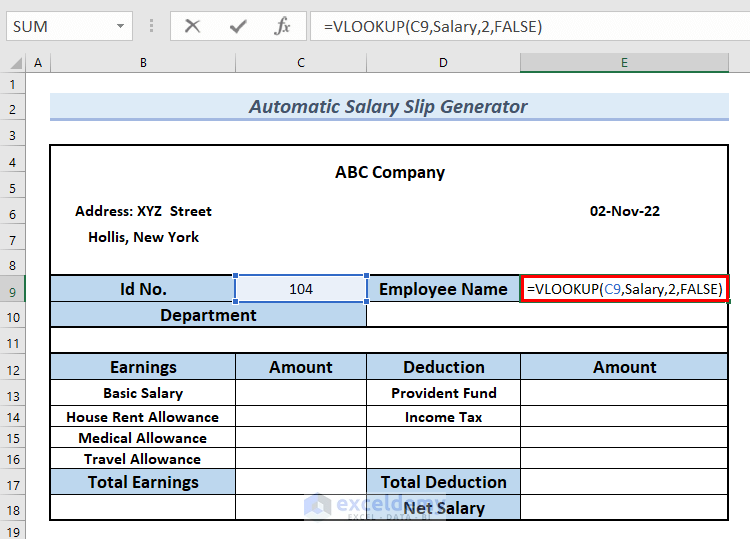
Formula Breakdown
- VLOOKUP(C9,Salary,2,FALSE) →The VLOOKUP function looks for values in a table or data range.
- C9→ is the lookup_value.
- Salary → is the table_array.
- 2 → is the col_index_num.
- FALSE→ means exact match.
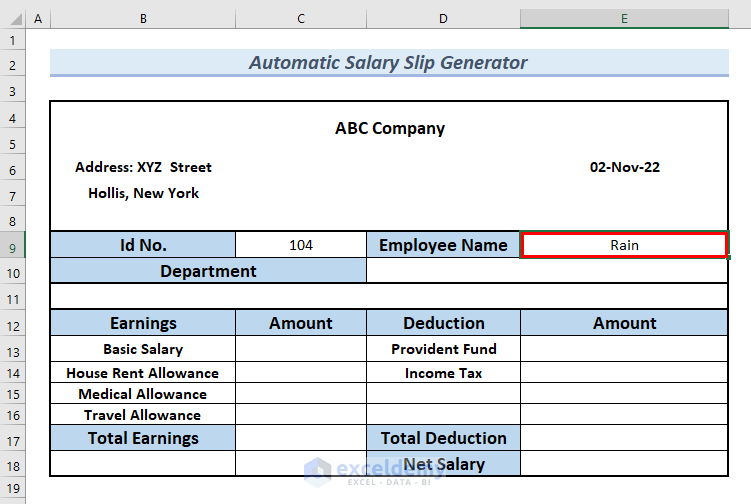
- VLOOKUP(C9,Salary,2,FALSE) → becomes
- Output: Rain
- Explanation: Here, Rain is the Employee’s Name.
- You can see the Employee’s Name in cell E9.
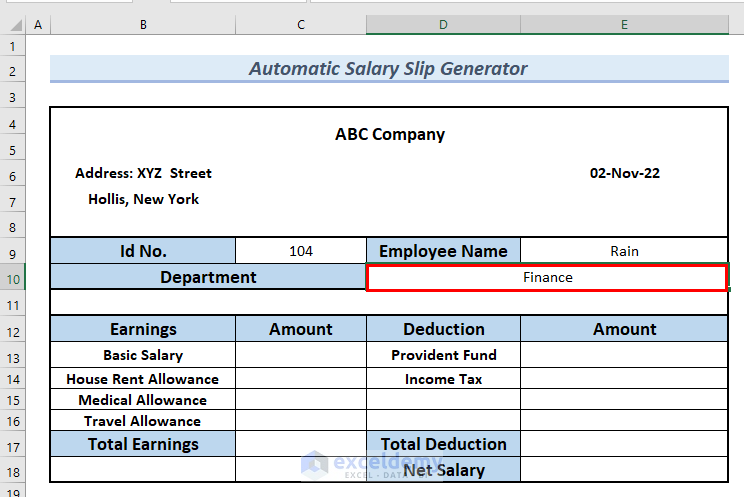
- Insert the following formula in cell E10 to find the Department.
=VLOOKUP(C9,Salary,3,FALSE)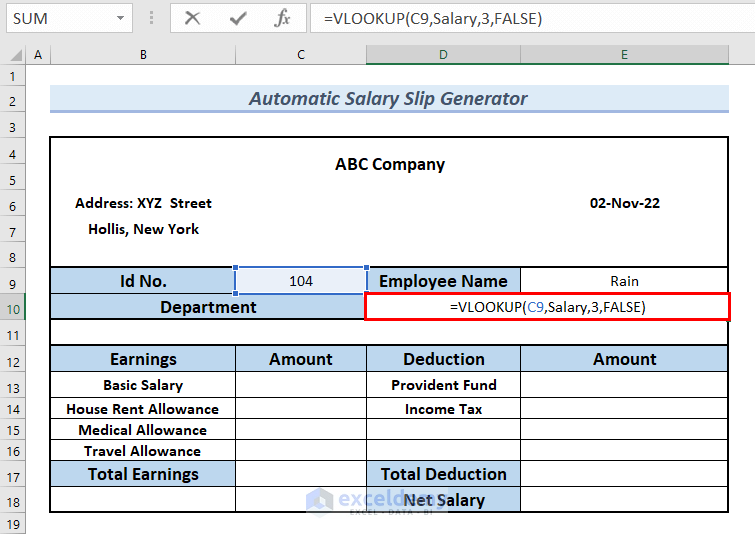
- Press Enter.
Similarly, using the VLOOKUP function, we will fetch the Basic Salary, House Rent Allowance, Medical Allowance, Travel Allowance, Provident Fund, and Income Tax.
- For the Basic Salary, insert the following formula in cell C13:
=VLOOKUP(C9,Salary,4,FALSE)- For the House Rent Allowance, insert the following formula in cell C14:
=VLOOKUP(C9,Salary,5,FALSE)- For Medical Allowance, apply the following formula to cell C15.
=VLOOKUP(C9,Salary,6,FALSE)- For Travel Allowance, use the following formula in cell C16.
=VLOOKUP(C9,Salary,7,FALSE)- For the Provident Fund, use the following formula in cell E13.
=VLOOKUP(C9,Salary,9,FALSE)- For the Income Tax, put the following formula in cell E14:
=VLOOKUP(C9,Salary,10,FALSE)

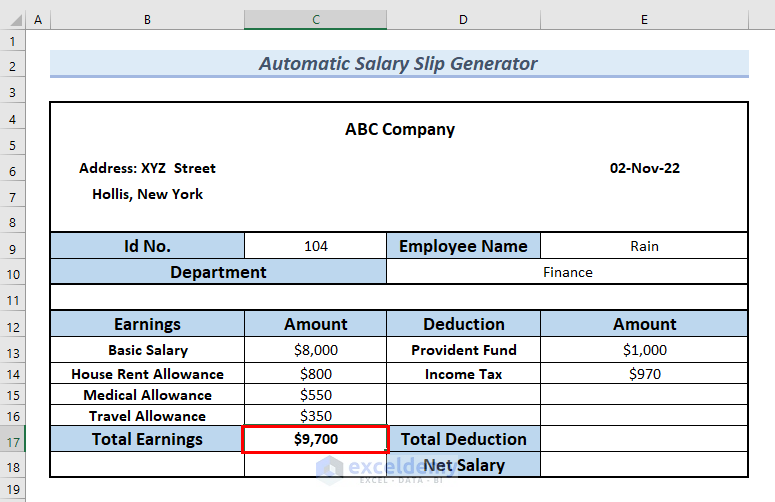
Step 6 – Summing up Total Earnings in the Automatic Salary Slip
- Insert the following formula in cell C17:
=SUM(C13:C16)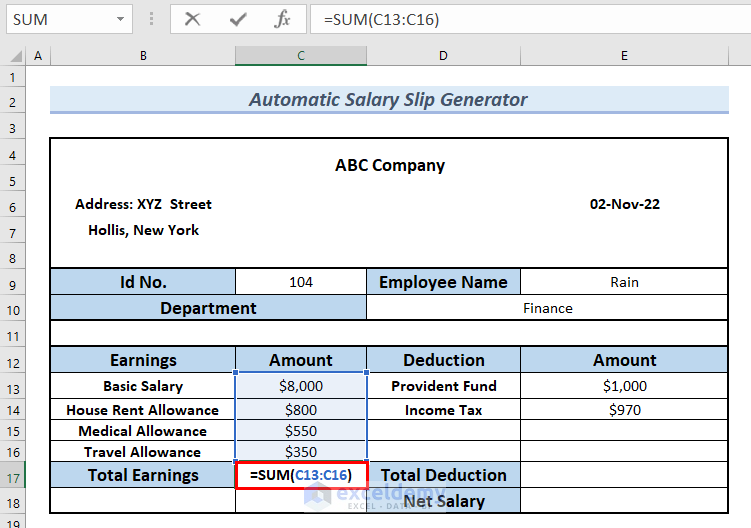
- Press Enter.
- You can see the Total Earnings in cell C17.
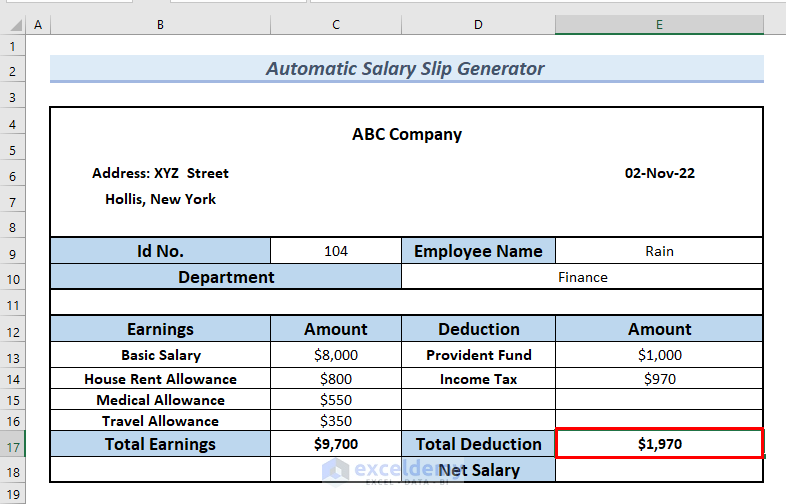
Step 7 – Calculating the Total Deduction in Automatic Salary Slip
- Use the following formula in cell E17:
=SUM(E13+E14)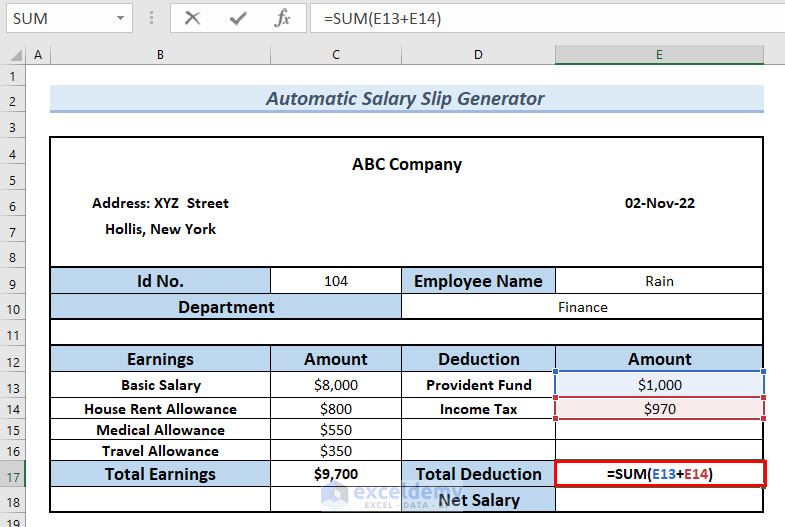
- Press Enter.
Step 8 – Calculating the Net Salary
- Insert the following formula in cell E18:
=C17-E17This simply deducts the Total Deduction from Total Earnings.
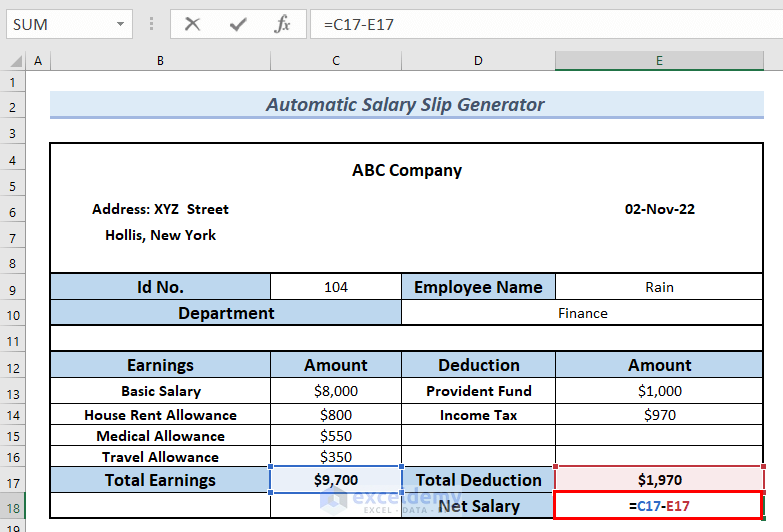
- Press Enter.

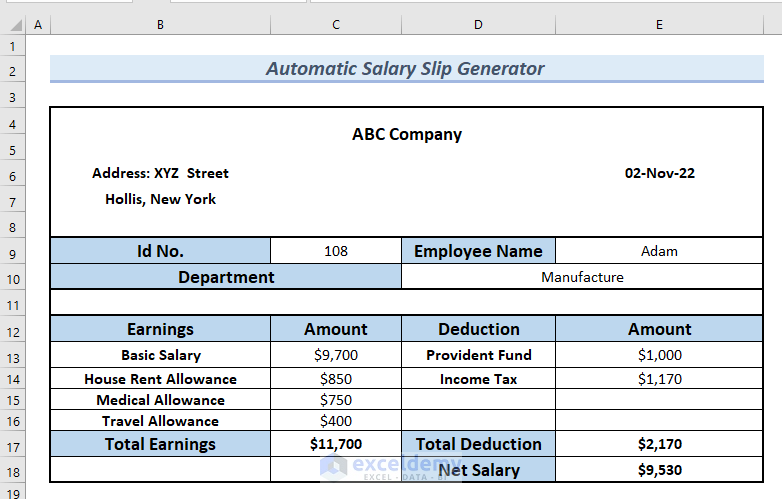
- Change the ID No. by clicking on the drop-down arrow in cell C9. We selected 108.
- The salary slip has been changed to the salary slip for the employee with ID No. 108.
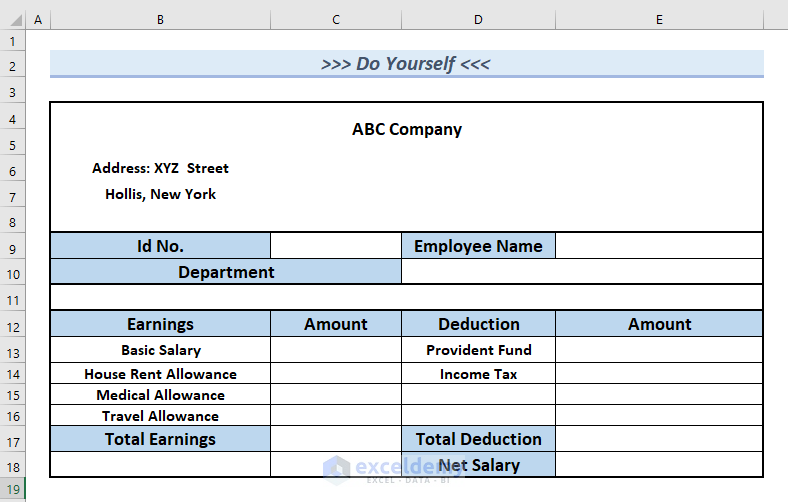
Practice Section
You can download the Excel file below to practice the explained method or use it as a template.
Download Practice Workbook
<< Go Back to Make Salary Slip | Salary | Formula List | Learn Excel
Get FREE Advanced Excel Exercises with Solutions!

Very simple step by step process! I was able to follow it easily and got my payslips done! Thank you so much!
Hello Morea Steven,
You are most welcome. Glad to hear that our step by step process helped you to create a paysilp. Keep learning Excel with ExcelDemy!
Regards
ExcelDemy
Thank you so much for this Automatic Pay slip Generator.
Please it this capable of processing pay slips for different staff (say 50 -100 staff) all at once?
Or must it be generated for one staff at a time?
Thank you…
Hello Chukwuemerie,
You are most welcome. Thanks for your appreciation. Here’s a VBA solution to generate pay slips for multiple employees:
Set Up Your Workbook:
1. Create a master sheet (EmployeeData) with columns for Employee ID, Name, Salary, and other details.
2. Prepare a pay slip template on another sheet (PaySlip).
VBA Code:
1. The macro loops through each employee in EmployeeData.
2. It fills in the PaySlip template with their details.
3. Saves each pay slip as a PDF in a designated folder.
Regards
ExcelDemy
Helped a bunch. Thank You!
Now to send emails. Please help!
Hello Jaco Herbst,
You are most welcome. Thank you for your feedback! I’m glad the article was helpful.
To send emails with your salary slips directly from Excel, you can use Outlook and VBA.
1. Open the VBA Editor (press Alt + F11).
2. Insert a Module and paste a macro to automate emailing salary slips.
3. The macro will loop through your list, attach or embed the slip, and send it via Outlook.
This macro assumes you have a list of employees with their email addresses and that each salary slip is in a separate worksheet or you’re attaching a generated PDF for each.
1. Replace “SalaryData” with your actual sheet name.
2. Adjust columns as per your layout (email, name, month, etc.).
3. To attach salary slips as PDF, export slips and use the .Attachments.Add line (uncomment and update the path).
4. The macro currently uses .Display so you can review emails before sending. Change to .Send to send automatically.
Regards
ExcelDemy