How to Create a Bank Statement Outline Using Data Organization Guidelines in Excel
Create an organized outline for a Bank Statement using the Data Organization Guidelines provided by Microsoft.
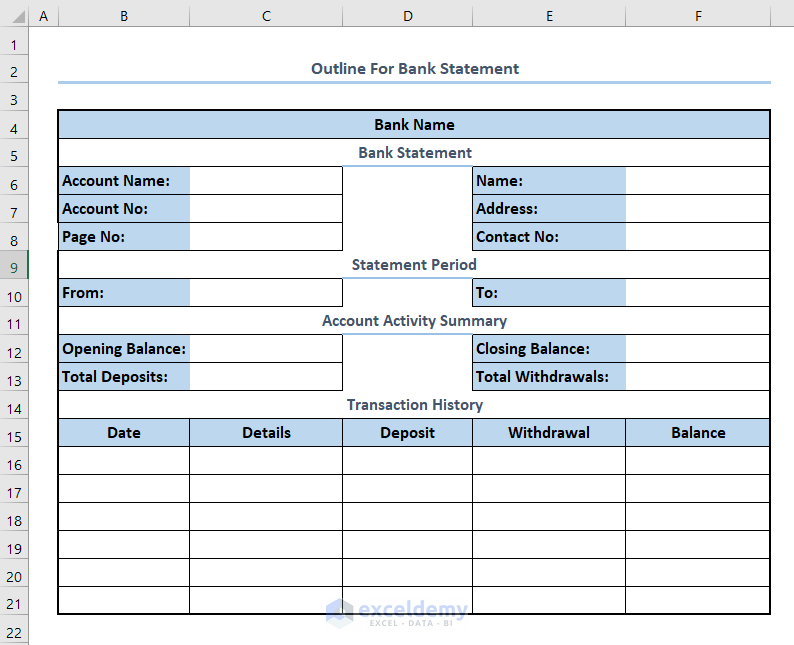
- Below you can see an outline of a Bank Statement.
- It includes account details, personnel details, statement period, account activity summary, and transaction history.
To organize a Bank Statement.

Method 1 – Organizing Bank Statements According to the Date of Transaction in Excel
Steps:
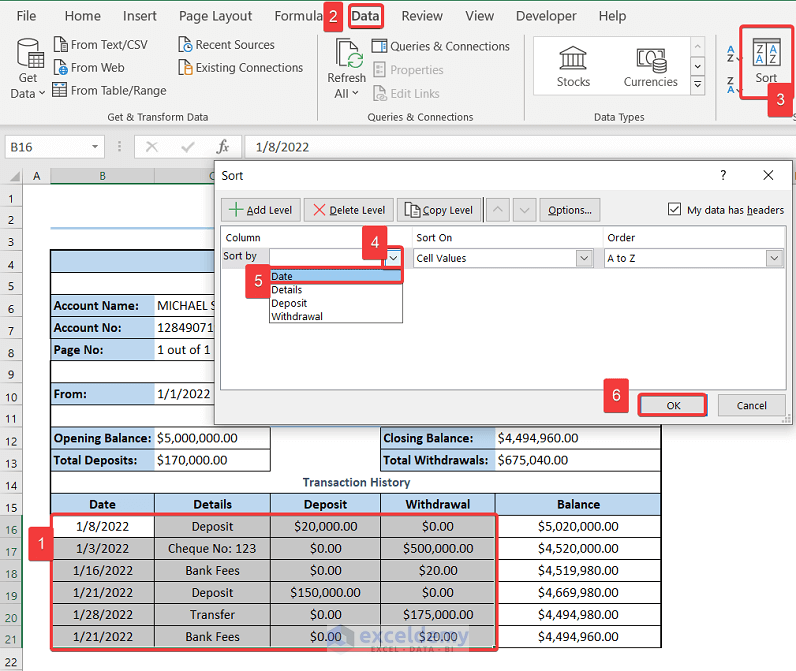
- Select the cell range you want to organize. Here, B16:E21.
B16 and E21 are the first and last cells of the columns Date and Withdrawal.
- Go to the Data tab.
- Click Sort.
- Click the Down-Arrow beside Sort by.
- Select Date.
- Click OK.
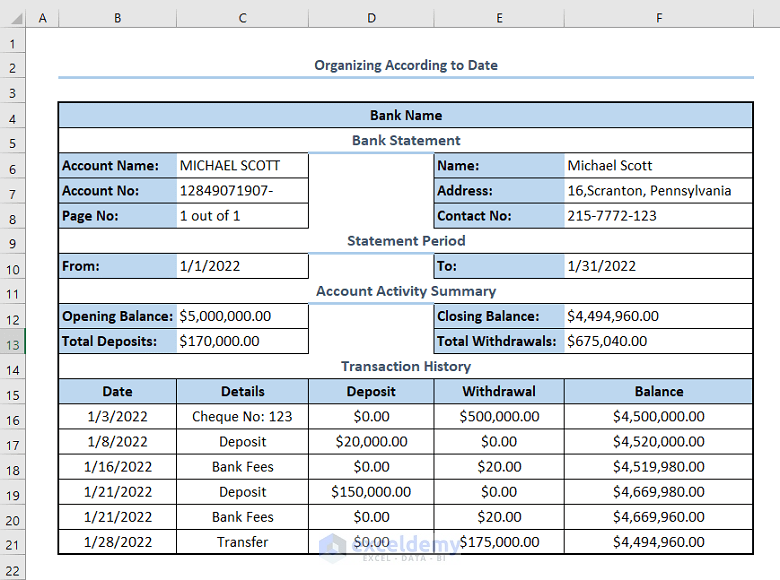
This is the output.
Notes:
- To organize your Bank Statement according to the Deposit amount, you can select Deposit in Sort by and the described steps.
- To organize your Bank Statement according to the Withdrawal amount, you can select Withdrawal in Sort by and follow the the described.
- Avoid selecting cells that include formulas.
Method 2 – Showing Deposits First and Organizing Bank Statements According to the Date of Transaction in Excel
To get the Deposit amounts and sort them by Date of Transaction:
Steps:
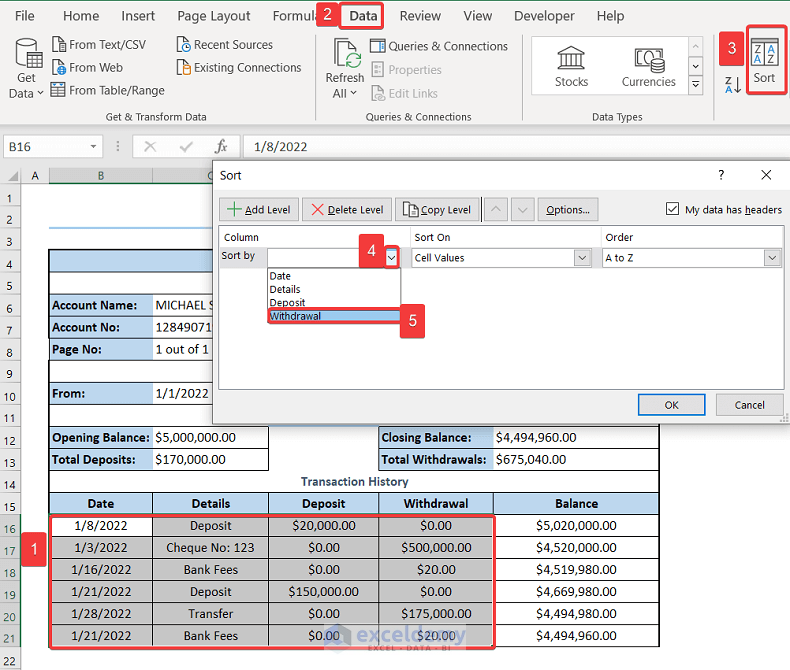
- Select B16:E21.
- Go to the Data tab.
- Click Sort.
- Click on the Down-arrow beside the Sort by.
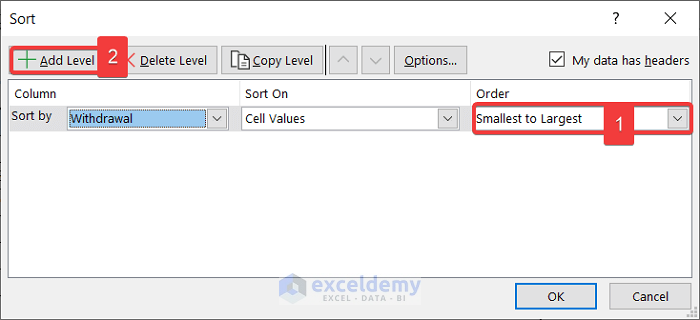
- Select Withdrawal in Sort by.
- In Order, select Smallest to Largest.
- Click Add Level.
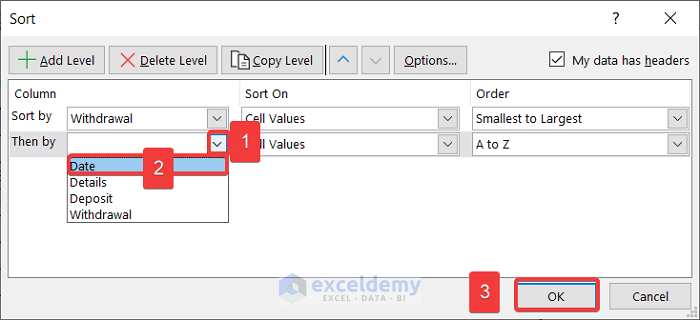
- Click the Down-Arrow beside Then by.
- Select Date in Then by.
- Click OK.
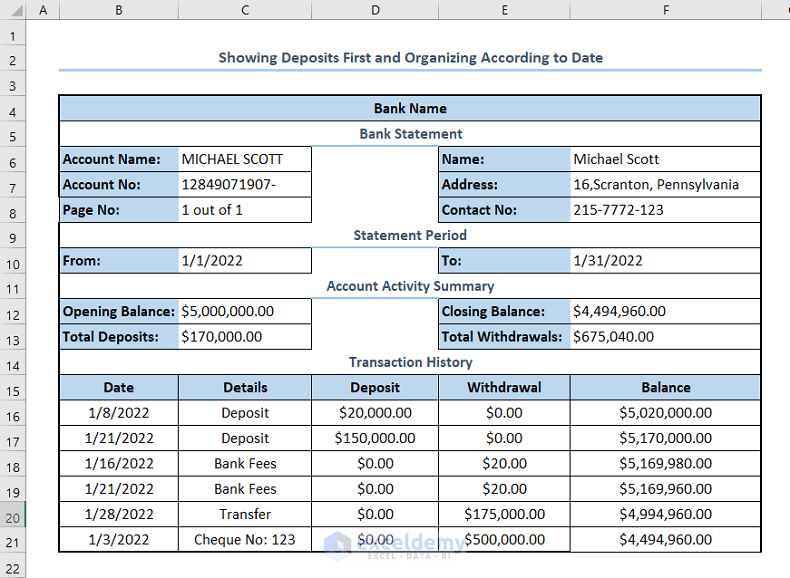
This is the output.
Notes:
- To see the Withdrawals organized according to their Date of Transaction: select Deposit instead of Withdrawal in Sort by.
- Avoid selecting cells that include formulas.
Read More: How to Convert Bank Statement Text to Excel
Download the practice workbook.
Related Article
<< Go Back To How to Create a Bank Statement in Excel |Excel For Finance | Learn Excel
Get FREE Advanced Excel Exercises with Solutions!
