Method 1 – Convert Bank Statement Text from PDF to Excel
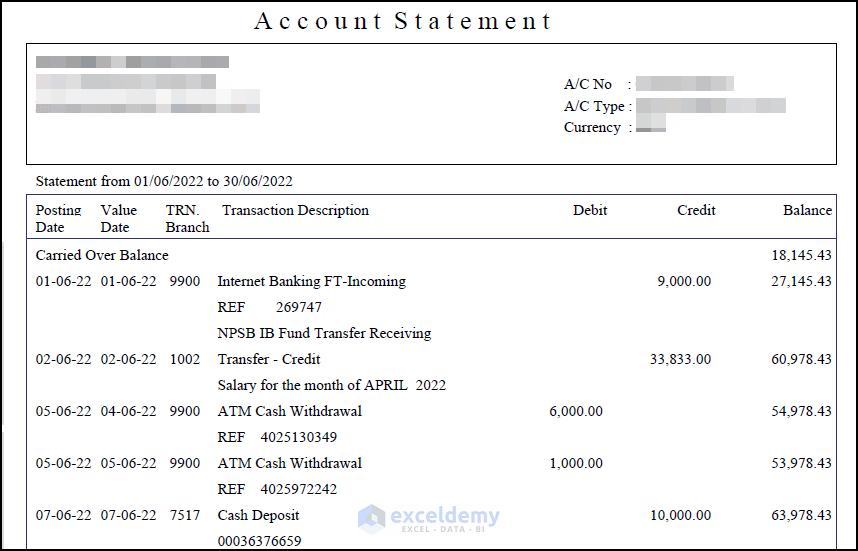
In this case, we have a bank statement for June’22 in PDF format. We’ll convert this bank statement into an Excel spreadsheet.
Steps
- Open a new workbook.
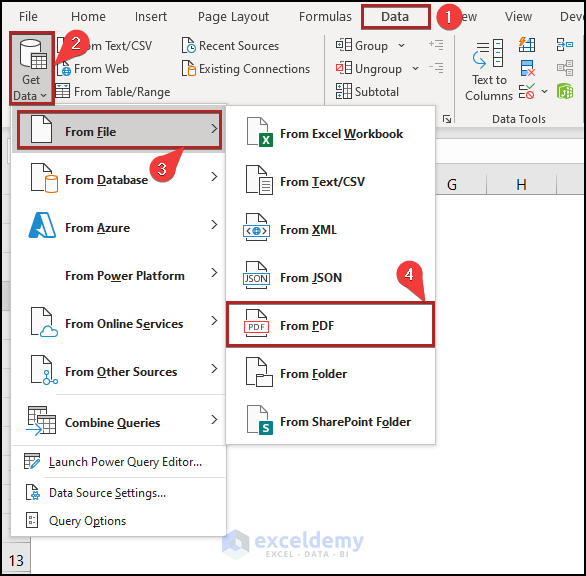
- Go to the Data tab.
- Click on the Get Data drop-down on the Get & Transform Data group.
- Go to the From File sub-menu.
- Choose From PDF from the available options.
- The Import Data window will open up.
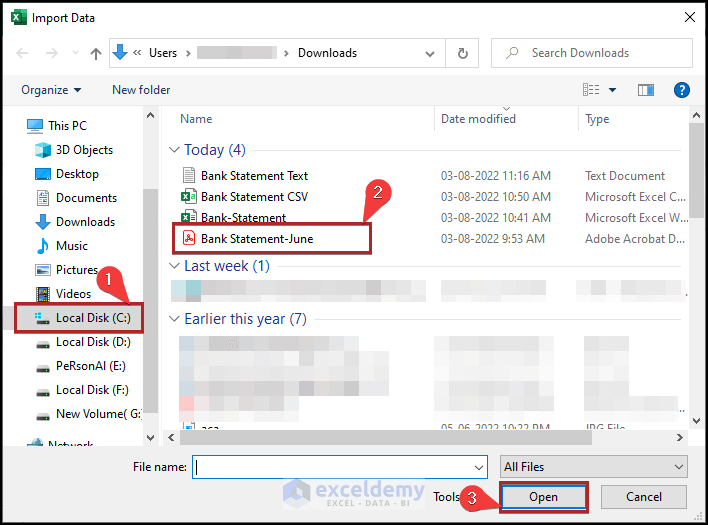
- Select the file path where the PDF file is stored.
- Choose the file. Here, we’ve selected Bank Statement-June.
- Click on the Open button.
- The Navigator window opens.
- Check the box for Select multiple items.
- Check three boxes containing tables (Table001, Table002, and Table003).
- Click the Load button.

- Excel will go to the Queries & Connections task pane. It’ll be available on the right of your display.
- Right-click on Table001 (Page 1).
- Click on Load To from the context menu.

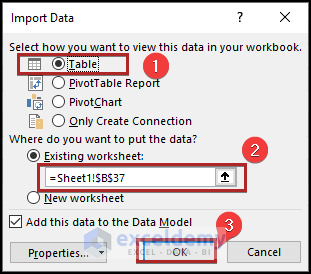
- The Import Data dialog box opens.
- Choose Table in the Select how you want to view this data in your workbook option.
- Select Existing worksheet and B4 cell as the output destination in the Where do you want to put the data? option.
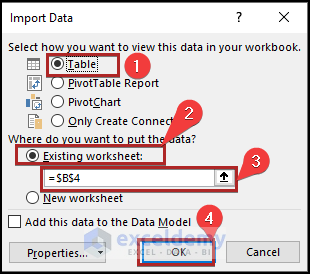
- Import Table002 in the same worksheet. Change the output destination.
- Import Table003 in the same way.
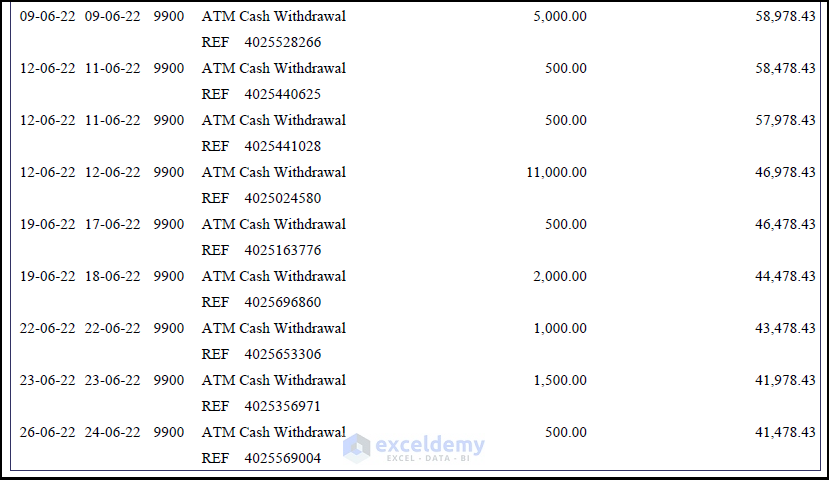
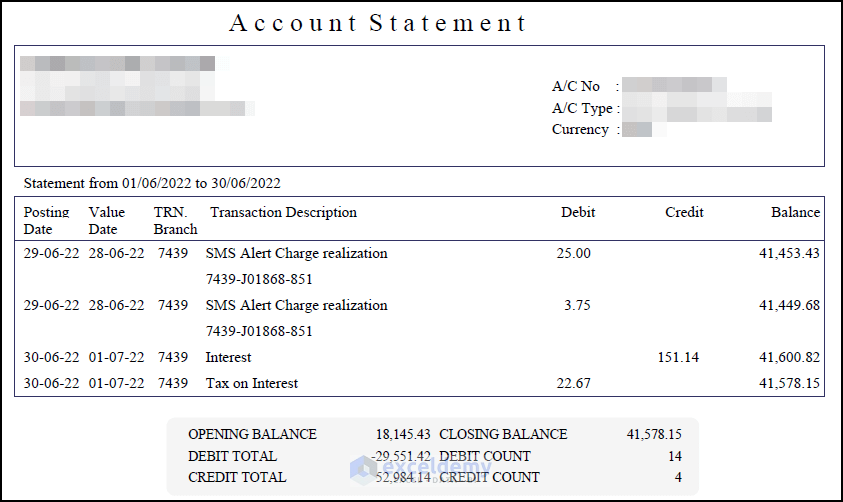
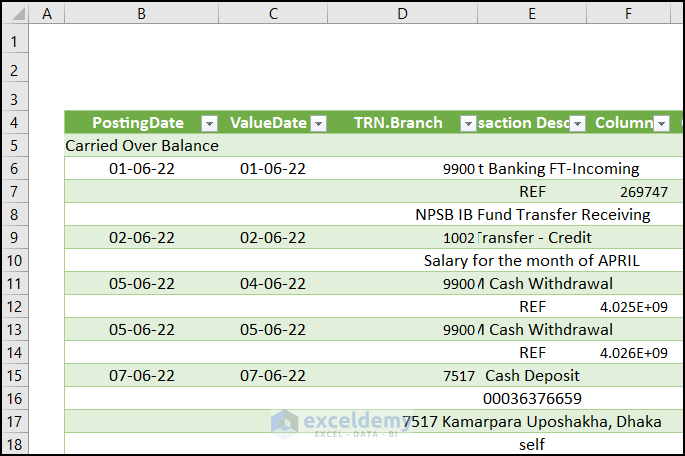
- The data should look as shown in the below image. You can edit the bank statement in Excel.
- The data is in a Table format now.
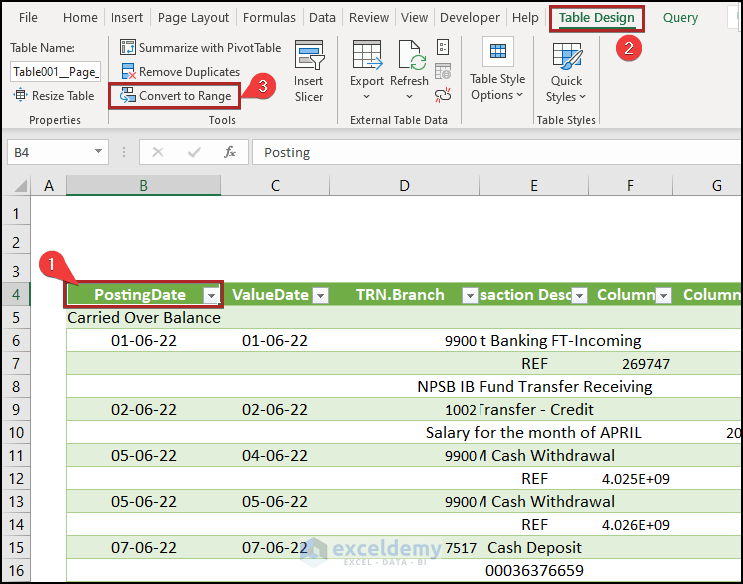
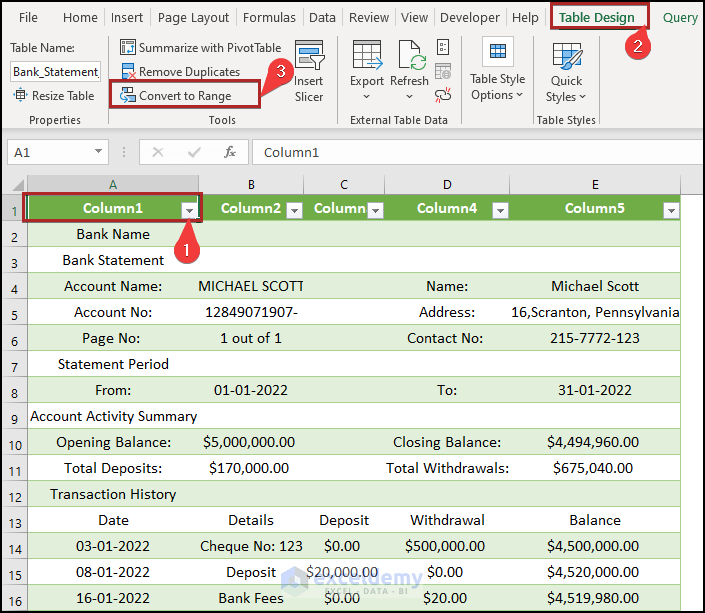
- Select any cell on the table. We selected cell B4.
- The Table Design tab appears.
- Select the Convert to Range tool on the Tools group.
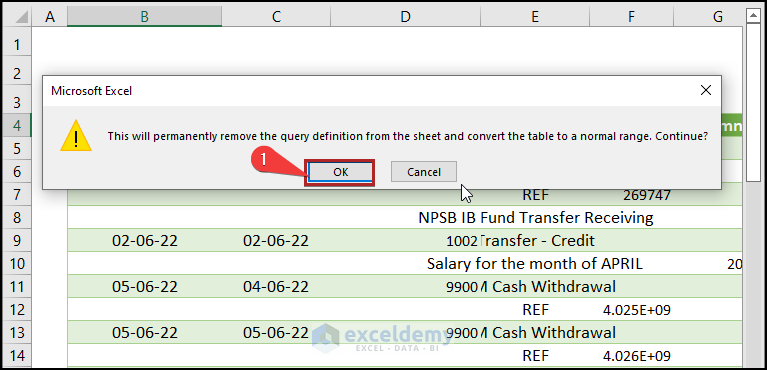
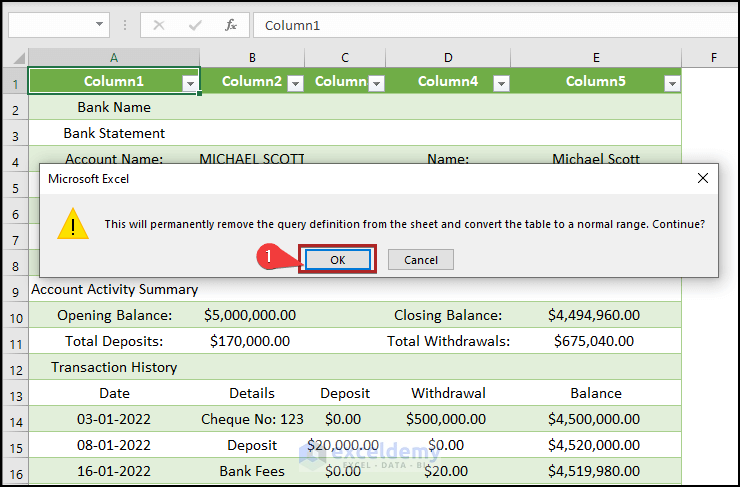
- A Microsoft Excel warning box appears. Click OK on the box.
- The table has been transformed into a regular range.
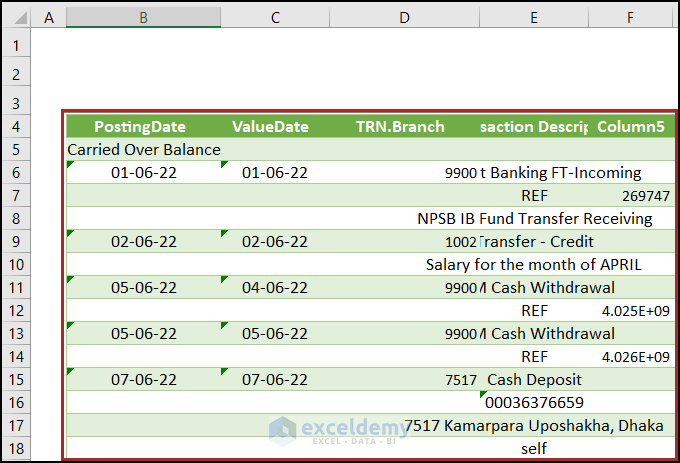
- Select the whole dataset.
- Move to the Home tab.
- Select the Fill Color drop-down.
- Choose No Fill to apply to the entire dataset.

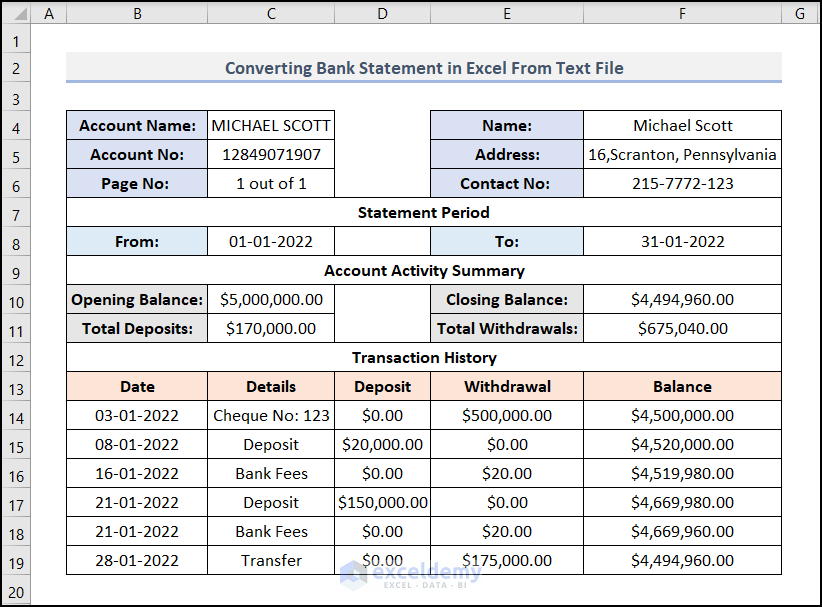
- The statement looks like the image below.
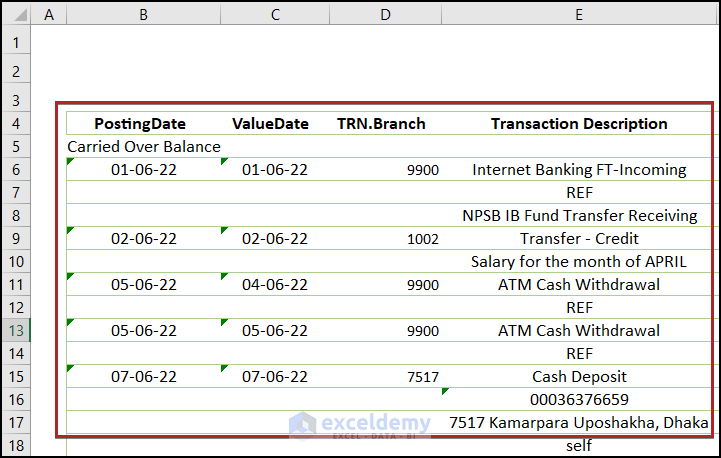
- Give a suitable title to the dataset. We have chosen Converted Bank Statement in Excel from PDF.
- Apply formatting like borders and filling cells with colors. Our bank statement gets the right outlook to be an Excel sheet.

Read More: How to Convert Credit Card Statement to Excel
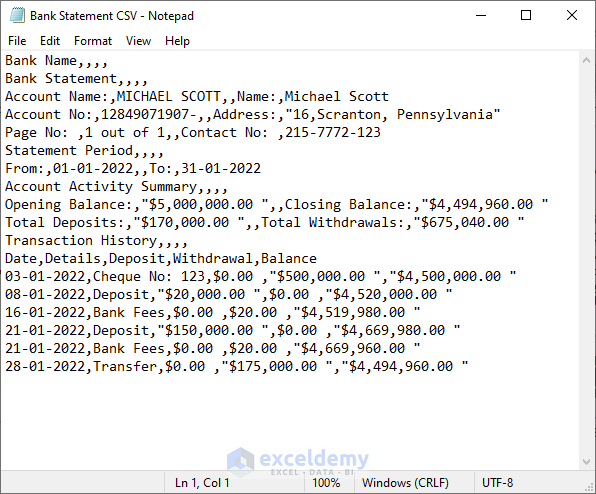
Method 2 – Convert Bank Statement Text from CSV File to Excel
We have a bank statement for January’22 in CSV file format.
Steps
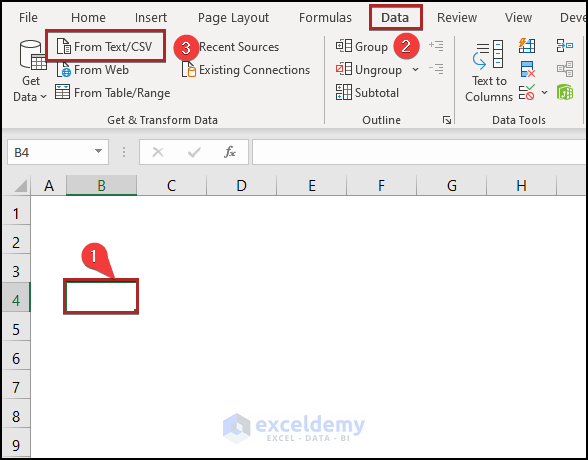
- Select cell B4.
- Go to the Data tab.
- Select From Text/CSV in the Get & Transform Data group.
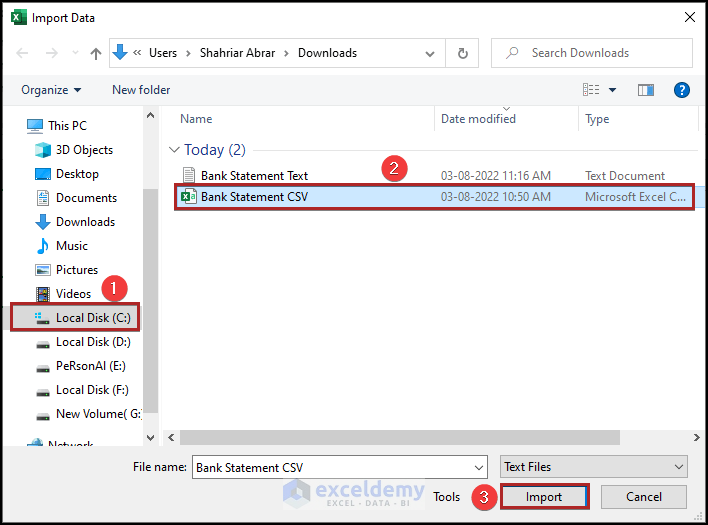
- The Import Data window opens.
- Find the file.
- Click on the Import button.
- A preview window opens.
- Set the Comma as the Delimiter.
- You can see the data preview in the window.
- Select the Load button.

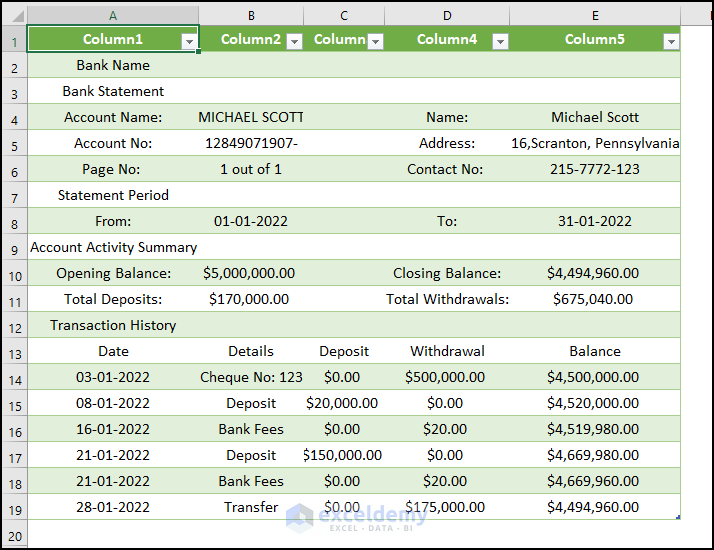
- We selected cell B4, but the imported data occupies the sheet from the top left portion.
- Select cell A1.
- Go to the Table Design tab.
- Select the Convert to Range tool in the Tools group.
- Click OK on the warning box.
- Delete the first 3 rows.
- Select cell A2 and give a suitable title to the dataset.
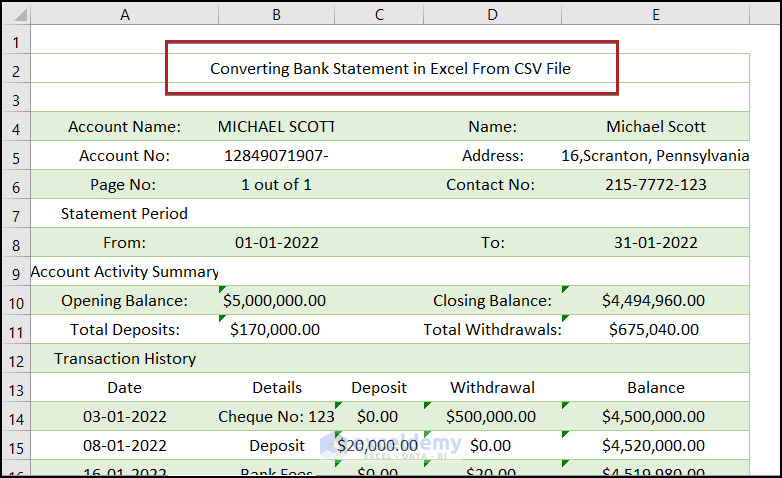
- Remove all the borders and fill colors from the worksheet.
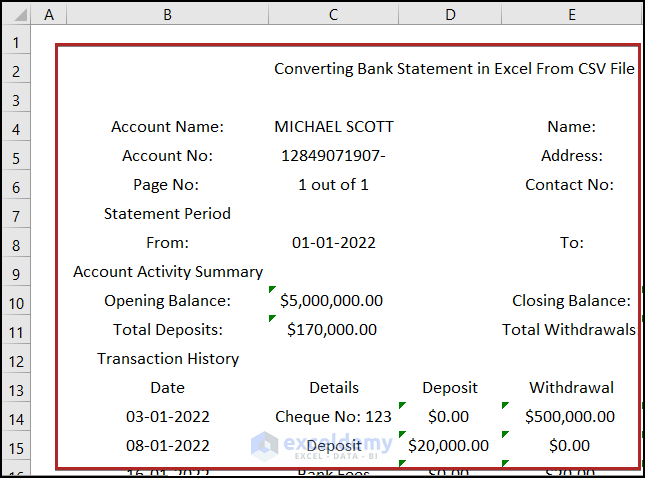
- Apply your own formatting.

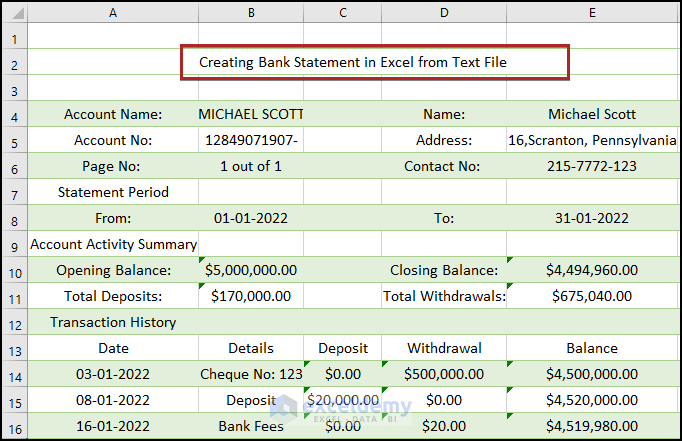
Method 3 – Convert Bank Statement Text from Text File to Excel
Here’s a bank statement for January’22 in text file format.
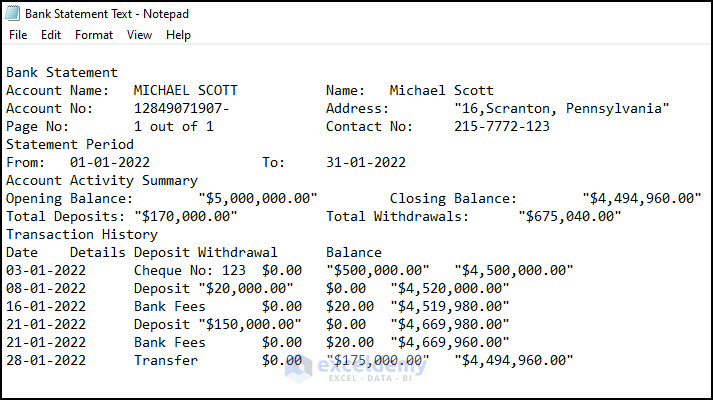
Steps
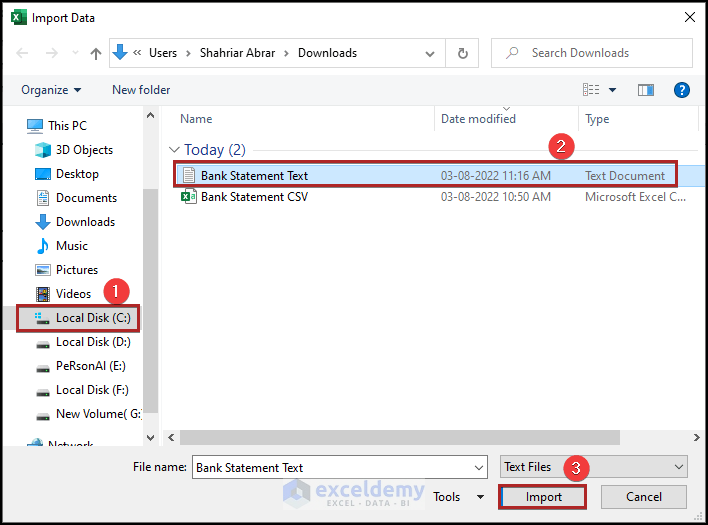
- Select cell B4.
- Go to the Data tab.
- Select From Text/CSV in the Get & Transform Data group.

- The Import Data window opens.
- Choose the right file directory.
- Select the file from the list. We chose Bank Statement Text.
- Click on the Import button.
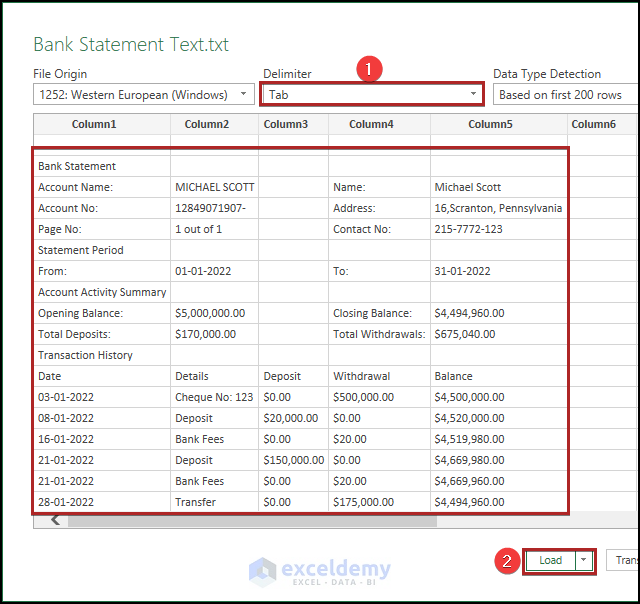
- A preview window opens.
- Set Tab as the Delimiter.
- You can see the data preview window.
- Select the Load button.
- The imported data table looks like the one below.
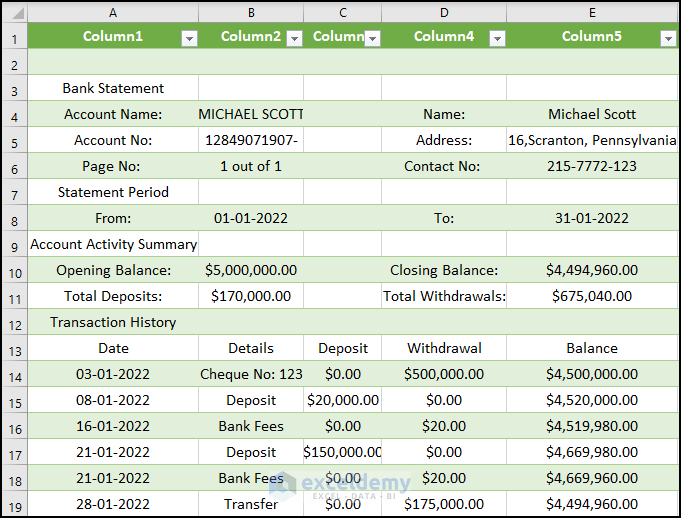
- Convert the table into a simple data range and give it a title.
- Remove the unnecessary rows and strip all formatting.
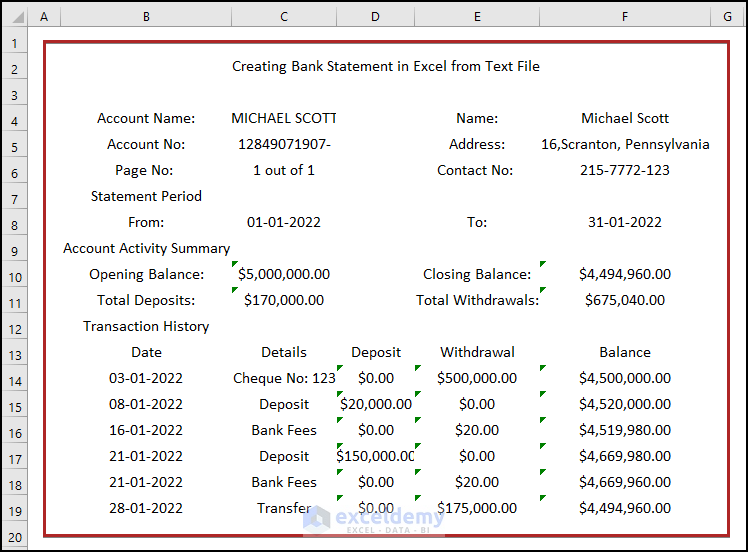
- Apply formatting how you like it.
Download the Practice Files
<< Go Back To How to Create a Bank Statement in Excel |Excel For Finance | Learn Excel
Get FREE Advanced Excel Exercises with Solutions!
