
Image by Editor
Creating dynamic reports in Microsoft Word that incorporate Excel data allows you to maintain up-to-date information and visualizations without manual updates.
In this tutorial, we will show how to integrate Excel data into Microsoft Word to create dynamic reports and charts and implement automatic updates.
Integrate Excel Data and Chart into Word Dynamically
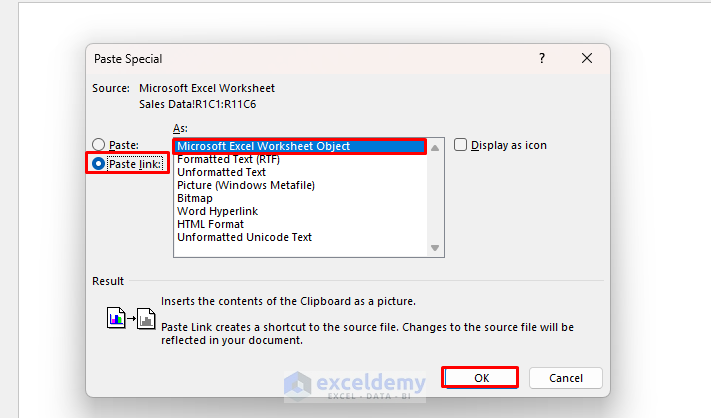
Link Excel Data to Word
- In Excel, select the entire table (e.g., A1:F6).
- Right-click >> choose Copy or press Ctrl + C.

- Go to Home tab >> select Paste dropdown >> select Paste Special.
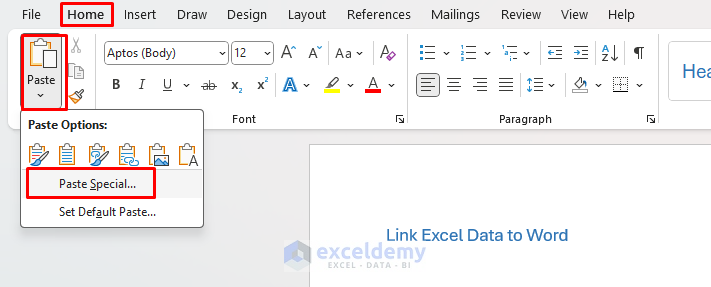
- Select Paste Link >> choose Microsoft Excel Worksheet Object.
- Click OK.
Now you’ll have a linked Excel table in your Word document. If you update the data in Excel, you can right-click on the table in Word and select Update Link to refresh the data.

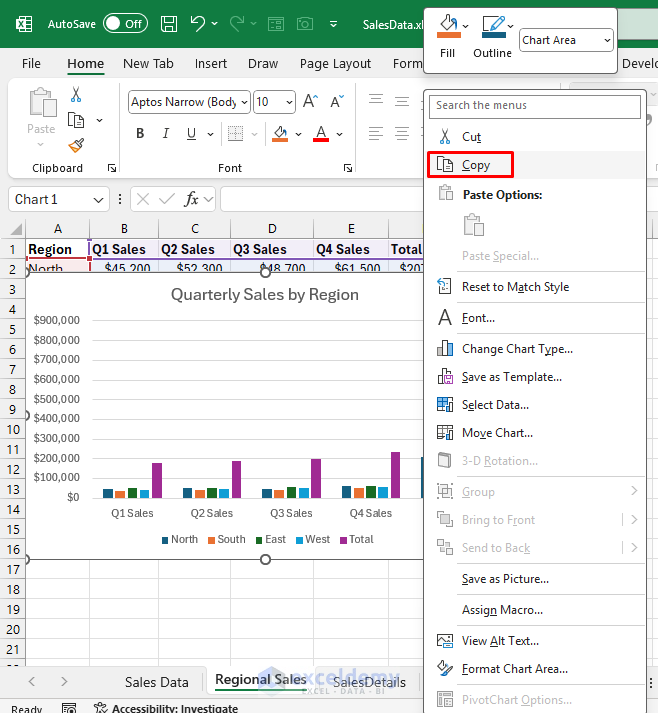
Link Excel Chart to Word
- Create a chart in Excel.
- Select the chart in Excel.
- Right-click >> choose Copy or press Ctrl + C.
- In your Word document, position the cursor where you want the chart.
- Go to Home tab >> select Paste dropdown >> select Paste Special.
- Select Paste Link >> choose Microsoft Excel Worksheet Object.
- Click OK.

- This will link the Excel chart to Word.
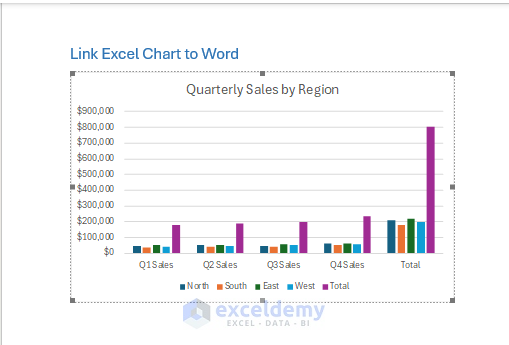
Tip: Double-click on the linked chart it will navigate to the Excel sheet.
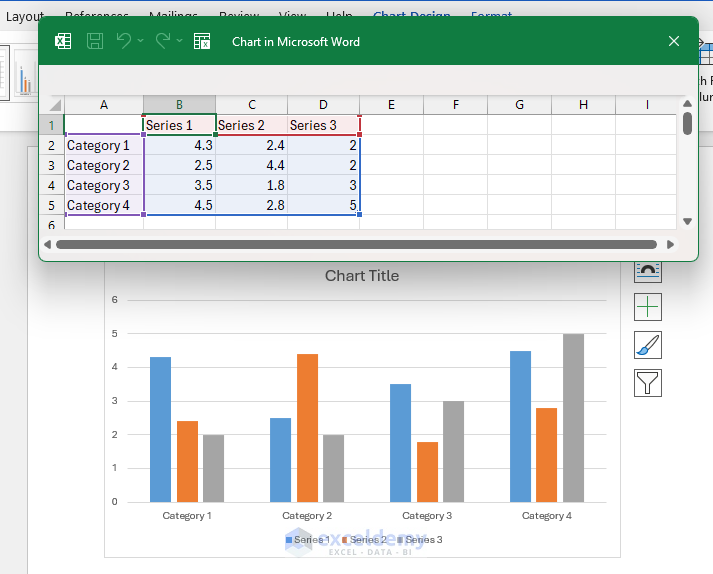
Create a Chart in Word Using Excel Data
- Link an Excel table.
- Select the data in Word.
- Go to the Insert tab >> select Chart >> select Column chart.
- Choose your chart type and click OK.

- The chart will be linked to the data table
Test the Dynamic Link
- Return to your Excel file.
- Change the product name.
- Save the Excel file.
- Go back to Word >> right-click on the chart >> select Update Link.

- Data will be updated dynamically in Word.

Control Linked Content
You can manage linked objects by:
- Right-click the object >> select Update Link
- Or go to File tab >> select Info >> select Edit Links to Files (in Word).
- You can update, change the source, or break the link.
Create Dynamic Word Reports
Let’s integrate a dynamic Monthly Sales Report.
- Excel File: Prepare and save a workbook containing the monthly sales data from January to March.
- Create Charts in Excel:
- A Bar chart showing Sales by Category.
- A Column chart showing Sales by Product.
- A Line chart showing Sales trends.
- In Word:
- Insert a section titled “Q1 Sales Overview”.
- Link Bar, Column, and Line chart using Paste Special >> Paste Link.
- Link the data table or summary using the same method.
- Add contextual insights around each chart:
- For example, highlight peak sales months or top-selling products.
- Write a brief analysis explaining category performance.
- Update Later: When the Excel file is updated with April data, simply open the Word document and click Update Link to reflect new figures instantly.

Advanced: Create a Sales Report with Mail Merge
Automatically generate customized reports per sales rep, region, or client.
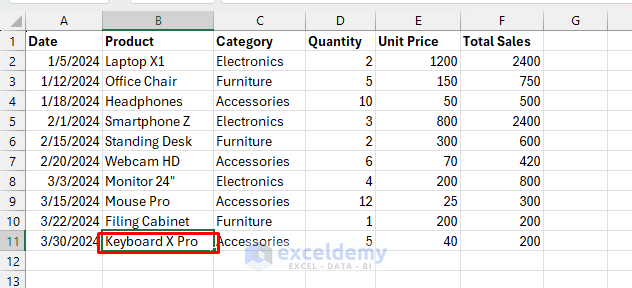
Preparing the Data Source: In Excel, create a new sheet with individual sales records.
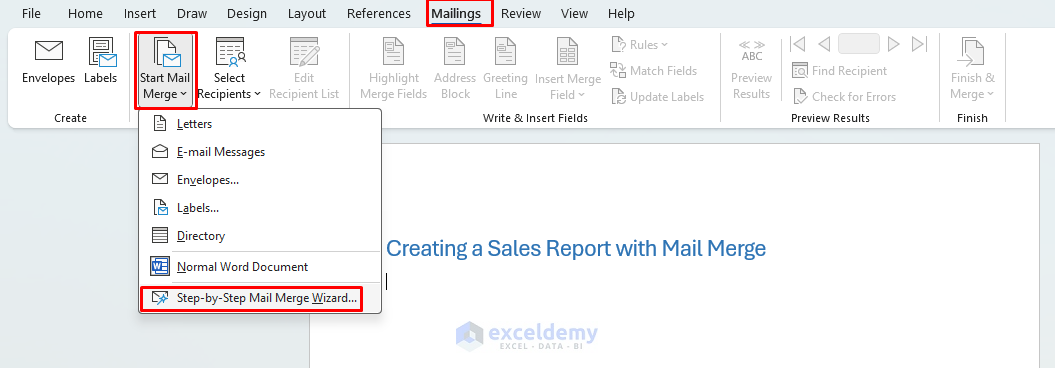
Create Mail Merge in Word
- Go to Mailings tab >> select Start Mail Merge >> select Step-by-Step Mail Merge Wizard.
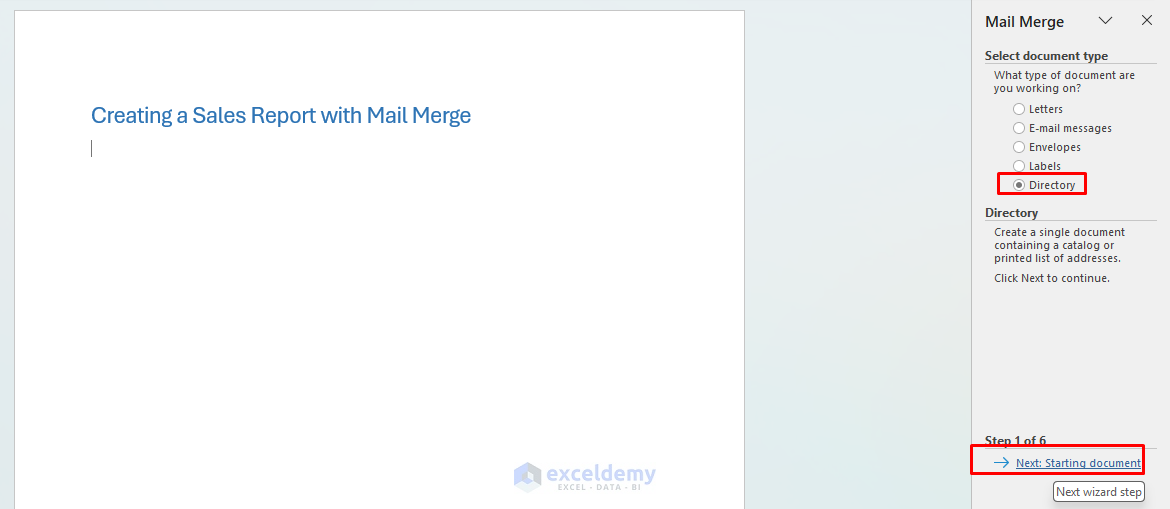
- Select Directory as document type.
- Click Next: Starting document.
- Select Use the current document >> click Next: Select recipients.

- Select Use an existing list >> click Browse.
- Navigate to your SalesDetails.xlsx file and select it.
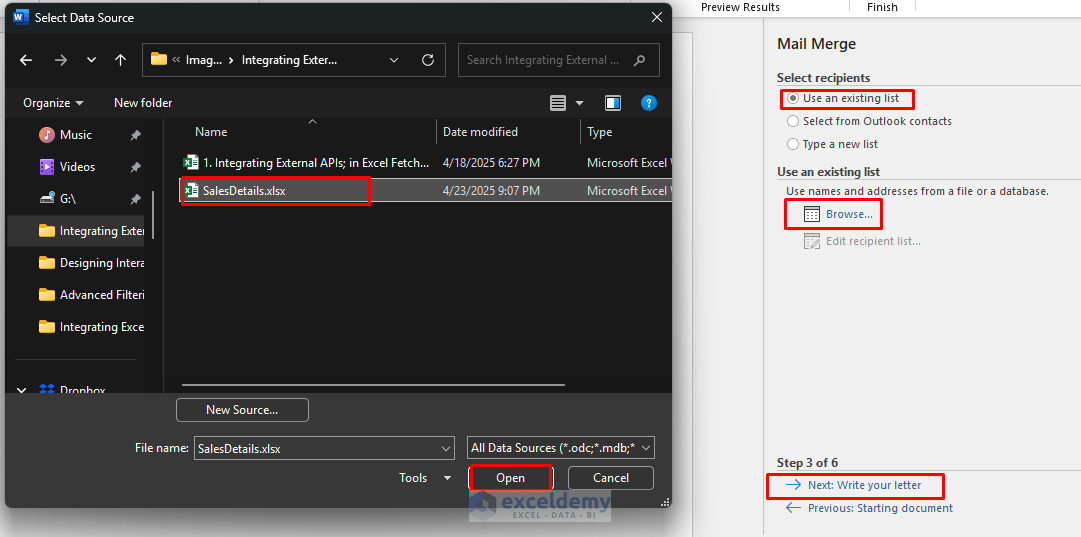
- In the Select Table dialog, choose the sheet with sales data.
- Click OK.

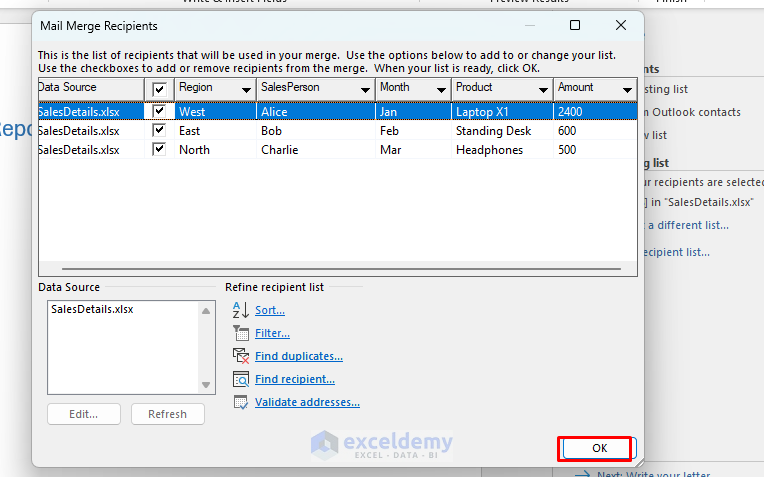
- The Mail Merge Recipients box will pop up; review it.
- Click OK.
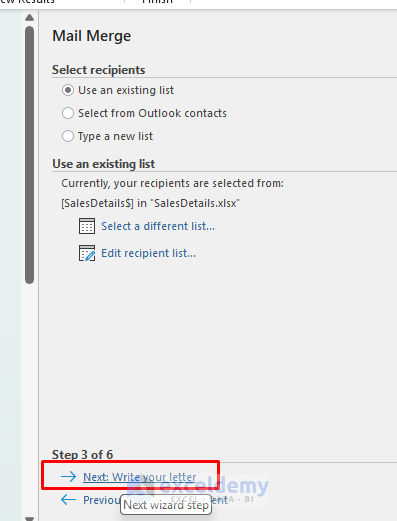
- Click Next: Write your letter.
Designing the Report:
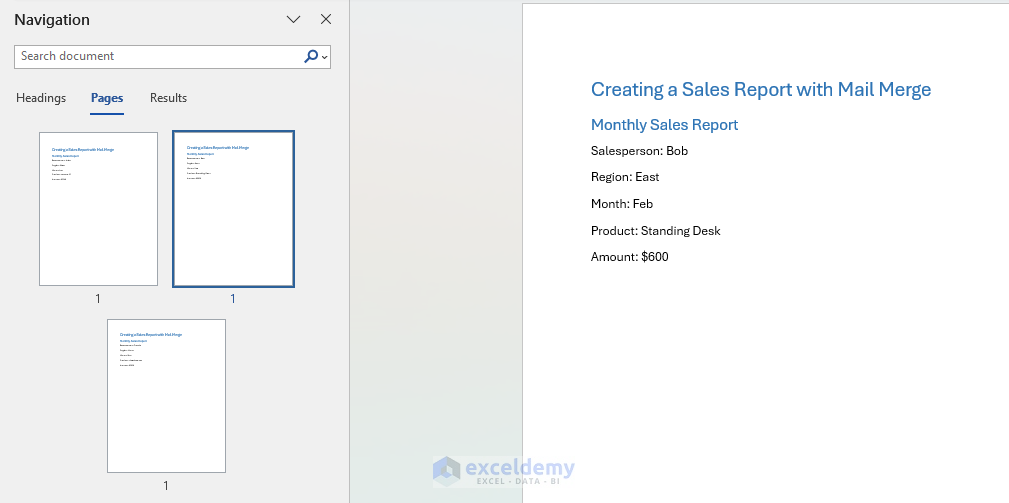
- Add a heading: Monthly Sales Report.
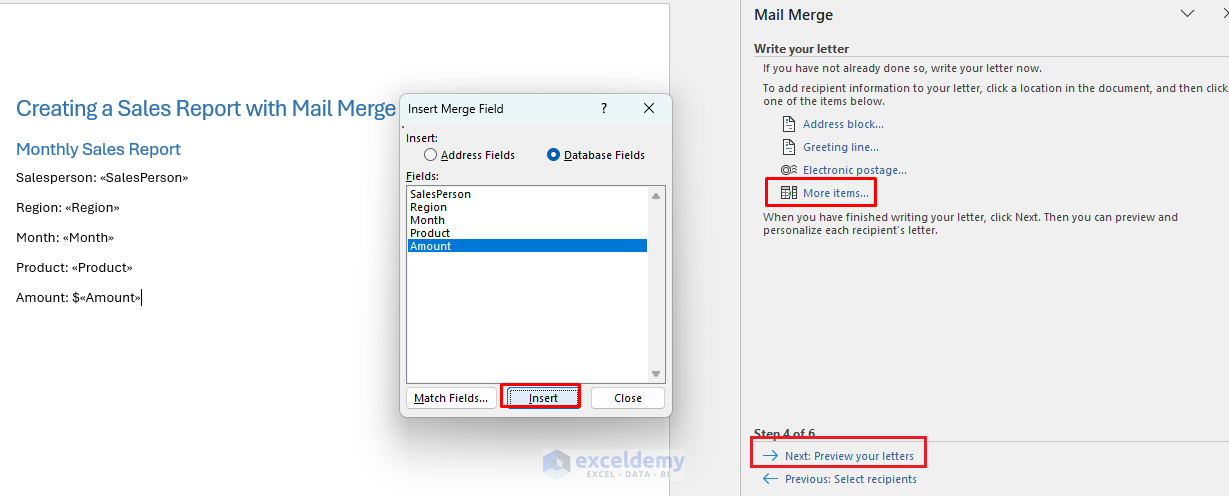
- Click More items…
- A dialog box will appear showing all the columns from your Excel data (SalesPerson, Region, Month, Product, Amount).
- One by one, select Fields >> click Insert.
- SalesPerson: «SalesPerson»
- Region: «Region»
- Month: «Month»
- Product: «Product»
- Amount: $«Amount»
- Click Next: Preview your letters to see how records will appear.
- Preview your letters from the Recipient.
- Click Next: Complete the merge.

- Click Edit individual directories to create the final document.
Best Practices
- Keep Excel and Word files in the same folder to avoid broken links.
- Use named ranges in Excel for clarity.
- Avoid using Excel filters when linking dynamic tables.
- Save a copy of Word documents with links removed if you need static records.
Conclusion
By following our tutorial, you can integrate Excel data into MS Word to create dynamic reports and charts. Whether you’re preparing a quarterly dashboard, a team-wise report, or customized communications, integrating Excel with Word ensures data accuracy and automation. You can use Paste Link for dynamic reporting or Mail Merge for bulk customization. This integration saves time, reduces errors, and improves document professionalism.
Get FREE Advanced Excel Exercises with Solutions!
