No data analyst can think a day without using Pivot Table in their day-to-day data analysis job. Pivot Table is one of the sophisticated parts of Microsoft Excel. Using a pivot table, you can slice and dice your data within a few minutes. But things are more interesting if you can use Excel Formulas in the Pivot table. In this article, we will learn how to use GETPIVOTDATA in Excel with 4 useful examples.
What Is GETPIVOTDATA Function?
The GETPIVOTDATA function runs a query among the whole pivot table and after that, returns data based on its structure.
- Syntax
=GETPIVOTDATA (data_field, pivot_table, [field1, item1], …)
- Arguments
data_field: The Data_field contains the data you want to return. It includes double installments,
pivot_table: The specific cell range containing the Pivot Table.
- Optional Arguments
field1, item1: Benefits to enter field and element names that you want to retrieve from the dataset up to 126 pairs. In the case of non-numeric values, you must enclose them in quotes.
How to Use GETPIVOTDATA in Excel: 4 Useful Examples
To describe the examples, we need to create a pivot table first. Here is a quick overview of it.
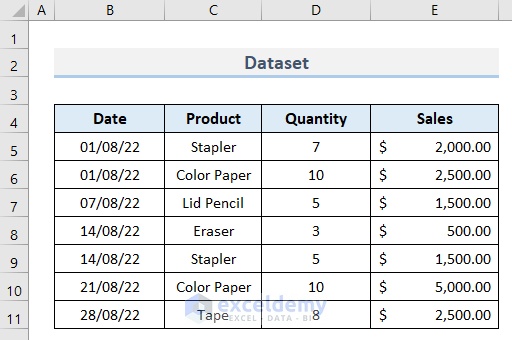
- First, create a dataset with the information as shown below:
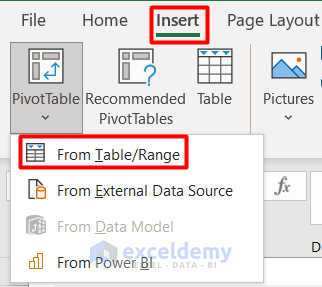
- Then, go to the Insert tab and select Pivot Table from the Tables group.
- Here, click on From Table/Range from the drop-down section.
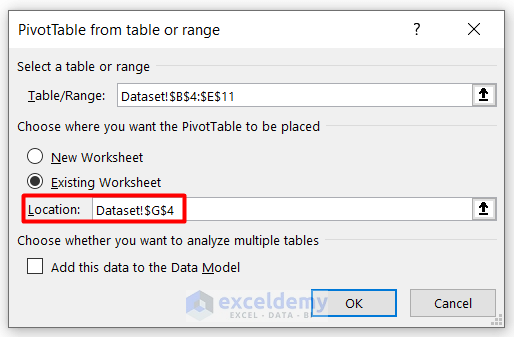
- Following, insert the Location as cell G4 as we want the pivot table here.
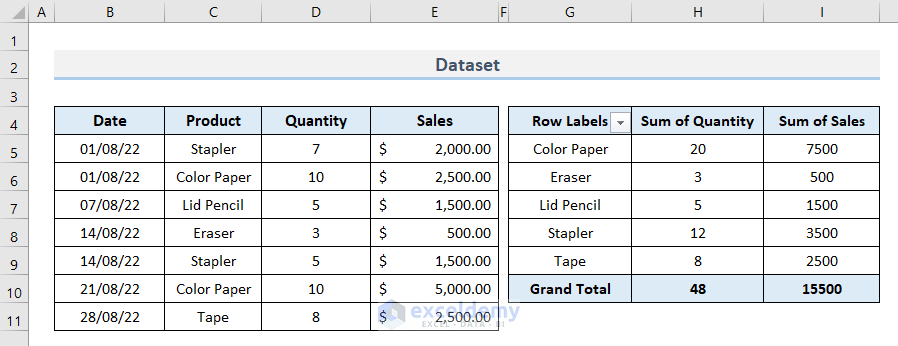
- Lastly, press OK and you will see the Pivot Table is showing in the required place.
Now, let us see some examples of using the GETPIVOTDATA function in this pivot table.
1. Use Excel Cell Reference to Apply GETPIVOTDATA
We can use the GETPIVOTDATA function to extract a cell reference and get the required output. Here is how it works.
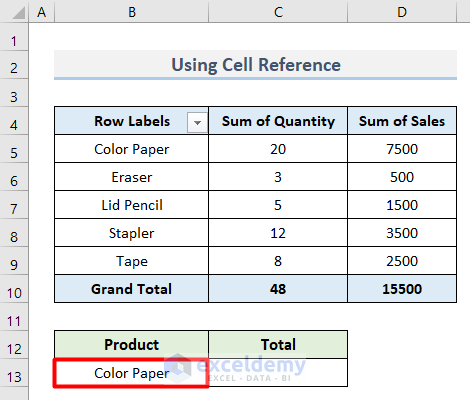
- First, insert the name of the product in cell B13.
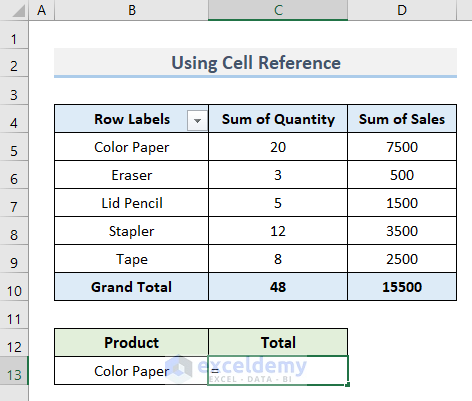
- Then, just type an Equal (=) sign in cell C13.
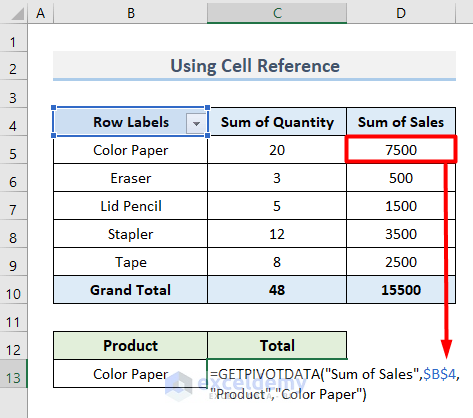
- Following, select cell D5 as it contains the Sales amount of our required product Color Paper.
- Along with it, you can see Excel automatically generated the GETPIVOTDATA formula taking the cell reference.
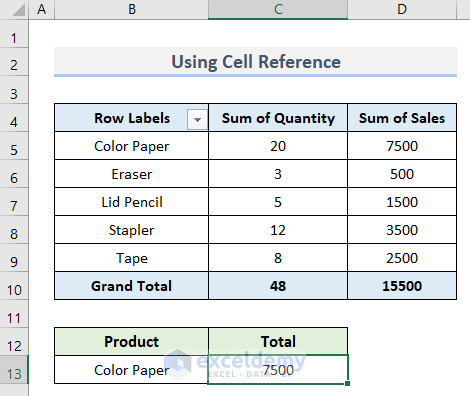
=GETPIVOTDATA("Sum of Sales",$B$4,"Product","Color Paper")- Lastly, press Enter and you will see the final output.
2. Apply GETPIVOTDATA in Cell References for Value Field
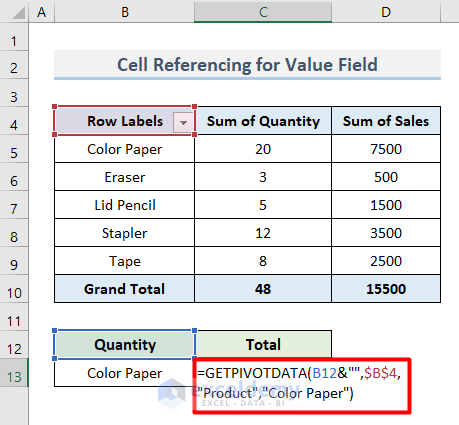
If the pivot table has a value field, then the formula turns a bit different. In this case, we need to concatenate an additional Empty String to get the proper result. Let’s see the following steps.
- First, insert this formula in cell C13 like in the first example.
=GETPIVOTDATA(B12&"",$B$4,"Product","Color Paper")Here, you can see the reference cell B12 is associated with Empty String ( “” ) to concatenate the cell reference with cell B4.
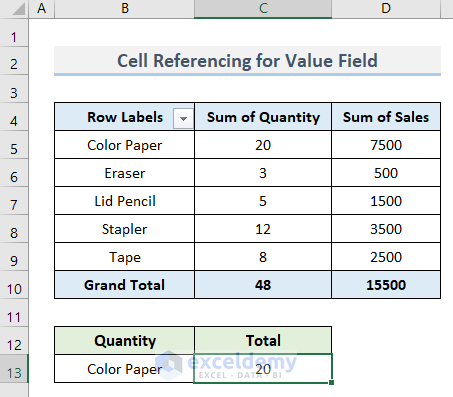
- After this, press Enter.
- That’s it, you have got your total sales amount of Color Paper.
3. Insert Dates for GETPIVOTDATA Function
We can also use the GETPIVOTDATA function for various types of dates in the pivot table. Here are four solutions regarding this.
3.1. Match Date Format
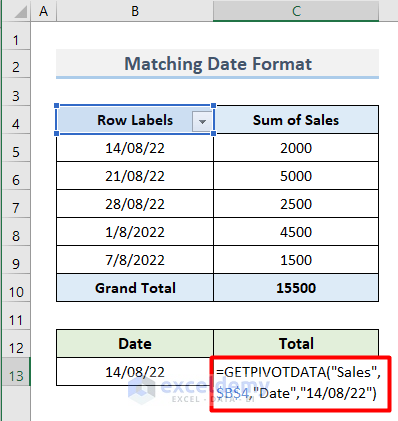
The similarDate format is an important factor in running the function.
- For example, we will find the total amount of sales on 14/08/22.
- Therefore, insert this formula in cell C13 maintaining the similar date format as the pivot table.
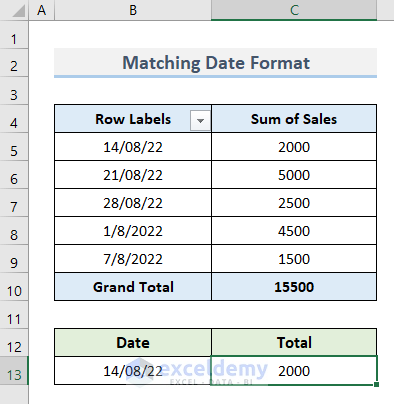
=GETPIVOTDATA("Sales",$B$4,"Date","14/08/22")- Lastly, press Enter and you will see the result.
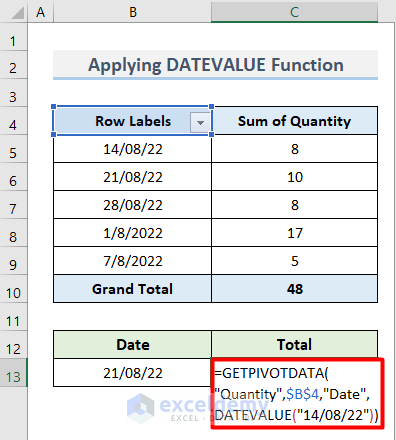
3.2. Apply DATEVALUE Function
Instead of typing manually, the DATEVALUE function will help to fetch values on the selected date.
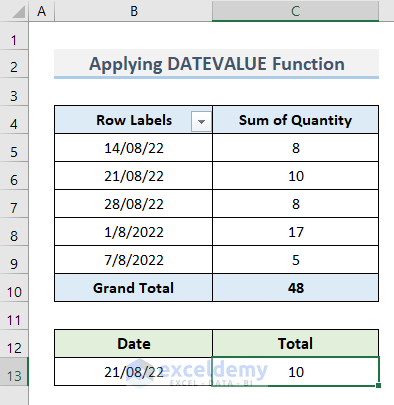
- First, insert this formula in cell C13 to find the amount of product quantity on 21/08/22.
=GETPIVOTDATA("Quantity",$B$4,"Date",DATEVALUE("14/08/22"))- Following, hit the Enter button.
- That’s it, you will get the required value within a click.
Here, we used the DATEVALUE function to filter or sort any dates in the pivot table if they are in text format and use it in the calculation.
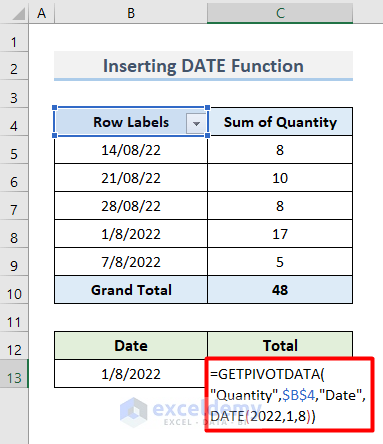
3.3. Insert DATE Function
The DATE function is also similar to the previous one in the case of using the GETPIVOTDATA function.
- First, insert this formula in cell C13.
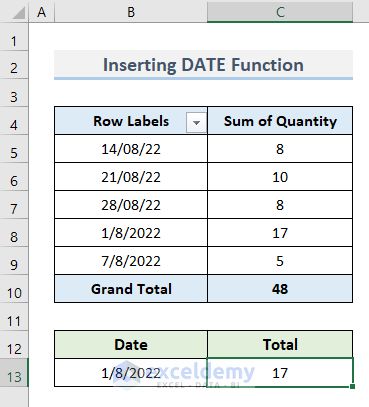
=GETPIVOTDATA("Quantity",$B$4,"Date",DATE(2022,1,8))- Next, press Enter.
- That’s it, you will get the result.
Here, we applied the DATE function to return the sequential serial number that represents the date in cell B13.
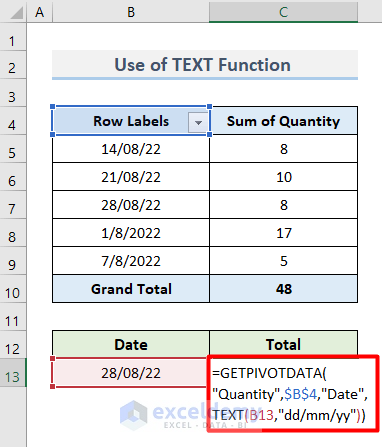
3.4. Use TEXT Function
As we are giving the highest concern on the date format, the TEXT function will help us tremendously.
- First, insert this formula in cell C13.
=GETPIVOTDATA("Quantity",$B$4,"Date",TEXT(B13,”dd/mm/yy”))- Next, hit Enter.
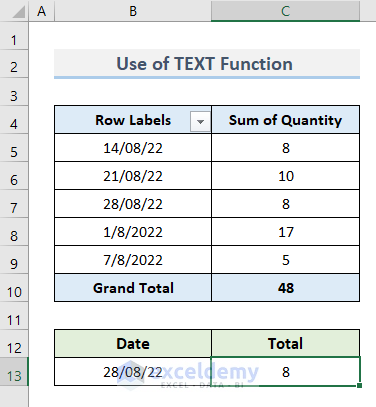
- Finally, you will notice the result here.
Here, we used the TEXT function to format the numbers given in the formula to format it into date format and run it.
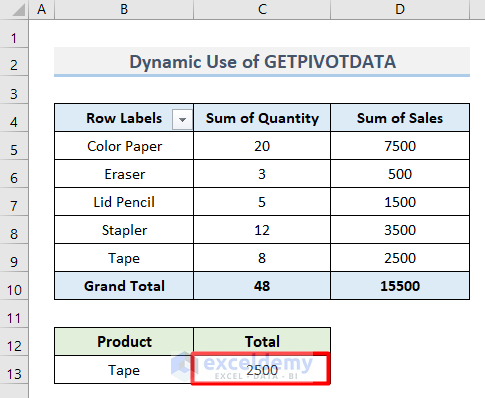
4. Dynamic Use of GETPIVOTDATA Function
In this last example, we will learn to use the GETPIVOTDATA function for dynamic purposes. It means, following the procedures we will be able to get output for any type of Product, not a select one.
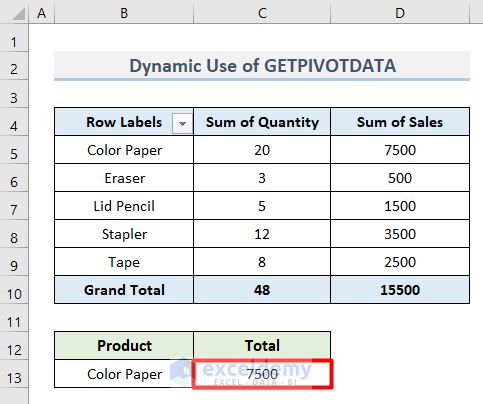
- As we described in the first example, we get the value of Sales for the product Color Paper like this:
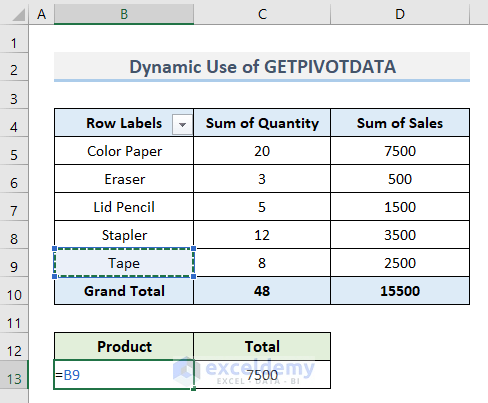
- Now, insert this formula in cell B13.
- It will reference the cell that you want to output.
=B9- Then, press Enter.
- That’s it, you will see that the Total amount has automatically changed without typing any formula.
- Following this procedure, you can get results for any products from your pivot table using the GETPIVOTDATA function.
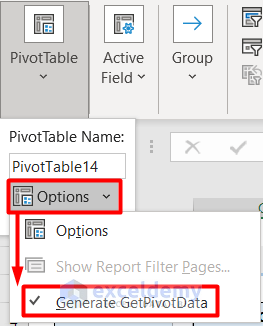
How to Turn Off Auto Generation of GETPIVOTDATA in Excel
If you want to stop the generation of the GETPIVOTDATA in Excel, you can apply these steps.
- First, select any cell inside the Pivot Table.
- Then, go to the PivotTable Analyze tab and select Pivot Table.
- Here, click on Options and deselect Generate GetPivotData.
- That’s it, the auto-generation is turned off now.
Advantages
- It is a very easy process as it only takes one click on the reference cell to get the output.
- Flexible to modify at any stage.
Disadvantages
- Apart from the dynamic method, all the options are dedicated to single cells. The Autofill tool will not show the real results in this case.
Download Practice Workbook
Download this sample file to practice by yourself.
Conclusion
Therefore, I hope that it was an efficient article for you on how to use GETPIVOTDATA in Excel with 4 useful examples. Let us know your feedback.
How to Use GETPIVOTDATA in Excel: Knowledge Hub
<<Go Back to Pivot Table in Excel | Learn Excel
Get FREE Advanced Excel Exercises with Solutions!