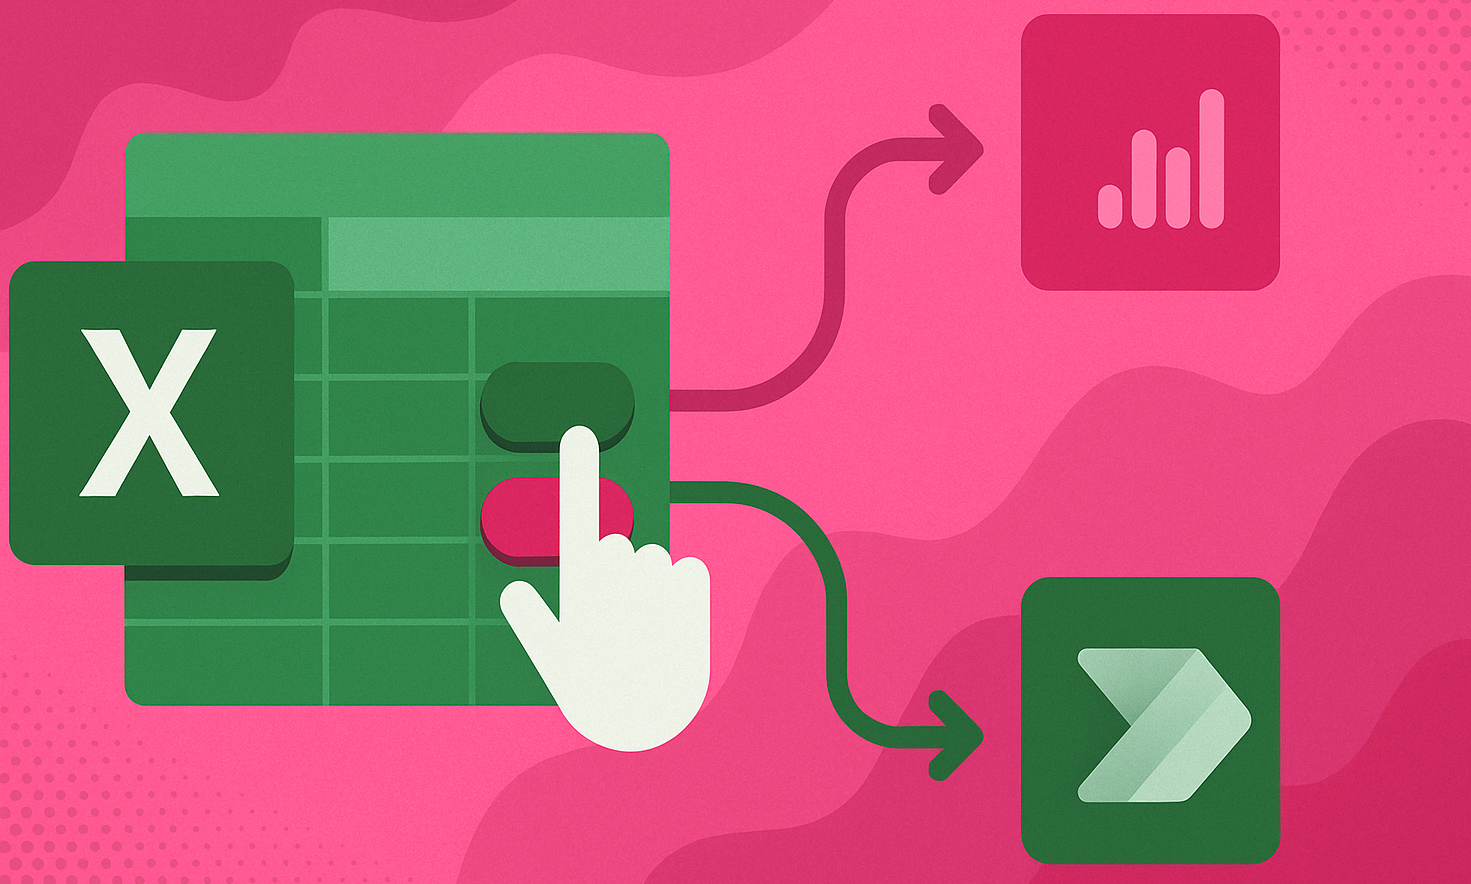
Excel is a powerful platform and has always been more than a spreadsheet tool. With the power of Power Automate and Power BI, you can now make Excel act like a workflow launcher, where clicking a button can refresh reports, send emails, update SharePoint lists, or even trigger approval workflows.
In this tutorial, we will show you how to trigger Power BI or Power Automate actions from Excel buttons.
Why Trigger Power BI or Power Automate from Excel?
- Automate repetitive tasks directly from your spreadsheet.
- Refresh Power BI dashboards on demand.
- Send Excel data to Teams, Outlook, or SharePoint instantly.
- Launch approval workflows without leaving Excel.
- Turn Excel into a lightweight “app” with workflow buttons.
What You’ll Need (Prerequisites)
- Microsoft 365 account with Excel for the web (for Office Scripts).
- Access to Power Automate (included in Microsoft 365).
- Power BI Service (free or Pro, depending on your dataset sharing needs).
Method 1: Use Excel Online Buttons with Office Scripts (Regular)
This method works on the standard version of Power Automate (no Premium required).
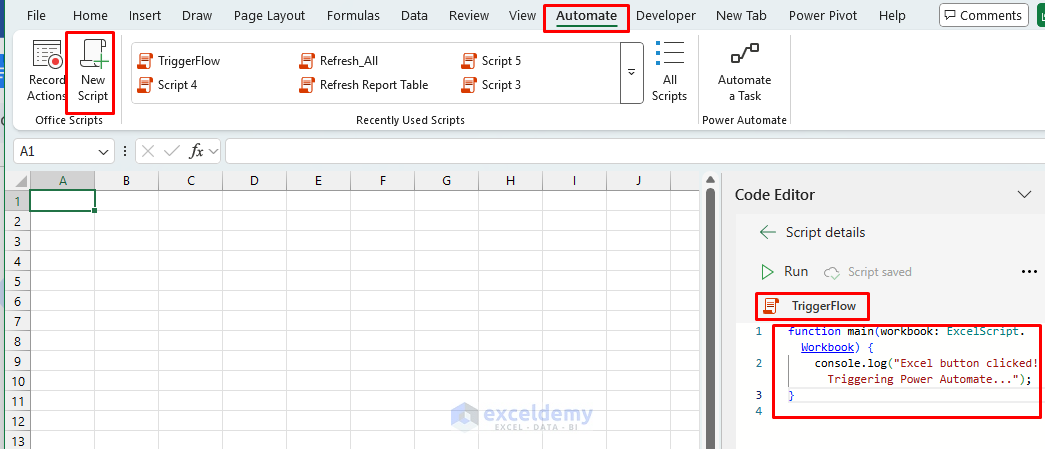
Step 1: Create an Office Script in Excel
- Open your workbook in Excel for the web.
- Go to the Automate tab >> select New Script.
- Replace the existing script with the following script:
function main(workbook: ExcelScript.Workbook) {
    console.log("Excel button clicked! Triggering Power Automate...");
}
- Save it as TriggerFlow.
Step 2: Add a Button in Excel
- You can add a button from the Code Editor.
- Click on More Options (…) >> select Add in Workbook.

Now, clicking this button will run your script.
Step 3: Connect the Script to Power Automate
- Automate tasks from the Code Editor.
- Click on More Options (…) >> select Automate a Task.

- It will navigate to the Power Automate website.
- Click Continue.

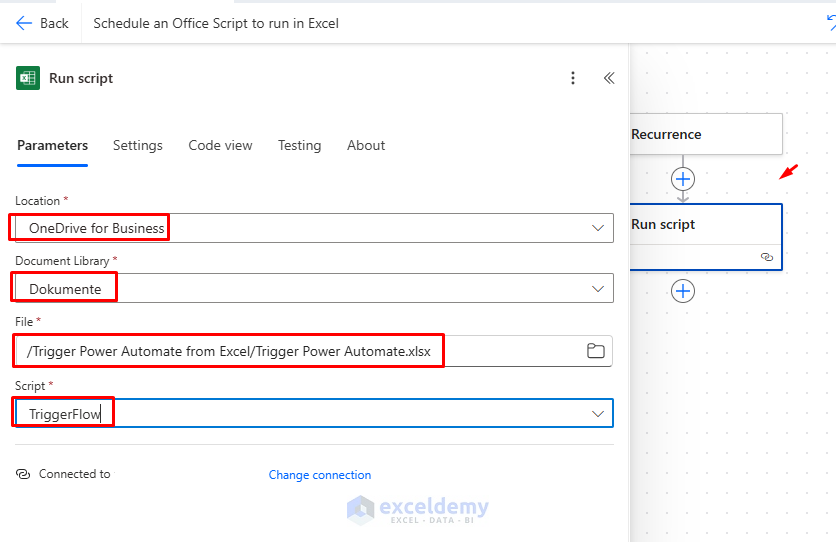
- In Run Script >> select Parameters
- Location: Select Excel Online (Business)
- Document Library: Select Documents
- File: Select your Excel file
- Script: Select TriggerFlow
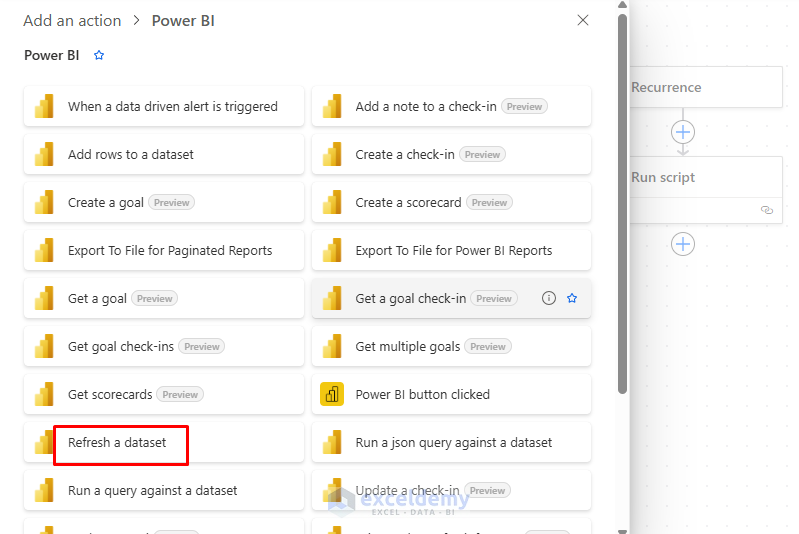
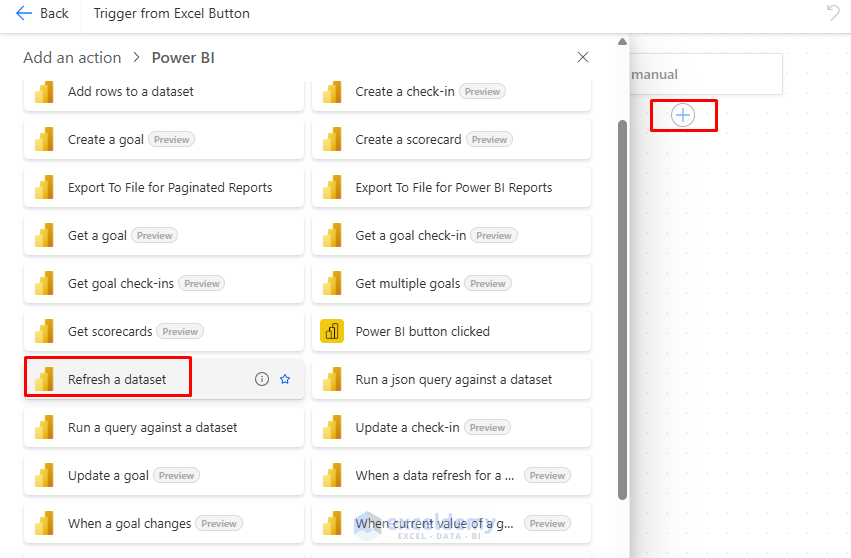
- Click on the Plus (+) icon to add an action.
- Select Power BI.
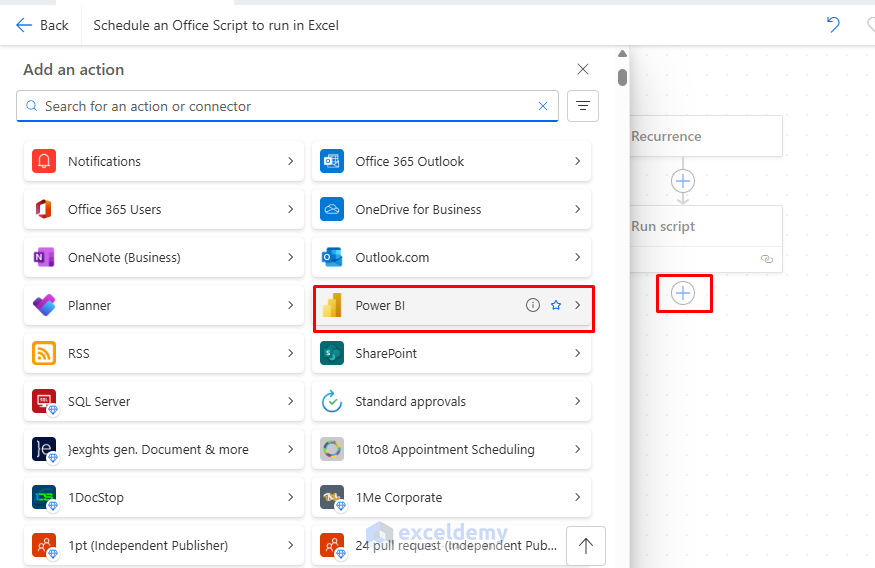
- You will see several actions for Power BI.
- Select Refresh a dataset.
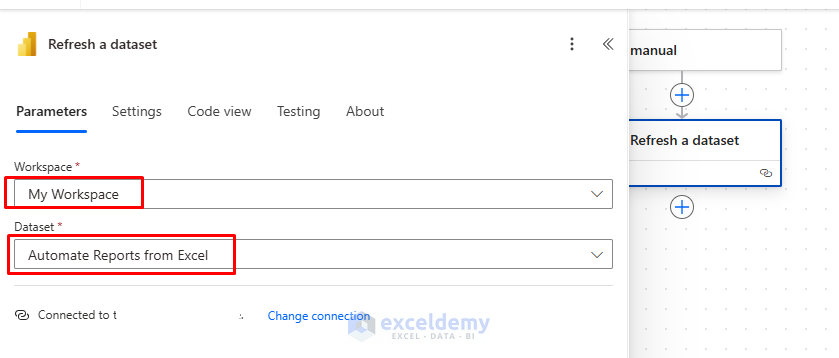
- In Parameters
- Workspace: Select My workspace
- Dataset: Select your dataset

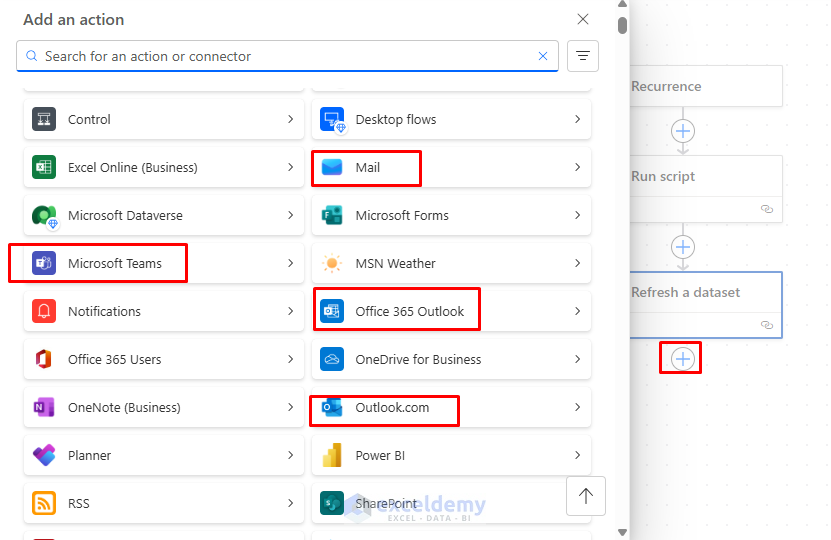
- You can add other actions in the flow.
- Outlook → Send an email
- Teams → Post a message
- SharePoint → Add a new list item
- Once you’re done, save the flow.
- Click on Save.

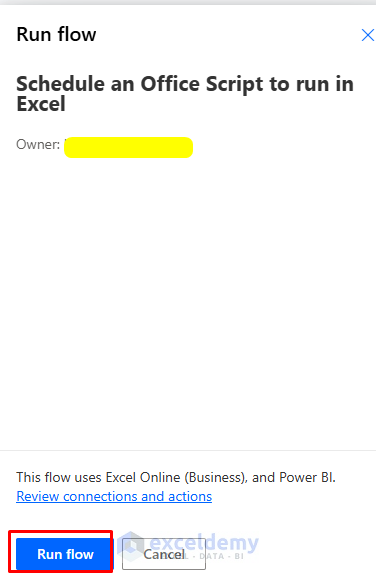
Step 4: Test Power Automate Flow
- Click on Test.

- Select Manually to test the flow.
- Click Test.

- Click Run flow.
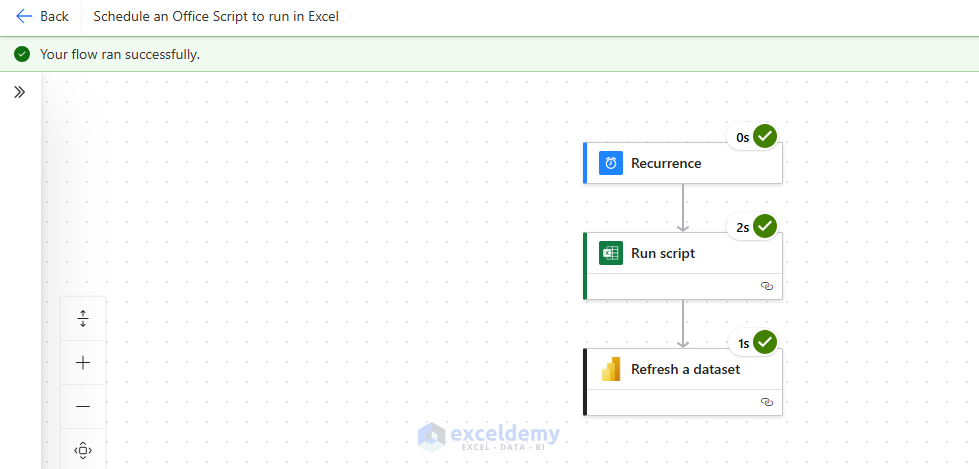
- The test will run, showing the duration and a success notification upon completion.
- Go back to Excel for the web.
- Click your TriggerFlow button.
- The script runs → Power Automate is triggered → Action executes.
- As we added a Power BI dataset refresh, our report updates instantly.

Use Cases:
- Refresh Power BI dashboards with one click.
- Send approval requests directly from an Excel sheet.
- Post status updates to Teams when data changes.
- Email filtered reports from Excel to your manager.
- Log order data into SharePoint lists.
Method 2: Trigger Power Automate Flows from Excel Buttons (Premium)
Step 1: Create a Power Automate Flow
- Go to Power Automate.
- Select Create >> select Instant Cloud Flow.

- Name the flow: Trigger from Excel Button.
- Choose When an HTTP request is received as the trigger.
- Click Create.

- Click on the Plus (+) icon to add an action:
- Select Power BI >> Select Refresh a dataset.
- In Parameters
- Select Workspace
- Select Dataset.
- Add another action:
- Send an email (V2)
- In Parameters
- Insert To
- Type Subject
- Type Body

- Now Save the flow.
Get the Flow’s URL (HTTP Trigger):
- After saving the flow, the ‘When an HTTP request is received’ step will generate a unique URL.
- Copy this URL to use in your VBA code.

Step 2: Create a Button in Excel
- Open Excel.
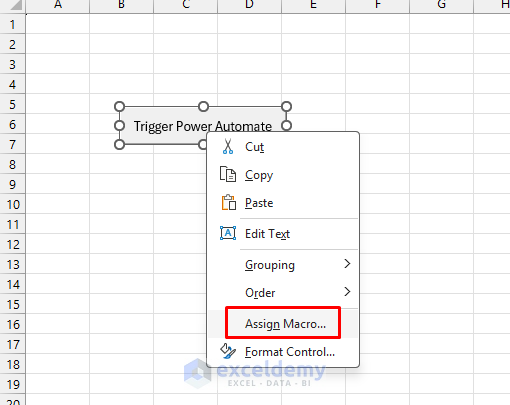
- Go to the Developer tab >> select Insert >> select Button (Form Control).
- Draw the button on your sheet.

- Right-click >> select Assign Macro.
Step 3: Add VBA Code to Call the Flow
- Paste this VBA code (replace with your Flow URL):
Sub TriggerFlow()
    Dim objHTTP As Object
    Dim URL As String

    URL = "Insert URL from your Flow"

    Set objHTTP = CreateObject("MSXML2.XMLHTTP")
    objHTTP.Open "POST", URL, False
    objHTTP.Send

    MsgBox "Flow Triggered Successfully!"
End Sub

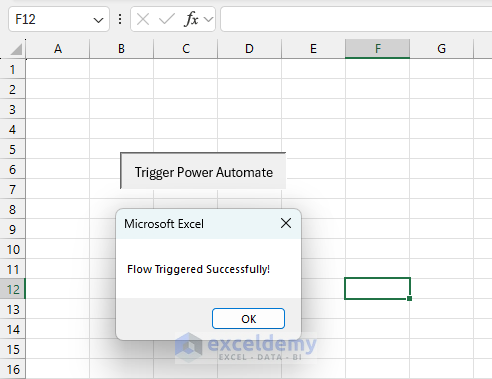
- Click the ‘Trigger Power Automate’ button to call your Power Automate flow.
- A success message will appear when the flow is triggered successfully.
Conclusion
By following the above methods, you can trigger Power BI or Power Automate actions from Excel buttons, whether you have regular or premium versions. With Excel for the web buttons, Office Scripts, and the standard version of Power Automate, you can already trigger Power BI refreshes, send emails, or start workflows directly from your spreadsheet. If your organization has Premium licenses, you can unlock even more advanced integrations (like VBA + HTTP triggers or custom APIs). But even with the standard version, Excel can act as a powerful workflow launcher for your daily tasks.
Start with small actions, build a button that refreshes your Power BI dataset. Once you see it work, you can extend the idea to approvals, email alerts, or team notifications.
Get FREE Advanced Excel Exercises with Solutions!

Was anyone able to get Method 1 to work? When I click the button in excel for the web the Power Automate Flow is not triggered.
Hello RandomGuy,
Yes, Method 1 should work in Excel for the web (Microsoft 365), as Power Automate is now fully supported there. Just make sure that:
1. Your workbook is saved in OneDrive or SharePoint.
2. You’ve connected the button to the correct Power Automate flow.
3.You’re signed in with the same Microsoft account used for the flow.
If you’re using the desktop app, it must also be connected online—otherwise, the automation won’t trigger.
Regards,
ExcelDemy
Method one doesn’t work for me either and also appears to be how you would trigger an excel script from the web – in Power Automate, the flow is described as “Schedule and Office script to run in Excel”
Hello Steve,
Method 1 is indeed based on Office Scripts in Excel for the web, which is why Power Automate shows the trigger as “Schedule and Office Script to run in Excel.” This method does not behave like a traditional instant “button trigger” and works only under specific conditions (Excel for the web, OneDrive/SharePoint storage, correct account and script setup).
If this approach doesn’t trigger the flow in your case, we recommend using Method 2 or Method 3 from the article, which are more reliable for triggering Power Automate or Power BI actions directly from Excel.
Thanks for pointing this out, it helps clarify this limitation for other readers as well.
Regards,
ExcelDemy
How do you pass a dynamic file Identifier into Run script in Power Automate for Method 1? I’m creating a template file for others to use, but it means the file can’t be hard-coded in PA.
Hello Harry,
You can make it dynamic by using the file’s Identifier from the trigger or a previous action instead of hard-coding it. For example, if the Excel file is uploaded or selected dynamically, use outputs from actions like When a file is created, Get files (properties only), or List rows present in a table to pass the current file Identifier into the Run script action.
In the Run script step:
1. Click the File field
2. Choose Enter custom value
3. Insert the dynamic Identifier token from your earlier step
This way, the flow works with any copy of the template file without needing to edit the Power Automate flow each time.
Reagrds,
ExcelDemy