The first dataset lists the names that will be applied to the new XML files.
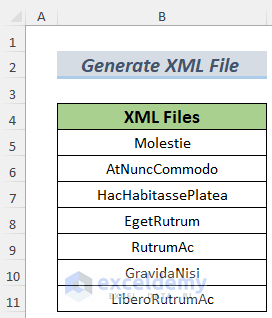
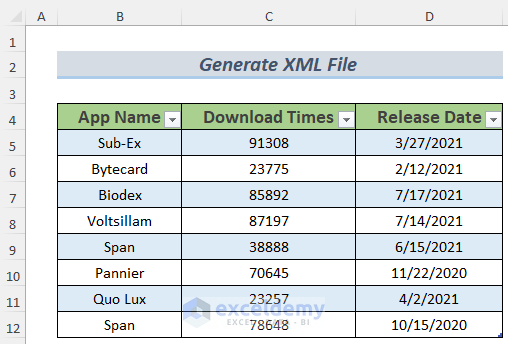
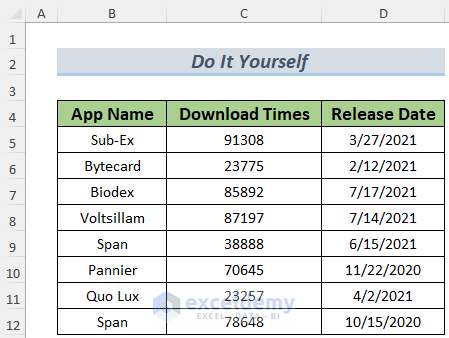
This sample dataset will be converted to an XML file.
Method 1 – Generating XML File from Excel Worksheet
Steps:
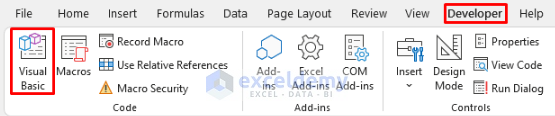
- Go to the Developer Tab and select Visual Basic.
- The VBA editor will appear. Select Insert >> Module to open a VBA Module.

- Enter the following code in the VBA Module.
Sub CreatingXML()
Dim mnFilename As Range
Dim mnFileSystem As Object
Dim mnXMLFile As Object
Set mnFileSystem = CreateObject("Scripting.FileSystemObject")
With ActiveSheet
For Each mnFilename In .Range("B5:B11" & LastRowFind("convertxml"))
Set mnXMLFile = mnFileSystem.CreateTextFile( _
Filename:=ThisWorkbook.Path & "\" & mnFilename.Value & ".xml", Overwrite:=True)
With mnFilename
mnXMLFile.WriteLine ("<?xml version=""1.0"" encoding=""UTF-8"" standalone=""yes""?>")
mnXMLFile.WriteLine ("    <File>")
mnXMLFile.WriteLine ("        <Date>" & .Offset(0, -1).Value & "</Date>")
mnXMLFile.WriteLine ("        <FileName>" & .Value & "</FileName>")
mnXMLFile.WriteLine ("        <FileExtension>" & .Offset(0, 1).Value & "</FileExtension>")
mnXMLFile.WriteLine ("        <Title>" & .Offset(0, 2).Value & "</Title>")
mnXMLFile.WriteLine ("        <Mappings>")
mnXMLFile.WriteLine ("            <Mapping>")
mnXMLFile.WriteLine ("                <RICCode>" & .Offset(0, 3).Value & "</RICCode>")
mnXMLFile.WriteLine ("                <SEDOL>" & .Offset(0, 4).Value & "</SEDOL>")
mnXMLFile.WriteLine ("                <ISIN>" & .Offset(0, 5).Value & "</ISIN>")
mnXMLFile.WriteLine ("                <BBGTicker>" & .Offset(0, 6).Value & "</BBGTicker>")
mnXMLFile.WriteLine ("            </Mapping>")
mnXMLFile.WriteLine ("        </Mappings>")
mnXMLFile.WriteLine ("    </File>")
End With
mnXMLFile.Close
Next mnFilename
End With
Set mnXMLFile = Nothing
Set mnFileSystem = Nothing
End Sub
Function LastRowFind(mn_wSheet As String) As Long
With Worksheets(mn_wSheet)
LastRowFind = .Cells.Find(What:="*", LookIn:=xlValues, SearchOrder:=xlByRows, _
                        SearchDirection:=xlPrevious).Row
End With
End Function
Code Explanation
- We named our Sub Procedure as CreatingXML().
- We declared some variables: mnFilename As Range, mnFileSystem, and mnXMLFile As Object.
- We set mnFileSystem to create a FileSystemObject.
- The names are stored in the B5:B11 range of the “convert XML” sheet which is why we choose this range and the worksheet with a user-defined function named LastRowFind in a With Statement.
- We used the .WriteLine method to generate the XML files and run the code.


- Run the Macro named CreatingXML.

- Go to the location of these XML files, which is the location of the workbook you use to create them.

The XML file will open in Microsoft Edge by default (if you don’t have any other software set to open this type of file).
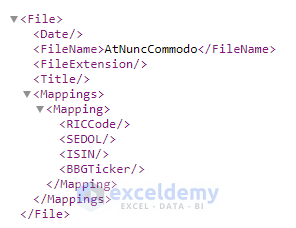
The file can be opened in Notepad.

Method 2 – Generating XML File Using ADODB Object
Steps:
- Follow the steps in Method 1 to open a VBA Module.
- Enter the following code in the Module.
Option Explicit
Dim mn_UTFStrm As Object
Sub GenrateXMLFileByADO()
  Set mn_UTFStrm = CreateObject("ADODB.Stream")
  With mn_UTFStrm
  .Type = 2
  .Charset = "utf-8"
  .Open
  RepeatingHeader 1, "Product", "Date", "Price", "VAT"
  .SaveToFile "C:\ProductSales.xml", 2
  End With
End Sub
Sub RepeatingHeaderValue(ByVal Header, ByVal Value)
  Dim mn_content As String
  mn_content = "<Element2>"
  mn_content = Replace(mn_content, "2", Header)
  mn_UTFStrm.WriteText mn_content, 1
  mn_content = "<VALUE>number variable</VALUE>"
  mn_content = Replace(mn_content, "number variable", Value)
  mn_UTFStrm.WriteText mn_content, 1
  mn_content = "</Element2>"
  mn_content = Replace(mn_content, "2", Header)
  mn_UTFStrm.WriteText mn_content, 1
End Sub
Sub RepeatingHeader(ByVal Header, ByVal Name, ByVal ReadingBy, ParamArray Elements())
  Dim mn_content As String
  Dim i As Long
  mn_content = "<Element1>"
  mn_content = Replace(mn_content, "1", Header)
  mn_UTFStrm.WriteText mn_content, 1
  mn_content = "<NAME>string</NAME>"
  mn_content = Replace(mn_content, "string", Name)
  mn_UTFStrm.WriteText mn_content, 1
  mn_content = "<VALUE>string</VALUE>"
  mn_content = Replace(mn_content, "string", ReadingBy)
  mn_UTFStrm.WriteText mn_content, 1
  For i = 0 To UBound(Elements)
  RepeatingHeaderValue Header + 1, Elements(i)
  Next
  mn_content = "</Element1>"
  mn_content = Replace(mn_content, "1", Header)
  mn_UTFStrm.WriteText mn_content, 1
End Sub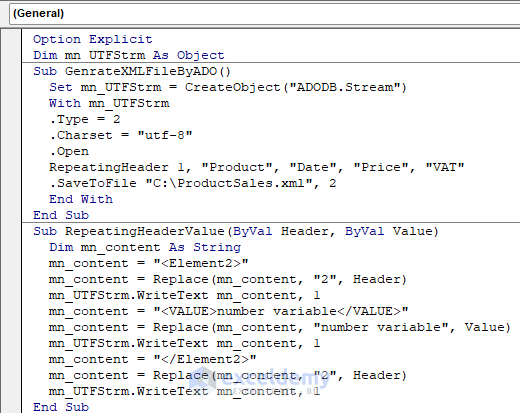

The execution of this code will return an XML file named ProductSales with column headers that you can use for your web page.
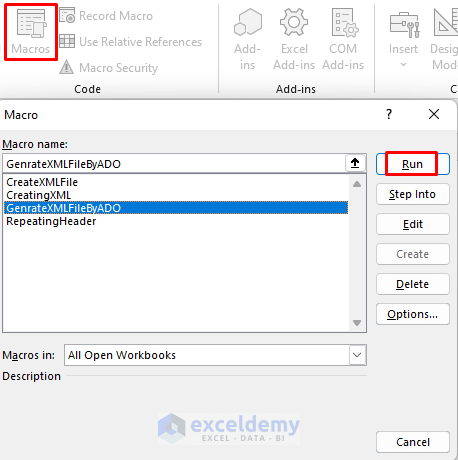
- Run the Macro named GenerateXMLFileByADO.
- Find the product sales file in the location defined in the VBA


Method 3 – Creating XML File from Excel Table
Steps:
- Follow the steps in Method 1 to open a VBA Module.
- Enter the below code in the Module.
Sub CreateXMLFile()
Dim MN_Row As Integer, MN_Column As Integer, MN_TEMP As String, mn_YesOrNo As Variant, mndefine_folder As String
Dim mn_XML_FileName As String, mn_XML_Record_Name As String, mn_LF As String, mn_rtc1 As Integer
Dim mn_first_range As String, mn_second_range As String, mn_tt As String, mn_FieldName(99) As String
mn_LF = Chr(10) & Chr(13)
Dim folderDialog As FileDialog
Set folderDialog = Application.FileDialog(msoFileDialogFolderPicker)
folderDialog.Title = "Select a folder to save the XML file"
If folderDialog.Show = -1 Then
mndefine_folder = folderDialog.SelectedItems(1) & "\"
Else
Debug.Print "User aborted folder selection"
Exit Sub
End If
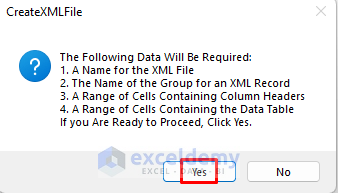
mn_YesOrNo = MsgBox("The Following Data Will Be Required:" & mn_LF _
& "1. A Name for the XML File" & mn_LF _
& "2. The Name of the Group for an XML Record" & mn_LF _
& "3. A Range of Cells Containing Column Headers" & mn_LF _
& "4. A Range of Cells Containing the Data Table" & mn_LF _
& "If you Are Ready to Proceed, Click Yes.", vbQuestion + vbYesNo, "CreateXMLFile")
If mn_YesOrNo = vbNo Then
Debug.Print "User aborted with 'No'"
Exit Sub
End If
mn_XML_FileName = GapFiller(InputBox("1. Enter the name of the XML file:", "CreateXMLFile", "convert_to_xml"))
If Right(mn_XML_FileName, 4) <> ".xml" Then
mn_XML_FileName = mn_XML_FileName & ".xml"
End If
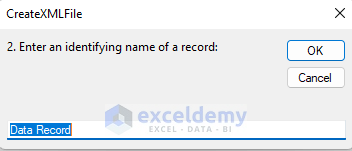
mn_XML_Record_Name = GapFiller(InputBox("2. Enter an identifying name of a record:", "CreateXMLFile", "Data Record"))
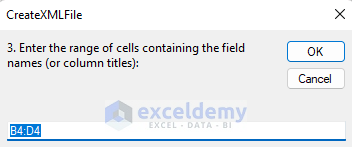
mn_first_range = InputBox("3. Enter the range of cells containing the field names (or column titles):", "CreateXMLFile", "B4:D4")
If MN_DataRange(mn_first_range, 1) <> MN_DataRange(mn_first_range, 2) Then
MsgBox "Error: Headers Should Be in the Same Row" & mn_LF & "Procedure Canceled", vbOKOnly + vbCritical, "CreateXMLFile"
Exit Sub
End If
MN_Row = MN_DataRange(mn_first_range, 1)
For MN_Column = MN_DataRange(mn_first_range, 3) To MN_DataRange(mn_first_range, 4)
If Len(Cells(MN_Row, MN_Column).Value) = 0 Then
MsgBox "Error: Headers Contain Blank Cell" & mn_LF & "Procedure Canceled", vbOKOnly + vbCritical, "CreateXMLFile"
Exit Sub
End If
mn_FieldName(MN_Column - MN_DataRange(mn_first_range, 3)) = GapFiller(Cells(MN_Row, MN_Column).Value)
Next MN_Column
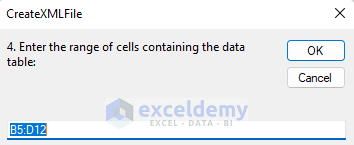
mn_second_range = InputBox("4. Enter the range of cells containing the data table:", "CreateXMLFile", "B5:D12")
If MN_DataRange(mn_first_range, 4) - MN_DataRange(mn_first_range, 3) <> MN_DataRange(mn_second_range, 4) - MN_DataRange(mn_second_range, 3) Then
MsgBox "Error: Number of the Name of the Fields <> Data Columns" & mn_LF & "Procedure Canceled", vbOKOnly + vbCritical, "CreateXMLFile"
Exit Sub
End If
mn_rtc1 = MN_DataRange(mn_second_range, 3)
If InStr(1, mn_XML_FileName, ":\") = 0 Then
mn_XML_FileName = mndefine_folder & mn_XML_FileName
End If
Open mn_XML_FileName For Output As #1
Print #1, "<?xml version=" & Chr(34) & "1.0" & Chr(34) & " encoding=" & Chr(34) & "ISO-8859-1" & Chr(34) & "?>"
Print #1, "<meadinkent>"
For MN_Row = MN_DataRange(mn_second_range, 1) To MN_DataRange(mn_second_range, 2)
Print #1, "<" & mn_XML_Record_Name & ">"
For MN_Column = mn_rtc1 To MN_DataRange(mn_second_range, 4)
Print #1, "<" & mn_FieldName(MN_Column - mn_rtc1) & ">" & AmpersandEliminate(CheckForm(MN_Row, MN_Column)) & "</" & mn_FieldName(MN_Column - mn_rtc1) & ">"
Next MN_Column
Print #1, "</" & mn_XML_Record_Name & ">"
Next MN_Row
Print #1, "</meadinkent>"
Close #1
MsgBox mn_XML_FileName & " created." & mn_LF & "Process Done", vbOKOnly + vbInformation, "CreateXMLFile"
Debug.Print mn_XML_FileName & " saved"
End Sub
Function MN_DataRange(Rng_As_Text As String, MN_Item As Integer) As Integer
Dim MN_user_range As Range
Set MN_user_range = Range(Rng_As_Text)
Select Case MN_Item
Case 1
MN_DataRange = MN_user_range.Row
Case 2
MN_DataRange = MN_user_range.Row + MN_user_range.Rows.Count - 1
Case 3
MN_DataRange = MN_user_range.Column
Case 4
MN_DataRange = MN_user_range.Columns(MN_user_range.Columns.Count).Column
End Select
Exit Function
End Function
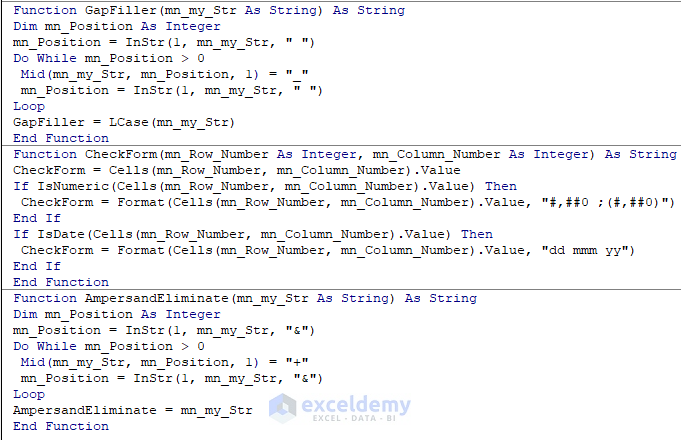
Function GapFiller(mn_my_Str As String) As String
Dim mn_Position As Integer
mn_Position = InStr(1, mn_my_Str, " ")
Do While mn_Position > 0
Mid(mn_my_Str, mn_Position, 1) = "_"
mn_Position = InStr(1, mn_my_Str, " ")
Loop
GapFiller = LCase(mn_my_Str)
End Function
Function CheckForm(mn_Row_Number As Integer, mn_Column_Number As Integer) As String
CheckForm = Cells(mn_Row_Number, mn_Column_Number).Value
If IsNumeric(Cells(mn_Row_Number, mn_Column_Number).Value) Then
CheckForm = Format(Cells(mn_Row_Number, mn_Column_Number).Value, "#,##0 ;(#,##0)")
End If
If IsDate(Cells(mn_Row_Number, mn_Column_Number).Value) Then
CheckForm = Format(Cells(mn_Row_Number, mn_Column_Number).Value, "dd mmm yy")
End If
End Function
Function AmpersandEliminate(mn_my_Str As String) As String
Dim mn_Position As Integer
mn_Position = InStr(1, mn_my_Str, "&")
Do While mn_Position > 0
Mid(mn_my_Str, mn_Position, 1) = "+"
mn_Position = InStr(1, mn_my_Str, "&")
Loop
AmpersandEliminate = mn_my_Str
End Function

The execution of this code will return an XML file named convert_to_xml.
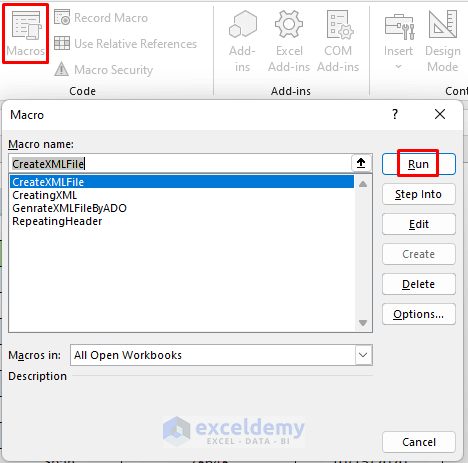
- Run the Macro named CreateXMLFile.
- The File Explorer window will appear. Select the drive/folder where you want to save the XML file and click OK.
- A message box will pop up showing you the data that the procedure will require.
- Click Yes.
- Enter a name for your XML file.
- Click OK.

- Insert a name for the data record and click OK.
- You will see another message box requiring a row with headers. As our Excel table has the Column Headers in the range B4:D4, we insert this range and click OK.
- Insert your working data. In this case, we have information in the range B5:D12. Insert this range and click OK.
- A message states that convert_to_xml file has been created. Click OK.

- Go to the file location.
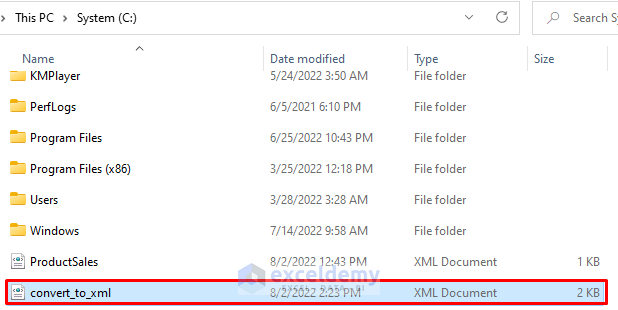
Open this file in Notepad.

Practice Section
Download Practice Workbook
Related Articles
<< Go Back to Export Excel to XML | Export Data from Excel | Learn Excel
Get FREE Advanced Excel Exercises with Solutions!

Hey thank you so much for sharing this information! This was extremely useful. However, when using method one, the macro continues to create a blank XML named “.xml”. Is there a way to prevent that?
Thanks again!
Dan
Hi Dabrowski, thanks for reaching out. If you remove the ‘& LastRowFind(“convertxml”)’ part from the 7th line of the code. It will solve your problem. The function ‘LastRowFind’ causes to generate that extra file.
can you please let me know if this xml V2 or V3 ?
Hey Praveen, thanks for reaching out. This XML files are actually in version 1 format.
could you please help me in getting the Version 3 format
Hello,
When using Method 3 (Macro 3): Creating XML File from Excel Table I get the following error:
Run-time error ’75’
Path/File access Error
The Debugger takes me to this row:
“Open mn_XML_FileName For Output As #1”
What am I missing?
Hi Andrija, thanks for reaching out. Actually there’s nothing wrong in the code. In my laptop, the code works properly. However, it may not work on other device. So I modified the code and updated the Download File in this article. I hope using the updated code will solve your problem.