
Excel is far more than a calculator or simple data analysis tool. When properly leveraged, it becomes a powerful platform for creating sophisticated workflow solutions that can automate processes, manage complex data relationships, and provide real-time insights for decision-making. Businesses of all sizes use Excel to manage processes, track progress, and automate repetitive tasks.
In this tutorial, we will show how to transform ordinary spreadsheets into powerful workflow tools with Excel.
Common Examples:
- Task and project trackers.
- Leave or vacation approval flows.
- Sales order processing.
- Inventory management.
- Content review/approval pipelines.
Key Components of an Excel Workflow Tool
A robust workflow tool in Excel typically includes:
- Input Sheet: Where users enter new data or requests (e.g., new tasks, leave requests).
- Status Tracking: A column to indicate the progress/status of each item.
- Automated Triggers: Conditional formatting or formulas that respond to status changes.
- Dashboards: Summary views or charts to visualize progress or bottlenecks.
- Notifications/Automation: VBA macros or Power Automate flows to send alerts or escalate actions.
Let’s build a practical Task Tracker Workflow from scratch.
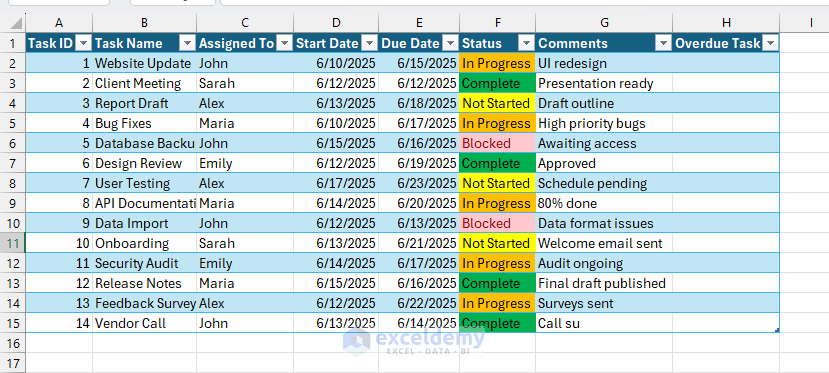
Step 1: Set Up Your Data Table
- Open Excel.
- Create a new worksheet, name it Tasks.
- Either input your data or import data from different sources.
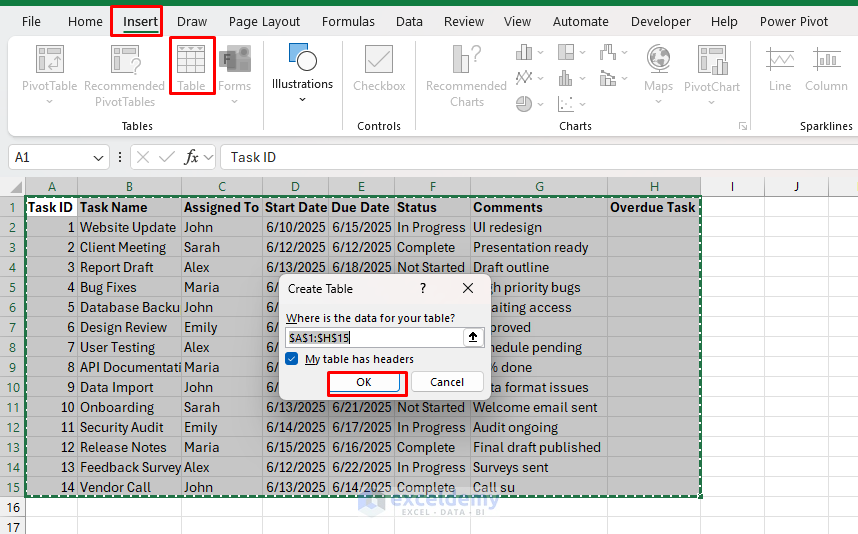
- Create a structured table with headers.
- Select the range.
- Go to the Data tab >> select Table or press Ctrl + T.
- Check “My table has headers”.
- Click OK.
- Rename the table:
- Go to Table Design tab >> select Table Name (e.g., tblWorkflow).

Step 2: Add Status Tracking
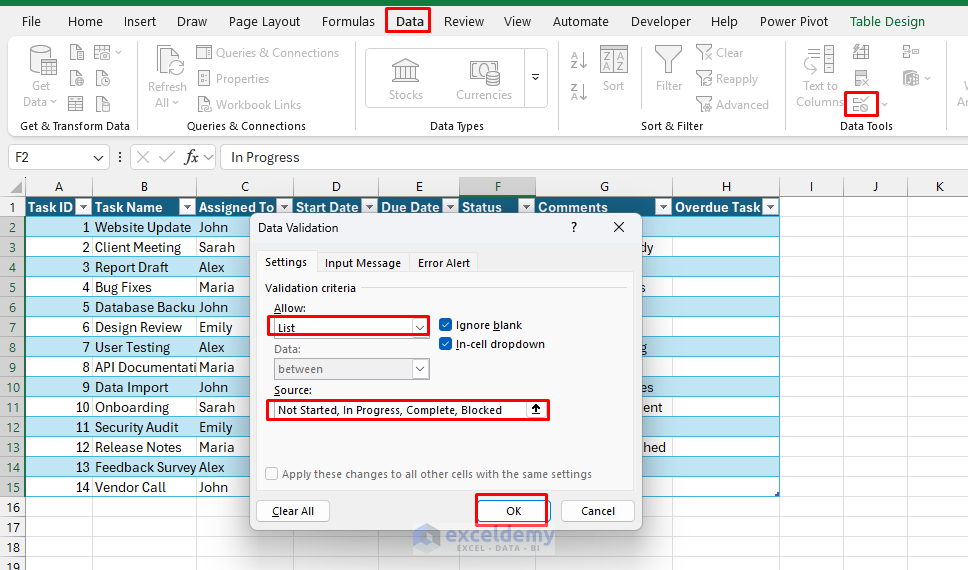
Create a dropdown for the Status column.
- Go to the Data tab >> select Data Validation.
- In Allow: select List.
- In Source: Type or select from range;
Not Started, In Progress, Complete, Blocked
- Click OK.
Step 3: Apply Conditional Formatting
Make tasks stand out based on their status.
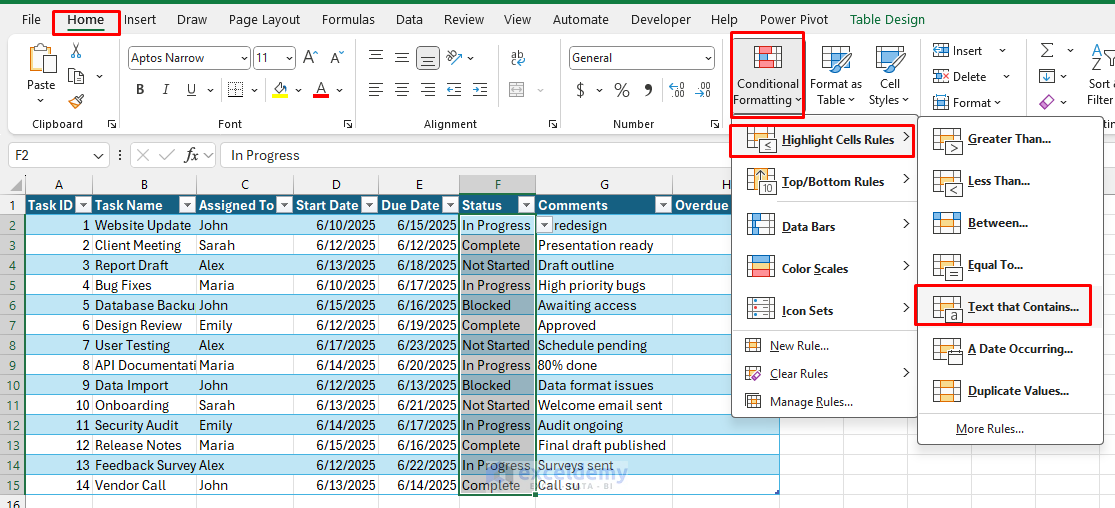
- Select the Status column.
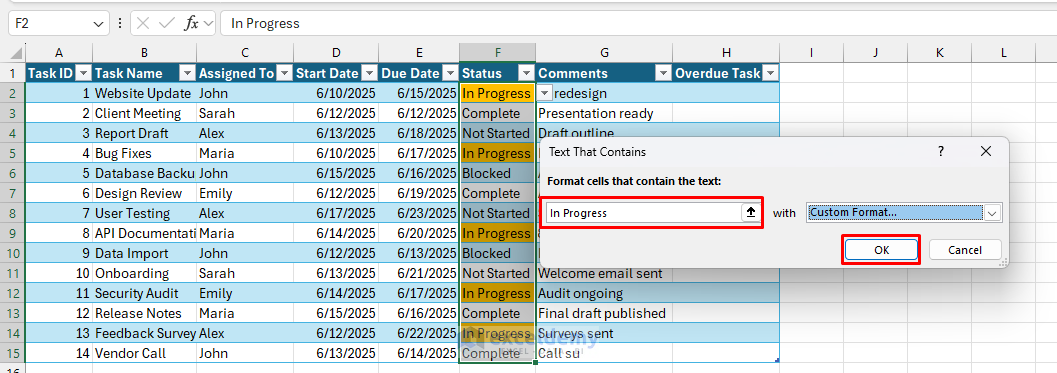
- Go to Home tab >> select Conditional Formatting >> select Highlight Cells Rules >> select Text that Contains.
-
- In Progress → Fill color: Orange.
- Click OK.
-
- Not Started → Fill color: Yellow.
- Complete → Fill color: Green.
- Blocked → Fill color: Red.
- Optionally, you can apply icon sets to track status visually.
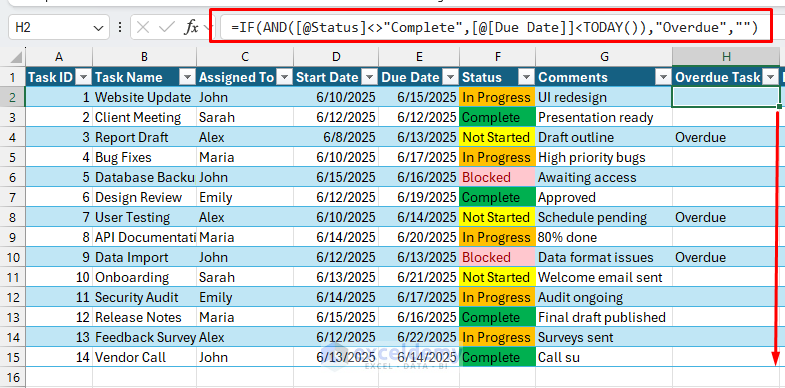
Step 4: Add Automated Overdue Flag
Insert a helper column to detect Overdue tasks.
- Select a cell and insert the following formula.
=IF(AND([@Status]<>"Complete",[@Due Date]<TODAY()),"Overdue","")
Progress Calculation:
If you’d like to create a % completion metric:
- Select a cell and insert the following formula.
=SWITCH([@Status], "Complete", 1, "In Progress", 0.5, "Not Started", 0, "Blocked", 0.25, "")
- Format the cell as a percentage.

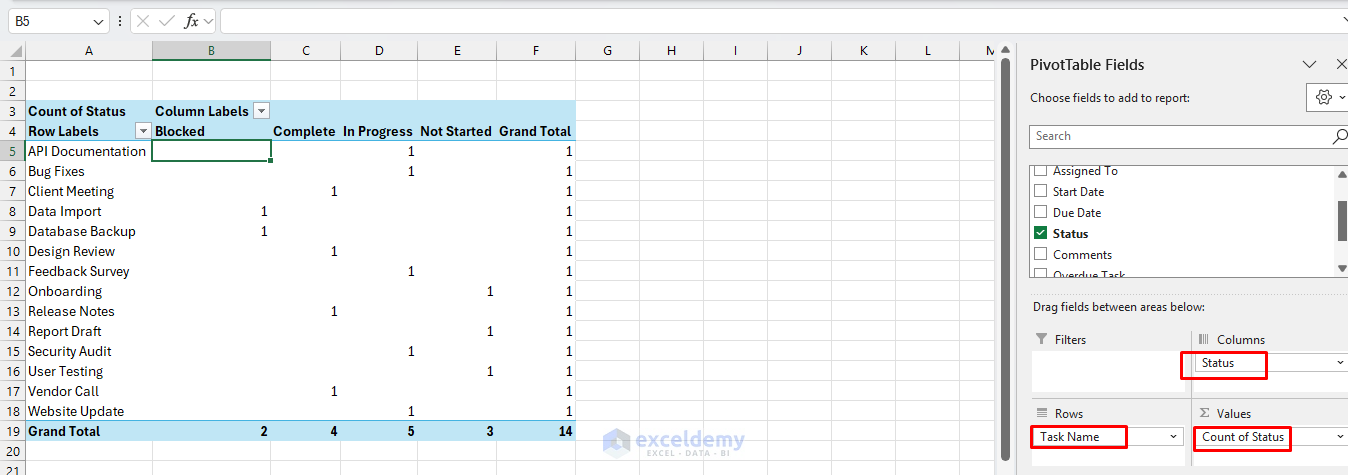
Step 5: Build a Dashboard
Insert a PivotTable or use COUNTIF formulas to summarize the task tracker.
Create Pivot Table:
- Go to the Insert tab >> select PivotTable.
- Select location: New Worksheet.
- Click OK.

In PivotTable Fields;
- Drag Task Name to the Rows field.
- Drag Status to the Columns field.
- Drag Status to the Values field.
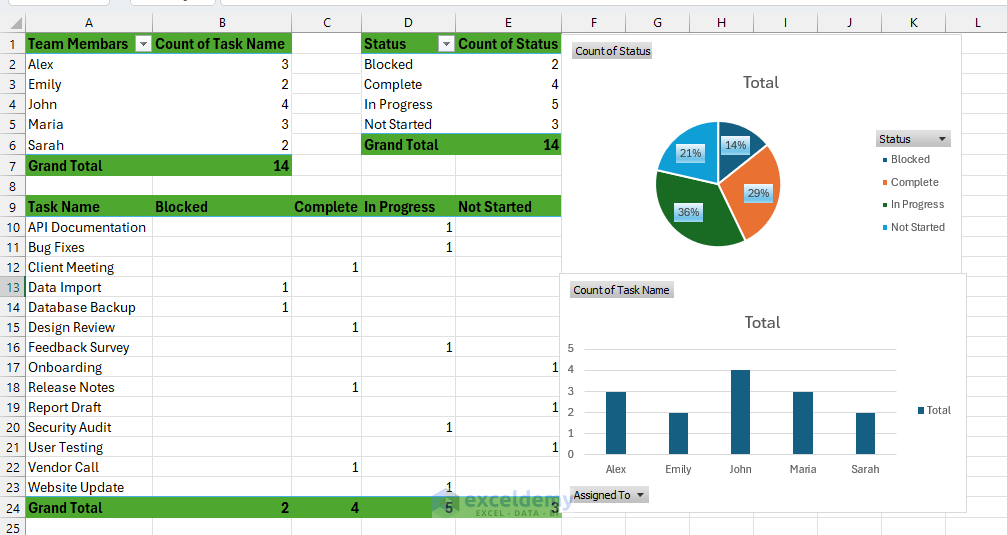
- Create these Pivot Tables for the Dashboard.
- Tasks by status.
- Overdue tasks.
- Tasks per person.
Create Chart:
- Create simple charts (bar/pie) to visualize.
- Go to the PivotTable Analyze tab >> select Pie chart.
- Click OK.

- Create Bar chart for the Team Members.
Dashboard:
Step 6: Add Workflow Automation with VBA
You can use VBA to automate the workflow. Like sending Email reminders for Overdue tasks.
- Go to the Developer tab >> select Visual Basic.
- Go to the Insert tab >> select Module.
- Copy-paste the following VBA code.
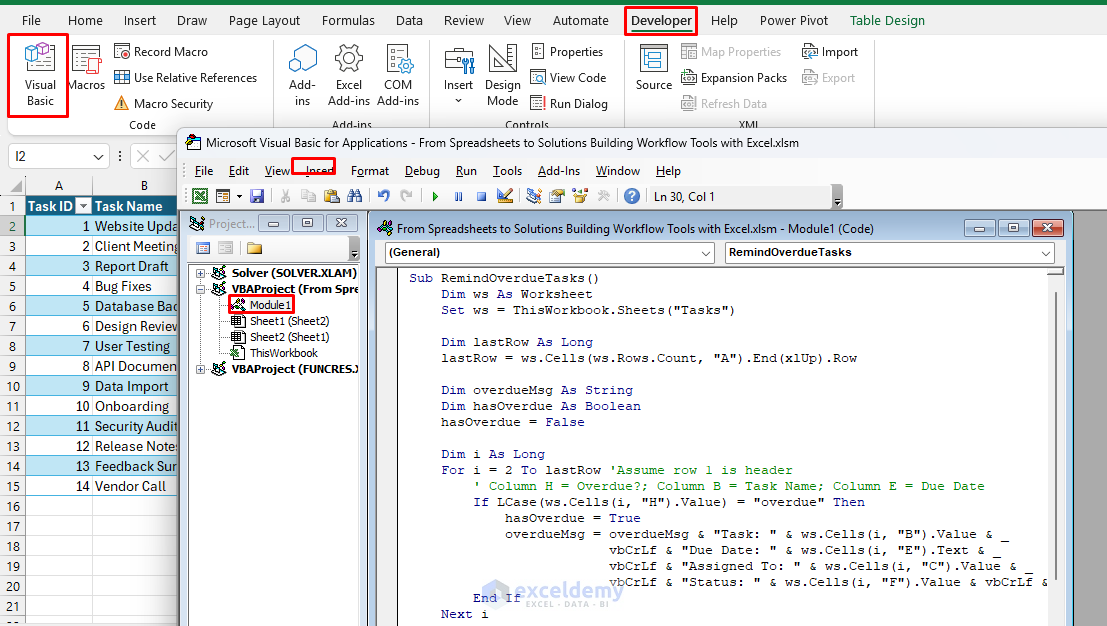
Sub RemindOverdueTasks()
    Dim ws As Worksheet
    Set ws = ThisWorkbook.Sheets("Tasks")

    Dim lastRow As Long
    lastRow = ws.Cells(ws.Rows.Count, "A").End(xlUp).Row

    Dim overdueMsg As String
    Dim hasOverdue As Boolean
    hasOverdue = False

    Dim i As Long
    For i = 2 To lastRow 'Assume row 1 is header
        ' Column H = Overdue?; Column B = Task Name; Column E = Due Date
        If LCase(ws.Cells(i, "H").Value) = "overdue" Then
            hasOverdue = True
            overdueMsg = overdueMsg & "Task: " & ws.Cells(i, "B").Value & _
                         vbCrLf & "Due Date: " & ws.Cells(i, "E").Text & _
                         vbCrLf & "Assigned To: " & ws.Cells(i, "C").Value & _
                         vbCrLf & "Status: " & ws.Cells(i, "F").Value & vbCrLf & vbCrLf
        End If
    Next i

    If hasOverdue Then
        MsgBox "Overdue Tasks:" & vbCrLf & vbCrLf & overdueMsg, vbExclamation, "Overdue Task Reminder"
    Else
        MsgBox "No overdue tasks found!", vbInformation, "All Clear"
    End If
End Sub
- The macro loops through all rows in the Tasks worksheet.
- If column H says “Overdue”, it collects the details.
- If any overdue tasks are found, it pops up a list.
- If none, it says “All Clear”.
Run the Code:
- Go to the Developer tab >> select Macros.
- Select RemindOverdueTasks >> click Run.
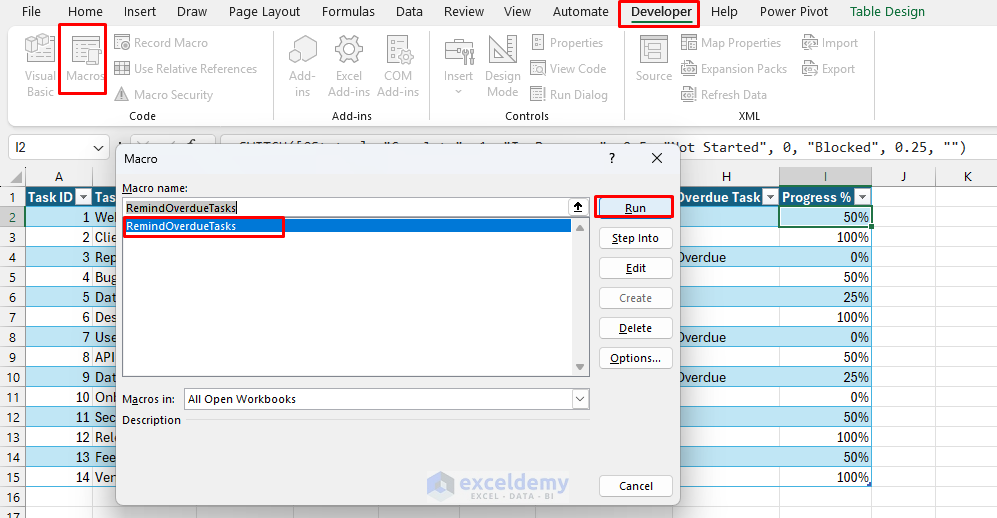
Result:

Best Practices for Effective Excel Workflows
- Use Tables for dynamic ranges and easy references.
- Restrict editing using data validation and sheet protection.
- Add clear user instructions (e.g., an “Instructions” sheet).
- Test your workflow with real-world scenarios before rolling out.
- Backup regularly and version-control key workflow templates.
Conclusion
By following the above steps, you can build workflow tools in Excel. Excel can be transformed from a simple spreadsheet into a practical workflow engine for your team. By structuring your data, leveraging built-in features like data validation and conditional formatting, and adding automation through formulas or VBA, you can create tailored workflow solutions, saving time and reducing errors.
Get FREE Advanced Excel Exercises with Solutions!
