The VBA Union Function
- Description
The VBA Union function unifies multiple ranges.
- Syntax:

Union (Arg1, Arg2, Arg3, Arg4, Arg5, Arg6, Arg7, Arg8, Arg9, Arg10, Arg11, Arg12, Arg13, Arg14, Arg15, Arg16, Arg17, Arg18, Arg19, Arg20, Arg21, Arg22, Arg23, Arg24, Arg25, Arg26, Arg27, Arg28, Arg29, Arg30)
- Arguments
| Name | Requirement | Data Type | Description |
|---|---|---|---|
| Arg1 | Required | Range | a minimum of two Range objects must be defined. |
| Arg2 | Required | Range | a minimum of two Range objects must be defined. |
| Arg3- Arg30 | Optional | Variant | A range. |
- Return Value
This function returns a Range.
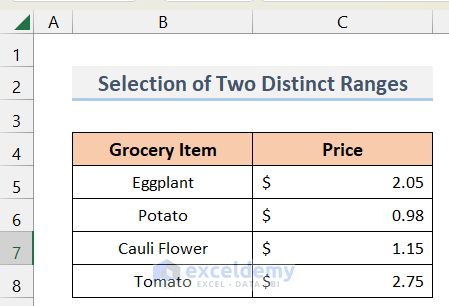
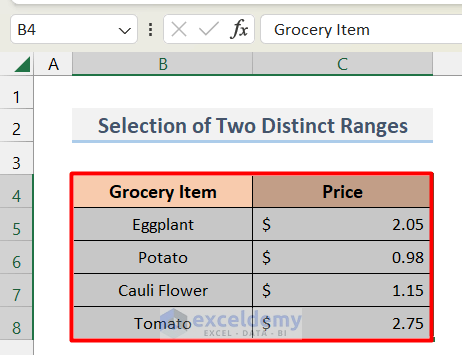
Example 1 – Select Two Distinct Ranges Using the VBA Union Function
The dataset showcases prices (C5:C8) of grocery items (B5:B8).
Steps:
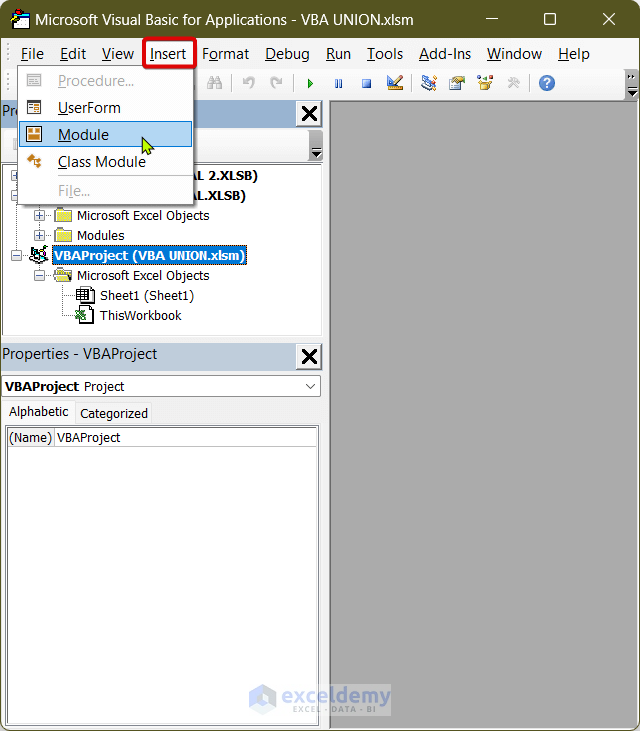
- Press Alt+F11 to open the Visual Basic window.
- Select Insert > Module.
- Enter the following code in the module.
Sub Unifying_Ranges()
Worksheets("Sheet1").Activate
Application.Union(Range("B4:B8"), Range("C4:C8")).Select
End Sub
Code Breakdown
The Unifying_Ranges subroutine is created. Sheet1 is activated and the Union function is used to select B4:B8 and C4:C8 ranges.
- Run the code by pressing F5.
The two ranges are selected:
Read More: How to Perform Union Query in Excel
Example 2 – Using the VBA Union Function to Change the Background Color of Two Ranges
Steps:
- Open a new module (follow the steps described in method 1).
- Enter the following code in the module.
Sub BG_Color_Change()
Worksheets("Sheet2").Activate
Application.Union(Range("B4:B8"), Range("C4:C8")).Interior.Color = RGB(150, 250, 230)
End Sub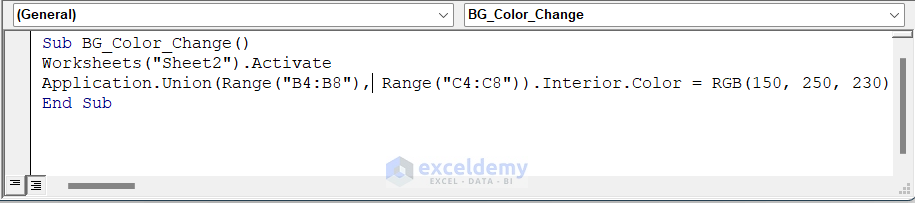
Code Breakdown
The BG_Color_Change subroutine is created. Sheet2 is activated and the Union function is used to select B4:B8 and C4:C8. The RGB color is changed using the Interior.Color command (here, Cyan 150, 250, 230).
- Run the code.
This is the output.

Read More: How to Do Union of Two Columns in Excel
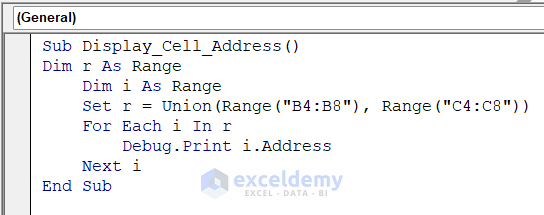
Example 3 – Displaying the Address of Combined Ranges in the Immediate Window
Steps:
- Open a new module (follow the steps described in method 1).
- Enter the following code in the module.
Sub Display_Cell_Address()
Dim r As Range
    Dim i As Range
    Set r = Union(Range("B4:B8"), Range("C4:C8"))
    For Each i In r
        Debug.Print i.Address
    Next i
End Sub
Code Breakdown
The Display_Cell_Address subroutine is created. r and i are declared as Range type variables. The unified range B4:B8 and C4:C8 is assigned to r. The address of each cell is displayed using a For loop.
- Run the code.
This is the output.
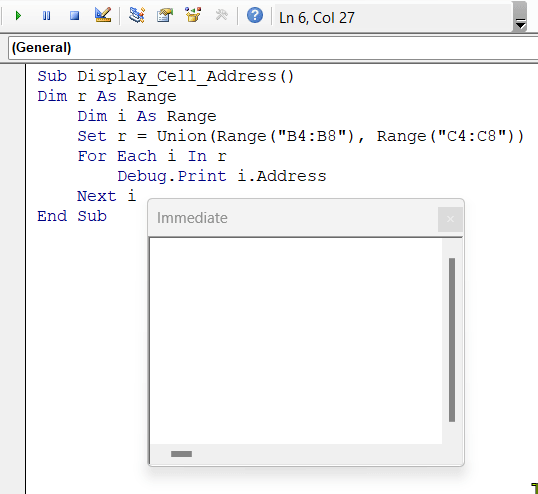
- If you don’t see the Immediate window, press Ctrl+G to open the window and run the code again.
Download Practice Workbook
Download the practice workbook.
Related Article
<< Go Back to Excel Union | Excel Operators | Excel Formulas | Learn Excel

