Quick View
Sub Insert_Single_Image()

Image_Name = "Argentina"
Image_Location = "E:\ExcelDemy\National Flags"
Image_Format = ".png"

Cell_Reference = "C3"

Set Image = ActiveSheet.Pictures.Insert(Image_Location + "\" + Image_Name + Image_Format)

Image.Top = Range(Cell_Reference).Top
Image.Left = Range(Cell_Reference).Left
Image.ShapeRange.Height = 45
Image.ShapeRange.Width = 75

End Sub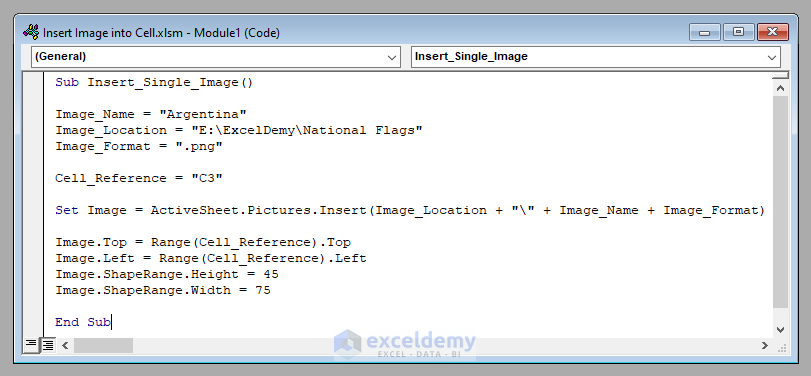
Step-by-Step Analysis
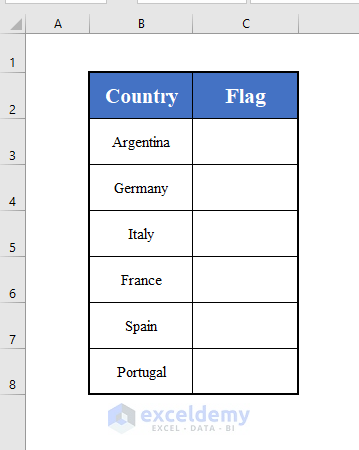
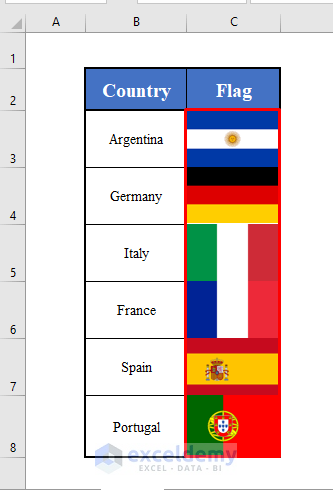
Below is a dataset with the names of countries and empty cells for their national flags.
We have a folder on our computer in the location E:\ExcelDemy\National Flags where we have stored the images of the flags of all these countries.
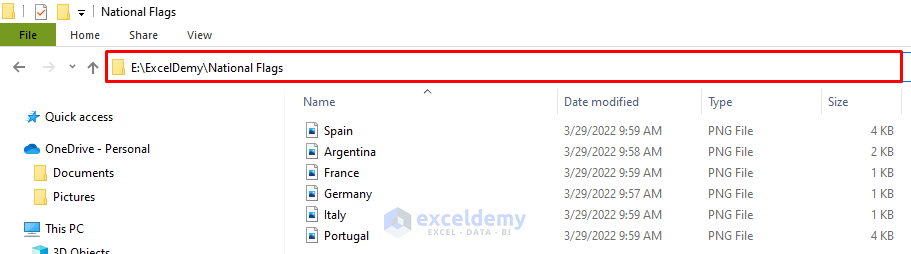
We will insert images from this folder into the respective cells of the worksheet.
Method 1 – Inserting a Single Image into a Cell using Excel VBA
Steps:
- Enter the Image_Name (Argentina), Image_Location on the computer (E:\ExcelDemy\National Flags), Image Format (.png)
- Enter the Cell_Reference (C3) of the image on the worksheet in the code.
Image_Name = "Argentina"
Image_Location = "E:\ExcelDemy\National Flags"
Image_Format = ".png"

Cell_Reference = "C3"- To declare the image:
Set Image = ActiveSheet.Pictures.Insert(Image_Location + "\" + Image_Name + Image_Format)- Set the attributes of the image:
Image.Top = Range(Cell_Reference).Top
Image.Left = Range(Cell_Reference).Left
Image.ShapeRange.Height = 45
Image.ShapeRange.Width = 75- The complete VBA code will be:
Sub Insert_Single_Image()

Image_Name = "Argentina"
Image_Location = "E:\ExcelDemy\National Flags"
Image_Format = ".png"

Cell_Reference = "C3"

Set Image = ActiveSheet.Pictures.Insert(Image_Location + "\" + Image_Name + Image_Format)

Image.Top = Range(Cell_Reference).Top
Image.Left = Range(Cell_Reference).Left
Image.ShapeRange.Height = 45
Image.ShapeRange.Width = 75

End Sub
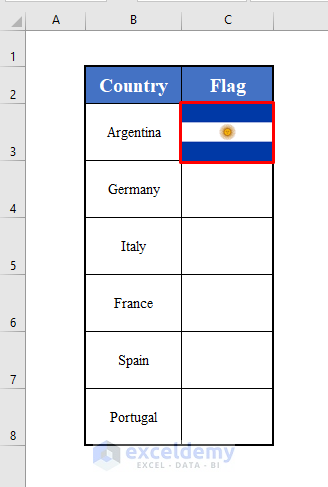
- Run the code (Don’t forget to change the Image_Name, Image_Location, Image_Format, and Cell_Reference of the image according to your need before running the code).
This will insert the image of the national flag of Argentina in cell C3 of the active worksheet.
Method 2 – Inserting a Series of Images into a Range of Cells with Excel VBA
Steps:
- Enter the Image_Names (Range B3:B8 on the worksheet), the Image_Location, Image_Format, and the Cell_References of the images into the worksheet (Range C3:C8).
Set Image_Names = Range("B3:B8")
Image_Location = "E:\ExcelDemy\National Flags"
Image_Format = ".png"

Set Cell_Reference = Range("C3:C8")- Iterate through a For-loop to declare the image and set the attributes of the image.
For i = 1 To Image_Names.Rows.Count
    For j = 1 To Image_Names.Columns.Count
        Set Image = ActiveSheet.Pictures.Insert(Image_Location + "\" + Image_Names.Cells(i, j) + Image_Format)
        Image.Top = Cell_Reference.Cells(i, j).Top
        Image.Left = Cell_Reference.Cells(i, j).Left
        Image.ShapeRange.Height = 45
        Image.ShapeRange.Width = 75
    Next j
Next i- The complete VBA code will be:
Sub Insert_Multiple_Images()

Set Image_Names = Range("B3:B8")
Image_Location = "E:\ExcelDemy\National Flags"
Image_Format = ".png"

Set Cell_Reference = Range("C3:C8")

For i = 1 To Image_Names.Rows.Count
    For j = 1 To Image_Names.Columns.Count
        Set Image = ActiveSheet.Pictures.Insert(Image_Location + "\" + Image_Names.Cells(i, j) + Image_Format)
        Image.Top = Cell_Reference.Cells(i, j).Top
        Image.Left = Cell_Reference.Cells(i, j).Left
        Image.ShapeRange.Height = 45
        Image.ShapeRange.Width = 75
    Next j
Next i

End Sub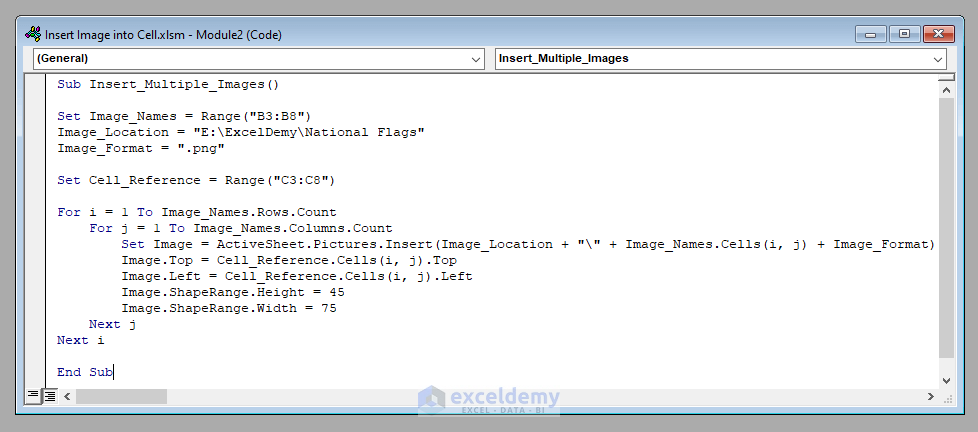
- Run the code (remember to change the image’s Image_Names, Image_Location, Image_Format, and Cell References according to your needs before running the code).
This will insert the images of the national flags of all the countries mentioned in the range B3:B8 into the range C3:C8 of the active worksheet.
Things to Remember
While working with VBA in Excel, you needn’t save any file to run VBA code. You can see the output of any code without saving the file. But if you want to save the file for future use, you must save the file as Excel Macro-Enabled Workbook (*.xlsm).
Download the Practice Workbook
Download this workbook to practice.
Related Articles
- How to Insert Picture from URL Using VBA in Excel
- Insert Pictures Automatically Size to Fit Cells with VBA in Excel


When I use one of these methods to supposedly insert an image into a cell, it seems what is actually done is to position the image over the cell. It is not actually _in_ the cell. Thus, when the sheet is sorted, the image does not move as it would if the image were actually imbedded in the cell. Like a fill color would move with the cell, for example.
Hello, JAN (YAN) WOELLHAF!
If those code does not work for you, try this one! Hope this will help you.
Sub InsertPic()
Dim path As String, photo As Picture, cell As Range
path = “E:\test” & Range(“C3”).Value & “.png”
Set cell = ActiveCell.MergeArea
Set photo = ActiveSheet.Pictures.Insert(PicPath)
With photo
.ShapeRange.LockAspectRatio = msoFalse
.Left = ImageCell.Left
.Top = ImageCell.Top
.Width = ImageCell.Width
.Height = ImageCell.Height
End With
End Sub
Can anyone advise why this code is not working?
Sub InsertStamp()
Dim fNameAndPath As Variant
Dim img As Picture
Dim ws As Worksheet
Dim Location As String
fNameAndPath = Application.GetOpenFilename(Title:=”Select Picture To Be Imported”)
If fNameAndPath = False Then Exit Sub
Location = Application.InputBox(“Please select the stamp location”, “Insert Stamp”, “Enter the cell HERE”, , , , , 8)
If Location = “Enter the cell HERE” Or Location = “” Then
Exit Sub
End If
For Each ws In ActiveWorkbook.Worksheets
ws.Select
Set img = ActiveSheet.Pictures.Insert(fNameAndPath)
With img
‘Resize Picture to fit in the range….
.Left = ActiveSheet.Range(Location).Left
.Top = ActiveSheet.Range(Location).Top
.ShapeRange.IncrementLeft -20.25
.ShapeRange.IncrementTop -9.75
.Placement = 1
.Name = “Stamp”
.PrintObject = True
End With
Next ws
End Sub
Hello Mahmoud,
Looks like there were several inconsistencies in your code. This is the modified version of your code:
Try out this one. It should work fine.
Thank you, very useful and clearly explained! I’m writing to you because I don’t know how to save the file to send it via email while maintaining the images inserted via VBA. Can you help me? Thank you
Hello Laura,
To save the file with the inserted images and send it via email, you can follow these steps:
Save the Workbook:
Attach the Workbook to Email:
Send the Email:
If you encounter any issues or have further questions, feel free to ask!