Insert a Textbox in an Excel Worksheet
Steps:
- In the Insert tab, click on the Text Box command from the Text group.
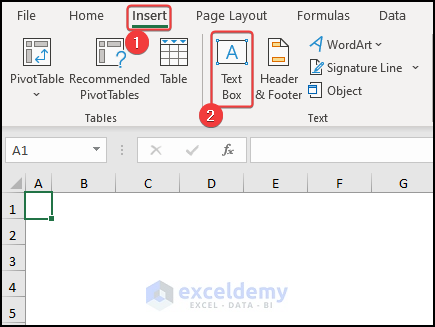
- The mouse cursor will change.
- Click and drag to insert the textbox in the worksheet.

- Write down a text inside the text box and format it. We wrote down our website name ExcelDemy.

Read More: How to Add Text to Textbox Using Excel VBA
Step-by-Step Procedure to Hide Textbox Using Excel VBA
We are going to hide the textbox which we inserted.
Note:
We used Microsoft 365 for the guide.
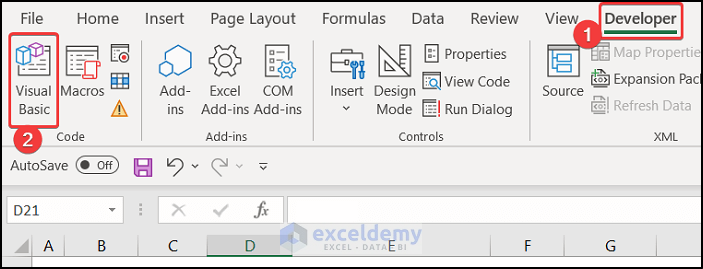
Step 1 – Launching the Visual Basic Editor Dialog Box
- Go to the Developer tab and click on Visual Basic. If you don’t have that, you have to enable the Developer tab. You can also press Alt + F11 to open the Visual Basic Editor.
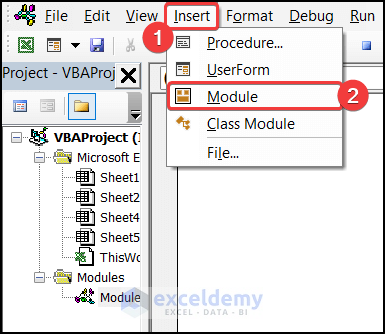
- Adialog box will appear.
- In the Insert tab on that box, click the Module option.
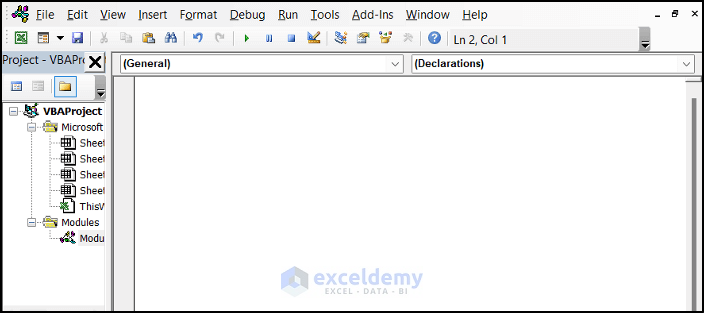
- A white empty editor interface will appear.
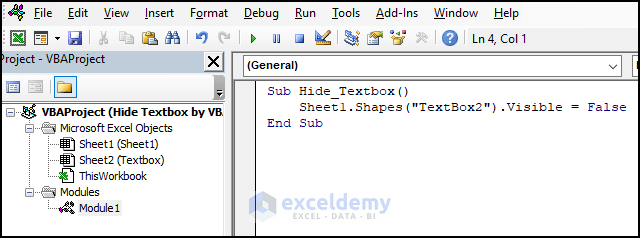
Step 2 – Using the VBA Code
- Click on the empty interface.
- Insert the following code in the box.
Sub Hide_Textbox()
    Sheet1.Shapes("TextBox2").Visible = False
End Sub- Press Ctrl + S to save the code.
- Close the Editor tab.
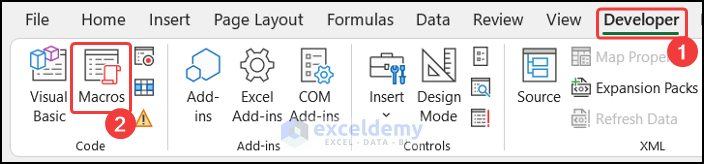
Step 3 – Run and Get Result
- In the Developer tab, click on the Macros option.
- A new dialog box called Macros will appear.
- Select the Hide_Textbox option.
- Click on the Run button to run this code.
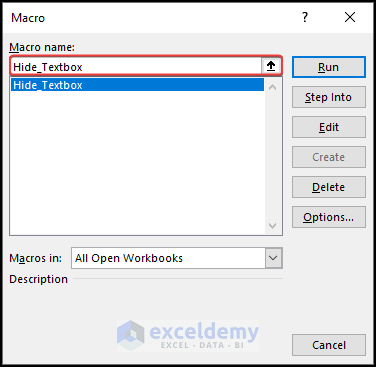
- The textbox will be hidden from the worksheet.

Download the Practice Workbook
Related Articles
- How to Convert TextBox Value to Cell with VBA in Excel
- How to Make Textbox Datepicker with Excel VBA
- How to Use VBA Textbox Properties in Excel
- How to Use VBA to Change Textbox Text in Excel
- Excel VBA to Convert Textbox Value to Number
- How to Use Excel VBA Textbox Events
- How to Format TextBox for Phone Number in Excel VBA

