In this article, we will explain in detailed steps how to convert a TextBox value into a cell with VBA in Excel.
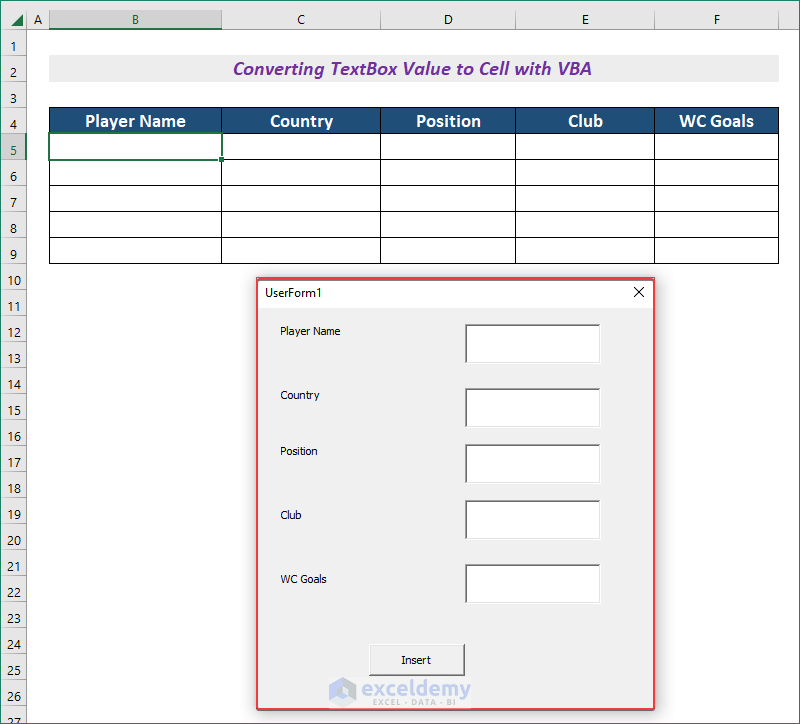
We’ll build a UserForm to input some information in some TextBoxes, then use a VBA Macro to convert that information into the cells in the template below.
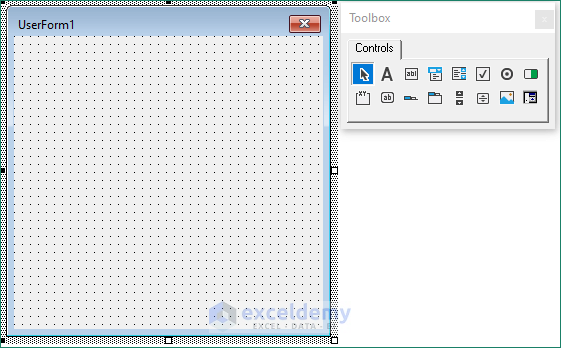
Step 1 – Open the VBA Window
- To open the VBA window, go to the Developer tab.
- Click on Visual Basic on the ribbon.

- In the VBA window that opens, go to the Insert tab.
- Select UserForm from the options.

A UserForm window will appear along with the Toolbox window.
Step 2 – Insert Labels on the UserForm
- To insert a Label, click on Label in the Toolbox window.
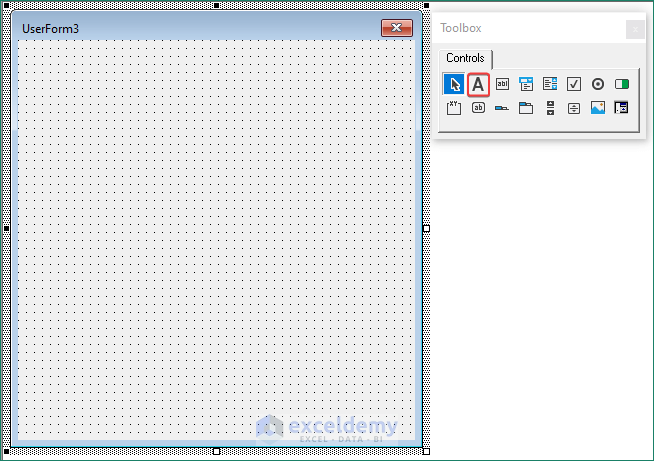
- Drag the mouse to a suitable location to place the Label.
- Rename the Label to Player Name.

Step 3 – Add a TextBox to the UserForm
Now we’ll add a TextBox from the Toolbox to capture the value for Player Name.
- Click on TextBox from the Toolbox window and drag it to a suitable location on the UserForm window.
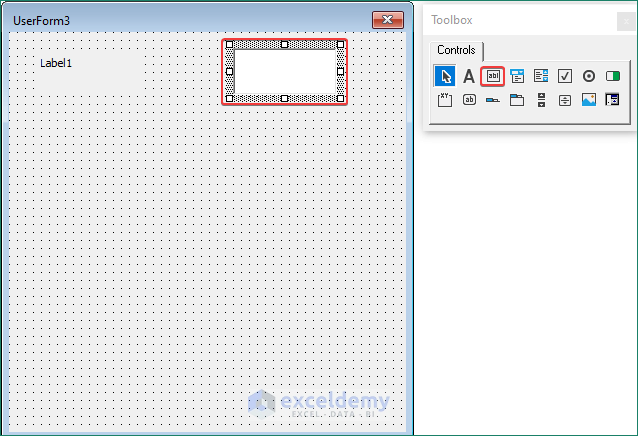
- In the same way, create a Label and corresponding TextBox for the other column names in our template (Country, Club, Position and WC Goals).

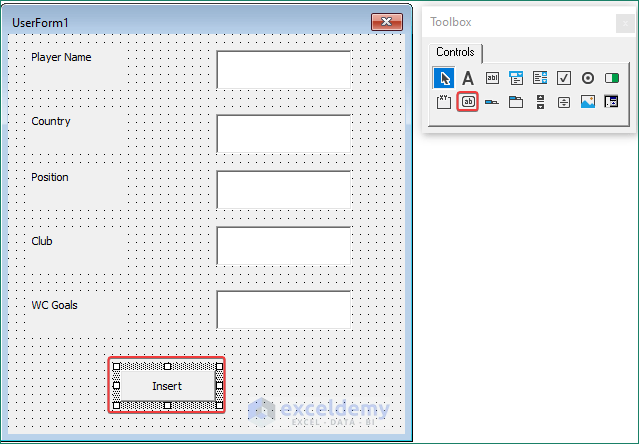
Step 4 – Insert a Command Button
Now we’ll insert a command button to execute the VBA.
- Click on CommandButton from the Toolbox and drag it create a command button in the UserForm.
- Rename the button Insert.
Step 5 – Assign a VBA Macro
Now we assign the VBA Macro to the command button. Clicking the button will write the input from the Textboxes into a row in our dataset.
- Double-click on the command button.
- Enter the following code in the interface that opens:
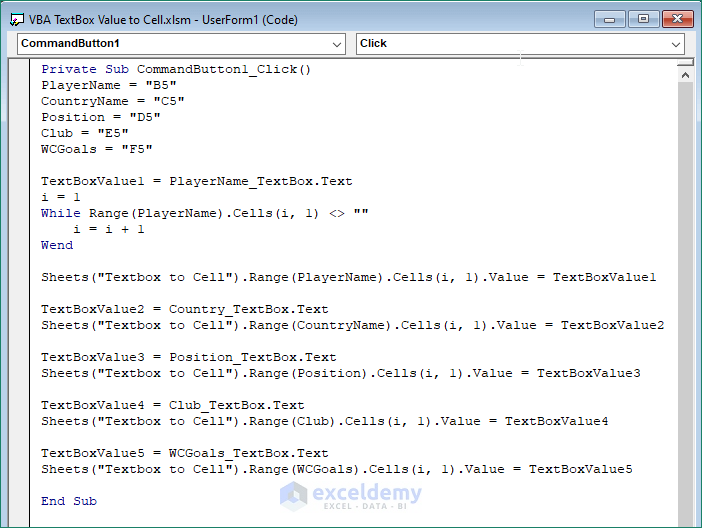
Private Sub CommandButton1_Click()
PlayerName = "B5"
CountryName = "C5"
Position = "D5"
Club = "E5"
WCGoals = "F5"
TextBoxValue1 = PlayerName_TextBox.Text
i = 1
While Range(PlayerName).Cells(i, 1) <> ""
i = i + 1
Wend
Sheets("Textbox to Cell").Range(PlayerName).Cells(i, 1).Value = TextBoxValue1
TextBoxValue2 = Country_TextBox.Text
Sheets("Textbox to Cell").Range(CountryName).Cells(i, 1).Value = TextBoxValue2
TextBoxValue3 = Position_TextBox.Text
Sheets("Textbox to Cell").Range(Position).Cells(i, 1).Value = TextBoxValue3
TextBoxValue4 = Club_TextBox.Text
Sheets("Textbox to Cell").Range(Club).Cells(i, 1).Value = TextBoxValue4
TextBoxValue5 = WCGoals_TextBox.Text
Sheets("Textbox to Cell").Range(WCGoals).Cells(i, 1).Value = TextBoxValue5
End Sub
- Click on the Run button or press F5 to execute the code.
A UserForm will open in the worksheet.
Step 6 – Convert the TextBox Value to a Cell
- Enter some values in the TextBoxes and click on the command button (i.e. Insert).
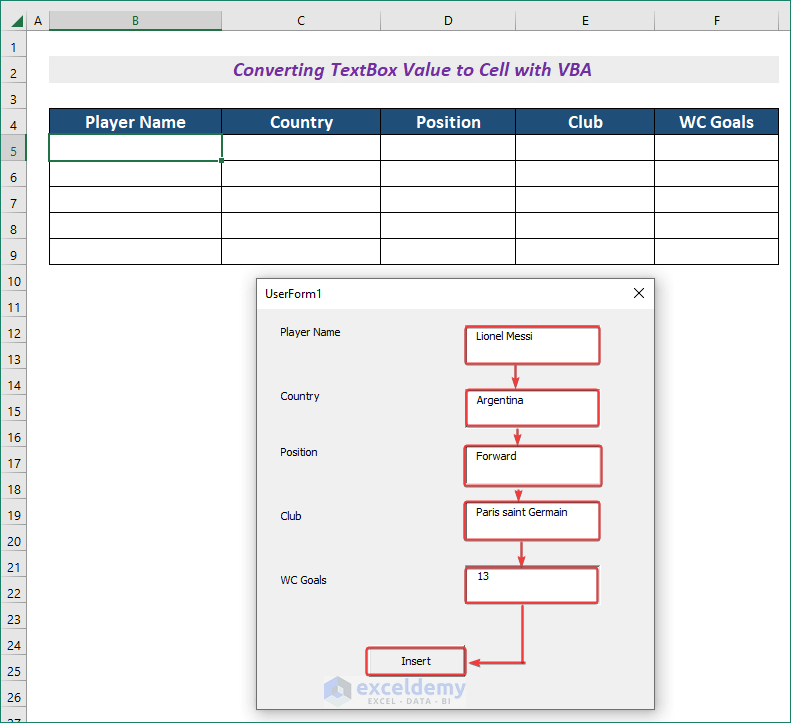
- The values in the TextBoxes will be converted into cell values.

- Insert a different player’s information and click on Insert again.
The information will be inserted into the next row.

Read More: Excel VBA to Convert Textbox Value to Number
Download Practice Workbook
Related Articles
- How to Make Textbox Datepicker with Excel VBA
- How to Hide Textbox Using Excel VBA
- How to Use VBA to Change Textbox Text in Excel
- How to Add Text to Textbox Using Excel VBA
- How to Use Excel VBA Textbox Events
- How to Use VBA Textbox Properties in Excel
- How to Format TextBox for Phone Number in Excel VBA

