What Do ‘Delete and Shift Left’ Commands Mean in Excel VBA?
The Delete command in Excel VBA means to delete an entire column, row, or cell. The Shift left means to shift the other cells where the delete operation takes place. This implies that any cells immediately adjacent to the ones that were removed will be shifted over to fill the vacant space.
For example, you take a dataset from cell B4 to E12. Now you want to delete columns C and D. Column E will be moved to the left, so it becomes the new C column, and so on.
The simple VBA code you should follow to delete the cell value and shift left is stated below.
Sub DeleteCells()
Dim myRange As Range
Set myRange = Range("C4:D12") 'change to your desired range
myRange.Delete Shift:=xlToLeft
End Sub
How to Launch the VBA Editor in Excel
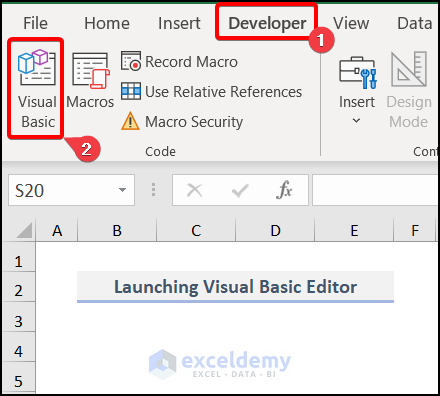
- Go to the Developer tab and choose Visual Basic.
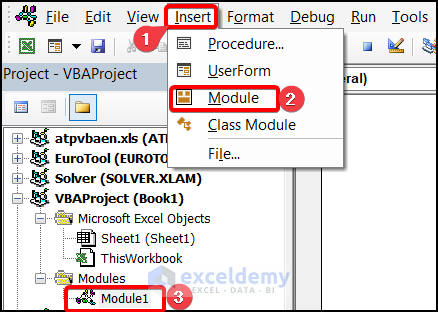
- Go to the Insert tab and select Module.
Excel VBA to Delete and Shift Left: 3 Examples with Cases
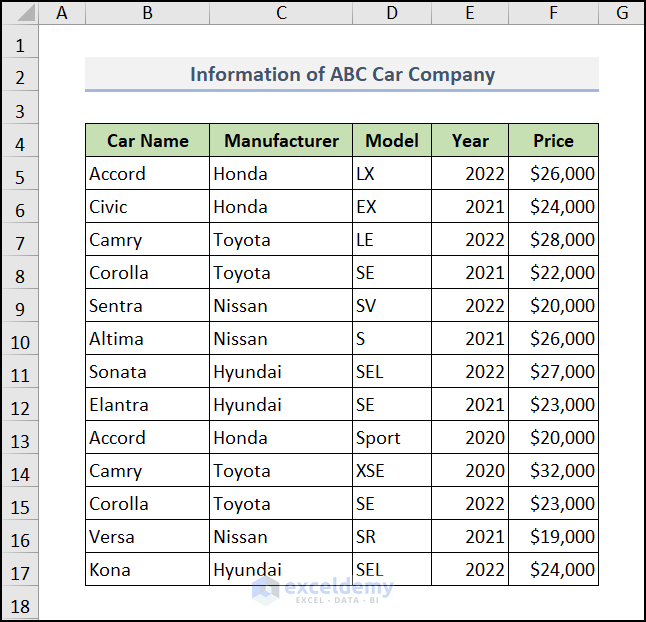
We’ll use the following simple dataset to showcase deleting and shifting left.
Example 1 – Delete Cells and Shift Left with VBA in Excel
Case 1.1 – Delete Cells for Any Value
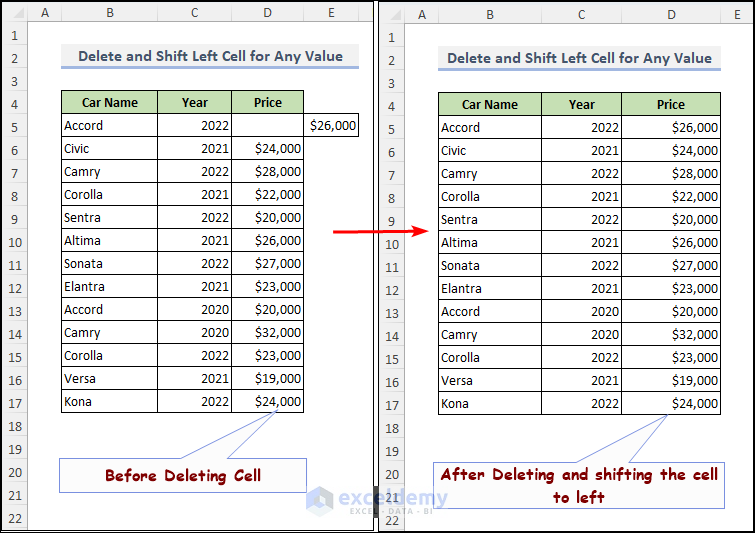
The value of D5 is shifted to the right side of the Price column. We need to delete the D5 cell value, which is blank, and move the value of cell E5 by shifting it to the left.
- Use the following VBA code.
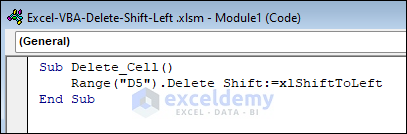
Sub Delete_Cell()
Range("F5").Delete Shift:=xlShiftToLeft
End Sub
The Delete command removes the value of cell D5 and Shift:=xlShiftToLeft shifts the value to the left.
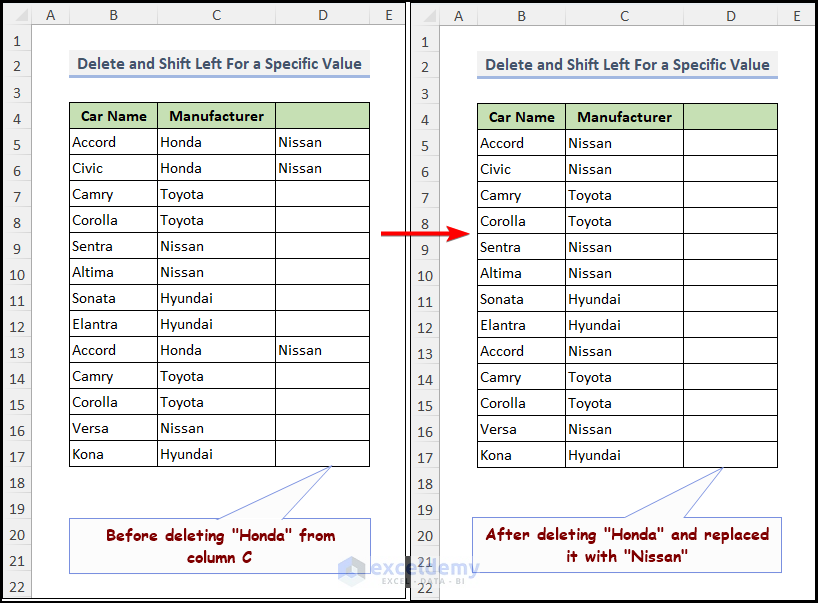
Case 1.2 – Delete Cells with a Specific Value
We want to replace all the Manufacturer names “Honda” with the name “Nissan”. We have used a VBA code where the search range is selected with “Honda” and then it will be replaced by “Nissan”.
- We have inserted a new module and written up the VBA code there.
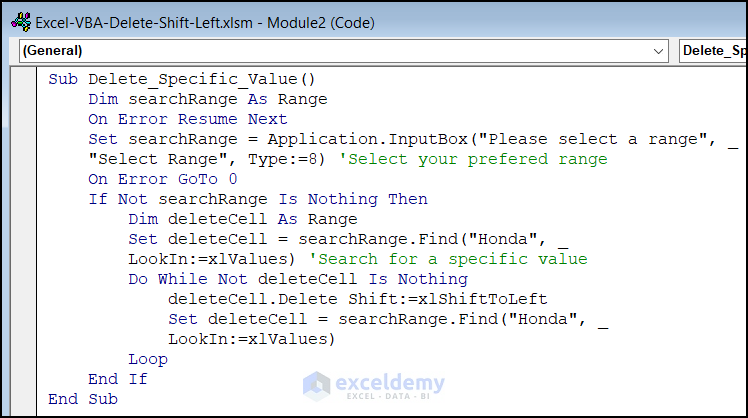
Sub Delete_Specific_Value()
Dim searchRange As Range
On Error Resume Next
Set searchRange = Application.InputBox("Please select a range", _
"Select Range", Type:=8) 'Select your preferred range
On Error GoTo 0
If Not searchRange Is Nothing Then
Dim deleteCell As Range
Set deleteCell = searchRange.Find("Honda", _
LookIn:=xlValues) 'Search for a specific value
Do While Not deleteCell Is Nothing
deleteCell.Delete Shift:=xlShiftToLeft
Set deleteCell = searchRange.Find("Honda", _
LookIn:=xlValues)
Loop
End If
End Sub
In a chosen range, this VBA function eliminates every occurrence of the value “Honda“.
Code Breakdown:
- The user can select a range of cells.
- The searchRange variable is given the range.
- Searching for the value “Honda” within the range is done using the searchRange.Find method.
- If “Honda” is detected, the cell containing the value is set to the deleteCell variable.
- The cell containing “Honda” is deleted using the deleteCell.Delete method, and the adjacent cells are relocated to the left to fill the empty space.
- The next instance of “Honda” within the range is located using the searchRange.Find(“Honda”, LookIn:=xlValues) command, and the loop is repeated until all instances of “Honda” have been eliminated.
For better visualization, we have attached the video of the whole process here.
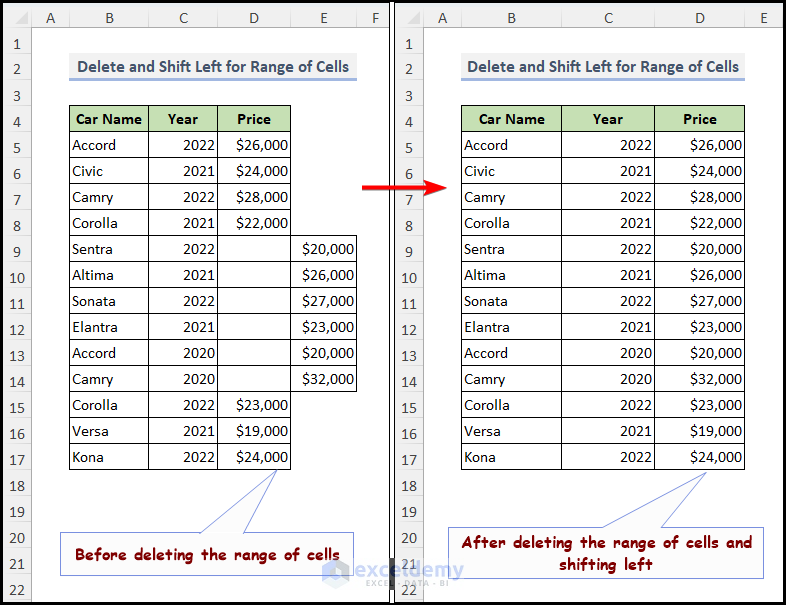
Example 2 – Delete the Selected Range/Selection and Shift Left with Excel VBA
In the dataset, the D9:D14 cells are blank, and their corresponding values exist on the right side. We want to delete the values for this range of cells.
- Use the following VBA code to do so.
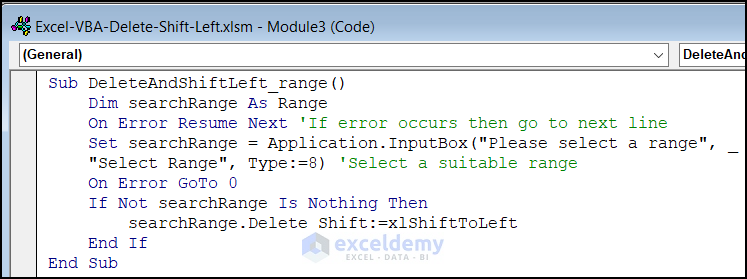
Sub DeleteAndShiftLeft_range()
Dim searchRange As Range
On Error Resume Next 'If error occurs then go to next line
Set searchRange = Application.InputBox("Please select a range", _
"Select Range", Type:=8) 'Select a suitable range
On Error GoTo 0
If Not searchRange Is Nothing Then
searchRange.Delete Shift:=xlShiftToLeft
End If
End Sub
This VBA script removes the chosen range and moves the surrounding cells to the left to fill the void.
Code Breakdown:
- The user is asked to choose a set of cells.
- The searchRange variable is given the range. it’s the searchRange.
- The range of cells is eliminated using the delete method, and the cells immediately to the right of the deleted cells are moved to the left to fill the void. The direction of the shift is specified by the Shift:=xlShiftToLeft option.
- The code will run the searchRange function if the user has chosen a valid range and the selected range is deleted and the other cells will be shifted left.
Follow the video for better clarification.
Read More: Excel VBA to Clear Contents of Range
Example 3 – Delete Columns and Shift Data to Left
Case 3.1 – Delete a Single Column and Shift Data to Left
In our dataset, we want to delete the “Year” column.
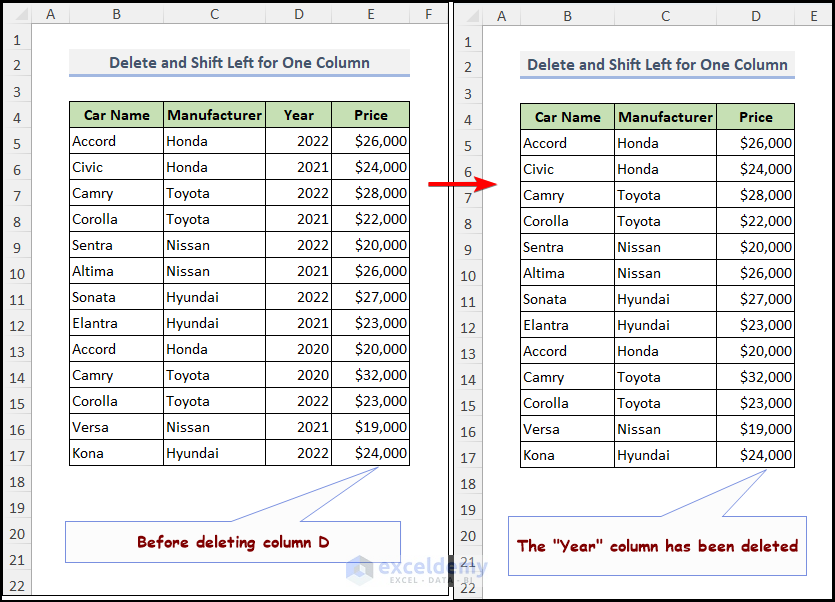
- The following VBA code will do the job:

Sub Delete_Column_ShiftLeft()
Range("D:D").Delete Shift:=xlToLeft
End SubCase 3.2 – Delete Multiple Columns and Shift Data to Left
In our dataset, we want to delete the Model and Year columns and shift the Price column to the left.
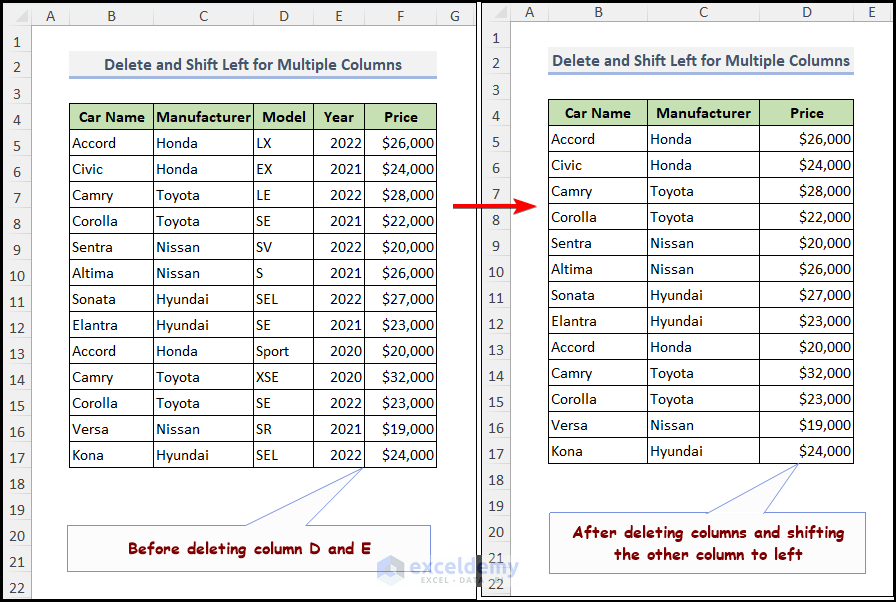
- Follow the below VBA code to delete multiple columns and shift the other columns to the left.
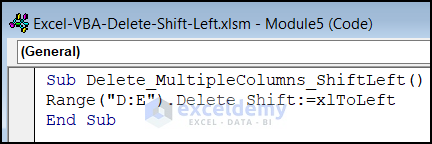
Sub Delete_MultipleColumns_ShiftLeft()
Range("D:E").Delete Shift:=xlToLeft
End SubCase 3.3 – Delete Columns Based on Cell Value and Shift Left
In our dataset, we want to delete the column where the model name LX exists.
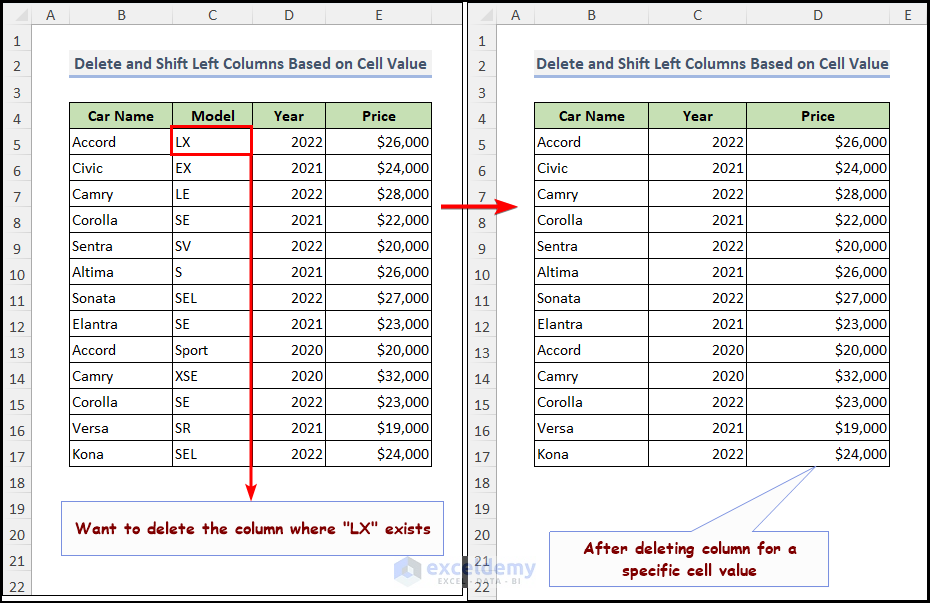
Use this VBA code to do so.

Sub Delete_Column_Specific_Value()
Dim searchRange As Range
On Error Resume Next
Set searchRange = Application.InputBox("Please select a range", _
"Select Range", Type:=8)
On Error GoTo 0
Dim searchValue As String
'Input the Search value that you looking for
searchValue = InputBox("Enter the search value:")
If Not searchRange Is Nothing And searchValue <> "" Then
Dim deleteColumn As Range
Set deleteColumn = searchRange.Find(searchValue, _
LookIn:=xlValues, LookAt:=xlWhole)
Do While Not deleteColumn Is Nothing
deleteColumn.EntireColumn.Delete Shift:=xlShiftToLeft
Set deleteColumn = searchRange.Find(searchValue, _
LookIn:=xlValues, LookAt:=xlWhole)
Loop
End If
End Sub
This VBA code deletes all columns that contain a specific value in a selected range. Here’s how it works:
Code Breakdown:
- The user is prompted to select a range of cells.
- The range is assigned to the searchRange variable.
- The searchRange.Find method is used to search for a specific value within the range. The user is prompted to enter the search value in an input box, and this value is assigned to the searchValue variable.
- If the searchRange is not “Nothing” and the searchValue is not an empty string, the code will execute. If either of these conditions is not met, the code will skip the deletion and exit the subroutine.
- The searchRange.Find method is used to find the first occurrence of the searchValue within the range. If the value is found, the cell containing the value is assigned to the deleteColumn variable.
- The deleteColumn.EntireColumn.Delete method is used to delete the entire column containing the searchValue, and the columns to the right of the deleted column are shifted to the left to fill the gap.
- The Set deleteColumn = searchRange.Find(searchValue, LookIn:=xlValues, LookAt:=xlWhole) statement is used to find the next occurrence of the searchValue within the range, and the loop continues until all occurrences of the value have been deleted.
- When you run the code, a prompt appears.
- Select the desired range.
- After pressing OK, you will get another prompt where you need to insert the value that you want to find.
- Press OK, and you will get the selected column deleted.
To make the process more clear, we have attached a video.
Case 3.4 – Delete a Column with Blank Cells and Shift Data to Left
If you need to delete a column that contains blanks, you can use the same code, but you need to change the search value and set it to blanks. As you can see, we have some blank spaces in the “Manufacturer” column.

- Here’s the code:
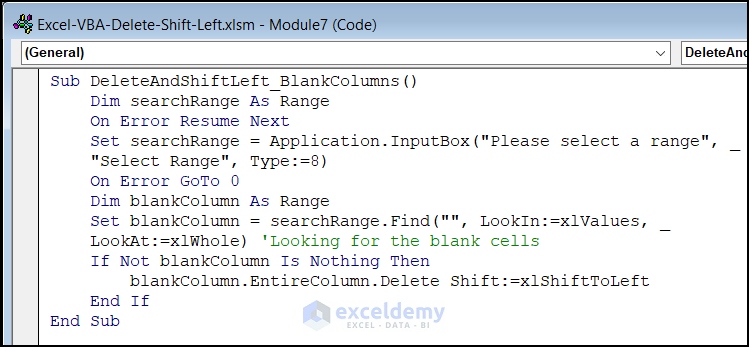
Sub DeleteAndShiftLeft_BlankColumns()
Dim searchRange As Range
On Error Resume Next
Set searchRange = Application.InputBox("Please select a range", _
"Select Range", Type:=8)
On Error GoTo 0
Dim blankColumn As Range
Set blankColumn = searchRange.Find("", LookIn:=xlValues, _
LookAt:=xlWhole) 'Looking for the blank cells
If Not blankColumn Is Nothing Then
blankColumn.EntireColumn.Delete Shift:=xlShiftToLeft
End If
End Sub
The code is almost the same as the code we stated in Method 3.3. The main difference is we set the searchRange. Find the blank statement. So, it finds the blank in the selected dataset and deletes the corresponding column where the blank occurs.
- When you press the F5 key, you will get a prompt to select the range.
- After selecting the range and pressing OK, you get your desired result.
How to Delete Rows with Excel VBA
Example 1 – Delete One Row with the Row Number
We have used the same dataset we used above. We will input a row number, and the delete command will delete the rows.

- Use this code to delete the row that contains Sentra.
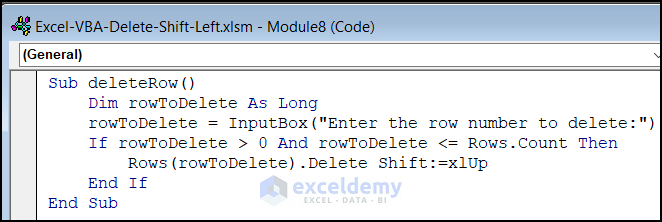
Sub deleteRow()
Dim rowToDelete As Long
rowToDelete = InputBox("Enter the row number to delete:")
If rowToDelete > 0 And rowToDelete <= Rows.Count Then
Rows(rowToDelete).Delete Shift:=xlUp
End If
End Sub
The code allows the user to select a row number with the help of the InputBox. The row will be deleted, and the other cells will shift up.
- When you run the code with the F5 key, you get a dialog box where you need to enter the row number that you want to delete. We put row 9 to delete.
Example 2 – Delete Rows Based on a Specific Value and Shift Rows Up
You can also delete a set of rows where a specific value exists. In our dataset, we want to delete the rows where the value “Toyota” exists.
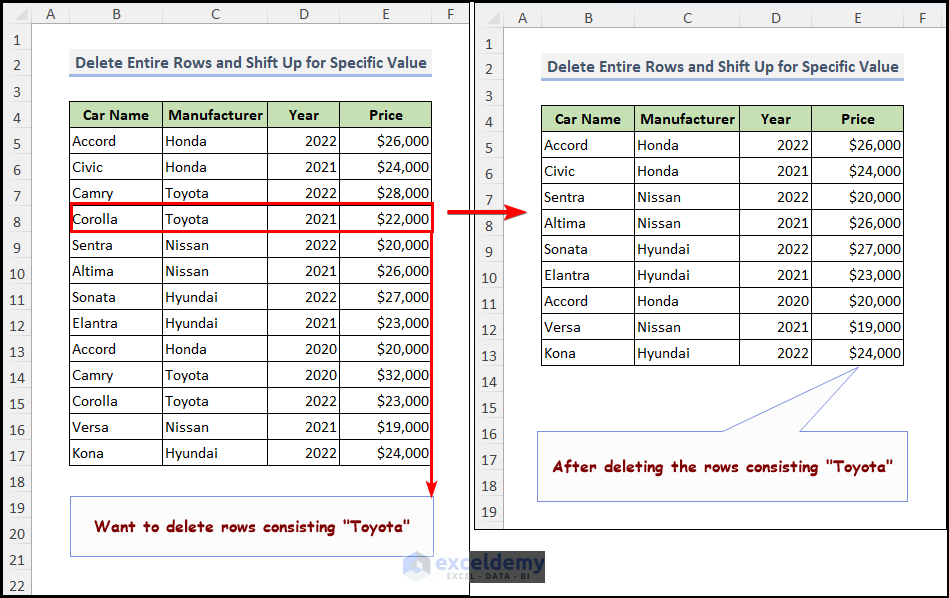
- This simple VBA code will search for the desired value and then delete the row where this value exists.
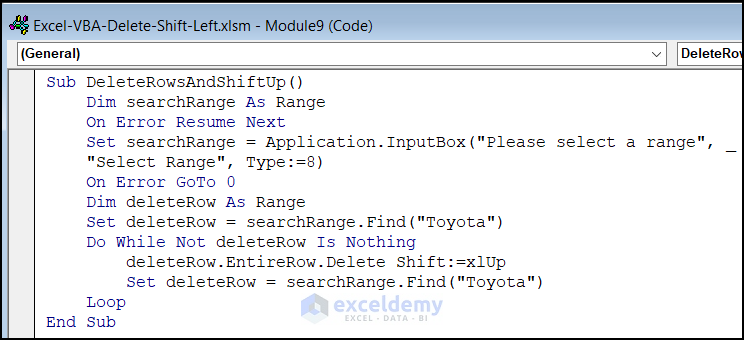
Sub DeleteRowsAndShiftUp()
Dim searchRange As Range
On Error Resume Next
Set searchRange = Application.InputBox("Please select a range", _
"Select Range", Type:=8)
On Error GoTo 0
Dim deleteRow As Range
Set deleteRow = searchRange.Find("Toyota")
Do While Not deleteRow Is Nothing
deleteRow.EntireRow.Delete Shift:=xlUp
Set deleteRow = searchRange.Find("Toyota")
Loop
End Sub
Code Breakdown:
- The macro prompts the user to select a range by using the InputBox method. The user selects a range on the worksheet.
- The range is assigned to the variable searchRange.
- The On Error Resume Next statement is used to ignore any errors that may occur during the execution of the code. This is done to prevent the macro from stopping if an error occurs during the execution.
- The Find method is used to find the first occurrence of the text “Toyota” in the searchRange.
- If the text “Toyota” is found, the EntireRow property is used to select the entire row that contains the text, and the Delete method is used to delete the row.
- The Shift parameter of the Delete method is set to xlUp, which means that the remaining rows will be shifted up to fill the space left by the deleted row.
- The Find method is used again to find the next occurrence of the text “Toyota” in the searchRange.
- The above steps are repeated until all rows containing the text “Toyota” have been deleted.
Run the code with the F5 key, and the dialog box appears to select the range. After selecting the range, you will have the desired range removed.
Read More: Excel VBA: Clear Contents If Cell Contains Specific Values
Frequently Asked Questions (FAQs)
What happens if I use “delete shift left” on a cell that is merged with other cells?
If you use the “delete shift left” command on a merged cell, the contents will be deleted but the neighboring cells won’t be shifted to the left. The united cell will instead be divided into many cells.
What is the difference between “Delete Shift Left” and “Delete Shift Up” in Excel VBA?
The commands “delete shift left” and “delete shift up” in Excel VBA both delete cells or ranges and move the remaining cells or rows to fill up the empty area. In contrast to “delete shift up,” which pushes the remaining rows up to fill the void, “delete shift left” shifts the remaining cells to the left to accomplish the same thing.
Is there a way to disable the “delete shift left” confirmation dialog in Excel VBA?
Yes, by changing the “Application.DisplayAlerts” value to False, you may make Excel VBA suppress the “delete shift left” confirmation box.
What is the difference between Clear and Delete commands in Excel VBA?
The Clear command removes cell contents and sometimes formatting if that is specified in the code. But the Delete command deletes the entire row/column/cell when we use it. It includes the formatting and shifts the cell to fill the gap.
The Delete command shows some errors, so it will delete all the formatting. If you make any errors, then you need to change all the formatting, while the Clear command only removes the particular cell contents. That’s why it is helpful in error handling.
Things to Remember
- The range of cells you want to eliminate must be specified, and this is crucial. Excel will prompt the user to choose the range if you don’t, which might not be what you want.
- The Delete and Clear methods are the two ways to delete cells in Excel VBA. Whereas the Clear technique merely clears the contents of the cells, the Delete method deletes the cells and moves the remaining cells to the left.
- Use the Application if you want to ask the user for permission to delete anything before it actually happens. To display a message box, use the DisplayAlerts property.
- Errors can occur if you attempt to delete cells that are protected or have data validation rules. To prevent your code from breaking, be sure to handle these errors appropriately.
Download the Practice Workbook
Related Articles
- How to Clear Contents of a Sheet with Excel VBA
- Excel VBA to Clear Contents of Named Range
- How to Clear Cells in Excel with Button
- How to Clear Contents Without Deleting Formulas Using VBA in Excel

