⧪ Method 1 – Taking the Necessary Inputs
Take the necessary inputs to the code. The inputs include
- The name of the source workbook (Workbook1 in this example)
- The name of the destination workbook (Workbook2 in this example)
- The full location of the source workbook on the computer.
- The full location of the destination workbook on the computer.
- The worksheet name of the source workbook (Sheet1 here).
- The worksheet name of the destination workbook (Also Sheet1 here).
Book1_Name = "Workbook1"
Book2_Name = "Workbook2"

Book1_Location = "C:\Users\Default User.DESKTOP-BEHT2NG\Desktop\Rifat\4273"
Boook2_Location = "C:\Users\Default User.DESKTOP-BEHT2NG\Desktop\Rifat\4273"

Book1_Sheet = "Sheet1"
Book2_Sheet = "Sheet1"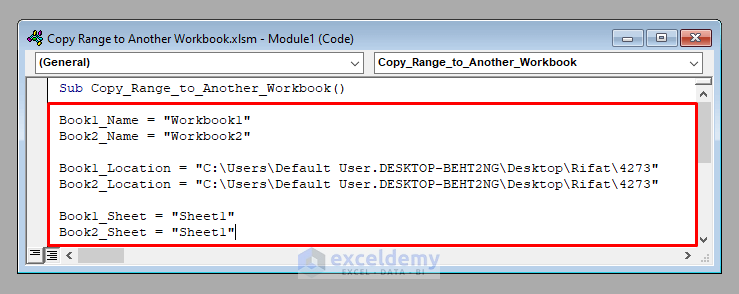
⧪ Method 2 – Opening Source Workbook and Copying the Desired Range
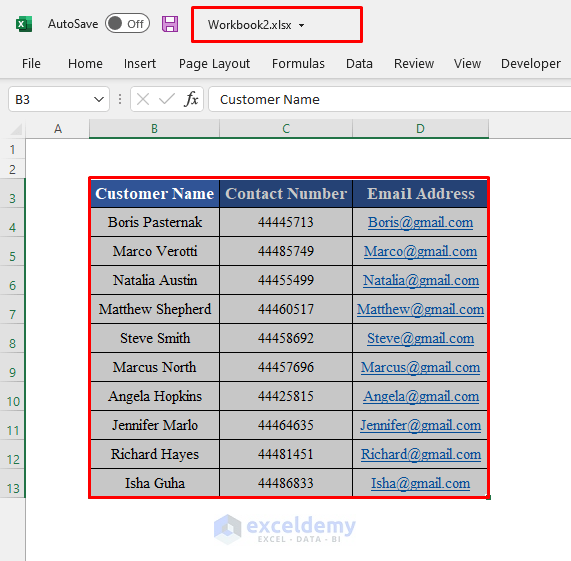
Open the source workbook (Workbook1) and copy the desired range (B3:D13) from there.
Workbooks.Open Book1_Location + "\" + Book1_Name + ".xlsx"
Worksheets("Sheet1").Range("B3:D13").Copy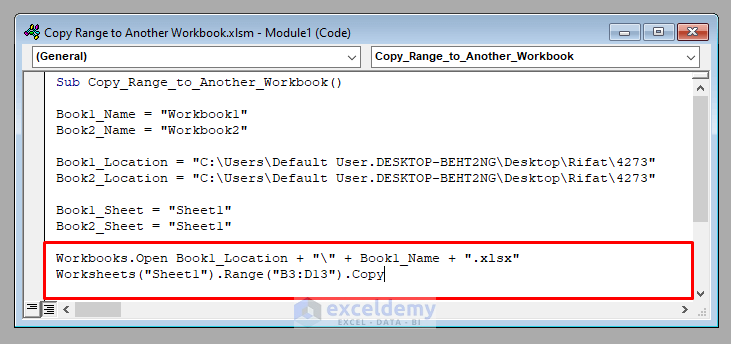
Notes:
- The extension of both the workbooks is .xlsx. If the extension of any workbook is different (Like .xlsm or .xlsb), use that instead.
- Copy all the used cells of the workbook, use the UsedRange property of VBA.
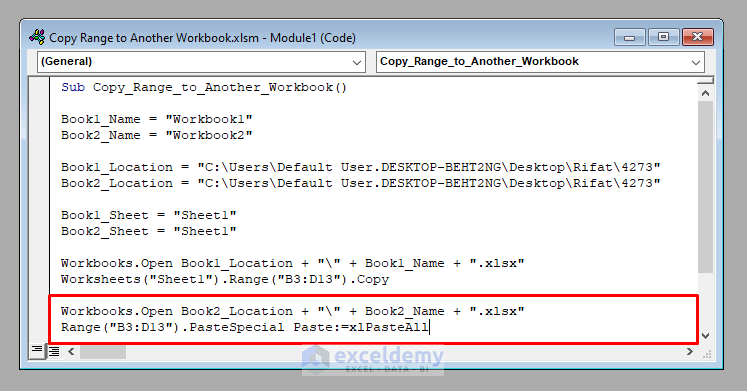
⧪ Method 3 – Opening Destination Workbook and Pasting the Copied Range
We used the xlPasteAll property of the PasteSpecial method of VBA.
Workbooks.Open Book2_Location + "\" + Book2_Name + ".xlsx"

Range("B3:D13").PasteSpecial Paste:=xlPasteAll
⧪ Method 4 – Turning Off the CutCopy Mode
Turn the CutCopy Mode to False.
Application.CutCopyMode = False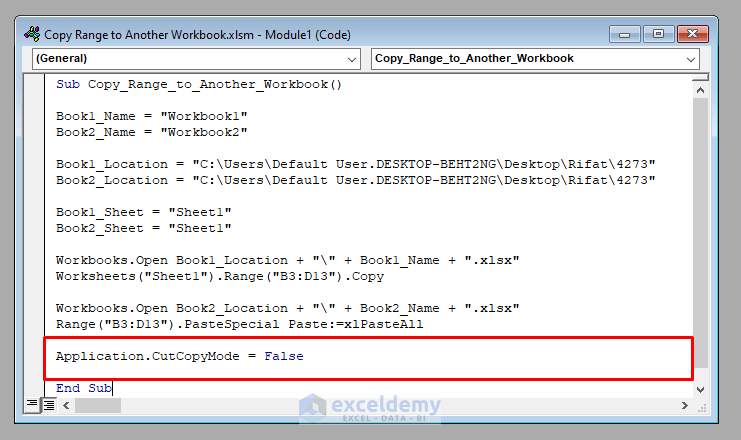
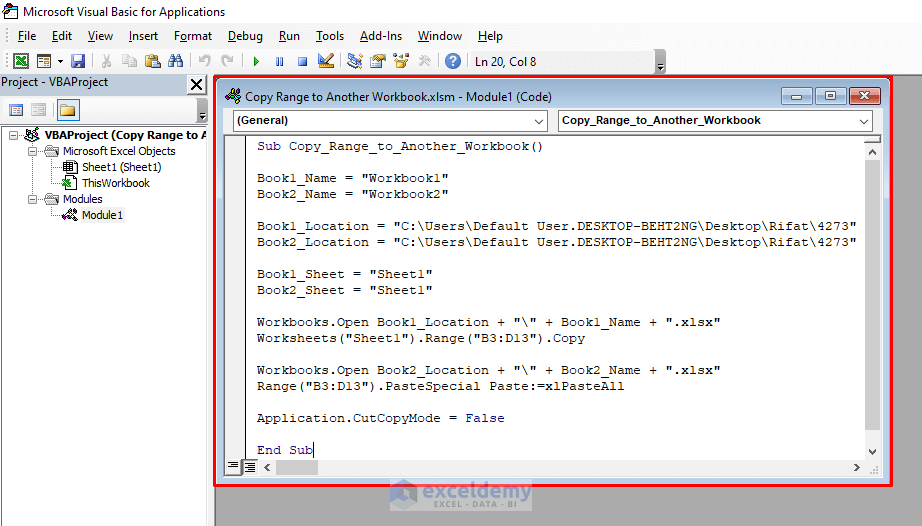
The complete VBA code will be:
⧭ VBA Code:
Sub Copy_Range_to_Another_Workbook()

Book1_Name = "Workbook1"
Book2_Name = "Workbook2"

Book1_Location = "C:\Users\Default User.DESKTOP-BEHT2NG\Desktop\Rifat\4273"
Book2_Location = "C:\Users\Default User.DESKTOP-BEHT2NG\Desktop\Rifat\4273"

Book1_Sheet = "Sheet1"
Book2_Sheet = "Sheet1"

Workbooks.Open Book1_Location + "\" + Book1_Name + ".xlsx"
Worksheets("Sheet1").Range("B3:D13").Copy

Workbooks.Open Book2_Location + "\" + Book2_Name + ".xlsx"
Range("B3:D13").PasteSpecial Paste:=xlPasteAll

Application.CutCopyMode = False

End Sub
Developing the Macro to Copy Range to Another Workbook Using Excel VBA
We’ve seen the step-by-step analysis of the code to copy a range from one workbook to another using VBA.
See how to develop a Macro to run the code.
⧪ Method 1 – Opening the VBA Window
Press ALT + F11 on your keyboard to open the Visual Basic window.
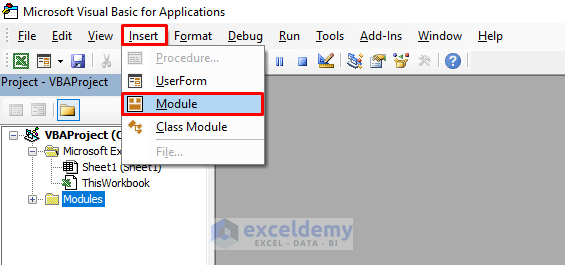
⧪ Method 2 – Inserting a New Module
Go to Insert > Module in the toolbar. Click on Module. A new module called Module1 (or anything else depending on your past history) will open.
⧪ Method 3 – Putting the VBA Code
This is the most crucial step. Insert the given VBA code in the module. Change the name of the workbook to the one you require.
⧪ Method 4 – Running the Code
Click the Run Sub / UserForm tool from the toolbar above.
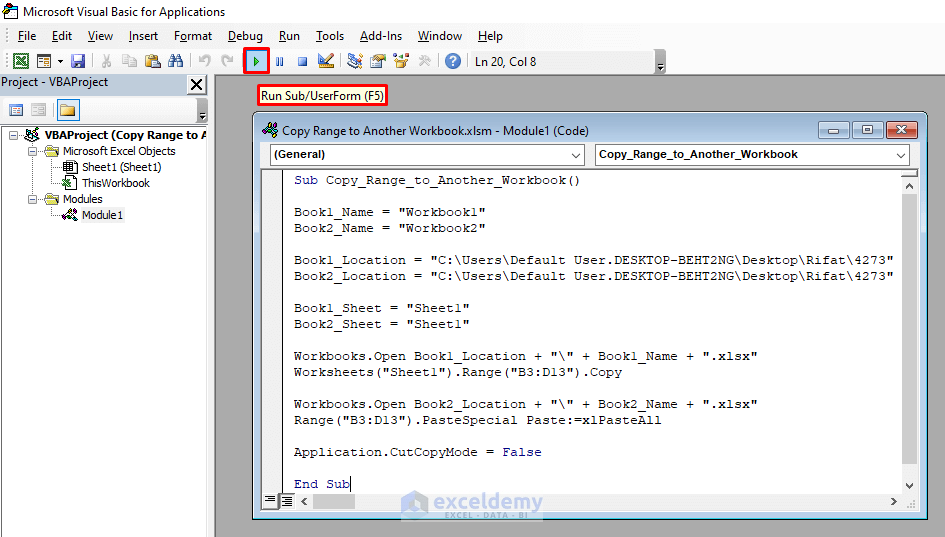
- The source workbook (Workbook1) and the destination workbook (Workbook2) will open, and the selected range will be copied from the source workbook to the destination workbook.
Things to Remember
- For pasting the copied range we’ve used the xlPasteAll property of the PasteSpecial method of VBA. Along with it, there are 11 more properties of the PasteSpecial method. You can have a glance at them if you are interested.
Download Practice Workbook
Download this practice workbook to exercise while you are reading this article.
Related Articles
- Macro to Copy Specific Columns from One Worksheet to Another in Excel
- Excel VBA to Copy Rows to Another Worksheet Based on Criteria
- How to Open Another Workbook and Copy Data with Excel VBA
- Excel VBA to Loop Through Files in Folder and Copy Data
- How to Open All Excel Files in a Folder and Copy Data Using VBA


This is one of the best implementation of the Copy/Paste VBA method. Love how tidy the code is, defining the inputs instead of hard coding it.
Personally, I like to define the inputs on a dedicated sheet in the workbook, which allows other users to change it without opening the code at all. But an even better version that my firm use as a standard template is add a loop so that the code will read through all the inputs in the table, to copy and paste items.
Anyway, thank you for bringing this information to the masses.