How to Launch the VBA Editor in Excel
The Developer tab contains the VBA applications. Enable the Developer tab.
Note: By default, the Developer tab is hidden.
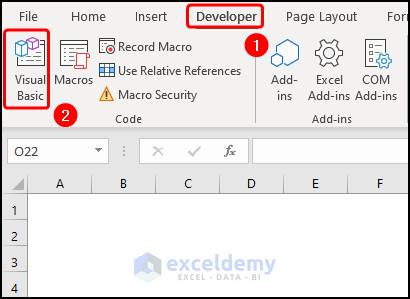
In the Developer tab, click Visual Basic in Code.

A new window is displayed.
- Click Insert and choose Module.
- Enter your VBA code and click Run or press F5.
The Application.ActiveCell Property in Excel VBA
The Application.ActiveCell property returns a range object that represents the active cell in the selected window.
- Syntax
expression.ActiveCellexpression is a variable representing the Application object.
- Remarks
The ActiveCell property returns the current cell in the active window if no object qualifier is given. It is important to differentiate between the selection and the active cell. The ActiveCell represents a single cell in the current selection, so even if multiple cells are selected, there is only one ActiveCell.
The Range.Offset Property in Excel VBA
The Range.Offset returns an offset range from the chosen range represented by a VBA range object.
- Syntax
expression.Offset (RowOffset, ColumnOffset)expression variable refers to a Range object.
- Arguments
| ARGUMENT | REQUIRED/OPTIONAL | EXPLANATION |
|---|---|---|
| RowOffset | Required | The number of rows to offset.
|
| ColumnOffset | Optional | The number of columns to offset.
|
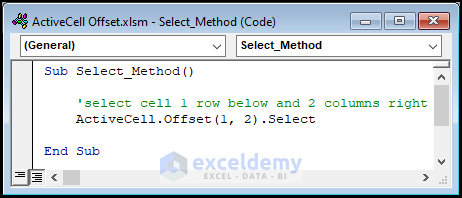
Example 1 – Moving the ActiveCell to Another Cell using the VBA ActiveCell.Offset.Select Method
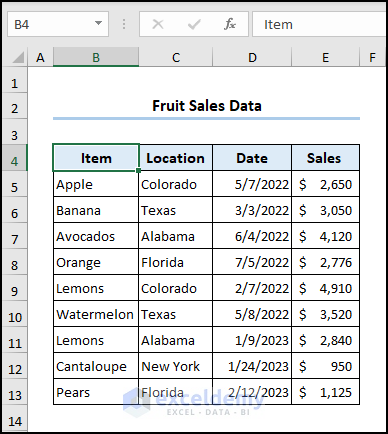
The sample dataset showcases Fruit Sales, including Item, Location, Date, and Sales.

Use the ActiveCell.Offset.Select method to move the active cell from B4 to the D5. Set the RowOffset argument value to 1 and the ColumnOffset argument value to 2. The ActiveCell will move 1 row downward and 2 columns to the right.
- Follow the previously described steps to insert a Module.
- Enter the code into the Module window >> click Run or press F5.
Sub Select_method()
'select cell 1 row below and 2 columns right
ActiveCell.Offset(1, 2).Select
End Sub
Example 2 – Entering a Cell Value with the VBA ActiveCell.Offset.Value Method
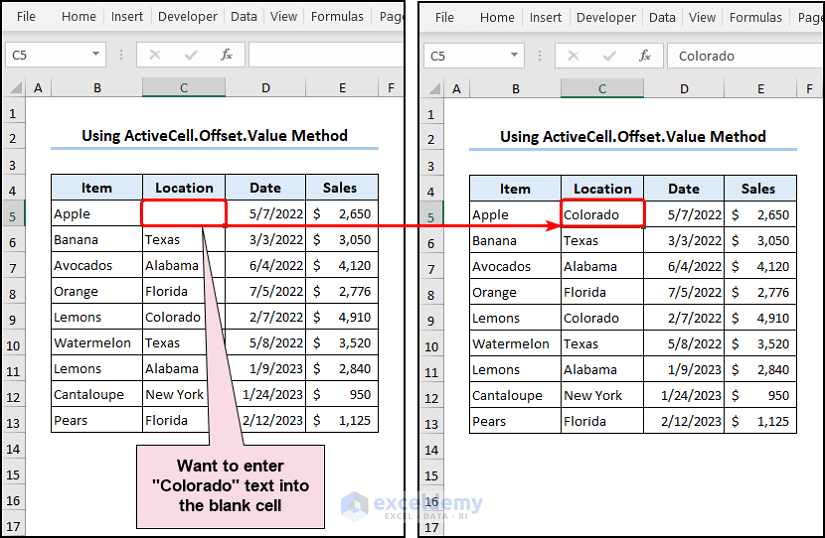
Using this VBA macro, you can enter text data into the blank cell C5 by offsetting the value.
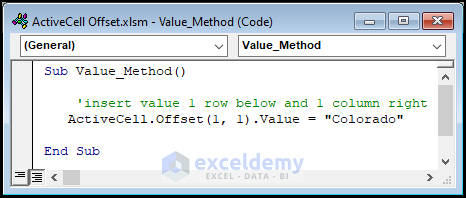
The ActiveCell.Offset.Value method enters the text “Colorado” in C5 which is 1 row below and 1 column to the right of the currently active cell B4.
Sub value_method()
'insert value 1 row below and 1 column right
ActiveCell.Offset(1, 1).Value = "Colorado"
End Sub
Example 3 – Selecting a Range Using the ActiveCell.Offset and the Range Object Functions
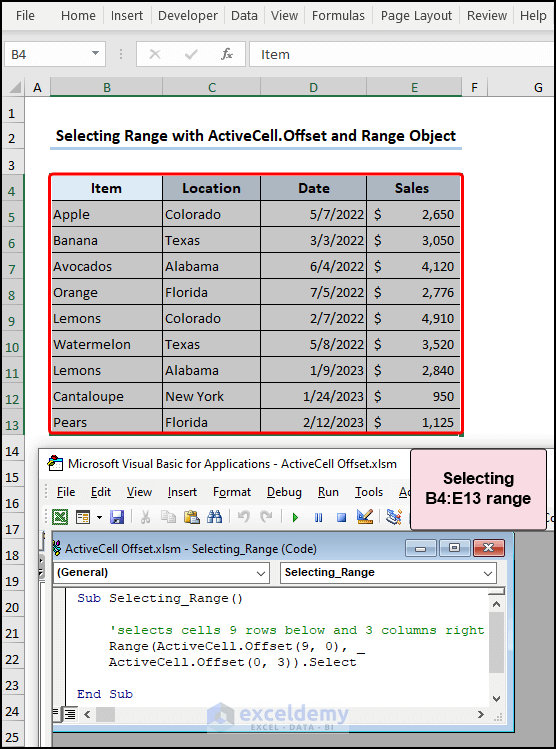
- Select a continuous range of cells by combining the ActiveCell.Offset and Range objects Functions.
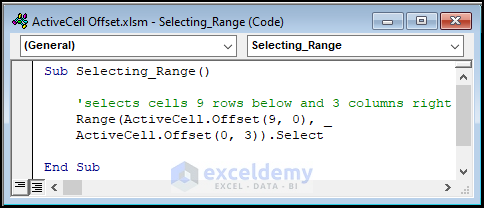
The “Selecting_Range” sub-routine selects a range of cells starting 9 rows below the current ActiveCell and extending 3 columns to the right of the ActiveCell.
Sub Selecting_Range()
'selects cells 9 rows below and 3 columns right
Range(ActiveCell.Offset(9, 0), _
ActiveCell.Offset(0, 3)).Select
End Sub
You can watch the video, where we can select a range of cells by combining the ActiveCell.Offset and Range objects.
Example 4 – Copying a Range of Cells
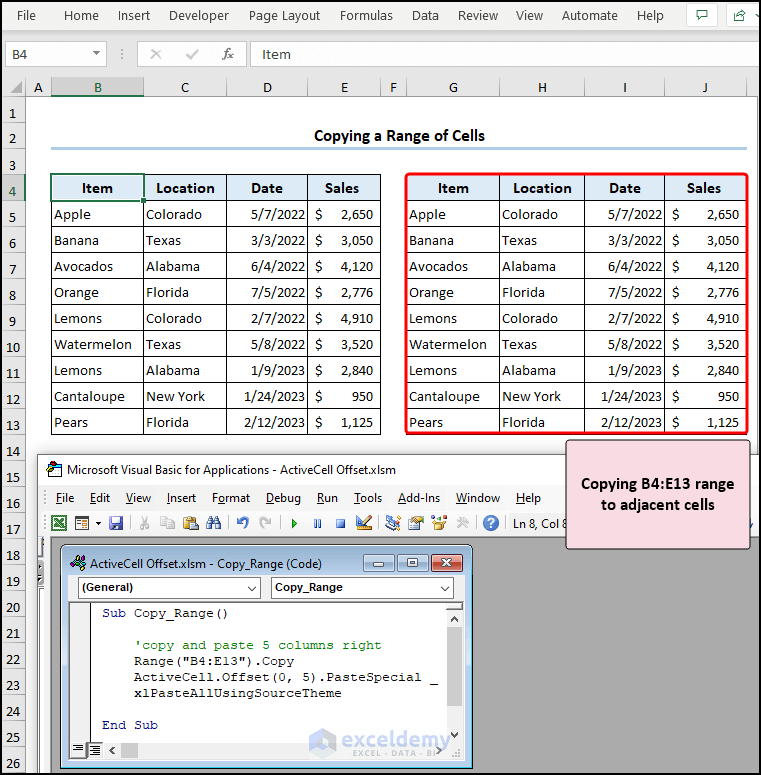
- To copy B4:E13 and paste it into G4:J13 cells, use this code.

This VBA macro copies B4:E13 and pastes it into a new location 5 columns to the right of the currently ActiveCell. The PasteSpecial method pastes the values with formatting and styling of the source theme.
Sub Copy_Range()
'copy and paste 5 columns right
Range("B4:E13").Copy
ActiveCell.Offset(0, 5).PasteSpecial _
xlPasteAllUsingSourceTheme
End Sub
Example 5 – Entering Data into Adjacent Cells
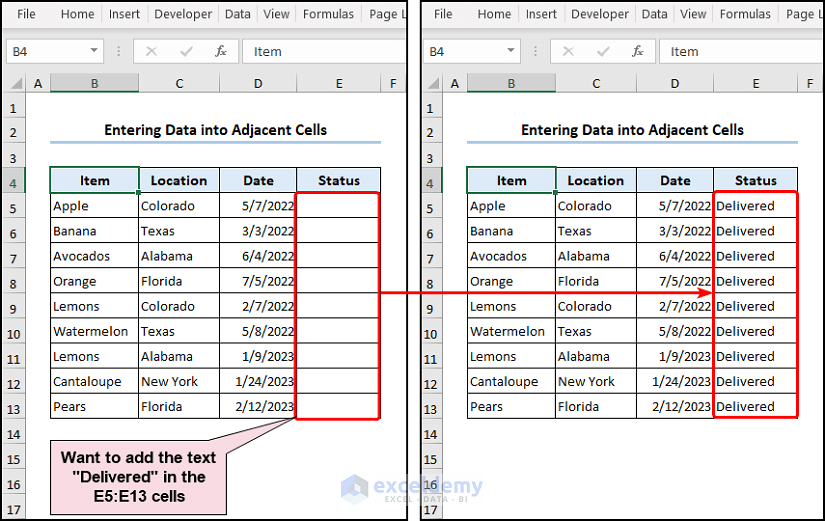
- Fill up the adjacent cells with the same text data using the ActiveCell.Offset.Value method and a Do While loop.

The Do While loop inserts the text “Delivered” 3 into the cell that is adjacent to each non-empty cells in the columns. The ActiveCell.Offset.Value method offsets the text values 3 columns to the right and 1 row down from the current ActiveCell.
Sub Enter_Data_Adjacent_Cells()
'loop and insert value until active cell is empty
Do While ActiveCell.Value <> ""
ActiveCell.Offset(1, 3).Value = "Delivered"
ActiveCell.Offset(1, 0).Select
Loop
End Sub
Read More: Excel VBA Offset Within Loop
Example 6 – Creating a Dynamic Named Range
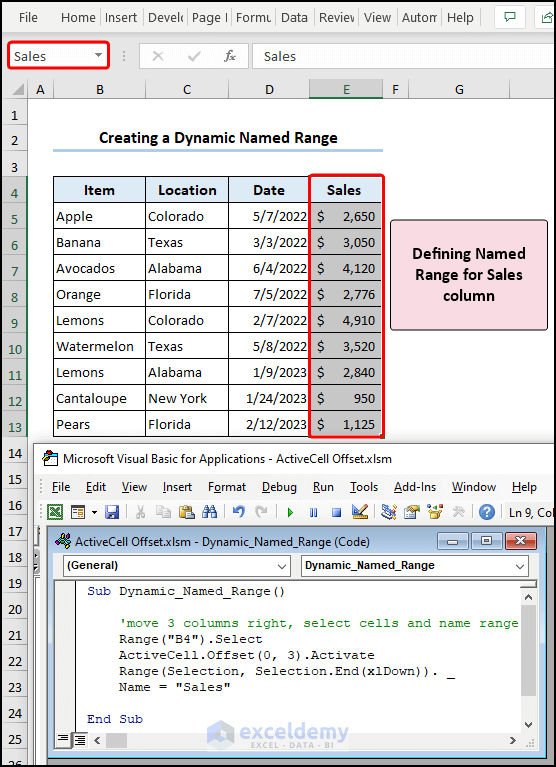
- Create a Named Range that refers to the Sales column. Select E4:E13 and you’ll see the Sales Named Range in the Name Box.
This macro defines a Named Range by choosing 3 columns to the right of the ActiveCell B4, and selecting all the cells until the last row. The Named Range is named Sales.
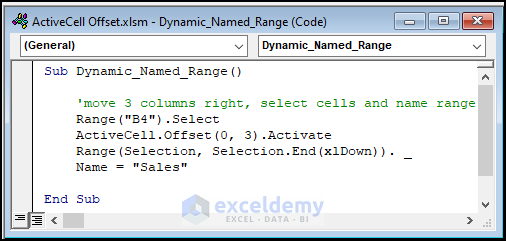
Sub Dynamic_Named_Range()
'move 3 columns right, select cells and name range
Range("B4").Select
ActiveCell.Offset(0, 3).Activate
Range(Selection, Selection.End(xlDown)). _
Name = "Sales"
End Sub

- Go to Formulas >> Name Manager to find the Sales Named Range.
Example 7 – Finding the Next Occurrence of a Value
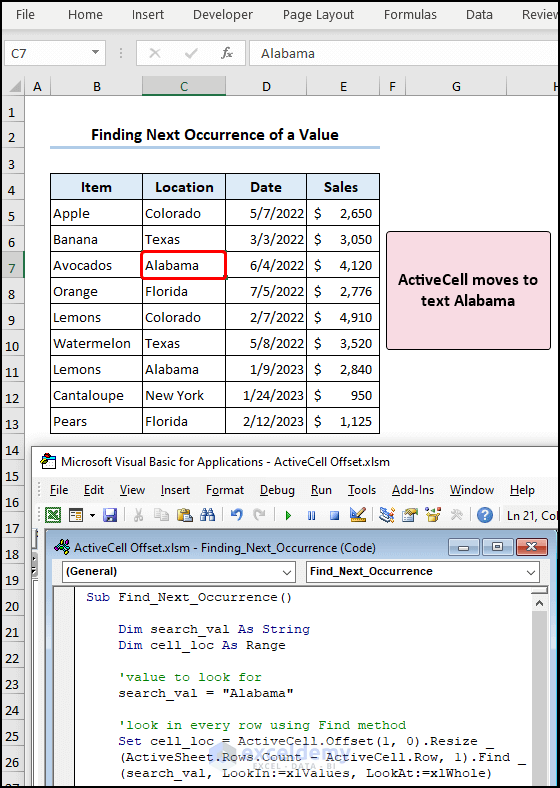
- The text “Alabama” occurs multiple times in a column. To find each occurrence of this word, use the code:

The ActiveCell is moved to the column header. If the target text exists in that column the ActiveCell moves to that cell. Otherwise, the program displays the message: the value was not found.
Sub Find_Next_Occurrence()
Dim search_val As String
Dim cell_loc As Range
'value to look for
search_val = "Alabama"
'look in every row using Find method
Set cell_loc = ActiveCell.Offset(1, 0).Resize _
(ActiveSheet.Rows.Count - ActiveCell.Row, 1).Find _
(search_val, LookIn:=xlValues, LookAt:=xlWhole)
'if found select value else return message
If Not cell_loc Is Nothing Then
cell_loc.Select
Else
MsgBox "The value was not found"
End If
End Sub
Code Breakdown:
- Declares the variables “search_val” and “cell_loc” String and Range.
- Assigns the text “Alabama” to the search_val variable.
- The VBA Offset method moves the ActiveCell one row down and the Resize method searches all cells until the last cell.
- The VBA Find method searches for the specified value within the range and finds an exact match.
- The If Then Else statement checks if the matching cell was found; if it is found the ActiveCell moves to that location.
- If the matching cell is not found, a MsgBox displays “The value was not found”.
Example 8 – Summing a Range of Cells using the ActiveCell.Offset Function
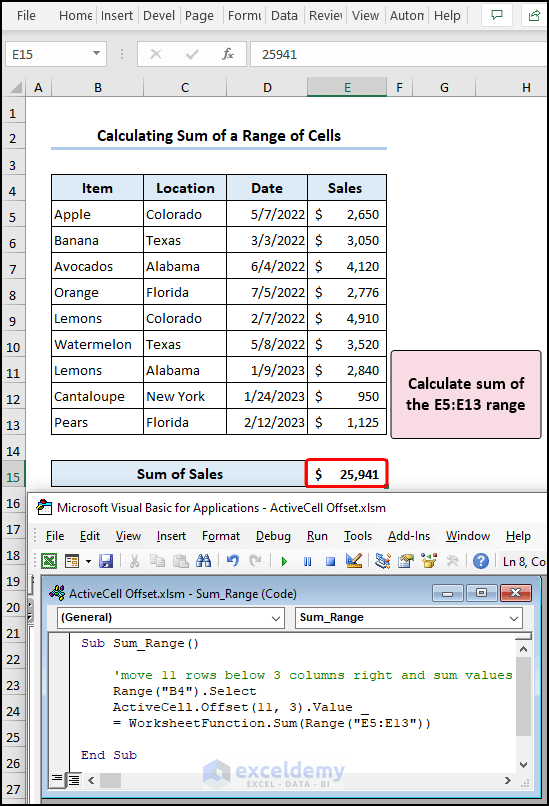
- Sum the values in a range and get the result in a specified location using the ActiveCell.Offset.Value method.
The “Sum_Range” sub-program utilizes the VBA WorksheetFunction.Sum to return the total “Sales”. You can replace the VBA Sum function with VBA Average function to obtain the average sales.
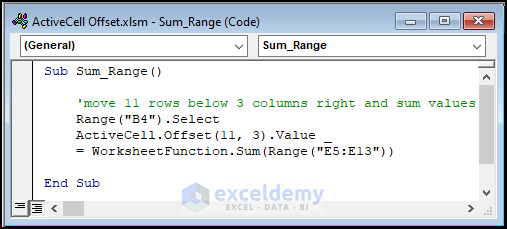
Sub Sum_Range()
'move 11 rows below 3 columns right and sum values
Range("B4").Select
ActiveCell.Offset(11, 3).Value _
= WorksheetFunction.Sum(Range("E5:E13"))
End SubExample 9 – Applying the ActiveCell.Offset and the CountIf Functions in Excel VBA
9.1 Counting the Number of Occurrences of a Text
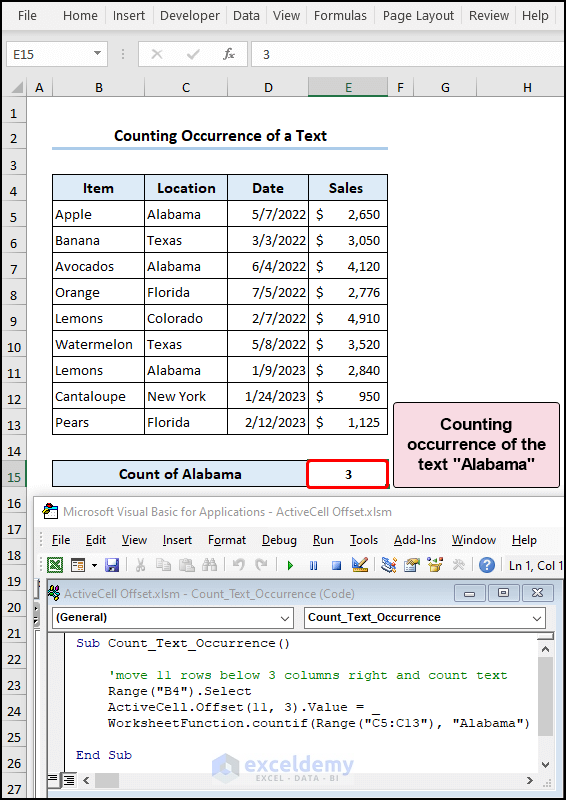
- To count the number of times the text “Alabama” occurs in a column, use this VBA code:
The “Count_Text_Occurrence” sub-program uses the VBA WorksheetFunction.CountIf to count the occurrence of the text “Alabama”.
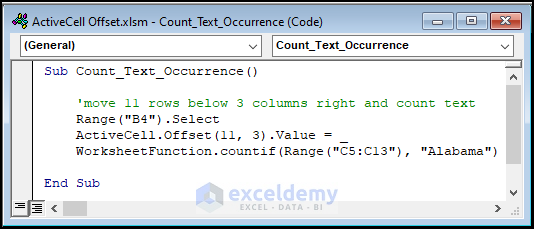
Sub Count_Text_Occurrence()
'move 11 rows below 3 columns right and count text
Range("B4").Select
ActiveCell.Offset(11, 3).Value = _
WorksheetFunction.countif(Range("C5:C13"), "Alabama")
End Sub
Code Breakdown:
- The first portion of this code works similarly to the one in the previous example.
- The WorksheetFunction.CountIf counts the text “Alabama” in C5:C13 and returns the result in E15.
9.2 Counting with Multiple Conditions (OR Criteria)
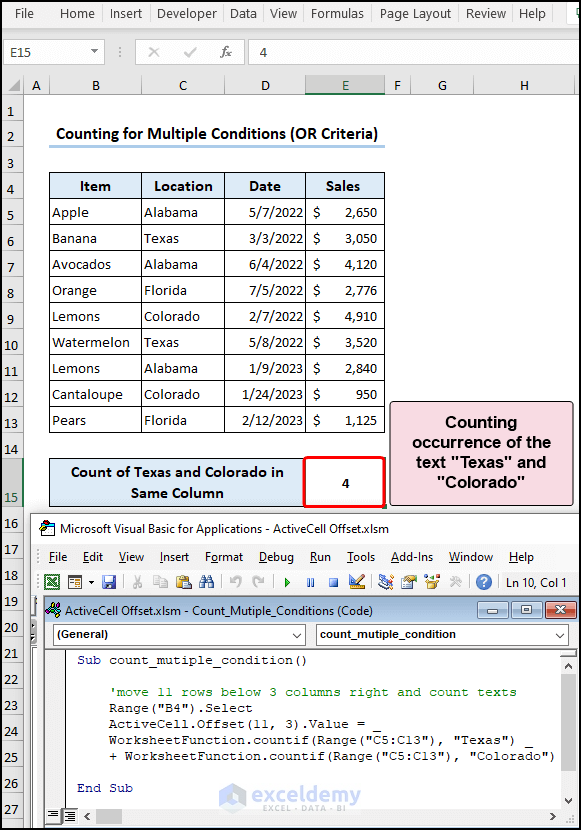
- To count the instances of the texts “Texas” or “Colorado” :
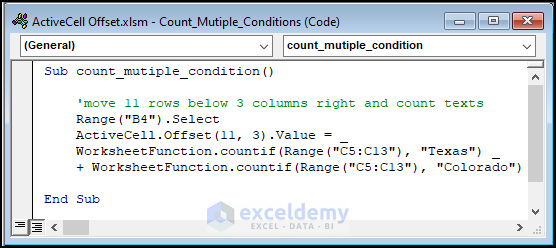
The “count_mutiple_condition” macro counts the occurrence of “Texas” or “Colorado”.
Sub count_mutiple_condition()
''move 11 rows below 3 columns right and count texts
Range("B4").Select
ActiveCell.Offset(11, 3).Value = _
WorksheetFunction.countif(Range("C5:C13"), "Texas") _
+ WorksheetFunction.countif(Range("C5:C13"), "Colorado")
End Sub
Code Breakdown:
- Using the addition (+) operator with the WorksheetFunction.CountIf, apply the OR criteria to count the occurrence of the texts “Texas” or “Colorado” in C5:C13.
Example 10 – Utilizing the ActiveCell.Offset and the SumIf Function in Excel VBA
10.1 Obtaining the Sum with a Numeric Condition
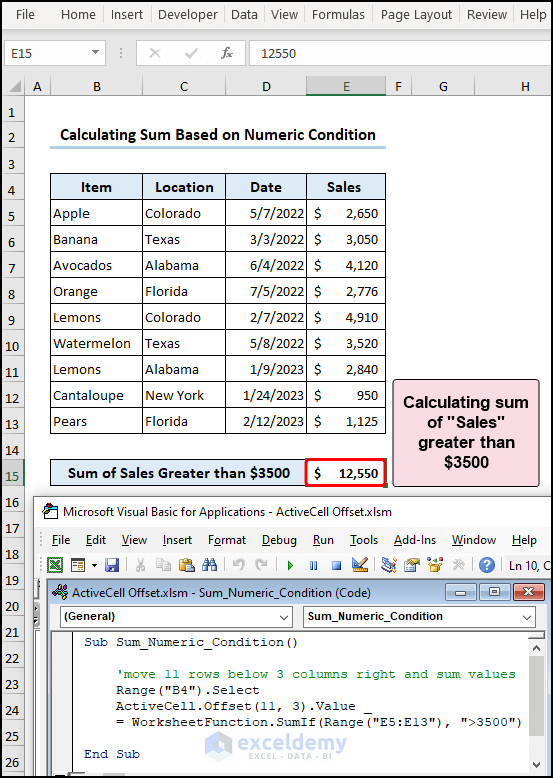
- Find “Sales” that exceed “$3500” using the VBA SumIf function.
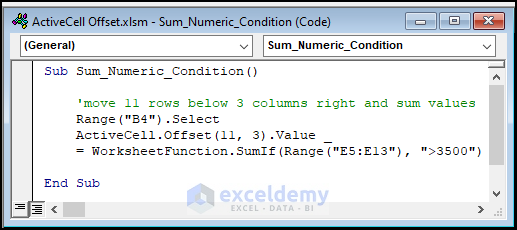
The “Sum_Numeric_Condition” sub-routine performs a summation in E5:E13 that satisfies the condition of “Sales” greater than “$3500”.
Sub Sum_Numeric_Condition()
'move 11 rows below 3 columns right and sum values
Range("B4").Select
ActiveCell.Offset(11, 3).Value _
= WorksheetFunction.SumIf(Range("E5:E13"), ">3500")
End Sub
Code Breakdown:
- The SumIf function of the WorksheetFunction object adds the values in E5:E13 that meet the condition. The condition is specified as “>3500” (values greater than “$3500”).
10.2 Calculating the Sum Using the Date Criteria
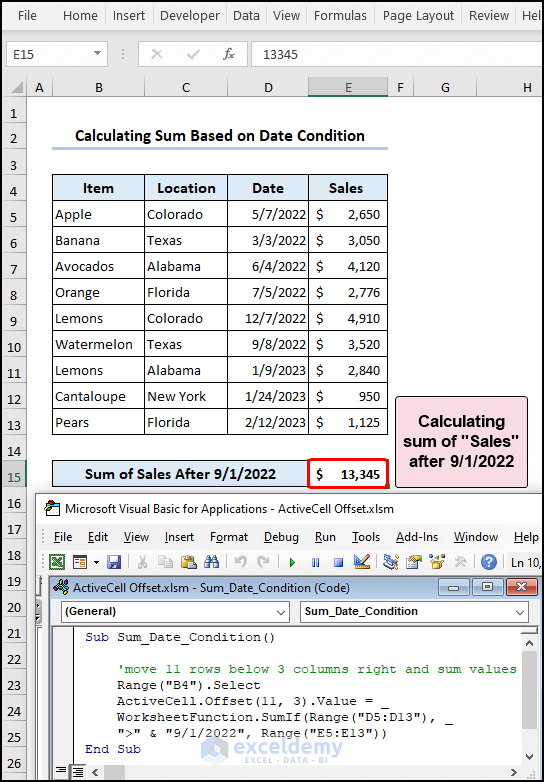
- Find “Sales” that occurred after “9/1/2023” using the VBA SumIf function:
The “Sum_Date_Condition” considers D5:D13 to check the dates after the specified date “9/1/2023” and calculates the sum total of the “Sales” in E5:E13.
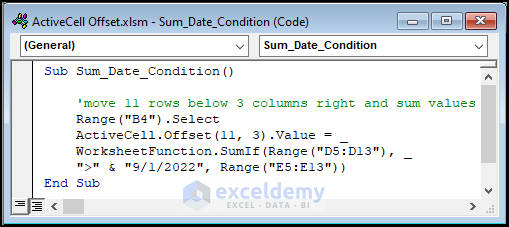
Sub Sum_Date_Condition()
'move 11 rows below 3 columns right and sum values
Range("B4").Select
ActiveCell.Offset(11, 3).Value = _
WorksheetFunction.SumIf(Range("D5:D13"), _
">" & "9/1/2022", Range("E5:E13"))
End Sub
Code Breakdown:
- The SumIf function adds the “Sales” values in E5:E13 based on the condition: “Date” values in D5:D13 greater than “9/1/2023”.
Example 11 – Using the ActiveCell.Offset to Format Cells Based on a Condition
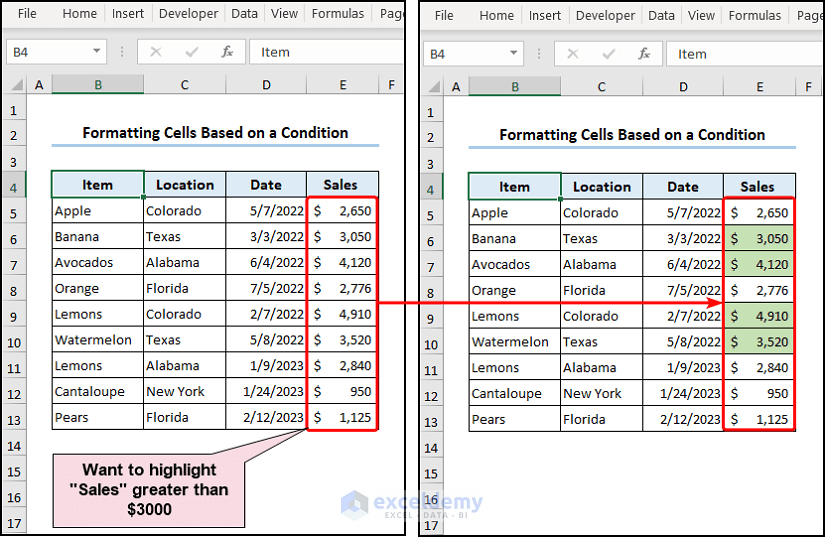
- VBA’s ActiveCell.Offset method can be used to format the cell color based on a condition (cell values greater than “$3000”).

The If Else statement checks whether the values in E5:E13 exceed “$3000”. If true, the cell color is changed to green.
Sub Format_Cells()
Dim cell As Range
'check if cell value > $3000, if so apply color
For Each cell In Range("E5:E13")
If cell.Value > 3000 Then
cell.Select
ActiveCell.Offset(0, 0).Select
With Selection.Interior
.Color = RGB(198, 224, 180)
End With
End If
Next cell
End Sub
Code Breakdown:
- The VBA For Each loop iterates through each cell in E5:E13.
- Nested into the For Each loop, the If statement checks if the cell value is greater than “$3000”.
- If the condition is met, the ActiveCell.Offset method selects the matched cell.
- Using the With statement, the Interior.Color property changes the cell color with the RGB function. The color code of the cell is RGB(198, 224, 180).
Example 12 – Deleting Rows Based on a Condition Using the VBA ActiveCell.Offset
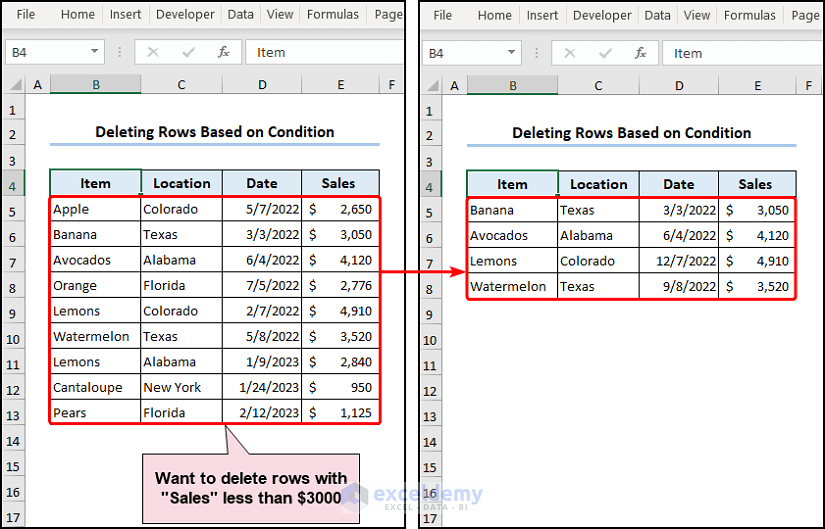
- Delete rows based on a condition (cell values greater than “$3000”) using the ActiveCell.Offset’s Row.Delete property.
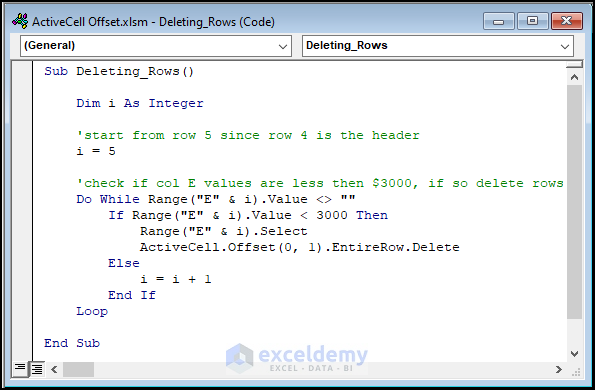
The VBA code uses the Do While and If Else statements to check the values in column E. If the value is less than “$3000”, rows are deleted. i=5 refers to the dataset values, since row 4 contains the column headers.
Sub Deleting_Rows()
Dim i As Integer
'start from row 5 since row 4 is the header
i = 5
'check if col E values are less then $3000, if so delete rows
Do While Range("E" & i).Value <> ""
If Range("E" & i).Value < 3000 Then
Range("E" & i).Select
ActiveCell.Offset(0, 1).EntireRow.Delete
Else
i = i + 1
End If
Loop
End Sub
Code Breakdown:
- The integer variable “i” starts checking from row 5, since row 4 is the column header.
- The Do While loop iterates through each row in column E until it encounters a blank cell.
- The If statement checks if the value in column E is less than $3000. If true, the Row.Delete property ActiveCell.Offset method deletes the entire row.
Example 13 – Finding Values with the ActiveCell.Offset and the VLookup Functions
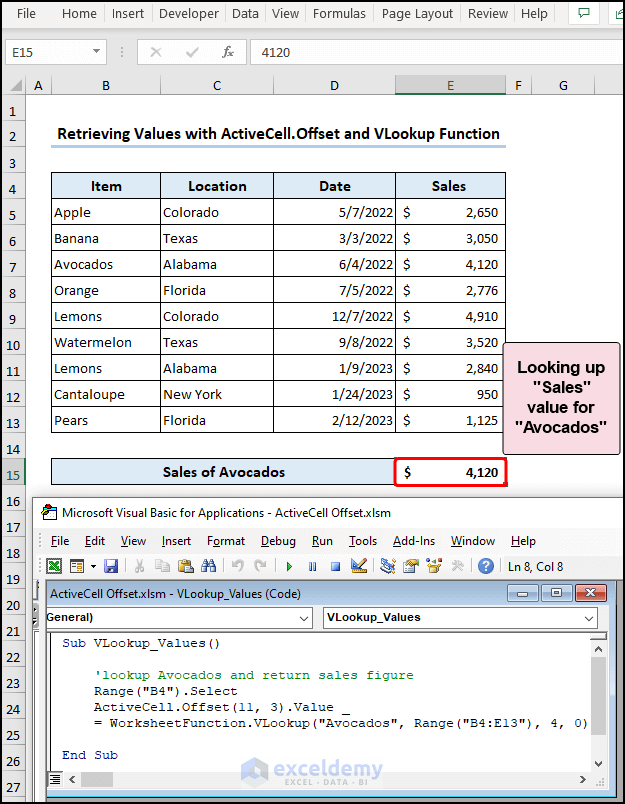
This code runs the VBA VLookup function to locate sales of “Avocados” in B4:E13.
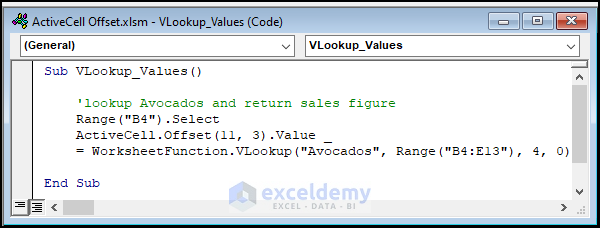
The VBA VLookup function checks B4:E13 for “Avocados” and returns the corresponding “Sales” figure.
Sub VLookup_Values()
'lookup Avocados and return sales figure
Range("B4").Select
ActiveCell.Offset(11, 3).Value _
= WorksheetFunction.VLookup("Avocados", Range("B4:E13"), 4, 0)
End Sub
How to Use the Range.Offset Property in Excel VBA (ActiveCell.Offset Alternative)

- Use the Range.Offset.Select to move to another cell.
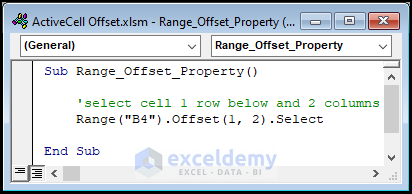
Here, Range(“B4”) selects B4, whereas the Offset(1, 2) moves the selection 1 row down and 2 columns to the right of the original cell. The Select method selects that cell in the worksheet.
Sub Range_Offset_Property()
'select cell 1 row below and 2 columns right
Range("B4").Offset(1, 2).Select
End Sub
How to Apply the Cells.Offset Property in Excel VBA
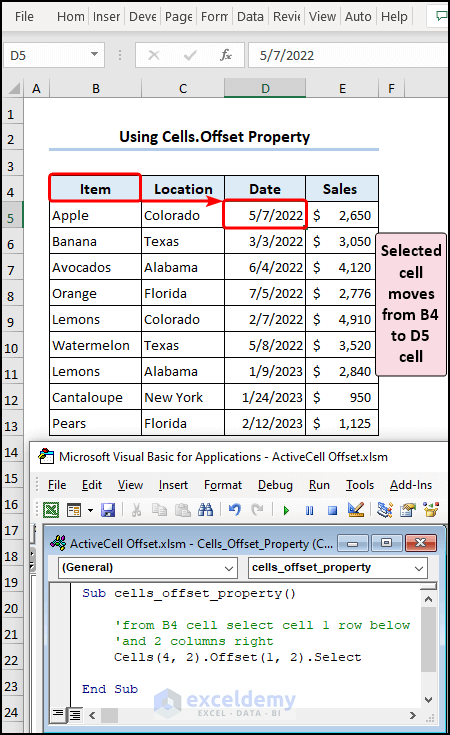
- Shift cells using the Cells.Offset property.
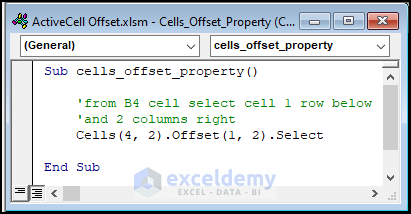
- Select B4 and the selection is moved 1 row down and 2 columns to the right using the Offset method.
Sub cells_offset_property()
Cells(4, 2).Offset(1, 2).Select
End Sub
Read More: Excel VBA Offset Column
Frequently Asked Questions
- How do you use the Offset method with a negative offset in Excel VBA?
Provide a negative value for the RowOffset or ColumnOffset. Use the following code to move the active cell one row upward
ActiveCell.Offset(-1, 0). Select- How do I Offset one column left in VBA?
To Offset one column to the left, set the RowOffset to 0 and ColumnOffset to -1. Use the code:
Sub OffsetColumnLeft()
' Get the currently selected column
Dim selectedColumn As Range
Set selectedColumn = Selection.EntireColumn
' Offset the column one cell to the left
selectedColumn.Offset(0, -1).EntireColumn.Select
End Sub
Download Practice Workbook
Download the following practice workbook.
Get FREE Advanced Excel Exercises with Solutions!
