Method 1 – Change the Default Date & Time Format to dd/mm/yyyy hh:mm:ss in Excel
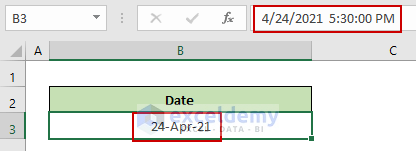
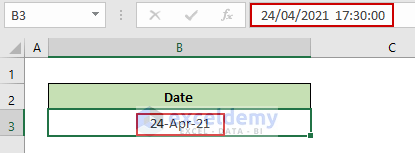
When we add a date in a cell of an Excel worksheet, it stores it in its default format. Here in cell B3, we entered 24 Apr 2021 5:30 PM. Excel stored it as 4/24/2021 5:30:00 PM that is as mm/dd/yyyy hh:mm:ss tt format.
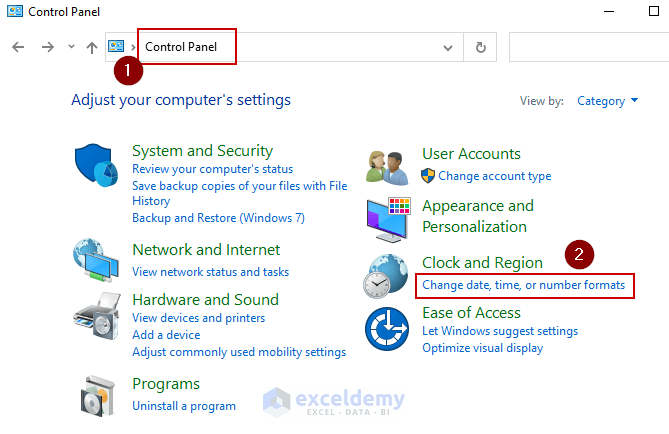
To check the default format-
- Go to the Control Panel.
- Under the Clock and Region , Click the Change date, time or number format link.
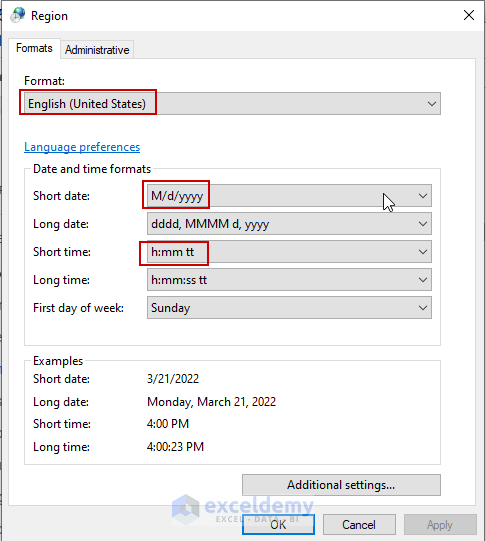
- In the Region window, we can see the computer’s default format as English(United States) that uses M/d/yyyy h:mm tt as its date and time format.
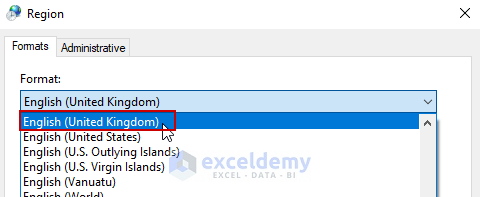
Change the Format to dd/mm/yyyy hh:mm:ss:
- From the Format dropdown, choose the English(United Kingdom) option.
- This region uses our desired format. Press OK to make it the default date and time format.

- Close the Excel Application and re-open it.
The date and time will now be in dd/mm/yyyy hh:mm:ss format.
Method 2 – Use of the TEXT Function to Convert a Date to dd/mm/yyyy hh: mm:ss Format in Excel
In the image below, we have a date that is in m/d/yyyy h:mm:ss AM/PM format in cell B5. Enter the following formula in cell C5.
=TEXT(B5,"dd/mm/yyyy hh:mm:ss") 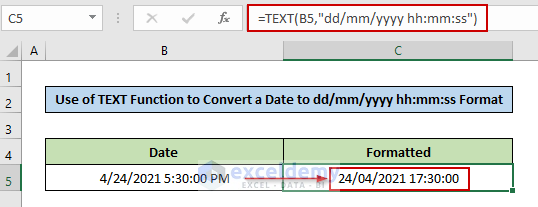
The date and time will be converted to dd/mm/yyyy hh:mm: ss format.
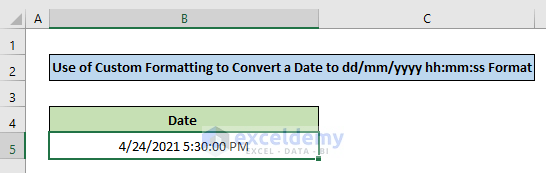
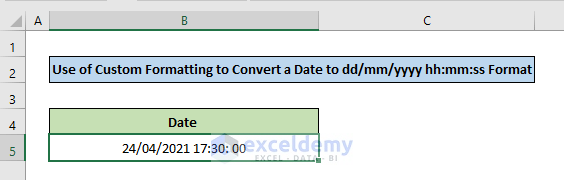
Method 3 – Convert a Date to dd/mm/yyyy hh:mm: ss Format Using Custom Formatting in Excel
- Select the cell (B5) that has the date in m/d/yyyy h:mm:ss AM/PM
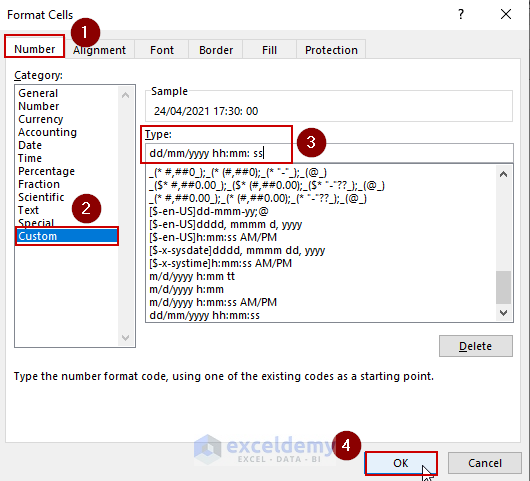
- Press Ctrl + 1 to open the Format Cells.
- In the Format cells window, go to the Number tab.
- From the Category list, choose the Custom option.
- In the Type input box put dd/mm/yyyy hh:mm: ss.
- Hit OK to save the change.
- The date format will change to dd/mm/yyyy hh:mm: ss.
Read More: Fix Excel Date Not Formatting Correctly
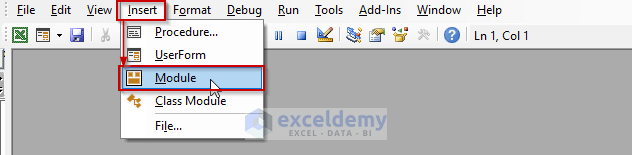
Method 4 – Run a VBA Code to Convert a Date to dd/mm/yyyy hh:mm:ss Format in Excel
- Go to the Developer tab from the Excel Ribbon.
- Click the Visual Basic option.

- In the Visual Basic For Applications window, click the Insert dropdown to select the New Module option.
- Copy and paste the following code in the visual basic editor.
Sub ConvertDateFormat()
Range("B5").NumberFormat = "dd-mm-yyyy hh:mm:ss"
End Sub
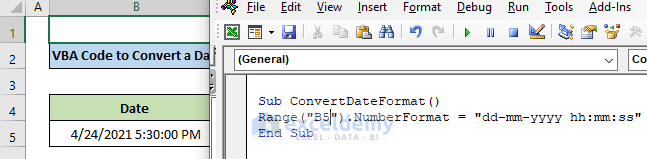
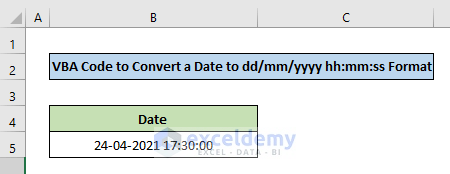
- Press F5 to run the code and get the output as shown in the following image.
Download Practice Workbook
Related Articles
<< Go Back to Date Format | Number Format | Learn Excel
Get FREE Advanced Excel Exercises with Solutions!

1. Change the Default Date & Time Format to dd/mm/yyyy hh:mm:ss in Excel
This worked for me, than you very much.. 🙂
Hi, Dhaval!
Thanks for your appreciation.
Regards
ExcelDemy