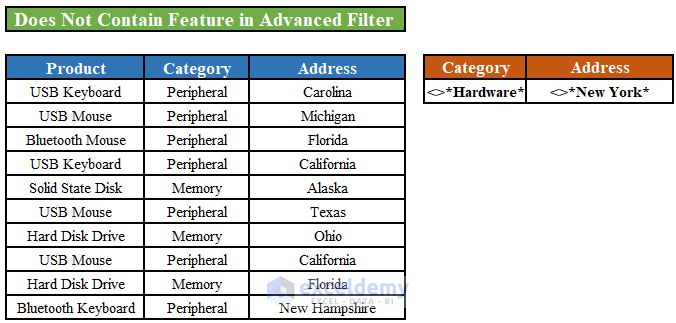
The sample dataset contains the Product Name, Product Category, and the shipping Address of customers.
We will use Excel Advanced Filters does not contain feature to hide the rows that do not contain specific text.
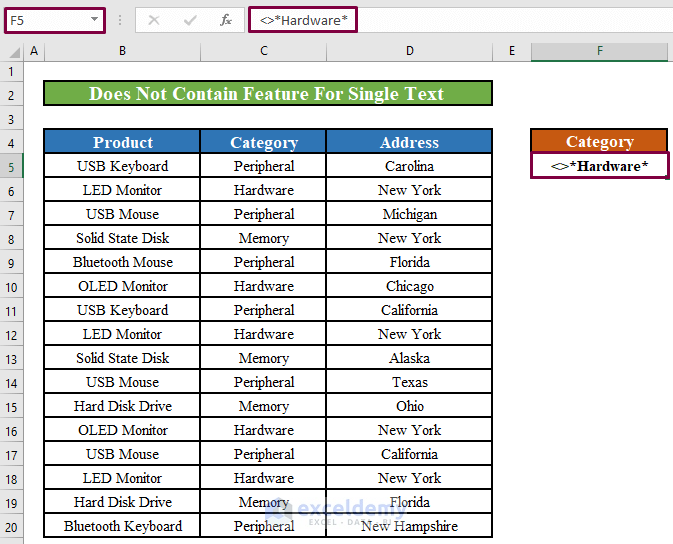
The image below shows the worksheet after the Does Not Contain filter has been applied.
The Does Not Contain syntax is below.
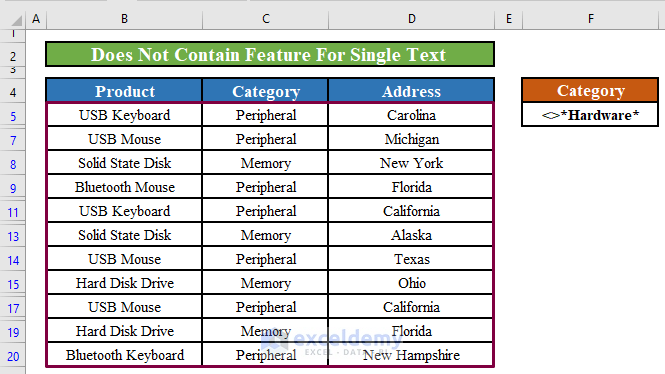
<>*Text That We Do Not Want To Contain*Method 1 – Filter Rows that Do Not Contain Single Specific Text in Excel
We can use the Does Not Contain feature in Advance Filter to filter out the rows that contain a single specific text. For example, we will filter out the rows that contain Hardware as Category.
Steps:
- Enter Category in cell F4 and <>*Hardware* in cell F5.
- Click on Data on the ribbon then select Advanced from the Sort and Filter options.
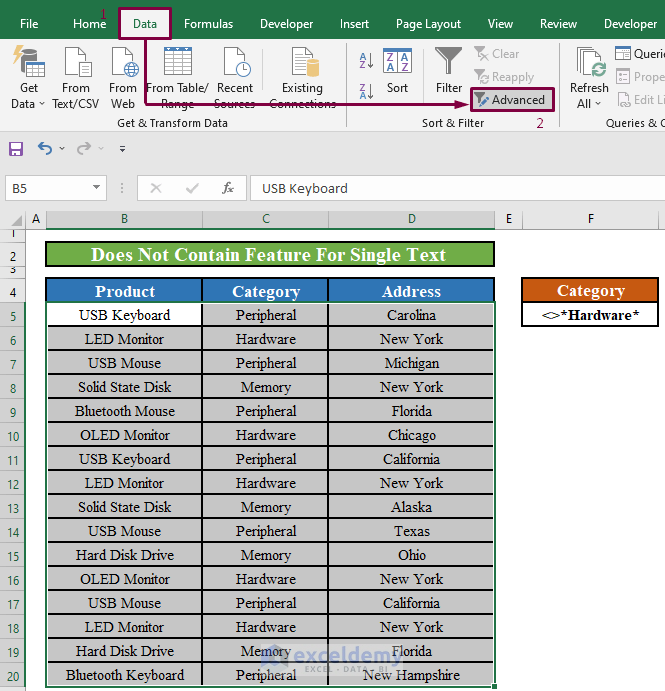
- A new window titled Advanced Filter will appear.
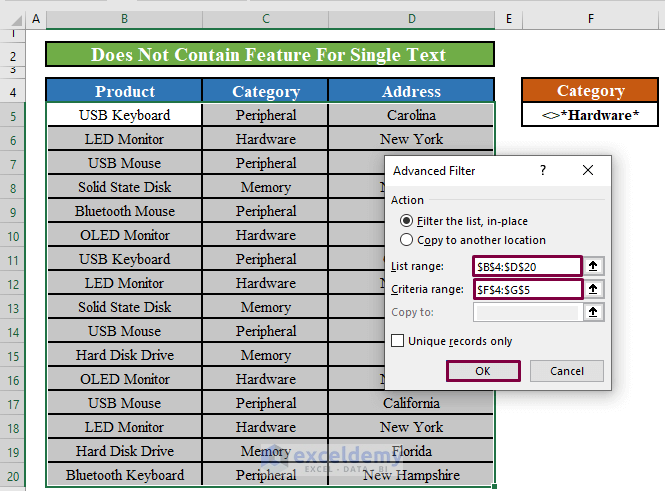
- Insert $B$4:$D$20 in the List range input box.
- Enter $F$4:$G$5 in the Criteria range input box.
- Click on OK.
- The Advanced Filter has filtered out the rows that contain Hardware as Category.
Method 2 – Filter Rows that Do Not Contain Multiple Texts in Excel
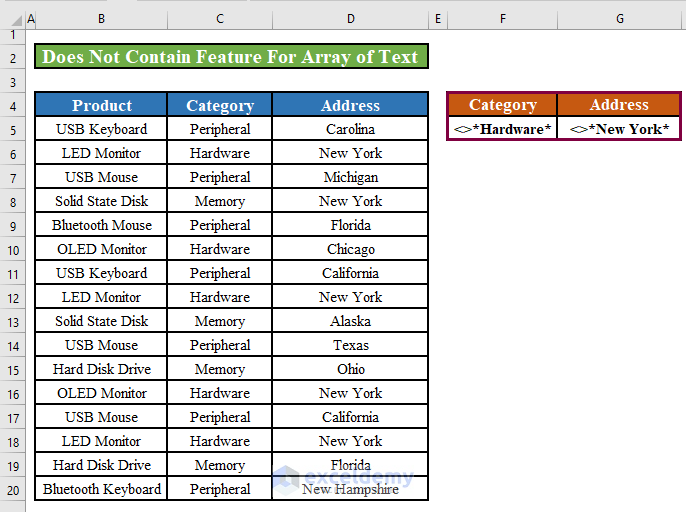
We can also use the Does Not Contain feature to filter out rows that do not contain multiple texts. For example, we can filter out the rows that contain Hardware as Category and New York as Address.
Steps:
- Enter the words Category in cell F4 and Address in cell G4.
- Enter <>*Hardware* in cell F5 and <>*New York* in cell G5.
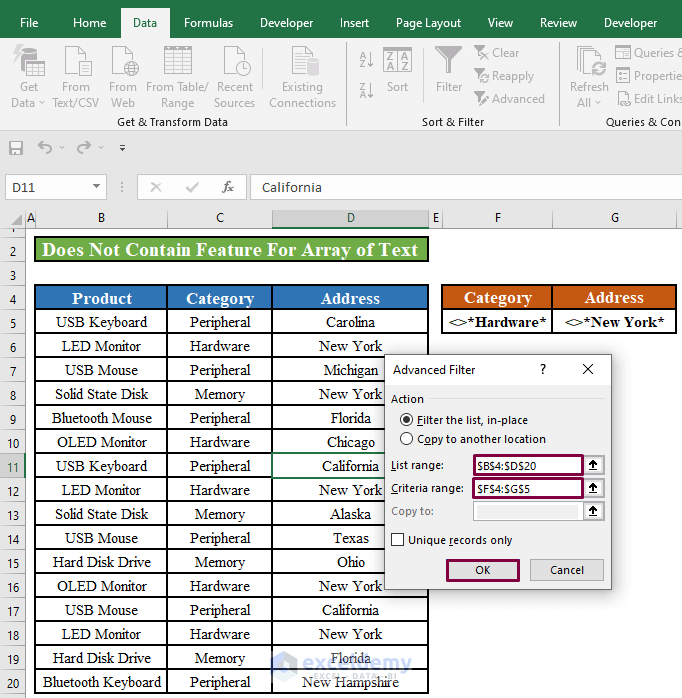
- Click on Data on the ribbon then select Advanced from the Sort and Filter options.

- A new window titled Advanced Filter will appear.
- Insert $B$4:$D$20 in the List range input box.
- Enter $F$4:$G$5 in the Criteria range input box.
- Click on OK.
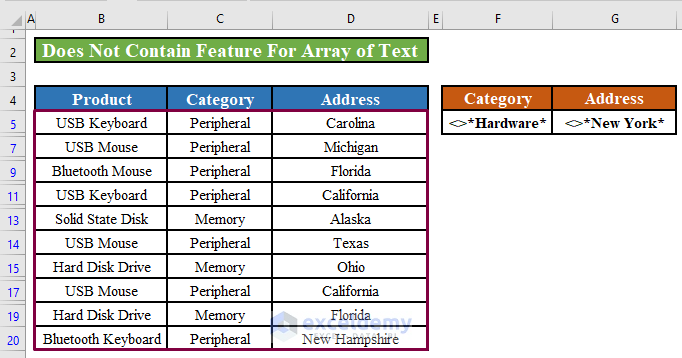
- The Advanced Filter has filtered out the rows that contain Hardware as Category and New York as Address.
Quick Notes
You have to put <> in front of the text that you do not want the rows to contain.
You also have to insert asterisk (*) symbol before and after the text. Otherwise, the Does Not Contain filter will not work.
Download Practice Workbook
<< Go Back to Advanced Filter | Filter in Excel | Learn Excel
Get FREE Advanced Excel Exercises with Solutions!
