Overview of XML Schema Format
Definition
Schema is a type of XML document format. An XML Schema describes the interactions between an XML object’s attributes and components.
Creating a Schema requires analyzing the structure of a document and attributing definitions to each and every structural element.
Building Blocks of an XML Schema Document
Every single Schema document has some fixed components.
- Elements and Attributes.
- Serial of the child element and the number of them.
- Data types of those multiple elements and attributes.
- The fixed value of those elements and attributes.
Data Types Used in XML Schema
- Time
- Date
- Integer
- Decimal
- String
- Duration
- Boolean
Benefits of Using XML Schema
- Explaining acceptable document content is relatively easy with XML Schema type.
- Validation of data is simpler.
- Data facts definition presentation.
- Data patterns are easier to demonstrate.
- Data conversion is easier.
Disadvantages of Using XML Format
- XML syntax is complex and verbose in a lot of cases, compared to other text-based formats.
- Array won’t be supported in XML.
- The document size of the XML files is larger compared to other file formats, because of the text-heavy nature.
- XML document is less readable.
How to Create a Schema in Excel: Step-by-Step Procedure
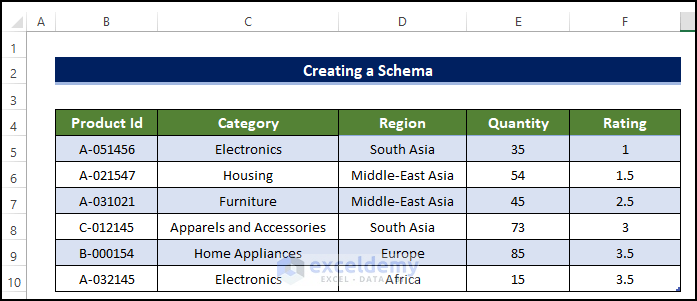
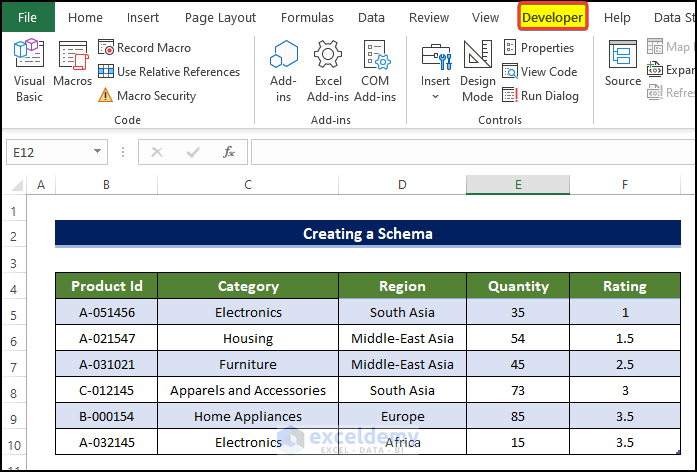
The following sample dataset will be used for illustration. In this process, you need to add the Developer tab in the ribbon. We also need to use the Notepad application outside of Excel.
Step 1 – Enable Developer Tab
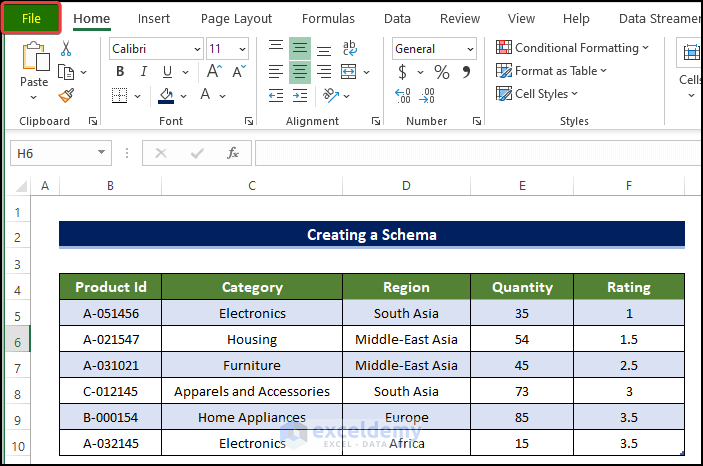
- Click on the File on the corner of the sheet.
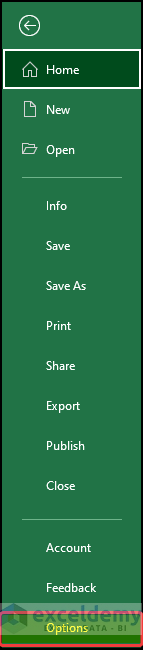
- On the Startup page, click on the Option.
- In the dialog box, click on the Customize Ribbon.
- In the right panel, see if the Developer box is checked.
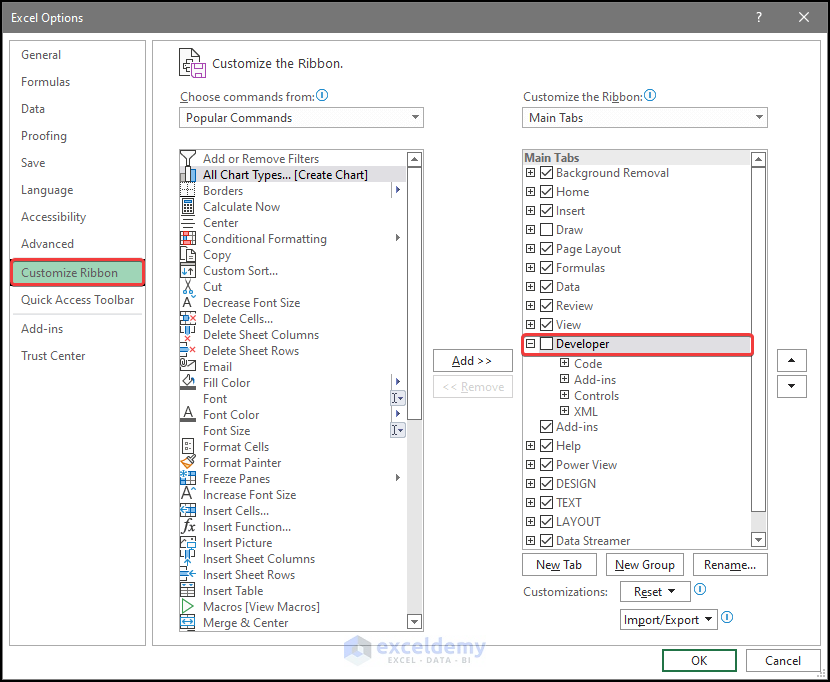
- If not, tick on the Developer check box and click OK.
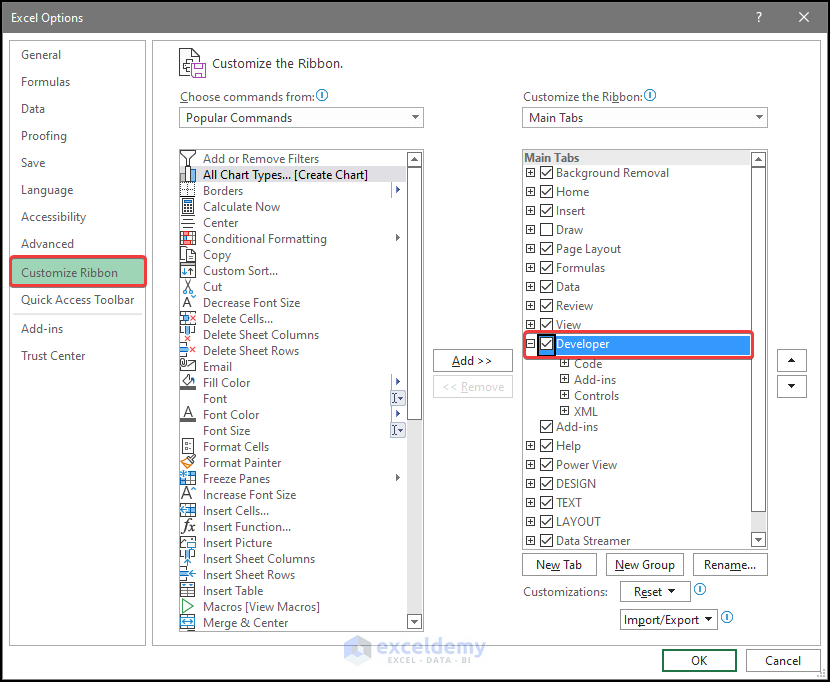
- The Developer tab will be in the ribbon.
Step 2 – Prepare Schema File in Notepad
After the Developer tab is in the ribbon, we can create the Schema-based XML file in Notepad.
- We need to prepare a Schema-based XML source file in Notepad based on the sample dataset.
- The Schema file will dictate the structure of the XML file and we need to do this outside Excel in a Notepad.
- Enter the following code in the Notepad.
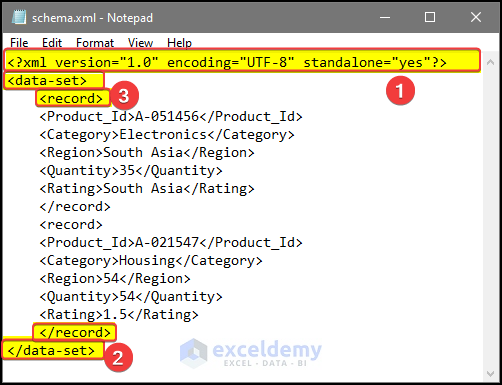
- The code has several components. Each tag carries a separate meaning.
- The first line is mandatory for all types of Schema-based XML files.
- We have entered the column header of our designated file in the opening and closing tag inside the record tag.
Step 3 – Load and Map Schema File in Worksheet
- Go to the Developer tab and click on Source.
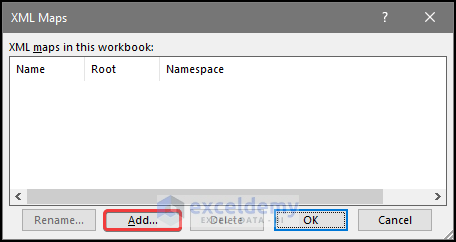
- From the side panel, click on the XML Maps.
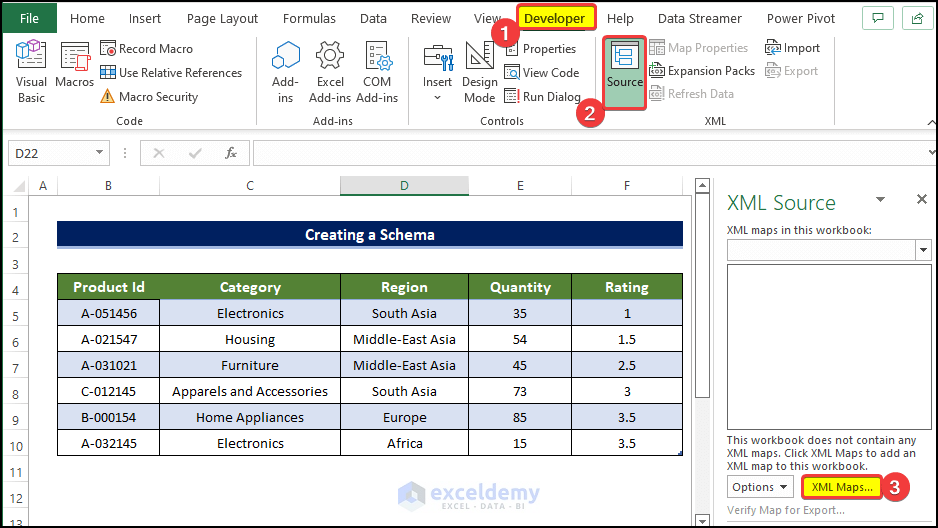
- In the XML Maps dialog box, click on Add.
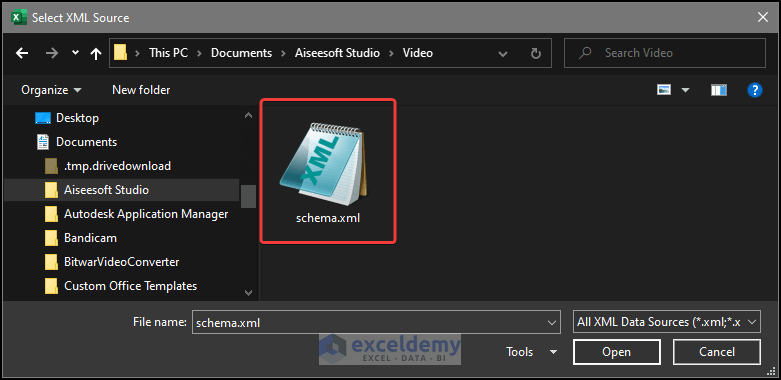
- A File Explorer window will open. From that window, select and load the XML Schema file that you created.
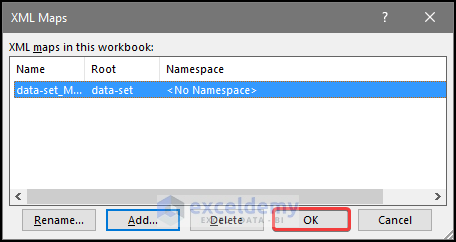
- In the XML Maps dialog box, the Schema file has been loaded.
- Click on the file to select the file and click on OK.
Step 4 – Replace Column Header
As we have the Schema file loaded, we can now drag and replace the existing columns in the sheet.
- We have the column headers from the Schema-based XML file in the side panel.
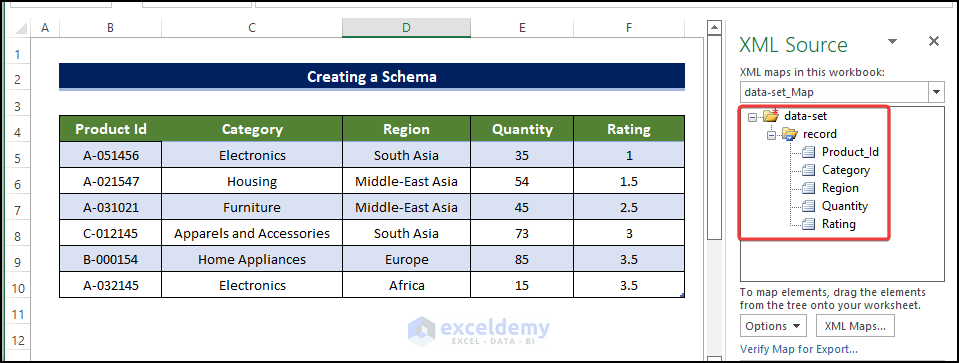
- Drag the first item in the side panel to cell B4.
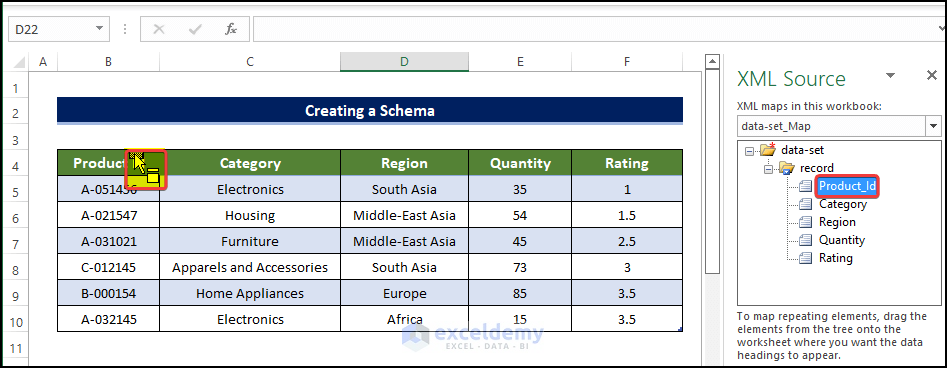
- Repeat the same process for the other column headers.
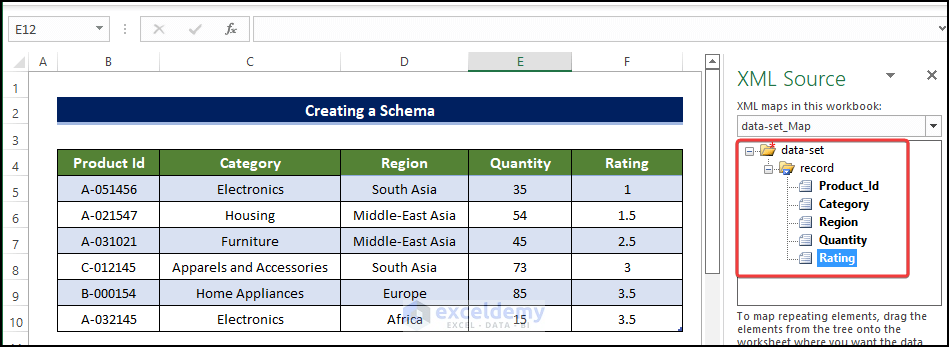
- We have successfully mapped the column headers from the Schema-based XML file to the Excel worksheet.
Step 5 – Export Excel File and Observe Output
- From the Developer tab, click on Export.
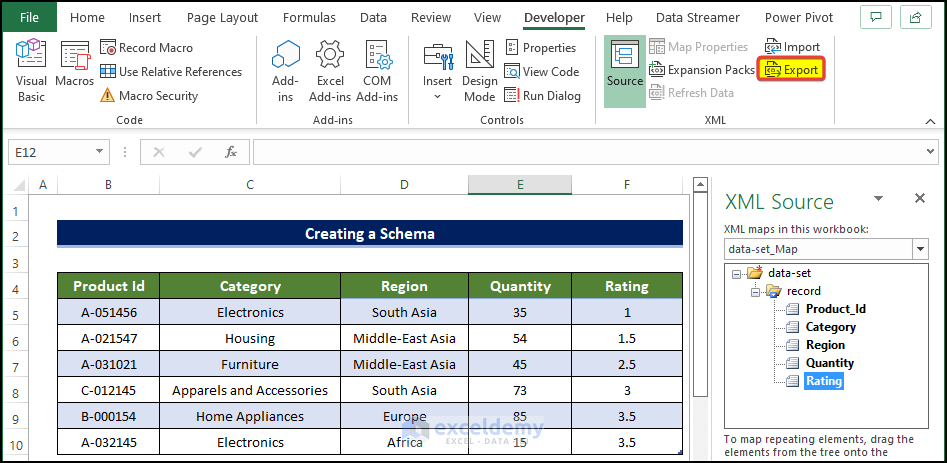
- There will be a file explorer window where you need to choose the destination of the output file.
- Choose the folder and click OK.

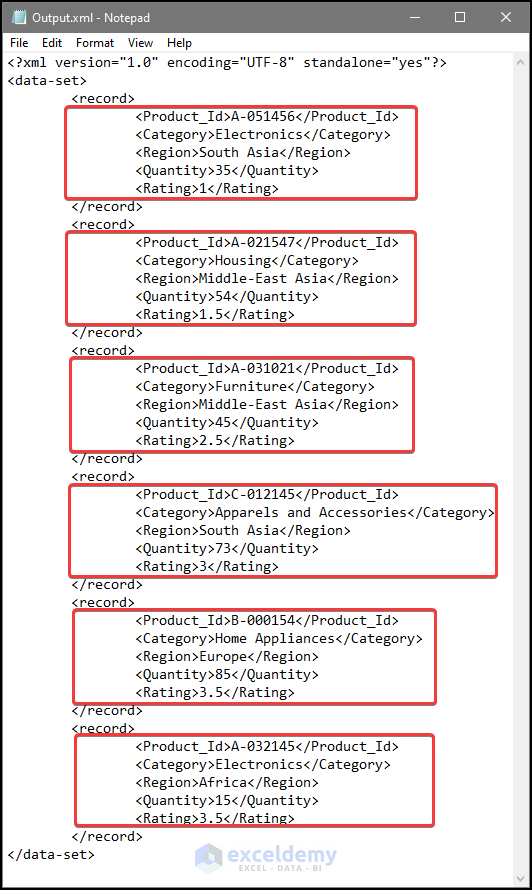
- Go to the Output file location and open the file.
- The file will look like the below image.
- We have mapped the Excel file with the help of a Schema file and export the result to get the final XML file.
- The final XML file will look like the following image.
Related Articles
<< Go Back to XML Mapping in Excel | Export Excel to XML | Export Data from Excel | Learn Excel
Get FREE Advanced Excel Exercises with Solutions!
