Excel has three default horizontal alignments for a cell: left, right, and center. But you can change the position of a value horizontally based on your requirements, and that is called changing indent.
In this Excel tutorial, you will learn how to change indent in Excel using different tools and commands.
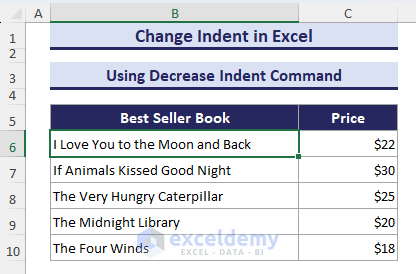
Consider a sample dataset containing some bestseller books along with their prices. The first cell has an increased indent of two times. Now, we will increase the indent for the rest of the cells in the column, like the first cell.
There are 4 ways to change indent in Excel:
1. Using Increase/Decrease Indent Command
Changing indents with the Indent commands is the most common approach in Excel. In the Alignment group of the Home tab, there are two commands named Increase Indent and Decrease Indent.
To increase indent in Excel, follow the steps:
- Select the cell in which you want to change the indent.
- Then, click as follows to increase the indent: Home tab > Alignment group > Increase Indent command.
 As you can see in the below image, the indent has been increased from the left side as our cell was aligned left. The Increase Indent command will increase the indent equivalent to three times the space for clicking each time.

To decrease indent in Excel, follow the steps below:
- Select the cell in which you want to change the indent.
- Then, click as follows to increase the indent: Home tab > Alignment group > Decrease Indent command.
 As a result, you will figure out that the indent has decreased and returned to the previous position.
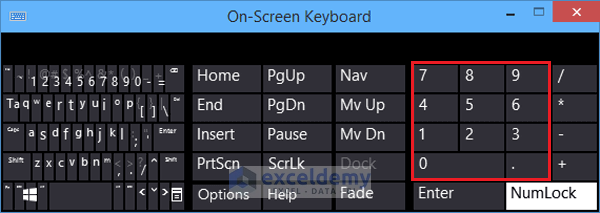
Excel has two keyboard shortcuts by which you can change the indent. The shortcuts are:
- Increase Indent: ALT + H + 6
- Decrease Indent: ALT + H + 5
But remember that you’ll need the Numeric Keys On to apply the commands.
2. Using Format Cells Dialog Box
You can also use the Format Cells dialog box to change the indent in Excel. Suppose you need to indent 5 or 10 times at a time, so you must use the Increase/Decrease Indent command or use shortcut keys 5 or 10 times. It’s pretty boring or time-consuming. In this case, the best way is to use the Format Cells dialog box. By applying this method, you can insert the indent number directly. Here’s how:
- First, select your data.
Here, we have selected the B6:B10 range. - Click as follows: Home tab > Alignment Settings icon.
Or, simply press Ctrl + 1 keys to open the Format Cells dialog box.

- Next, the Format Cells dialog box opens up.
- You will find the Alignment tab.
- Insert the number of indents in the Indent field. We insert 2 for intending twice.
- Then press OK.
 Now take a look; the indents have been increased twice.

Read More: How to Indent Twice the Data in Excel
3. Using Space Bar to Indent Manually
Unlike the previous two methods, you can also indent manually by using the Space Bar.
To indent manually in Excel, follow the steps below:
- Double-click a cell and place the cursor where you want to indent.

- Next, press the Space Bar key as many times as you require indents.
Here, we have pressed Space Bar three times, which is equal to the one indention by the Increase Indent command.

Read More: How to Indent Second Line in Excel Cell
4. Using VBA Macro
If you want to change the indent in Excel, you can also use the VBA Macro. By using VBA, you can easily select the required range and insert the indent number to automatically increase the indent in Excel.
To change the indent using VBA, follow the steps:
- First, go to the Developer tab > Visual Basic command.
- A Microsoft Visual Basic for Application dialog box appears.
- To insert a module, click as follows: Insert tab > Module command.
- Later, copy the following codes:
Sub Change_Indent() 'Developed by MD Tanvir Rahman, ExcelDemy Dim CI As Integer Dim rng As Range Set rng = Application.InputBox("Select a range:", Type:=8) CI = InputBox("Insert the Number of Indents", "Change Indent") rng.InsertIndent CI End Sub - Next, click on the Run command.
- An Input dialog box will show up. So, select the range you want to indent.
Here, we will select the B6:B10 range. - Another Change Indent dialog box will open up. Insert the number that you want to indent.
Here, we inserted 2.
From the GIF below, you can see that double indentations have been successfully added before the text.

Download Practice Workbook
You can download the free Excel workbook from here and practice independently.
Conclusion
To summarize, in this Excel tutorial, we explained how to change indent in Excel. You can use Indent commands as well as keyboard shortcuts to indent quickly. To indent multiple times, the use of the Formats Cells dialog box can be an excellent decision. The application of VBA Macro performs a large dataset and multiple worksheets at the same time.
Please feel free to share your opinions, thoughts, suggestions, and queries in the comment section below.
Frequently Asked Questions
How to set a specific indent value for Excel cells?
To set a specific indent value for Excel cells, follow the steps:
- Select the cell or range and press Ctrl + 1 Keys to open the Format Cells dialog box.
- Then, the Format Cells dialog box shows up. Now, go to the Alignment group and enter the desired value in the Indent field.
How to clear the indent in Excel cells?
Follow the steps to clear the indent in Excel cells:
- Select your data.
- Go to the Home tab and find the Alignment group. Next, click the Decrease Indent command until the indent is back to zero.
Why is “Increase Indent” or “Decrease Indent” option grayed out in Excel?
The “Increase Indent” or “Decrease Indent” options may be grayed out for the following reasons:
- A specific string of a cell is selected.
- The worksheet or the workbook is protected.
Related Articles
<< Go Back to Indentation in Excel | Excel Cell Format | Learn Excel
Get FREE Advanced Excel Exercises with Solutions!
