In this article, we will learn how to create a monthly duty roster format in Excel. A duty Roster is used for creating a schedule of work and it can be used for tracking of work of the employees of a company. In Excel, we can easily make this format. So, without delay, let’s explore the solutions.
What Is Monthly Duty Roster?
In the Monthly Duty Roster, there is information about employees’ working schedules, off dates and working hours for a specific month. Sometimes short information is also available here. Therefore, we can schedule duty time, can track the working time, and track the performance from this monthly duty roster.
How to Create Monthly Duty Roster Format in Excel: with Easy Steps
To demonstrate the procedure for creating a monthly duty roster in Excel, we will use a template. In the Duty Roster template, there is information about the Name and Designation of employees. There are also specific cells for Month, Date and Day. We will insert information for a specific month in this template to complete the Monthly Duty Roster Excel. So, follow the steps below to learn the procedure of building a lottery prediction algorithm in Excel.
STEP 1: Make Monthly Duty Roster Template Ready
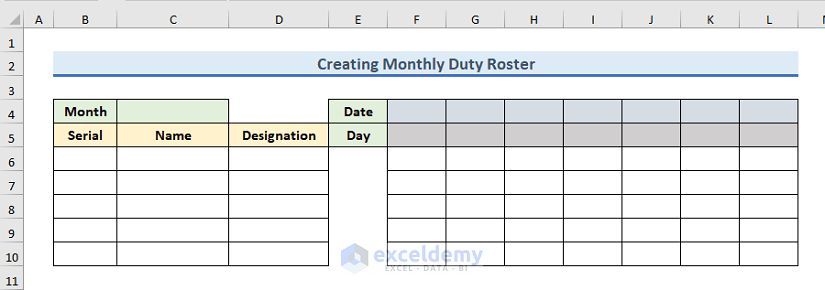
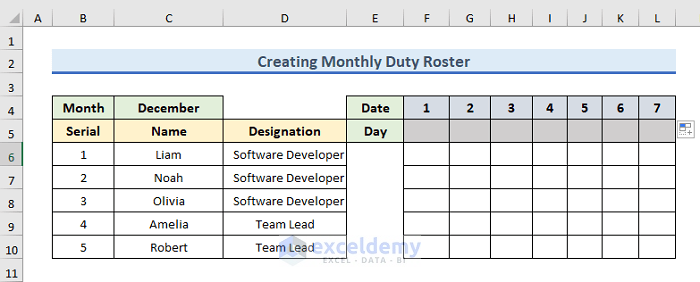
- Firstly, we will make the following template for creating Duty Roster Format.
- In this template, there will be headers for Serial number, Employee Name and Designation.
- And, dedicated cells are also there for information on Day, Date and Month.
- You can collect the template from our Excel Workbook.
- After making the template, we will create another Excel Sheet.
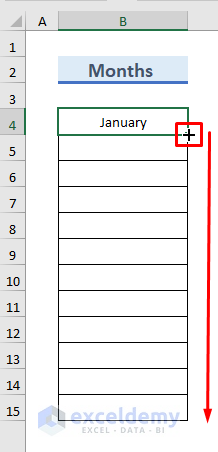
- In this sheet, there will be information about Months.
- Now, rename the sheet as Months.
- For creating this list, type January in the B4 cell.
- After that, drag down the Fill Handle to fill all the cells serially.
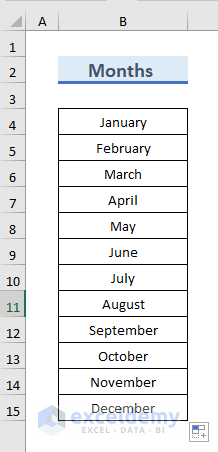
- As a result, the list of months can be seen.
STEP 2: Create Drop-Down Menu for Entry of Month
- In the following step, we will create a drop-down menu.
- From the drop-down menu, we can select the month.
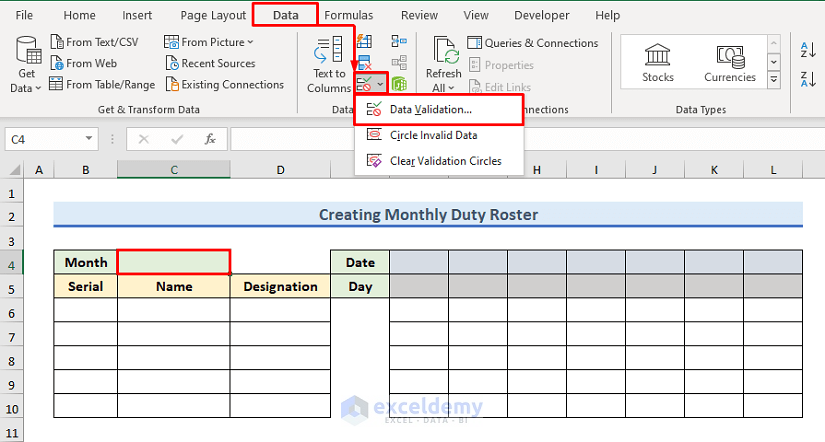
- To do so, select the C4 cell which is the right adjacent cell of the Month.
- After selection, go to the Data tab.
- Then, from the Data Tools group, select the Data Validation icon.
- After that, a wizard will come out and select Data Validation from there.
- Instantly, a dialog box named Data Validation will open up.
- Now, select List from the drop-down menu in the Allow field.
- And, in the Source field, write =Months!$B$4:$B$15.
- Then, press OK to proceed.
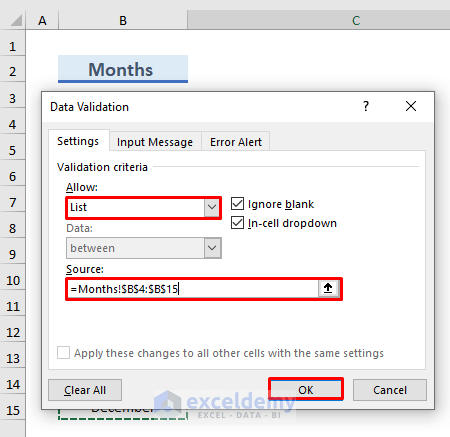
Here, Months is the name of the Excel Sheet where we put the months. And the list of months is put in the B4 and B15 cells.
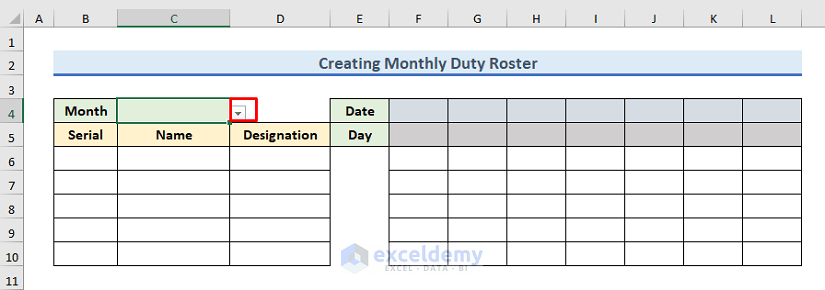
- As a result, besides the C4 cell, a drop-down menu occurred.
- Therefore, clicking the drop-down menu will show the options for months.
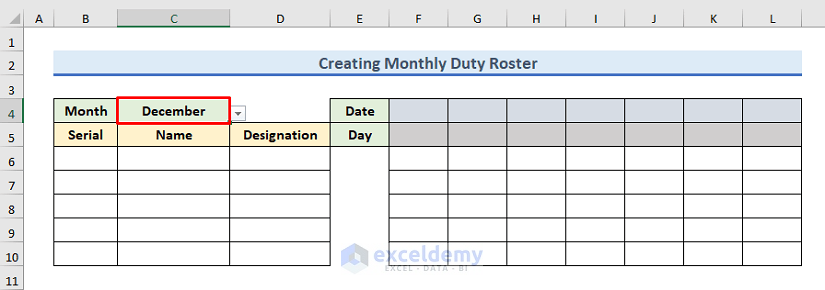
- We will create our monthly duty roster for the month of December 2022.
- That’s why we have selected December from the drop-down menu.
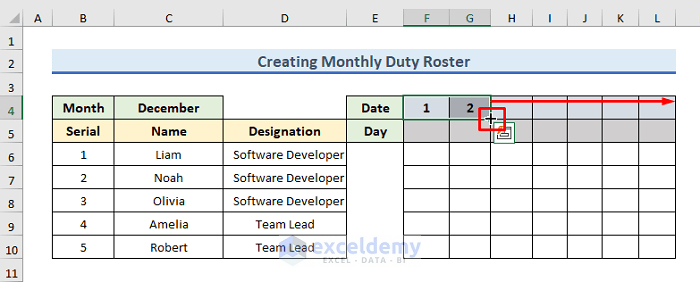
STEP 3: Insert Employee Information
- In the following step, we have to insert the information of the employees.
- So, insert the information serially.

STEP 4: Input Date and Duty on the Duty Roster
- In the following step, we will fill up the Day and Date.
- In the right side column of the Date header, type 1 and 2.
- That means these columns will insert duty for 1st and 2nd December 2022.
- After that, drag down the Fill Handle to fill all the cells of Date serially.
- As a result, you can watch the dates up to 31st December 2022 inserted.
- Now, we have to insert the information in the Day row.
- As 1st December 2022 is Thursday, we will write Thu in the F5 cell.
- After that, drag down the Fill Handle to fill all the cells of Day serially.
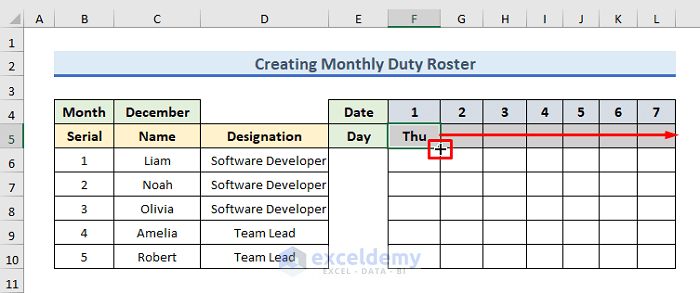
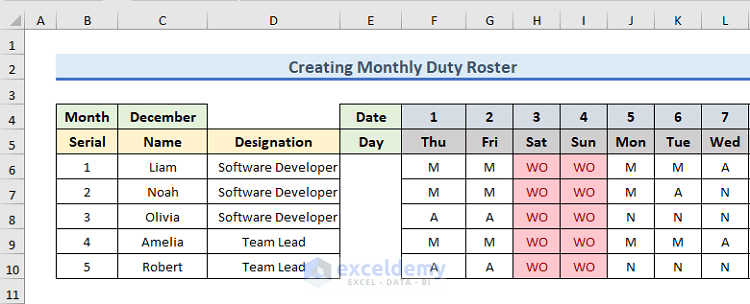
- As a result, rows of Date and Day are completed.
- You can see the result up to 7th December.

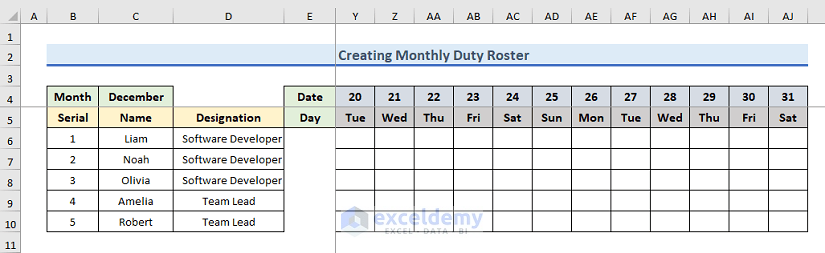
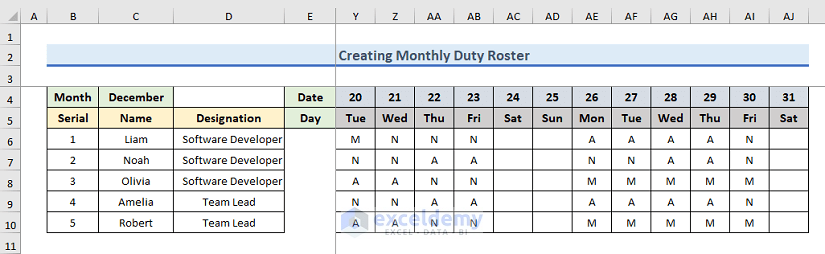
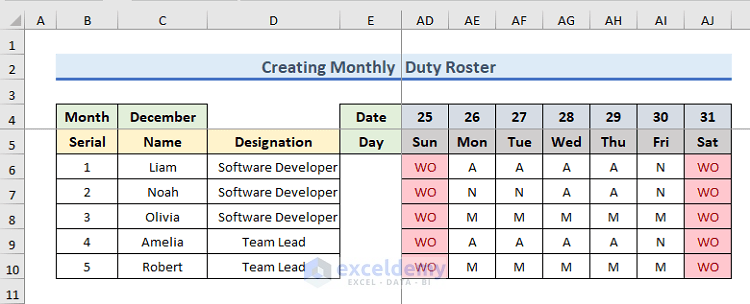
- In the following figure, you can also watch the result from 20th to 31st December.
- So, our monthly duty roster format is ready.
- Now, we will insert the duty time of the employees accordingly in the Excel Sheet.
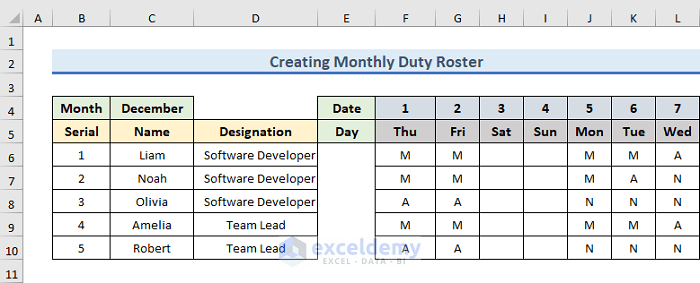
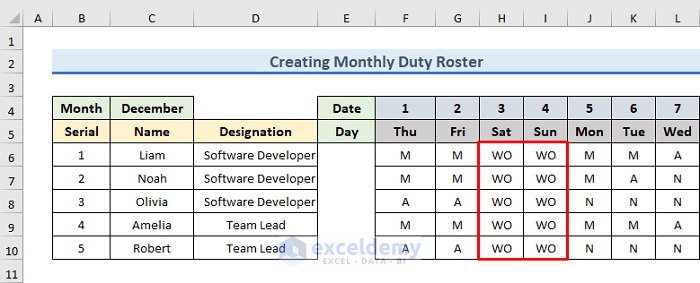
- In the following figure, you can see the rostered duty up to 7th December.
- Here, M indicates Morning, N indicated Night and A remarks Afternoon.
- In the following figure, you can see the rostered duty from 20th to 31st December.
STEP 5: Highlight Weekends
- In the next step, we will insert WO in the holidays and weekends.
- Normally, Saturday and Sunday are weekends.
- That’s why insert WO in the corresponding cells of Saturday and Sunday.
- In the following figure, you can see the WO cells up to 7th December.
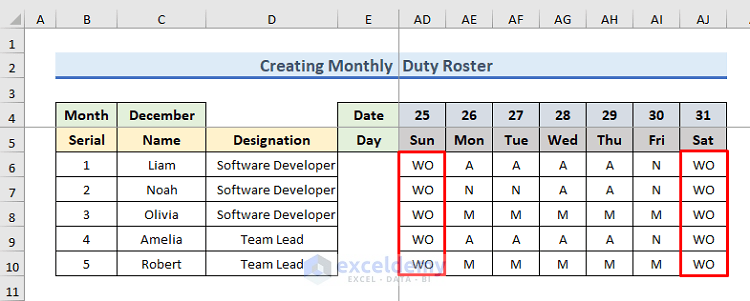
- In the following figure, you can also watch the WO cells from the 20th to the 31st of December.
- Now, it is beneficial to highlight the weekends.
- Therefore, we will highlight the weekends and vacations now.
- To do so, firstly, select the range F6 to AJ6.
- Here, the range indicates the overall monthly roster duty schedule.
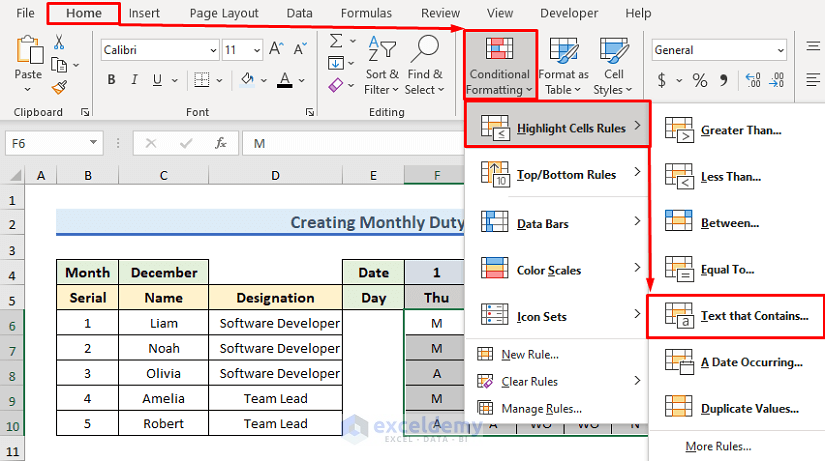
- After selection, click on the Home tab.
- Then, from the Styles group, press on the drop-down menu of Conditional Formatting.
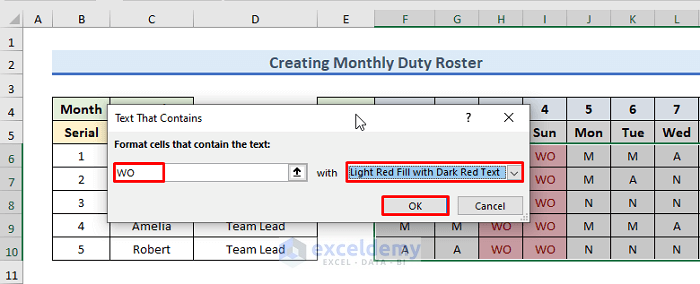
- From the drop-down menu, select Highlight Cells Rules >> Text That Contains.
- Instantly, a window named Text That Contains will open up.
- Here, we want to highlight WO-named cells.
- Therefore, write WO and select Light Red Fill with Red Text highlighter.
- You can change the color and design of the highlighter by selecting other options.
- Then, press OK to proceed.
- As a result, WO-named cells are highlighted.
- In the following figure, you can watch up to 7th December.
- And here, you can watch from 20th to 31st December.
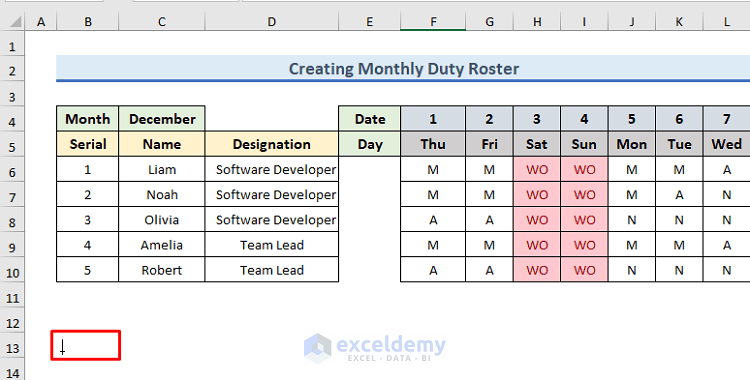
- In the last step, we will insert a text box.
- So, click on the Insert tab.
- After that, select Text >> Text Box from there.
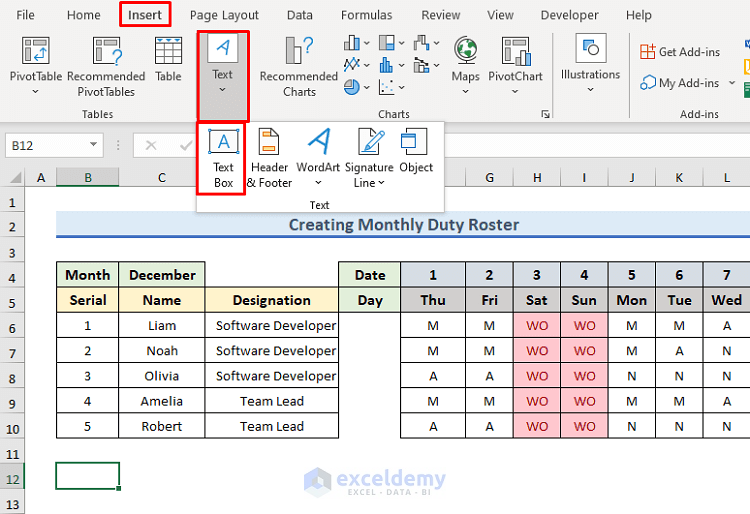
- Instantly, an arrow is showing indicating text boxes.
- Place this arrow where you want to put your textbox.
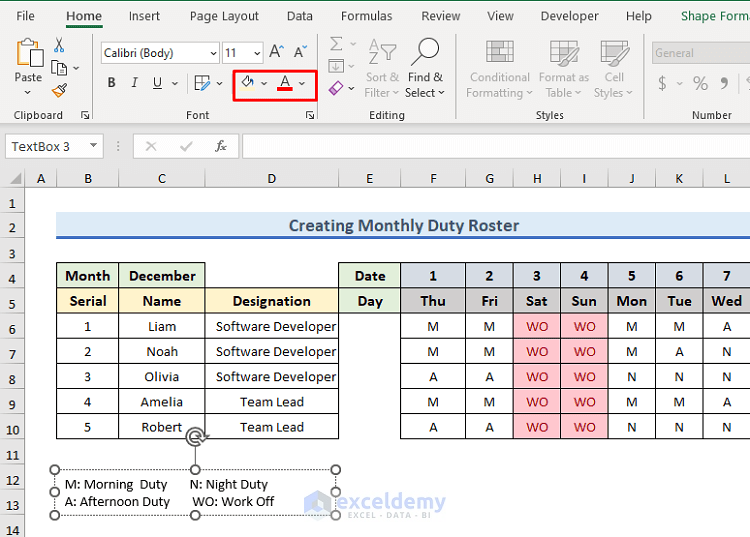
- After creating the text box, write down the information.
- In the text box, there will be information about the abbreviation of M, N, A and WO.
- After writing, you can change the color of the text and the cell using the following icons.
Final Output
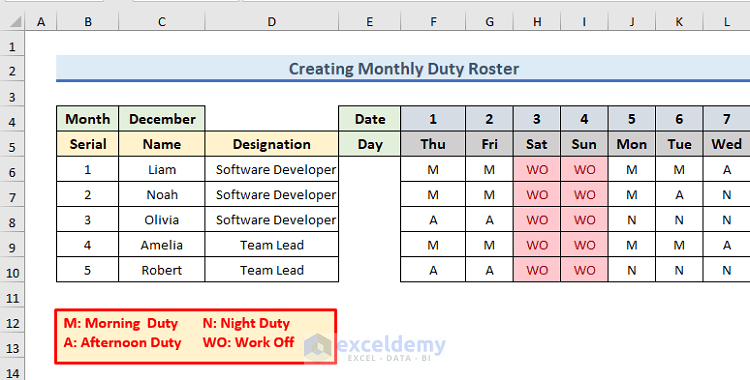
- As a result, our monthly duty roster format is ready.
- In the following figure, you can observe up to 7th December.
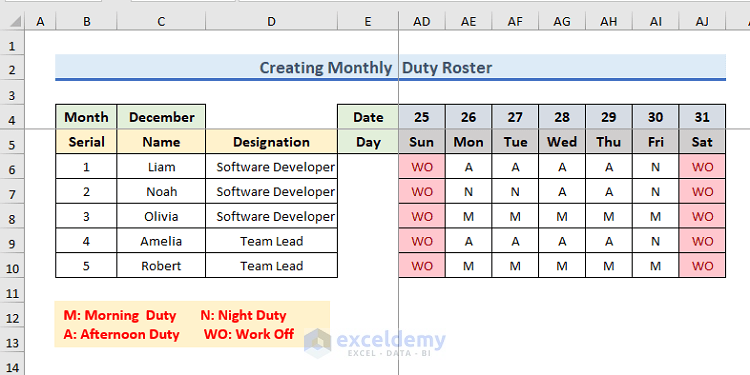
- And, in the figure below, you can observe the monthly duty roster from 25th to 31st December.
Read More: How to Create Weekly Duty Roster Format in Excel
Download Practice Workbook
To practice by yourself, download the following workbook.
Conclusion
In this article, we have demonstrated step-by-step procedures to create a monthly duty roster format in Excel. There is a practice workbook at the beginning of the article. Go ahead and give it a try. Last but not least, please use the comment section below to post any questions or make any suggestions you might have.
Related Articles
- How to Create Automatic Schedule Generator for Free in Excel
- Weekly Meal Planner Template with Snacks
- How to Create Shift Roster 24×7 with Excel Automation
- How to Create an Attendance Roster in Excel
<< Go Back to Roaster Templates | Excel Templates
Get FREE Advanced Excel Exercises with Solutions!
