In this guide, you’ll learn how to create test cases for an e-commerce website using Microsoft Excel. We’ll cover two specific scenarios: one for the product description page and another for the customer care page. Whether you’re using Microsoft 365 or any other version of Excel, follow these step-by-step procedures.
Step-by-Step Process:
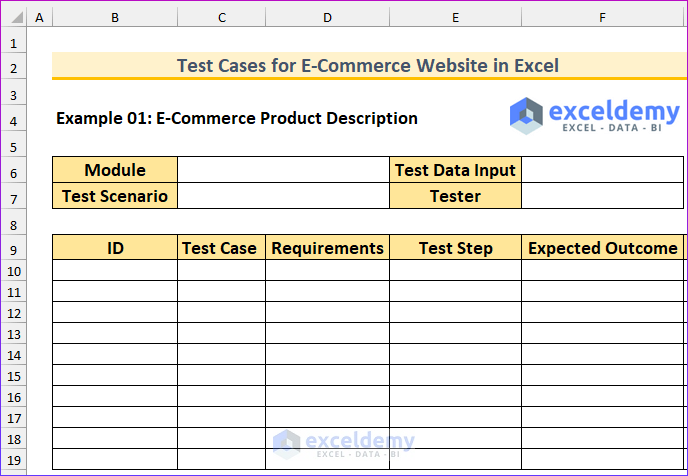
Step 1: Set Up the Test Case Format
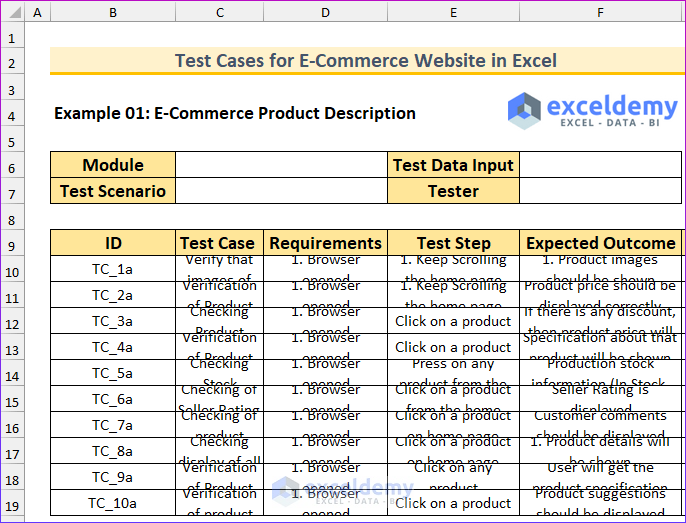
In this step, we’ll create a structured format for test cases related to an e-commerce product description using an Excel spreadsheet. The template will consist of eight columns. To enhance clarity, we’ll present the template in two parts.
Part 1: Initial Fields
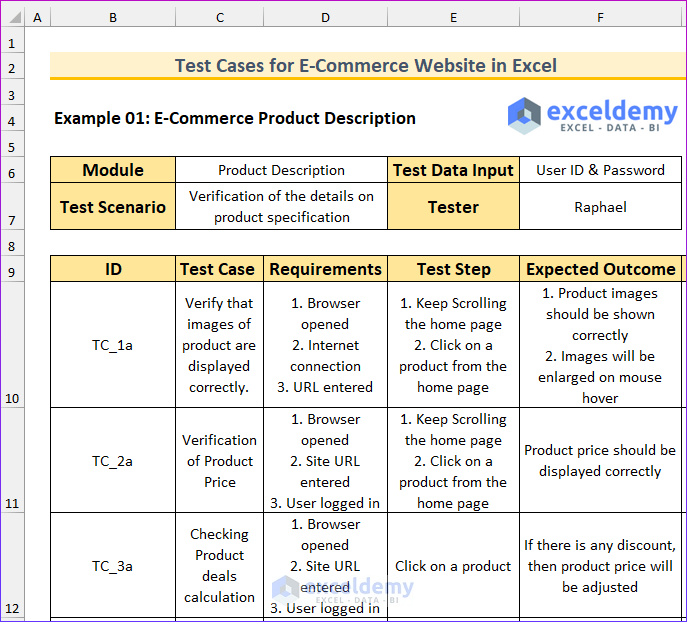
- Module:
- Define the module name for the test cases. In our case, it will be “Product Description.”
- Test Scenario:
- Specify the test scenario. For this example, let’s use “Verification of Details on Product Specification.”
- Test Data Input:
- Record user input relevant to the test case.
- Tester:
- Assign the person responsible for the testing process.
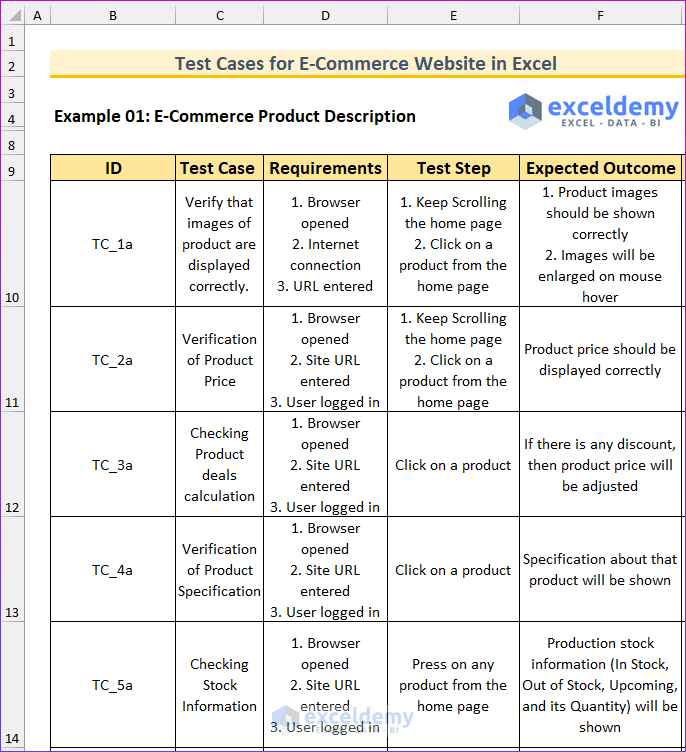
Part 2: Additional Columns
- ID:
- Assign a unique identification number to each test case.
- Test Case:
- Describe the subject of the test procedure.
- Requirements:
- If there are any prerequisites for a test case, document them here.
- Test Step:
- Outline the required steps to execute the test case.
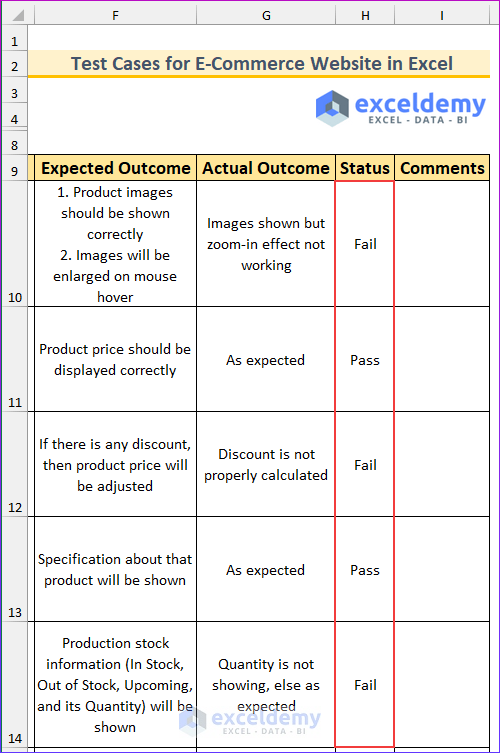
- Expected Outcome:
- Clearly state the expected output when everything works perfectly.
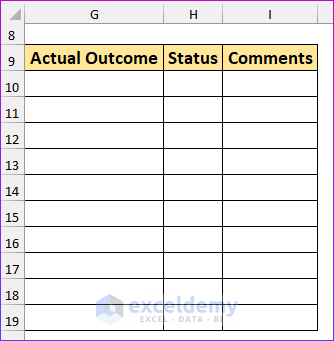
Part 3: Further Columns
- Actual Outcome:
- Record the real output obtained from executing a test case.
- Status:
- Indicate whether the test case passed or failed.
- Comments:
- Use this column for any additional comments or notes from the tester.
Remember that attention to detail is crucial when creating test cases. By following this format, you’ll have a well-organized structure for testing your e-commerce product descriptions effectively.
Read More: How to Write Test Cases in Excel Sheet
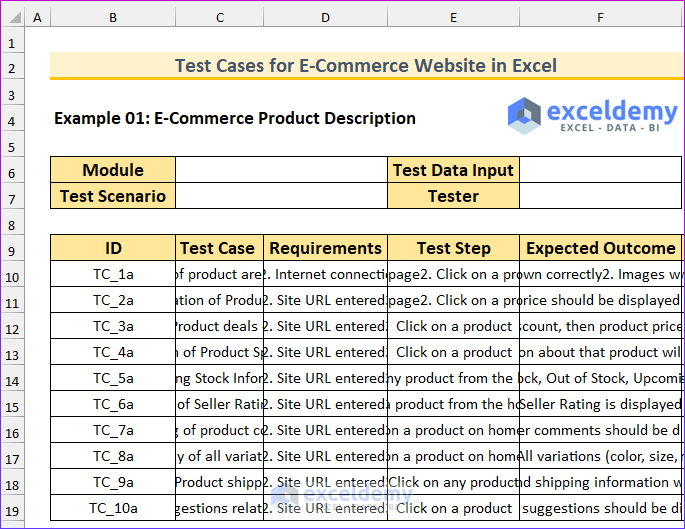
Step 2: Entering Relevant Data
In this step, we’ll populate the empty cells with the necessary information for our test cases. Follow these instructions:
- Type Values into Empty Cells:
- Begin by entering the relevant data into the empty cells of your test case template. These values could include test scenario descriptions, user input, and other relevant details.
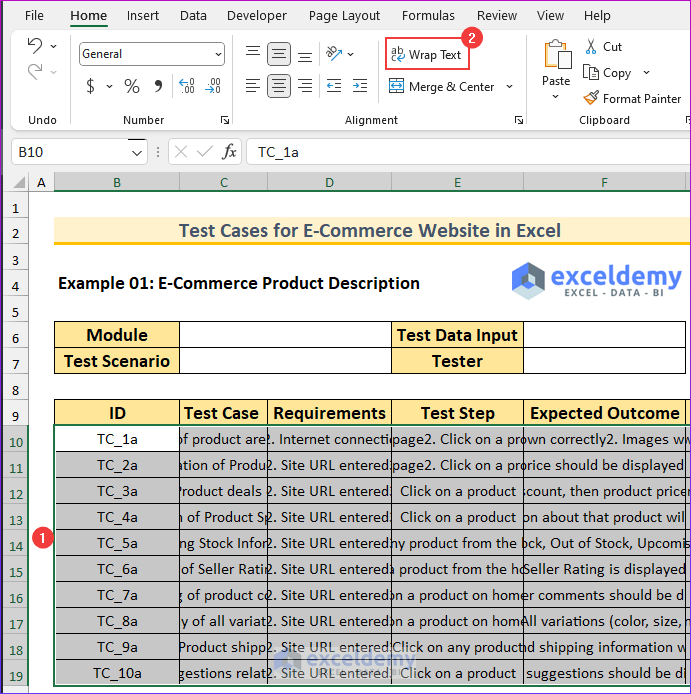
- Adjust Cell Formatting:
- Currently, the cell contents may not be visible due to their length. We’ll address this next.
- Select all the cells containing your data.
- Wrap Text:
- Go to the Home tab in Excel.
- Under the Alignment section, find the Wrap Text option.
- Click on it to enable text wrapping. This will ensure that long text values are displayed properly within the cells.
- AutoFit Rows:
- Some rows may still appear truncated. To fix this:
- Select the cells with wrapped text.
- Right-click and choose Row Height.
- Adjust the row height to accommodate the wrapped text.
- Some rows may still appear truncated. To fix this:
- Enter Relevant Values:
- Specifically, focus on the first set of cells (rows 6 and 7) where you’ll input module names, test scenarios, test data, and tester information.
Once you’ve completed these steps, your test case template will be ready for further use.
Read More: Test Cases for Banking Application in Excel Sheet
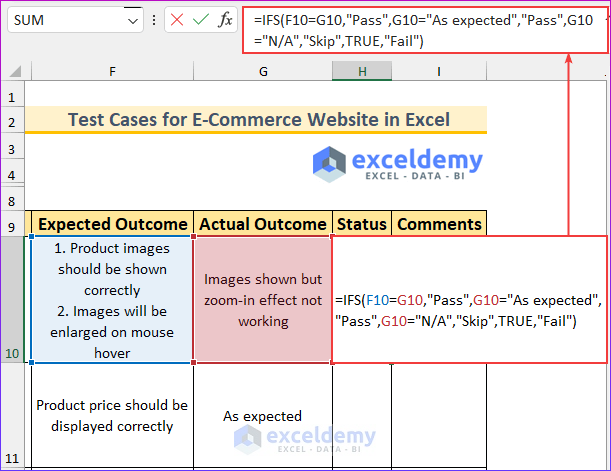
Step 3: Determining Test Status
In this step, we’ll create a formula using the IFS function to determine the test case statuses for an e-commerce website in Excel. The goal is to categorize each test case based on its outcome. Here’s how it works:
- Formula Setup:
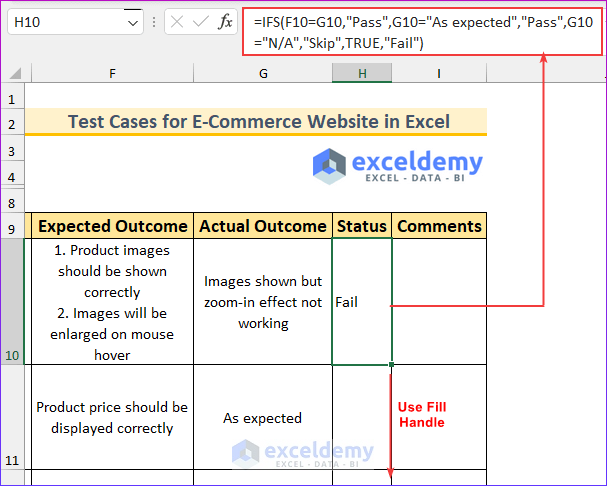
- Begin by typing the following formula into cell H10:
=IFS(F10=G10,"Pass",G10="As expected","Pass",G10="N/A","Skip",TRUE,"Fail")
-
- Press Enter to apply the formula.
- Formula Breakdown:
- The formula evaluates four conditions:
- If the value in cell F10 equals the value in cell G10, return Pass.
- If the value in cell G10 is As expected, also return Pass.
- If the value in cell G10 is N/A, mark the test case as Skip.
- For all other scenarios, label the test case as Fail.
- The formula evaluates four conditions:
- Output Explanation:
- Let’s break down the formula:
- If none of the first three conditions are met (i.e., they evaluate to FALSE), the formula defaults to the fourth condition, which returns Fail.
- The result in cell H10 will indicate the status for the specific test case.
- Let’s break down the formula:
- Apply to Other Cells:
- Use the Fill Handle to copy the formula down to the remaining cells.
- This process will assign statuses to all relevant test cases.
By following these steps, you’ll have a clear overview of the test case outcomes for your product description testing. Feel free to adapt this approach as needed for other scenarios or projects.
Read More: Create Test Cases for Login Page in Excel Sheet
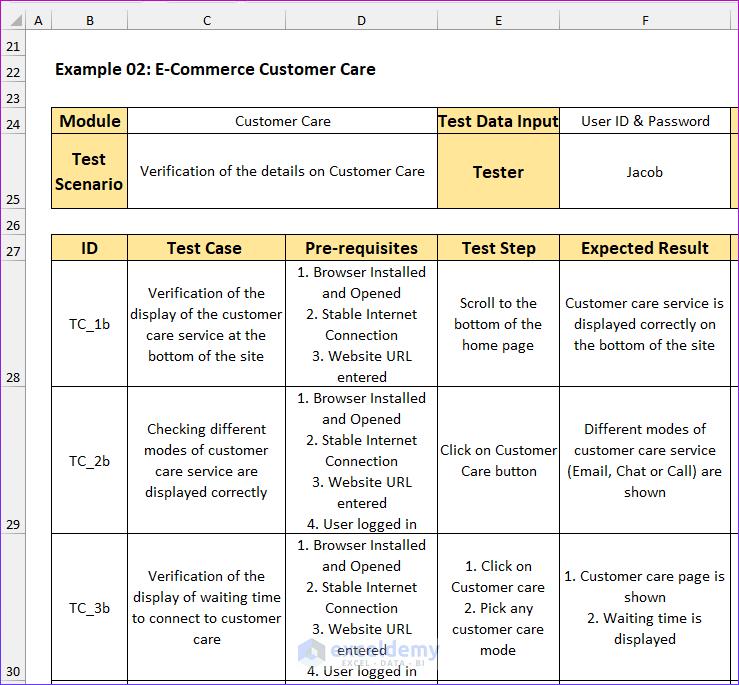
Step 4: Creating Test Cases for Customer Care
In this step, we’ll focus on creating test cases specifically for the e-commerce customer care page. The process will be similar to the previous steps, but we’ll highlight any differences as needed.
- New Fields:
- Introduce two additional fields:
- Testing Date: Record the date when the test cases were carried out.
- Authorized by: Indicate approval from a higher official.
- Introduce two additional fields:
- Data Entry:
- Type all relevant values into the appropriate cells. These could include module names, test scenarios, test data, and tester information specific to customer care testing.
- Test Status Formula:
- Similar to the previous example, we’ll use the following formula in cell H28 to determine the test status:
=IFS(F28=G28,"Pass",G28="As expected","Pass",TRUE,"Fail")
-
-
- This formula evaluates conditions based on the actual outcome (cell F28) and the expected outcome (cell G28).
- If the actual outcome matches the expected outcome, it’s marked as Pass.
- If the actual outcome is As expected, it’s also considered a Pass.
- If neither of these conditions applies, the test case is labeled as Fail.
-
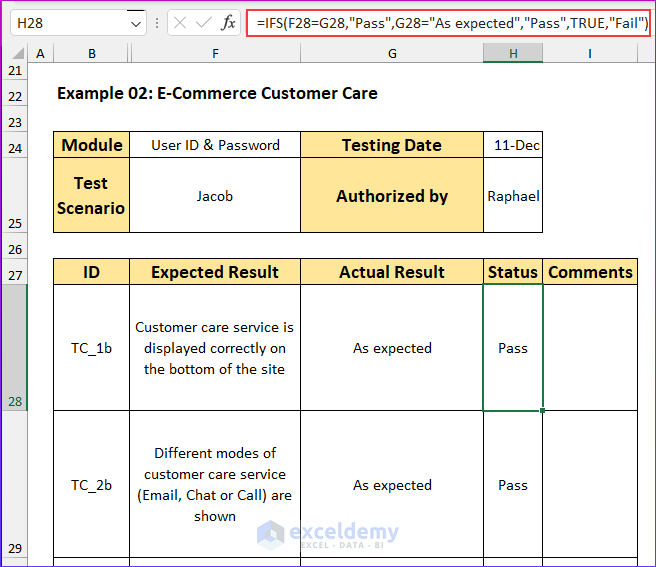
- Apply the Formula:
- Use the Fill Handle to copy the formula down to other relevant cells.
- This completes the process of creating test cases for the customer care page.
Read More: Prepare Test Cases for Gmail in Excel Sheet
Download Practice Workbook
You can download the practice workbook from here:
Related Articles
- Create Test Cases for Registration Form in Excel Sheet
- How to Export Test Cases from ALM to Excel
- How to Create Test Cases for ATM Machine in Excel Sheet
<< Go Back to Excel Test Cases Template | Excel Templates
Get FREE Advanced Excel Exercises with Solutions!
