Checklists are essential for an individual to keep track of tasks already completed and tasks that need to be done yet. Excel can help in creating a checklist using the Form Control Feature to keep track of tasks. In this article, we will show you how to make a checklist in Excel in 5 easy steps.
How to Make a Checklist in Excel: 5 Easy Steps
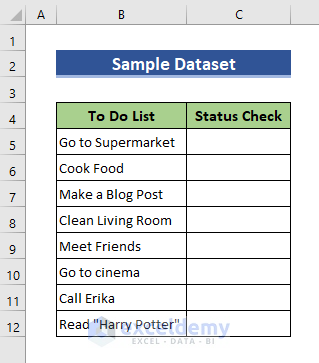
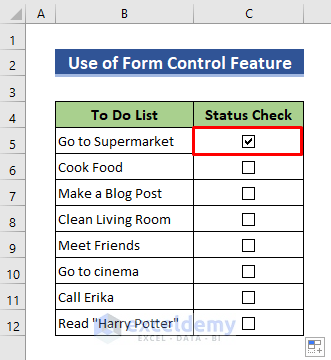
In this article, we will demonstrate how to make a checklist in Excel by following 5 easy steps. We will use the following dataset of To Do List for this purpose.
Step 1: Enable Developer Tab
We need the Developer tab first to make a checklist in Excel. If the Developer tab is not visible in your Excel worksheet, you need to enable it first.
- To do that, click on the arrow of Customize Quick Access Toolbar above the Home tab.
- Next, select More Commands. A pop-up window will appear.
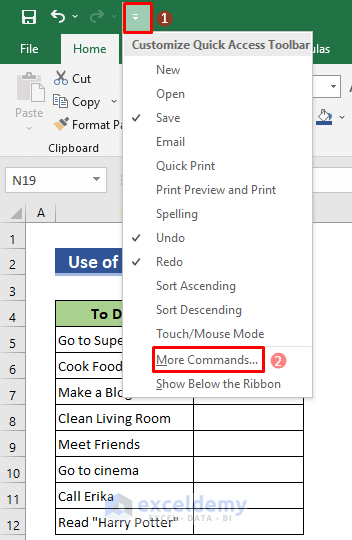
- In the pop-up window, go to Customize Ribbon and check the box of Developer.
- Click Ok and the Developer tab will be visible in your Excel window.

Read More: How to Make a Checklist in Excel Without Developer Tab
Step 2: Create Check Boxes
Now the most important step, creating checkboxes. Follow the steps below to make checkboxes in Excel
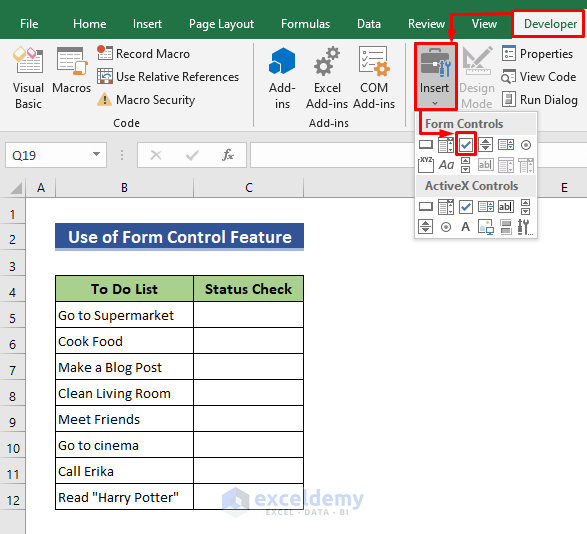
- First, go to the Developer tab and click Insert from the ribbon.
- Then click on the Check box option.
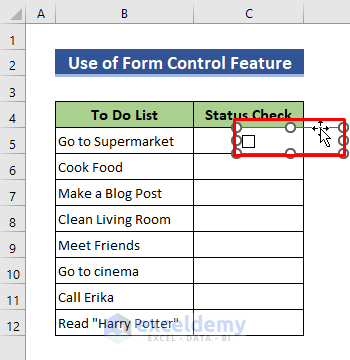
- The cursor will look like a “+” sign.
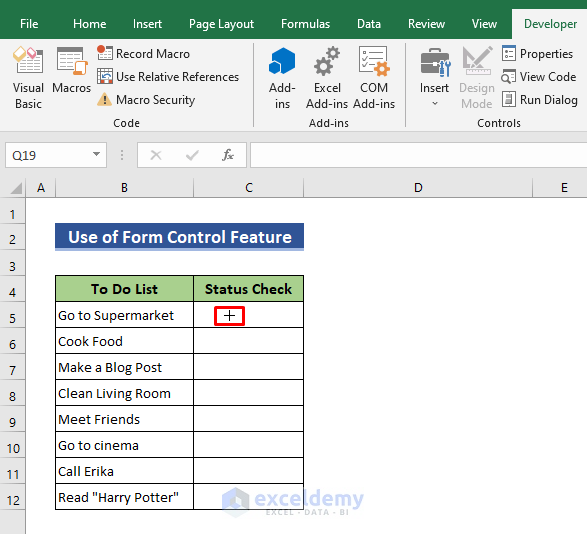
- Drag your cursor while holding the left button of the mouse to create a check box.
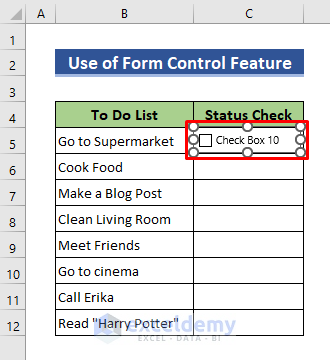
- Now we want to remove the text beside the check box. To do that, click the right button of your mouse and select Edit Text.
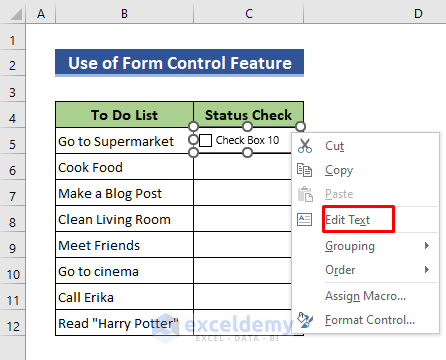
- You can see that the Edit Text option is enabled.
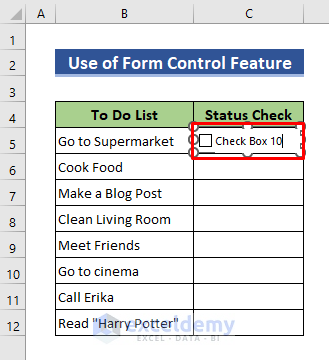
- Now use the Backspace button to delete the text.
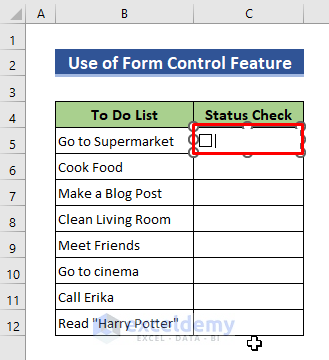
- Next, hold the left button of your mouse to move the check box to put it in the middle of the cell.
- Once the check box is positioned properly, select the cell and drag the bottom right corner of the cell.
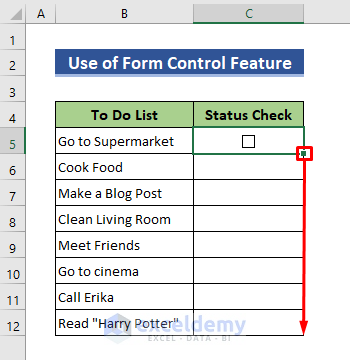
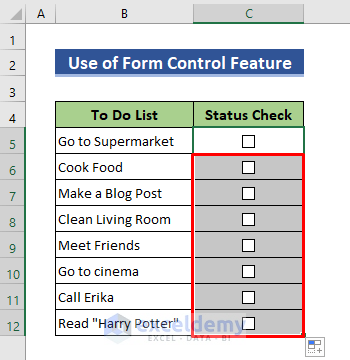
- This is how you will get check boxes in all cells.
Read More: How to Make a Daily Checklist in Excel
Step 3: Check the Boxes
In this step, we will check the boxes we just created. The procedure is discussed below.
- First, move your cursor to the check box you want to check.
- Once your cursor is near the box, the cursor will look like a Hand Icon.
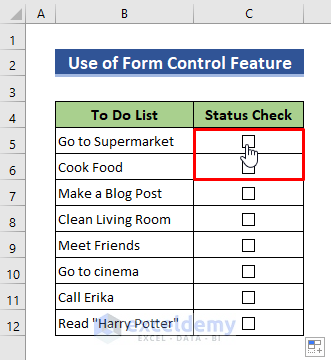
- Now you can click on the box to check the box.
Read More: How to Create an Interactive Checklist in Excel
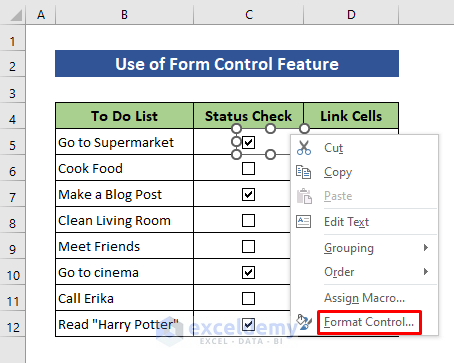
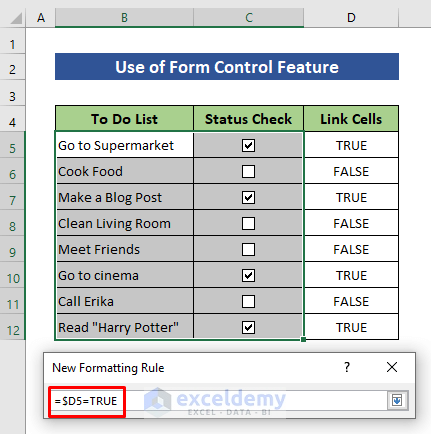
Step 4: Link Cells
Now we want to link cells to the check boxes to show “TRUE” or “FALSE” depending on the status of check boxes.
- First of all, right-click the check box and select Format Control.
- Format Control pop-up window will open. Click on the arrow of the Cell link.
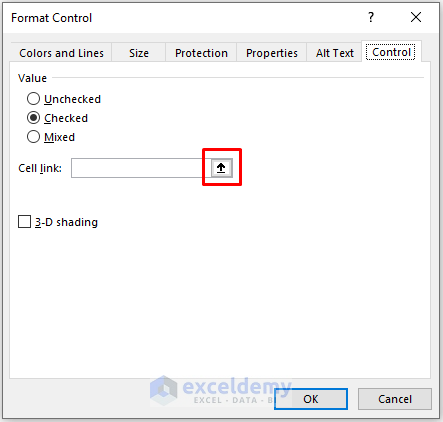
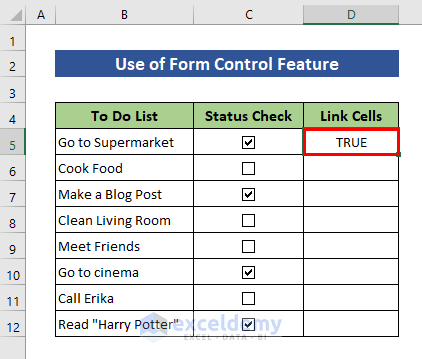
- Then, select the cell you want to link with the box. We selected cell D5.
- After that, press Enter.

- Then click OK to close the pop-up box.
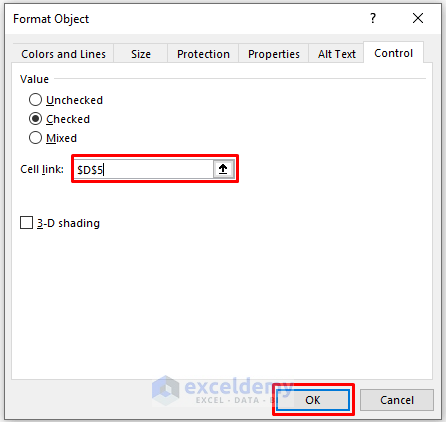
- You will see that cell D5 is showing “TRUE” as the box is checked.
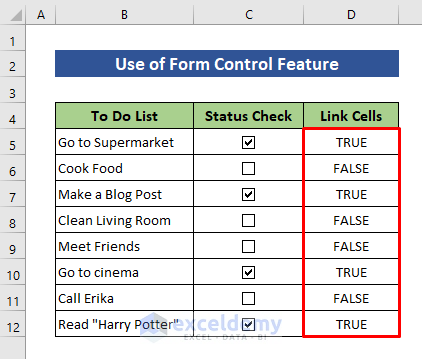
- Follow the same steps for all the cells. Cells with checked boxes will show “TRUTH” whereas cells linked with unchecked boxes will show “FALSE”.
Step 5: Format Checklist Color
If you want to assign different colors to cells depending on the status of check box, follow the steps provided below.
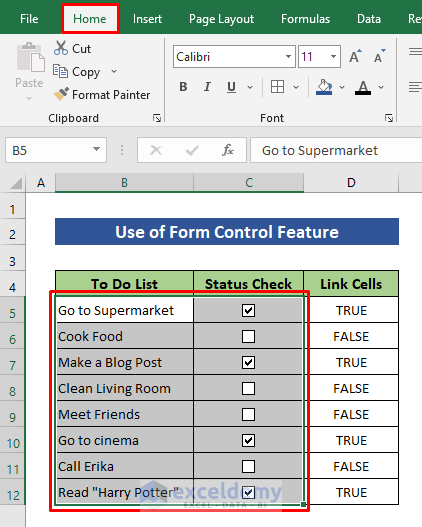
- First of all, select the To Do List and Status Check column.
- Then go to the Home tab.
- Next, click on Conditional Formatting from the ribbon and select New Rule.
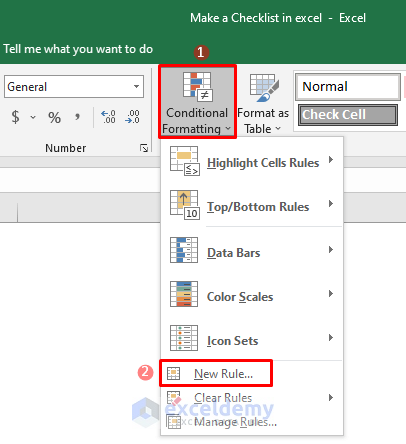
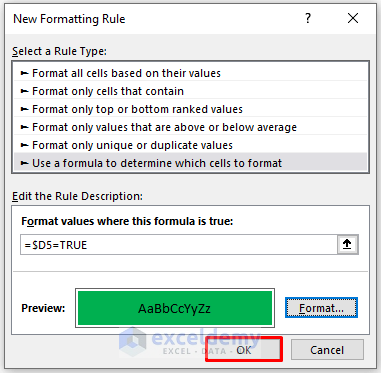
- New Formatting Rule pop-up will appear. Select Use a formula to determine which cells to format and click on the arrow.
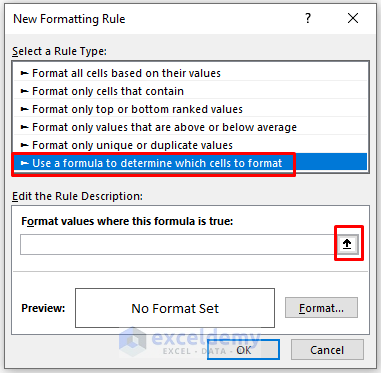
- Next, type =$D5=TRUE where D5 refers to cell D5.
- Hit the Enter button and select Format in the New Formatting Rule window.
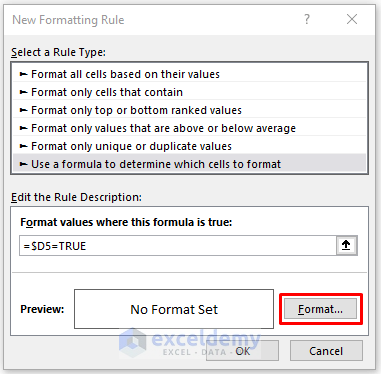
- Then go to the Fill tab there and choose any color.
- Now click OK.
- Then press Enter on your keyboard to close the pop-up.
- You will find that all rows with checked boxes now have the color you just selected while the unchecked boxes remain colorless.

Read More: How to Make Checklist with Conditional Formatting in Excel
Things to Remember
- Follow the first step if your Excel worksheet is missing the Developer If it is already visible, start from the second step.
- You can make your checklist more attractive by modifying different options in the Format Cells.
Download Practice Workbook
Download this practice workbook for practice while you are reading this article.
Concluding Remarks
Thanks for making it this far. I hope you find this article useful. Now you know 5 easy steps to make a checklist in Excel. Please let us know if you have any further queries and feel free to give us any recommendations in the comment section below.

