In this article we will demonstrate a variety of ways to use the VBA Range Offset. Here is an overview.
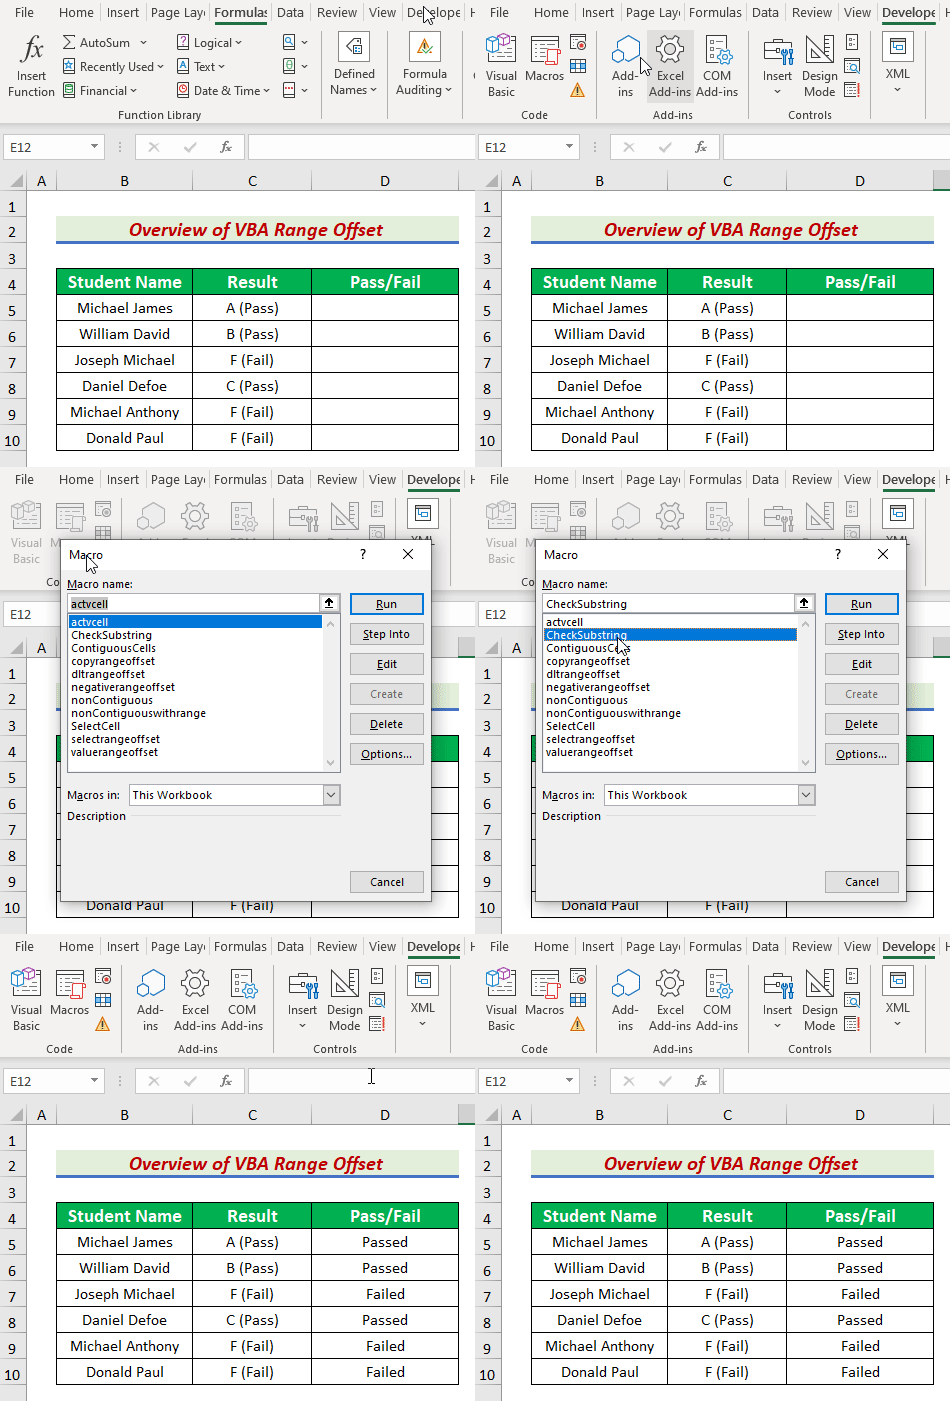
11 Suitable Ways to Use VBA Range Offset
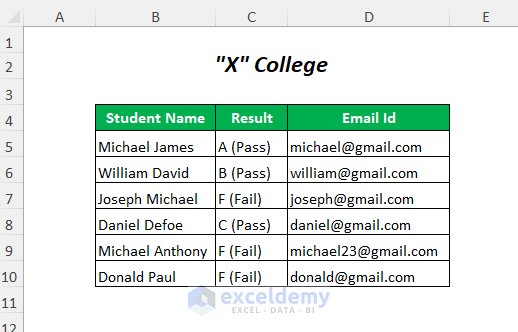
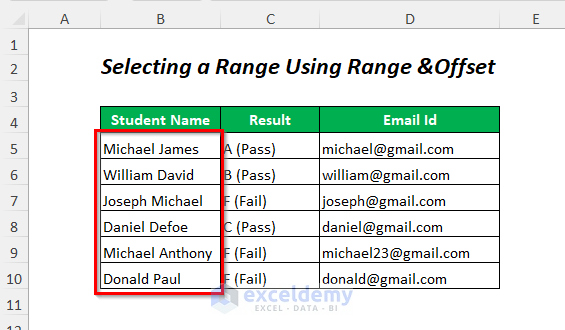
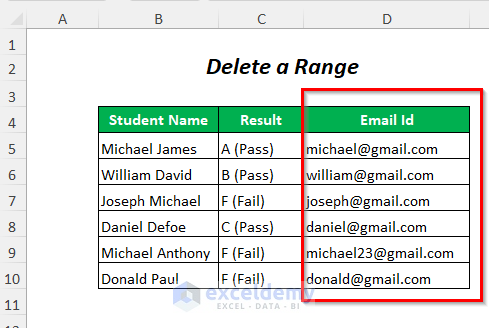
To illustrate our methods, we’ll use the following data table containing information about some students.
We used Microsoft Excel 365 version, but you can use any other version at your disposal.
Method 1 – Selecting a Cell Using VBA Range Function
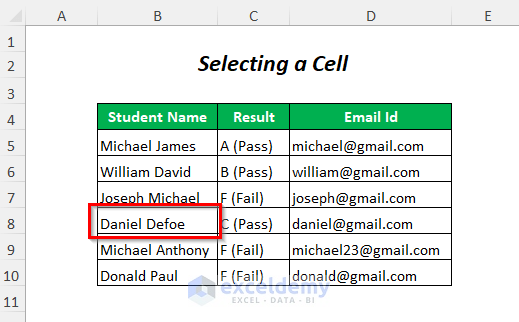
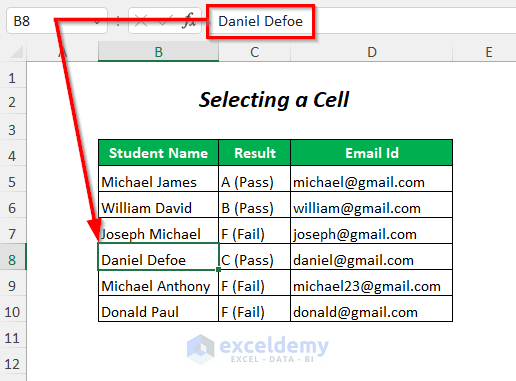
Let’s select the cell containing the name Daniel Defoe by using the RANGE function.
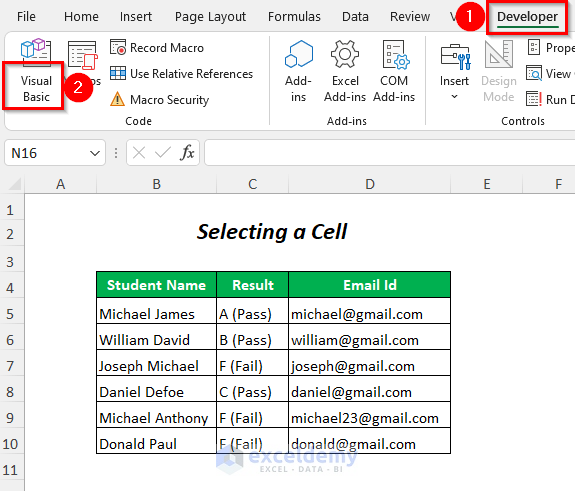
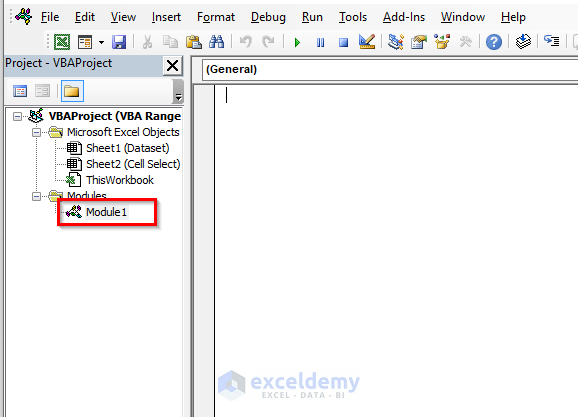
- Go to the Developer Tab >> Visual Basic.
The Visual Basic Editor will open up.
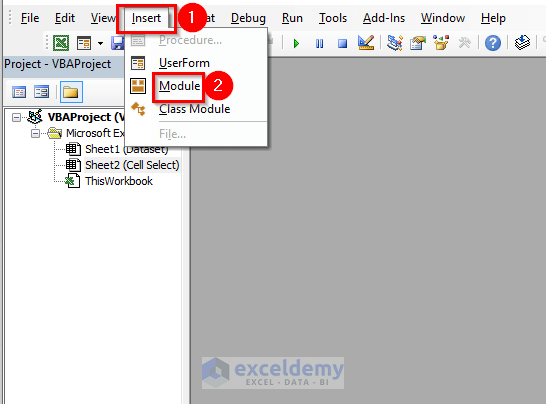
- Go to the Insert Tab >> Module option.
A Module will be created.
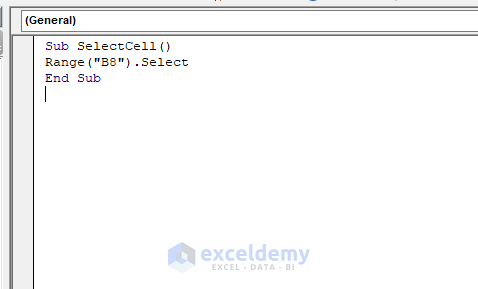
- Enter the following code in the Module:
Sub SelectCell()
Range("B8").Select
End Sub
This will select cell B8.
- Press F5 to run the code.
Result:
The cell containing Daniel Defoe is selected.
Read more: How to Use the Range Object of VBA in Excel
Method 2 – Selecting a Group of Contiguous Cells
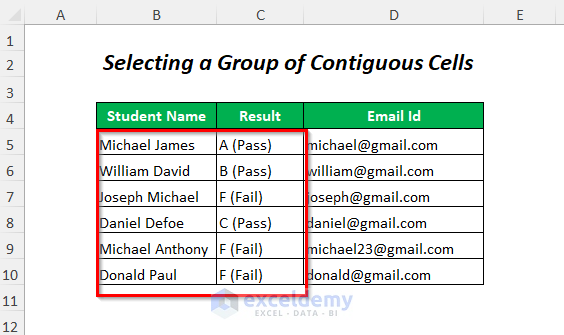
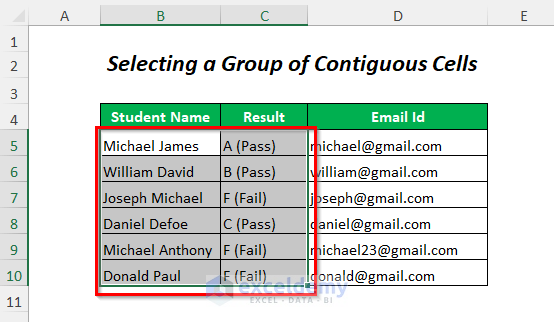
Now let’s select a range of contiguous cells, such as the Student Name and Result columns.
Steps:
- Follow the Steps of Method 1 to open a new Module window.
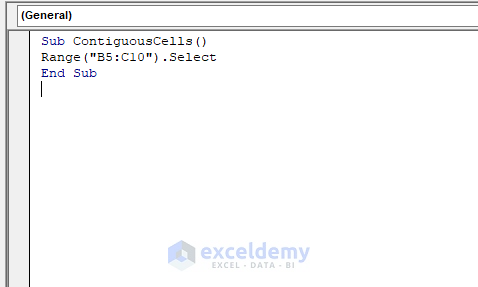
- Enter the following code in the Module:
Sub ContiguousCells()
Range("B5:C10").Select
End Sub
This will select the cells from B5 to C10.
- Press F5 to run the code.
Result:
The cells in Column B and Column C are selected.
Method 3 – Selecting a Group of Non-Contiguous Cells
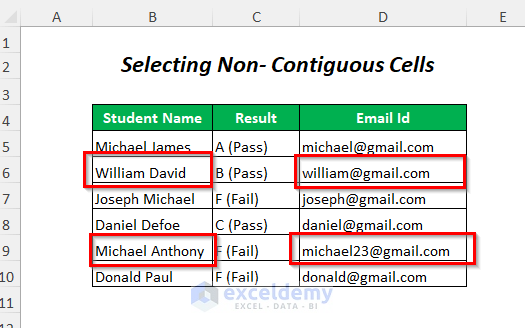
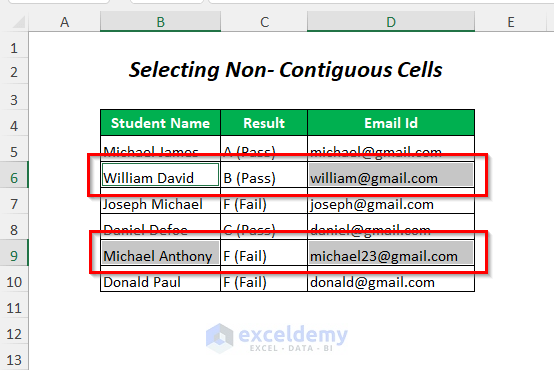
Suppose we want to select the students named William David and Michael Anthony along with their respective Email Ids.
Steps:
- Follow the Steps of Method 1 to open a new Module window.
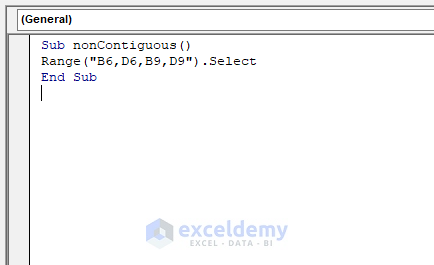
- Enter the following code in the Module:
Sub nonContiguous()
Range("B6,D6,B9,D9").Select
End Sub
This will select the cells B6, D6, B9, and D9.
- Press F5.
Result:
The cells containing the student names William David, Michael Anthony, and their respective Email Ids, are selected.
Method 4 – Selecting a Group of Non-Contiguous Cells and a Range
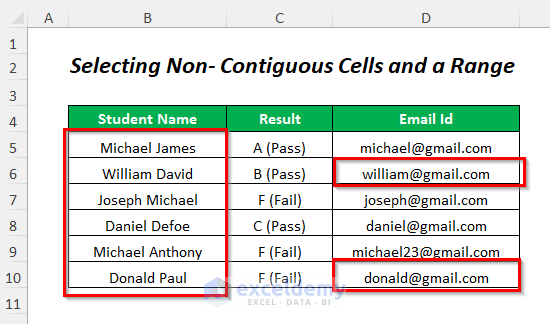
Now let’s select a range of cells and some non-contiguous cells simultaneously.
Steps:
- Follow the Steps of Method 1 to open a new Module window.
- Enter the following code in the Module:
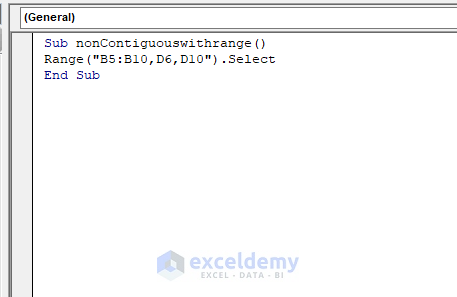
Sub nonContiguouswithrange()
Range("B5:B10,D6,D10").Select
End Sub
This will select the range B5:B10 and the cells D6 and D10.
- Press F5.
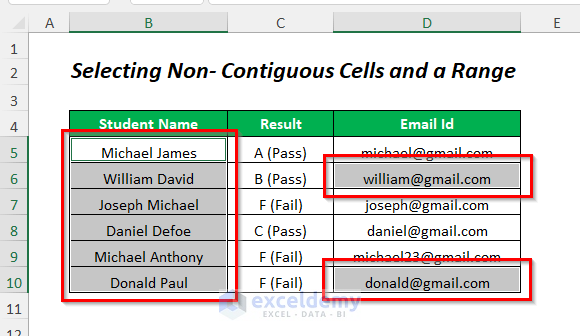
Result:
The cells in the column Student Name and two Email Ids for William David and Donald Paul are selected.
Method 5 – Selecting a Range Using Range Offset
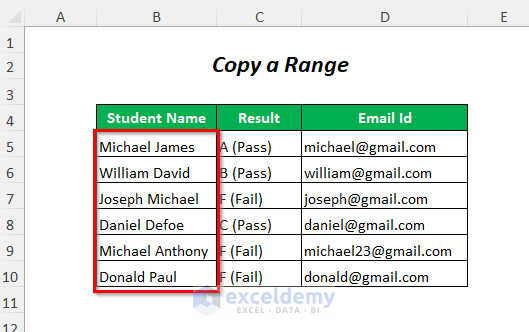
We can select a range of cells in the Student Name column by using the OFFSET function.
Steps:
- Follow the Steps of Method 1 to open a new Module window.
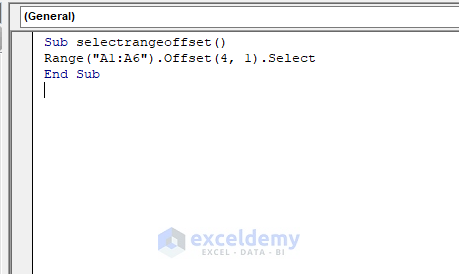
- Enter the following code in the Module:
Sub selectrangeoffset()
Range("A1:A6").Offset(4, 1).Select
End Sub
Range(“A1:A6”) will select the range A1:A6, then Offset(4, 1) will move 4 rows down from cell A1 and 1 column to the right. The same number of cells as in the range A1:A6 will then be selected.
- Press F5.
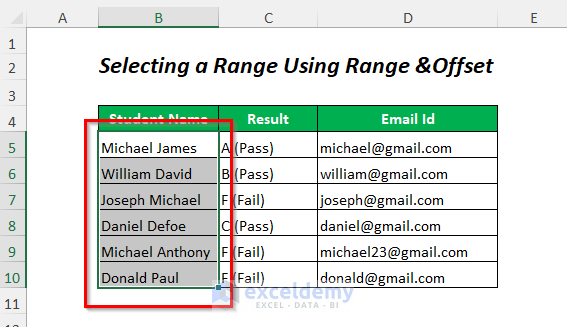
Result:
The column Student Name is selected.
Method 6 – Negative Range Offset
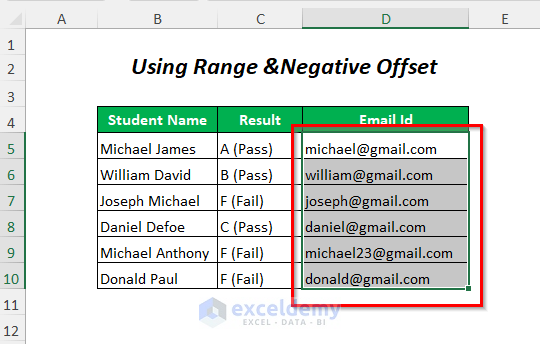
We’ll select the Email Id column using this method.
Steps:
- Follow the Steps of Method 1 to open a new Module window.
- Enter the following code in the Module:
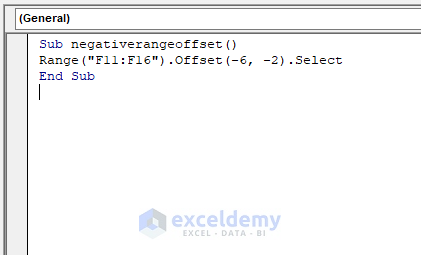
Sub negativerangeoffset()
Range("F11:F16").Offset(-6, -2).Select
End Sub
Range(“F11:F16”) will select the range F11:F16, then Offset(-6, -2) will move 6 rows up from cell F11 and 2 columns to the left. Then the same number of cells as in the range F11:F16 will be selected.
- Press F5.
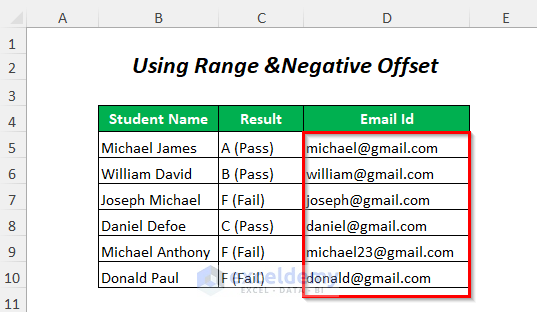
Result:
The column Email Id is selected.
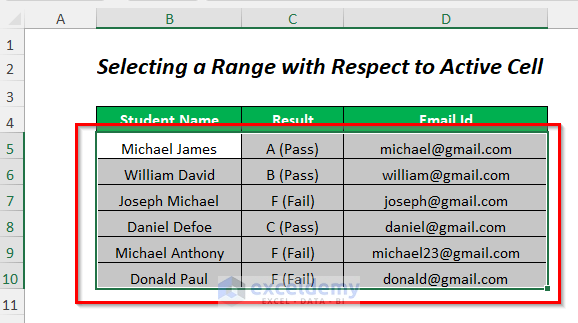
Method 7 – Selecting a Range with Respect to the Active Cell
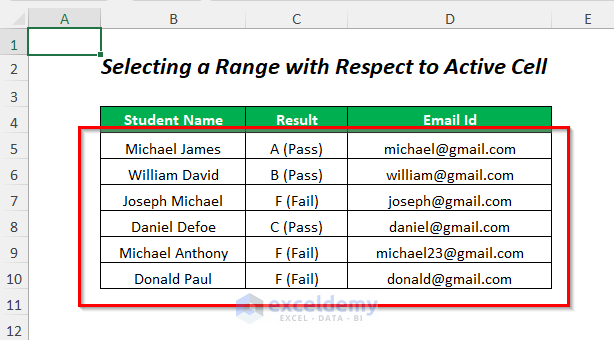
Here, the active cell is cell A1, and we will select the data range with respect to this cell.
Steps:
- Follow the Steps of Method 1 to open a new Module window.
- Enter the following code in the Module:
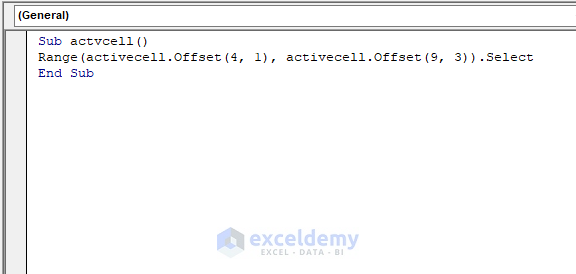
Sub actvcell()
Range(activecell.Offset(4, 1), activecell.Offset(9, 3)).Select
End Sub
Here, activecell is cell A1.
activecell.Offset(4, 1) will select a cell 4 rows down and 1 column to the right of cell A1, and activecell.Offset(9, 3) will select a cell 9 rows down and 3 columns to the right of cell A1.
All of the cells between these two cells will then be selected.
- Press F5.
Result:
The whole data range is selected.
Method 8 – Copy a Range
Steps:
- Follow the Steps of Method 1 to open a new Module window.
- Enter the following code in the Module:
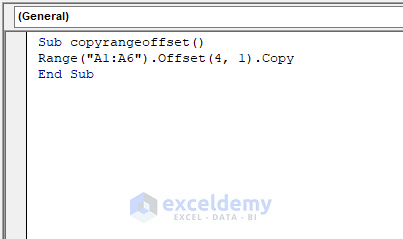
Sub copyrangeoffset()
Range("A1:A6").Offset(4, 1).Copy
End Sub
Range(“A1:A6”) will select the range A1:A6, then Offset(4, 1) will move 4 rows down from cell A1 and 1 column to the right. Then the same number of cells as in the range A1:A6 will be selected.
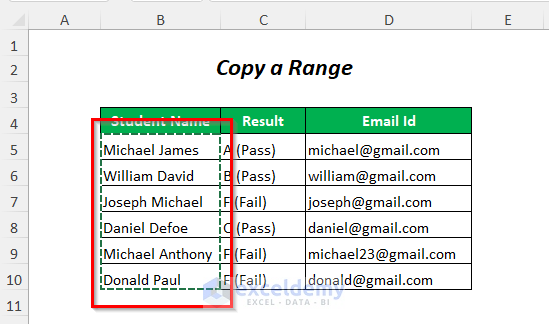
Finally, the values in the range B5:B10 will be copied.
- Press F5.
Result:
The data range in the Student Name column is selected and copied.
Method 9 – Deleting a Range
Steps:
- Follow the Steps of Method 1 to open a new Module window.
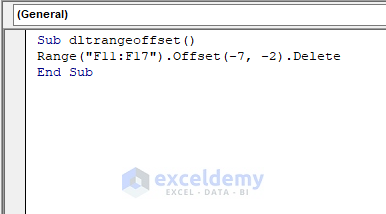
- Enter the following code in the Module:
Sub dltrangeoffset()
Range("F11:F17").Offset(-7, -2).Delete
End Sub
Range(“F11:F17”) will select the range F11:F17, then Offset(-7, -2) will move 7 rows up from cell F11 and 2 columns to the left. Then the same number of cells as in the range F11:F17 will be selected.
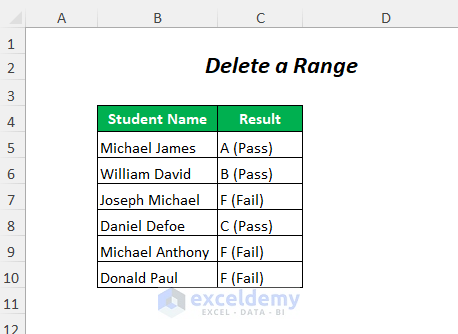
Finally, the range D4:D10 will be deleted.
- Press F5.
Result:
The data range in the Email Id column is deleted.
Method 10 – Using VBA Range Offset to Enter a Value
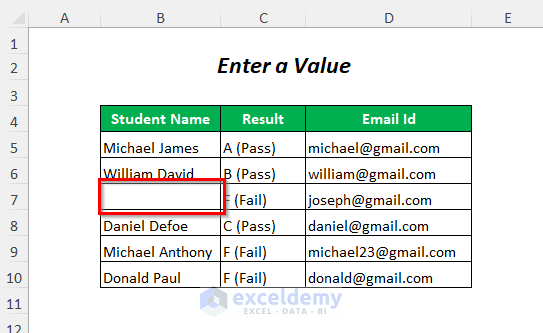
Here, we have an empty cell (having removed the value in this cell in order to demonstrate this method) in the Student Name column, and we want to fill it with the name Joseph Michael.
Steps:
- Follow the Steps of Method 1 to open a new Module window.
- Enter the following code in the Module:
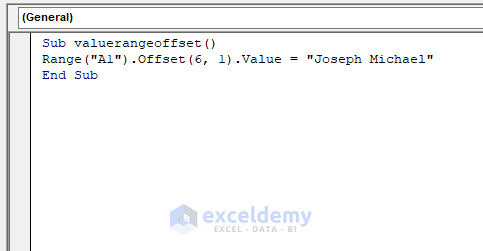
Sub valuerangeoffset()
Range("A1").Offset(6, 1).Value = "Joseph Michael"
End Sub
Range(“A1”) will select the cell A1, then Offset(6, 1) will move 6 rows down from cell A1 and 1 column to the right. Then cell B7 will be selected and the value “Joseph Michael” entered into it.
- Press F5.
Result:
The name Joseph Michael is inserted in cell B7.
Method 11 – Using VBA Range Offset to Get Output
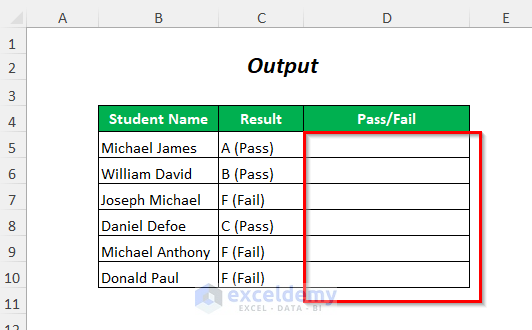
Suppose in a new column we want to enter Passed or Failed depending on the Result column, where Pass or Fail appears in brackets. We’ll find this substring in the Result column, and enter it in the Pass/Fail column.
Steps:
- Follow the Steps of Method 1 to open a new Module window.
- Enter the following code in the Module:
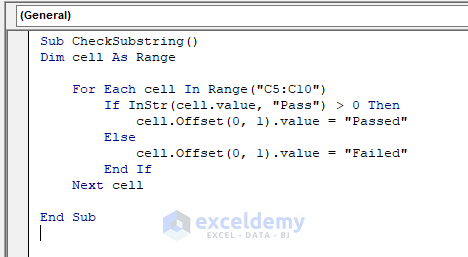
Sub CheckSubstring()
Dim cell As Range
    For Each cell In Range("C5:C10")
        If InStr(cell.value, "Pass") > 0 Then
            cell.Offset(0, 1).value = "Passed"
        Else
            cell.Offset(0, 1).value = "Failed"
        End If
    Next cell
End Sub
The cell range C5:C10 (the Result column) is selected by Range(“C5:C10”).
InStr(cell. value, “Pass”) > 0 is the condition. If the number is greater than zero (the cell contains “Pass”) then the following line will continue and provide output of Passed in the adjacent cell. The adjacent cell is selected by cell.Offset(0, 1), meaning 1 column to the right of the input cell.
If the condition returns false, meaning a cell doesn’t contain “Pass”, then the line under Else will execute and provide an output value of Failed in the adjacent cell.
This loop will iterate through each cell.
- Press F5.
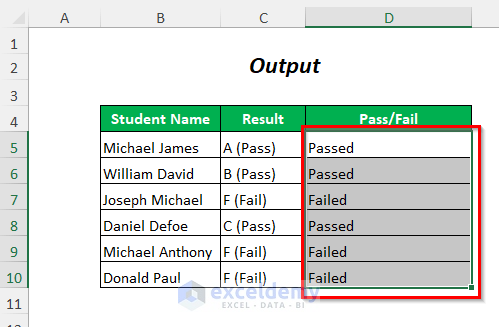
Result:
Either Passed or Failed is filled in the cells of the Pass/Fail column.
Download Workbook
Further Reading
- Excel VBA Copy Range to Another Sheet
- End of a Range Using VBA in Excel
- Excel Subscript Out of Range Error in VBA
- VBA for Each Cell in Range in Excel
- How to Count Text in Excel
