Method 1 – Use the INT Function to Split Date and Time
Steps:
- Add two new columns for date and time.
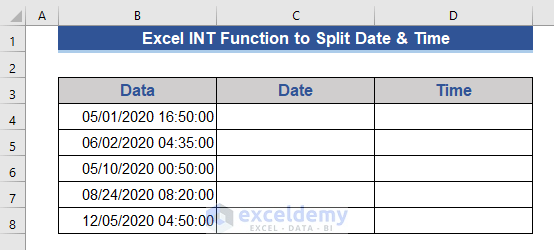
- Go to cell C4 and put the following formula.
=INT(B4)
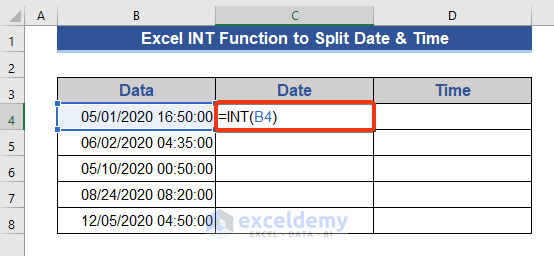
- Press the Enter key and drag the Fill Handle icon.
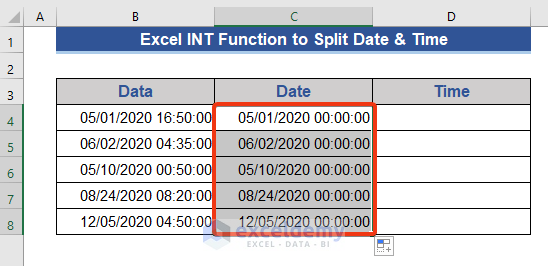
Dates are showing with 00:00:00 time. To remove this time value, the format of the cells need to be changed.
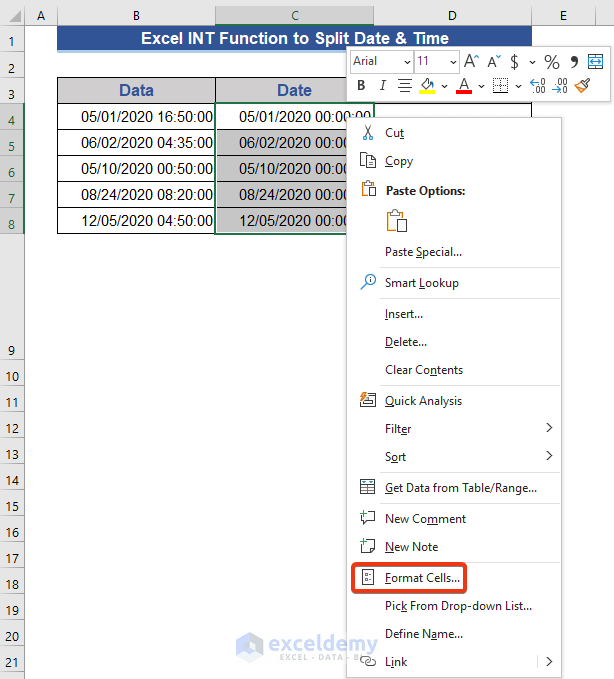
- Select the cells of the Date column and right-click.
- Choose the Format Cells option from the Context Menu.
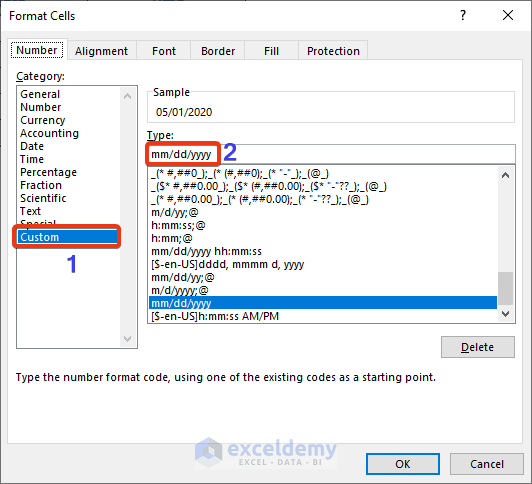
- From the Custom section, choose a format from the given list or put your desired format in box below Type:
- Press OK.
- Dates are formatted accordingly.
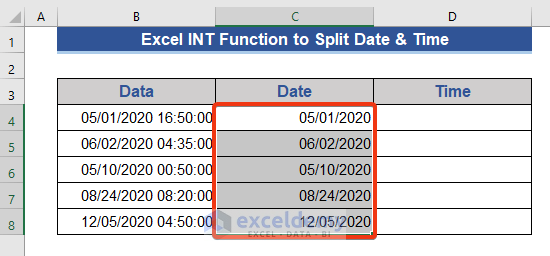
This INT function separates the date part first. To find out the time value,
- Go to Cell D4 of the Time column and put the formula below.
=B4-C4
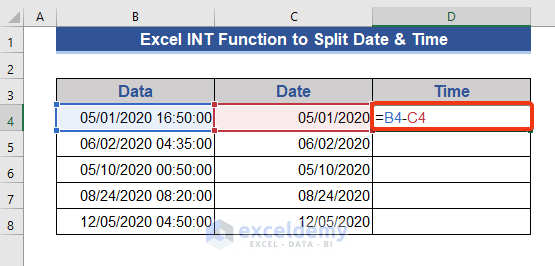
This subtracts the date value from the main data.
- Hit the Enter key and drag the Fill Handle icon.
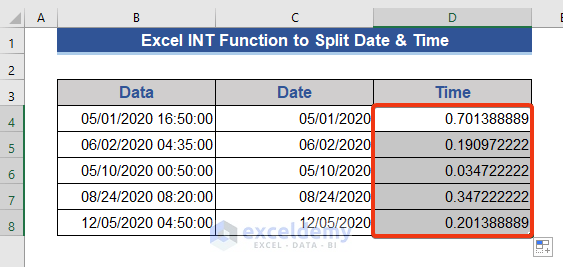
The time is not showing correctly.
- Follow the steps mentioned in method 1 to get the Format Cells window.
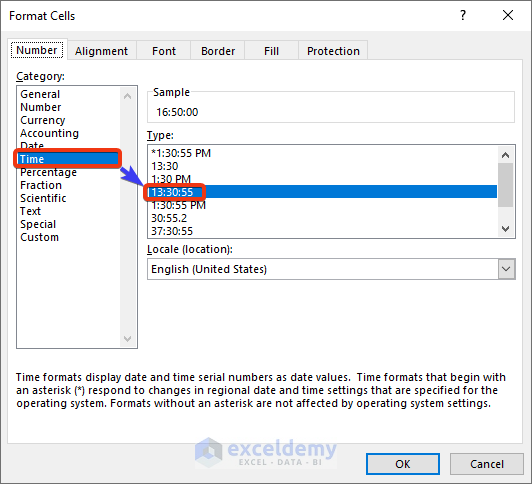
- Select the Time column and fix the format from Time. Press OK.
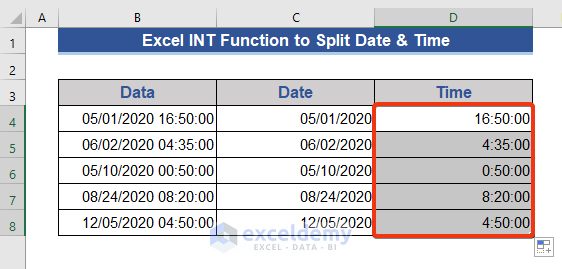
- The date and time column are split.
Step 2 – Split Date and Time Using Excel DATE Function
Steps:
- Go to Cell C4 of the Date column.
- Put the following formula.
=DATE(YEAR(B4),MONTH(B4),DAY(B4))
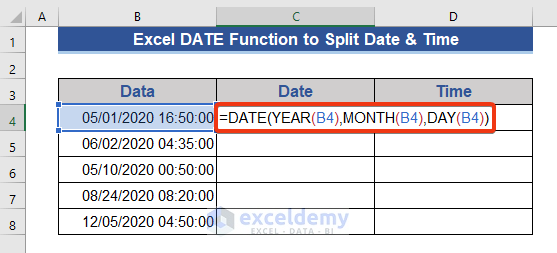
- Press Enter and drag the Fill Handle icon downwards.
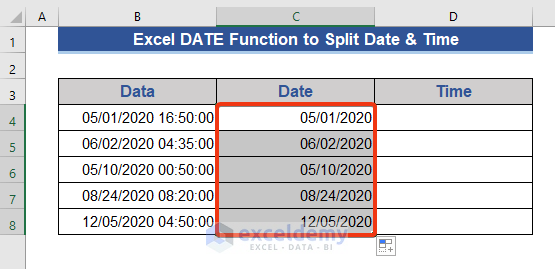
We get the date value. This date value will be subtracted from the Data column to get the time value.
- Put the formula below on cell D4.
=B4-C4
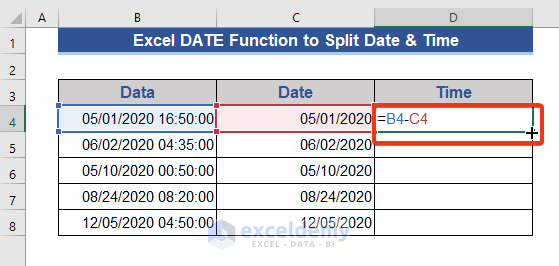
- Double click the Fill Handle icon.
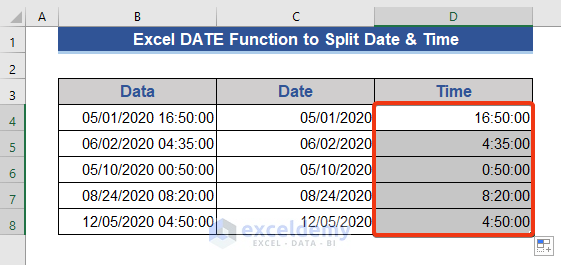
- After applying the Time format, you will get the proper output.
Step 3 – Use the TIME Function to Split Date and Time
Steps:
- Go to cell D4 of the Time column and put the formula below.
=TIME(HOUR(B4),MINUTE(B4),SECOND(B4))
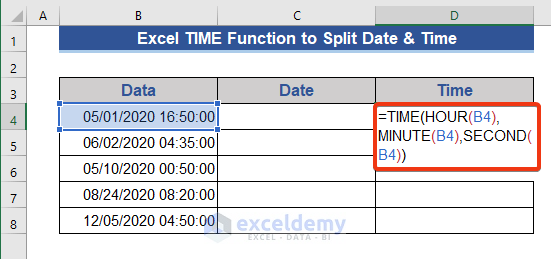
- Hit the Enter button and drag the Fill Handle icon.
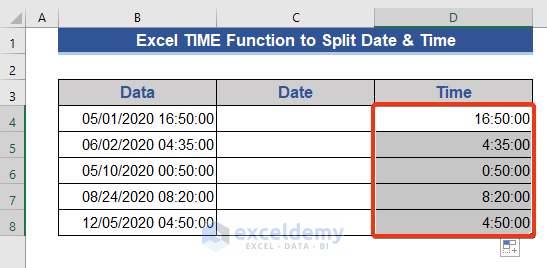
We get the time value.
- Subtract the time value from the Data column and get the Date. Put the following formula at cell C4 for that.
=B4-D4
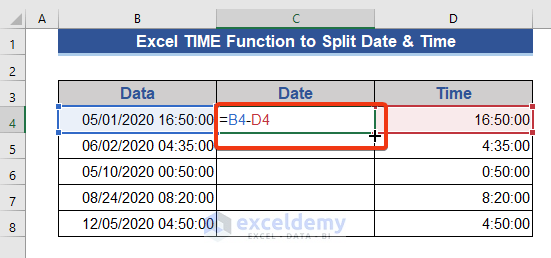
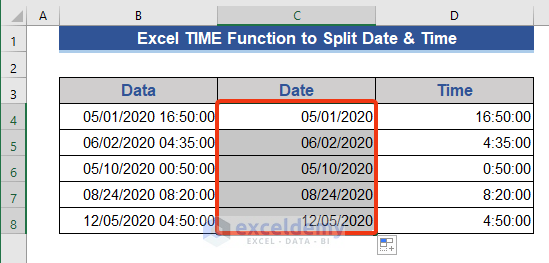
- Drag the Fill Handle icon to get the values for all the cells. Don’t forget to change the number format to a custom date.
Method 4 – Using the TEXT Function
Steps:
- Go to cell C4 of the Date column and put the following formula.
=TEXT(B4,"mm/dd/yyyy")
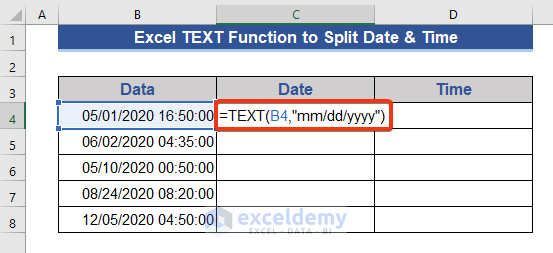
- Press Enter and drag the Fill Handle icon.
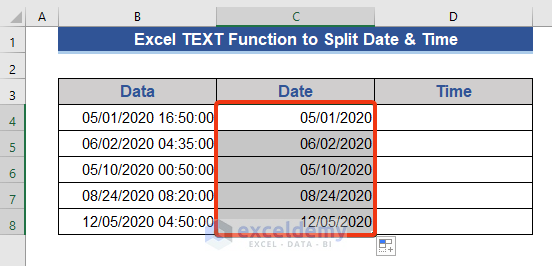
We get the date value.
- Add the following formula on cell D4 to determine the time value.
=TEXT(B4,"hh:mm:ss")
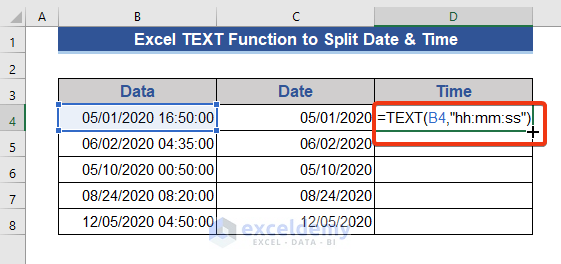
- Double click the Fill Handle icon.
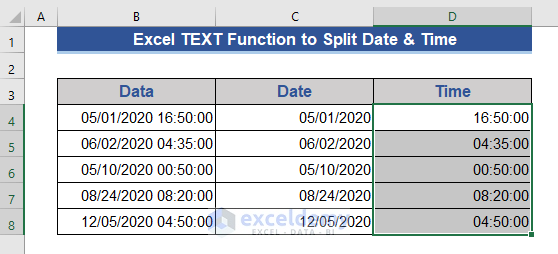
It will split the time and date values from the column.
Method 5 – Use of Text to Columns Feature
Steps:
- Choose all the cells of the Data column.
- Go to the Data tab now.
- Choose the Text to Columns option from the Data Tools group.
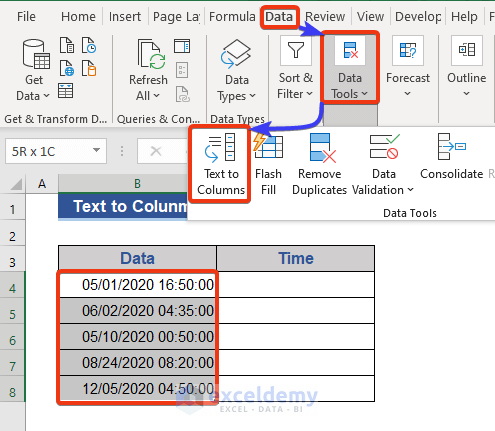
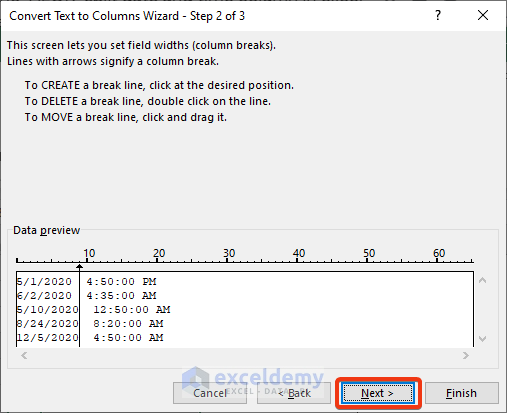
- Mark the Fixed width option from the 1st Step of Text to Columns Wizard.
- Press Next.
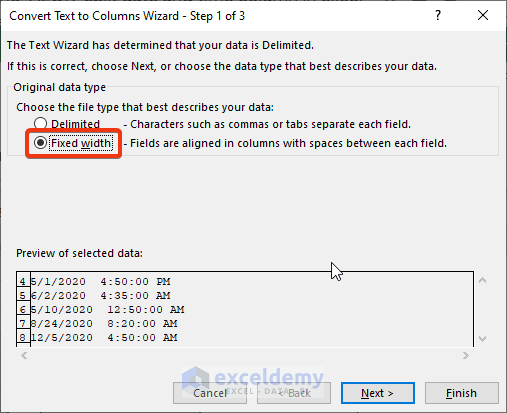
- In the 2nd step, go to the Data preview section and set the position. Press Next.
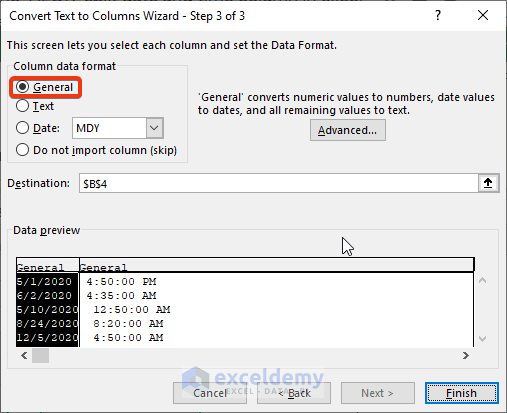
- Choose the General option as default. Click on the Finish button.
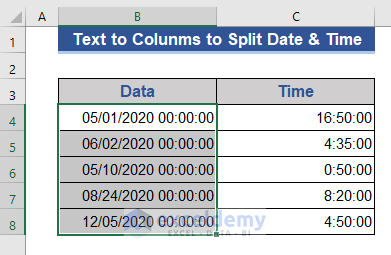
- Time value is separated. In the Data column, all the time values are zero. Only date values are presented here.
Method 6 – Use the Flash Fill Feature
Steps:
- Input values in the first 2 cells of the Date and Time column from the Data column to create a pattern.
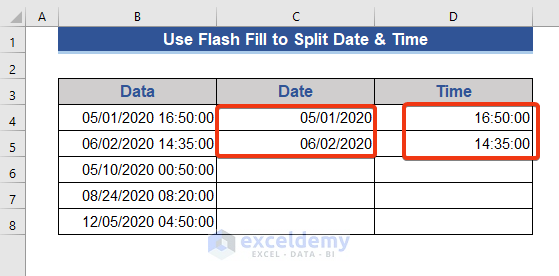
- Select all the cells of the Date column and go to the Data tab.
- Choose the Flash Fill option of the Data Tools.
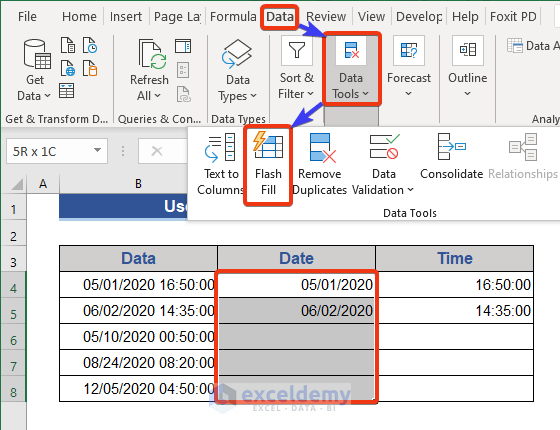
- It will fill dates for all the rows.
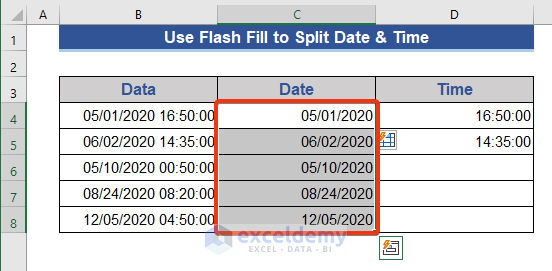
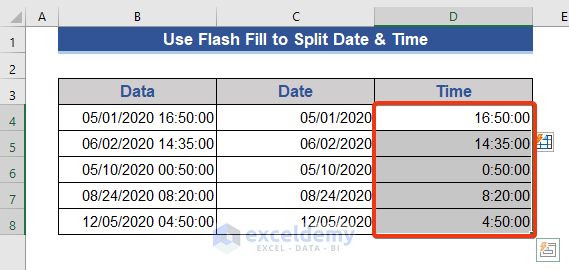
- Select all the cells of the Time column and apply the same technique.
Method 7 – Use Power Query to Extract Date and Time Separately
Steps:
- Select all the cells of the Data column.
- Choose From Table/Range from the Data tab.
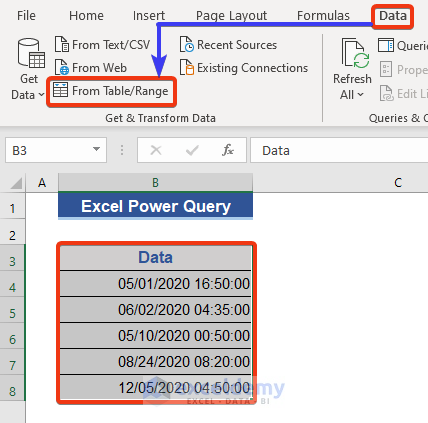
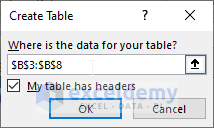
- A pop-up will appear with the selected range.
- Check the box My table has headers and press OK.
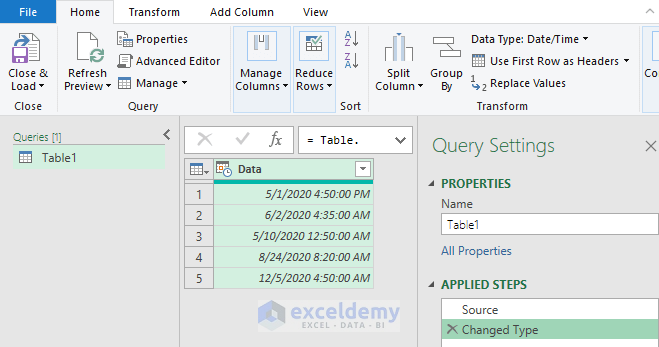
- The Power Query window appears now.
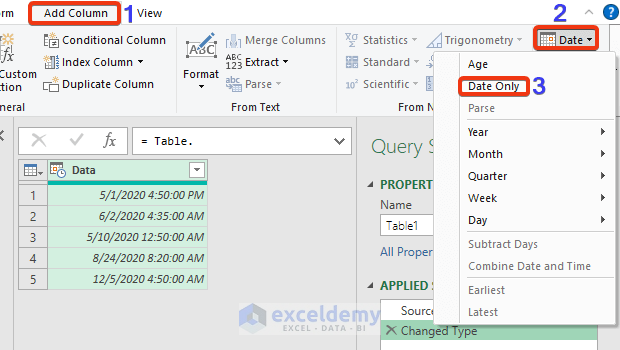
- Go to the Add Column tab.
- Choose Date Only from the Date feature.
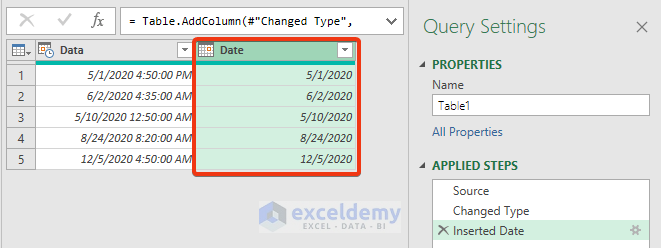
- All the dates are separated and form a new column.
- Choose the Add Column tab.
- Select Time Only from the Time feature.
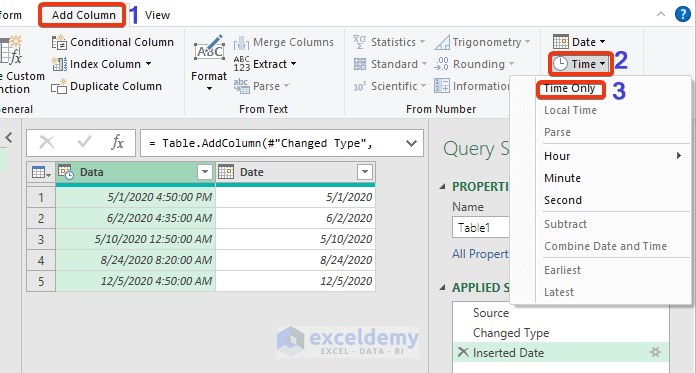
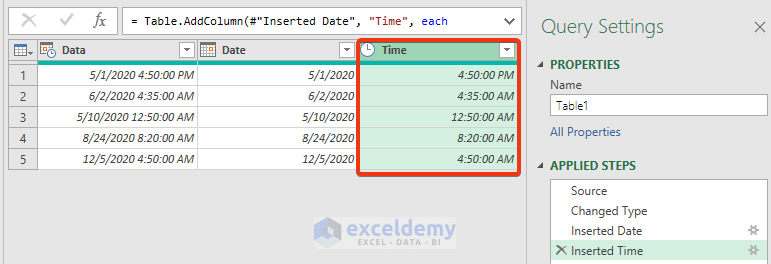
- It will output both the dates and time value.
Download Practice Workbook
Related Articles
- How to Split Column in Excel by Comma
- How to Split Column by First Space in Excel
- Split Column in Excel by Word
- How to Split One Column into Multiple Columns in Excel Formula


