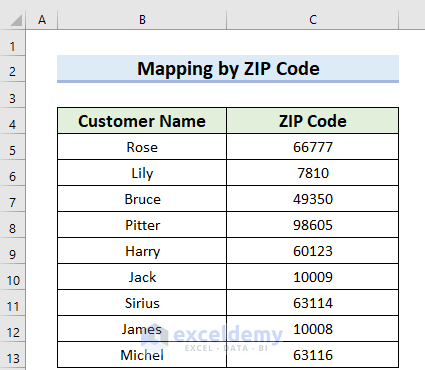
The below dataset contains 2 columns: Customer Name and ZIP Code.
Method 1 – Using Geographic Data Type to Map Data by ZIP Code
- Select the ZIP codes.
- From the Data tab >> click the Geography feature, which is under Data Types. You might use the drop-down arrow to find the Geography Data Type.
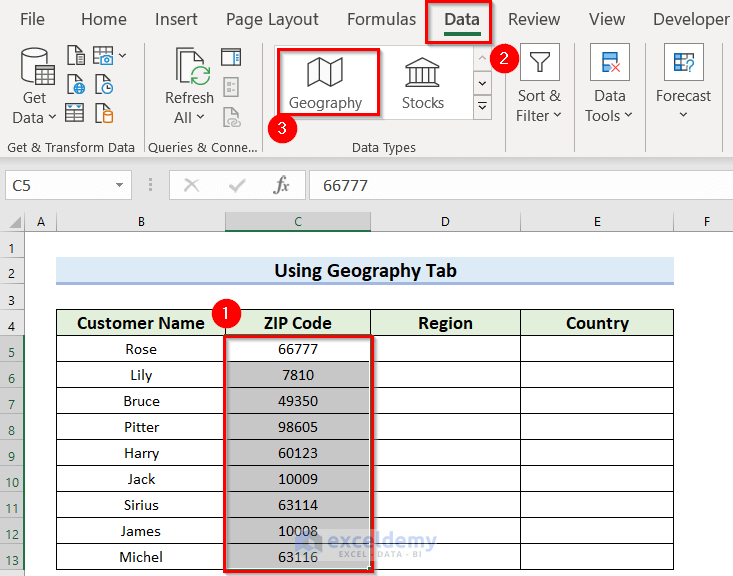
As a result, you will see the following output.
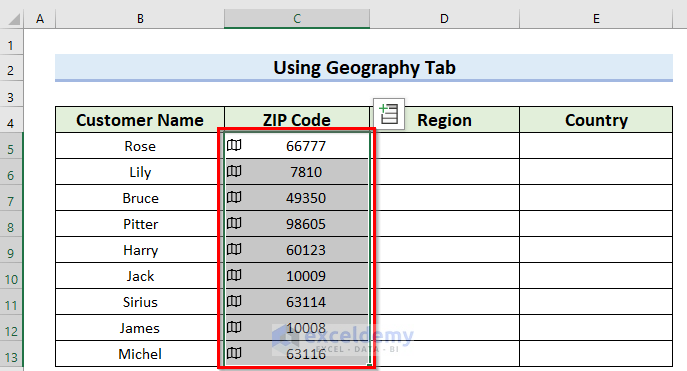
- Click on the symbol beside the ZIP codes.
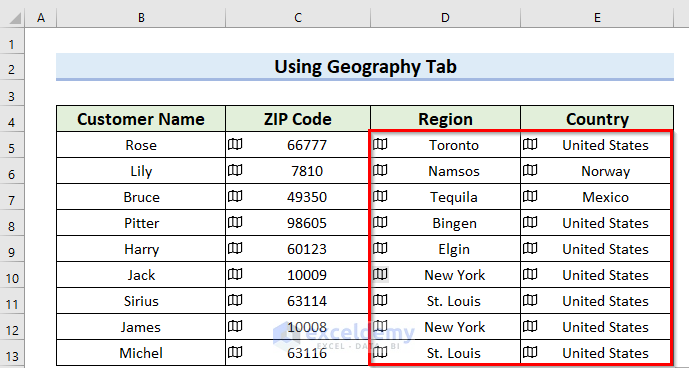
You will get all the geographic information, including the detailed location related to that ZIP code.
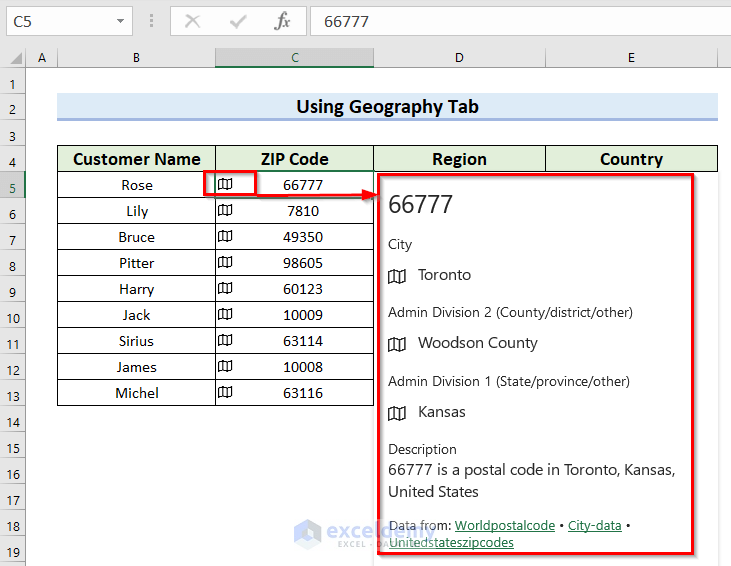
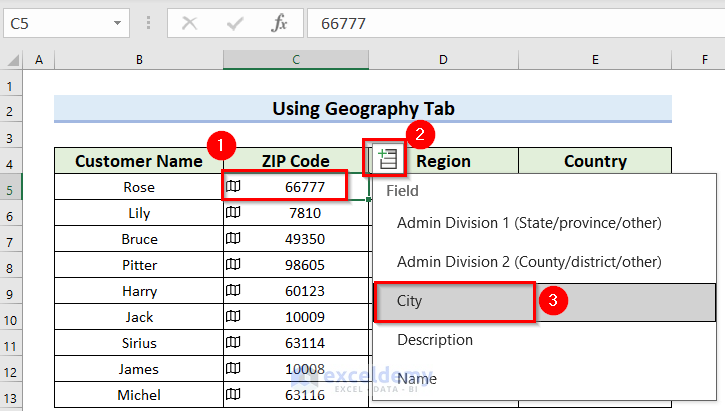
- Select cell C5.
- Click the Field icon.
- Choose City.
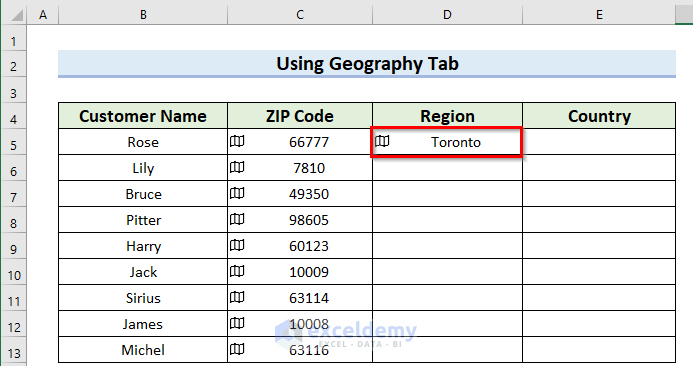
You will see the city name holding that ZIP code in a cell next to C5 – cell D5.
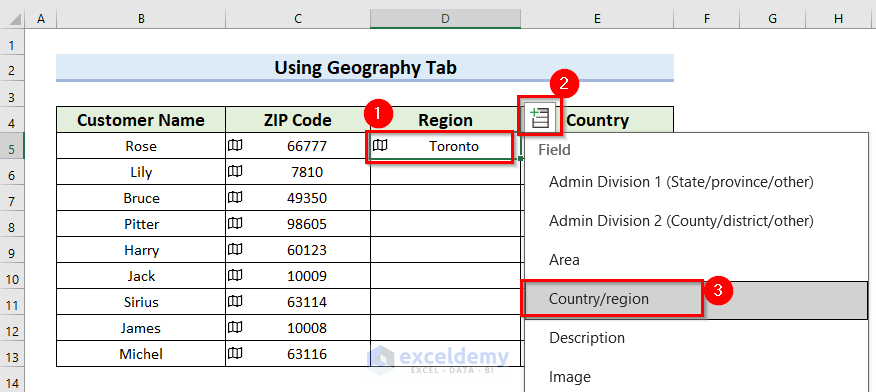
- Select cell D5.
- Click the Field icon.
- Choose a Country/region.
You will see the country name holding that ZIP code in a cell next to D5– cell E5.
You can follow another way to insert the geographical location for that particular ZIP code.
- In cell D5 type (=C5.) Then you can choose any type of available information from a list.
As I want to insert the city name. I have chosen City. The formula becomes:
=C5.City- Press ENTER.
- To get the other geographical locations select D5 & E5 and use the Fill Handle icon.
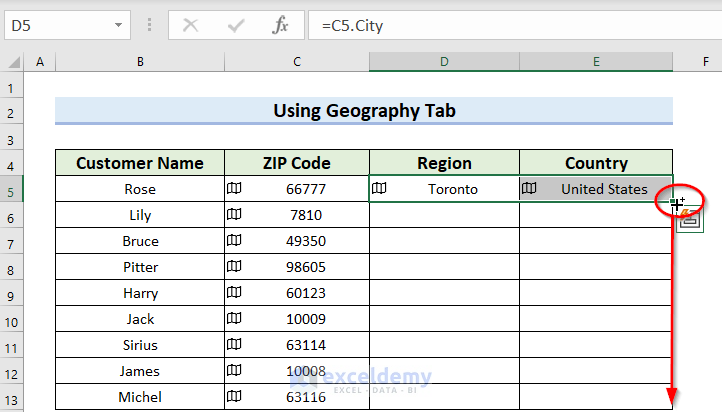
You will get all the regions and countries for the given ZIP codes.
Read More: How to Create Zip Code with Excel Formula
Method 2 – Using a Filled Map Chart
Steps:
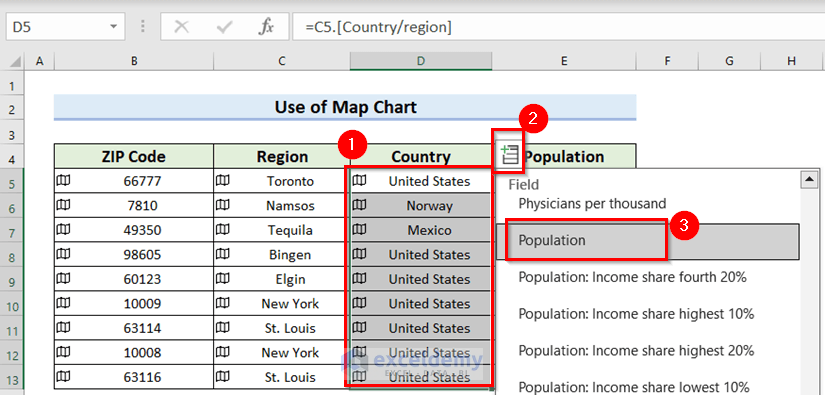
- Following the steps of method 1, insert the city and country name.
- Select D5:D13, click the Feild icon, and insert Population.
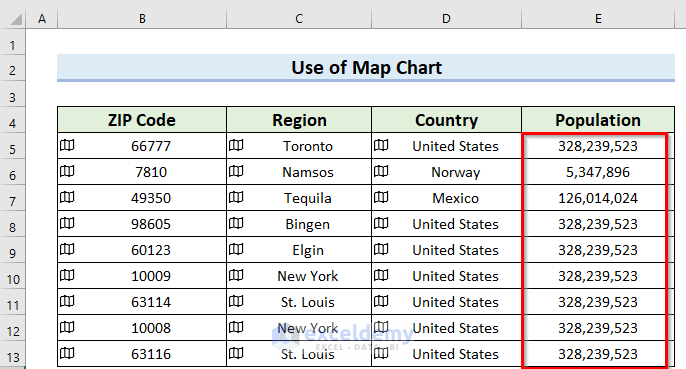
You will get all the populations of those countries.
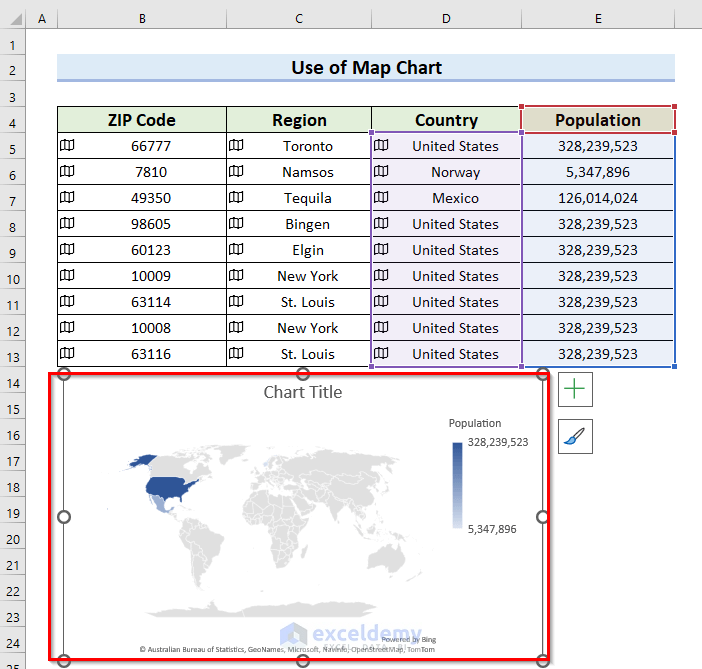
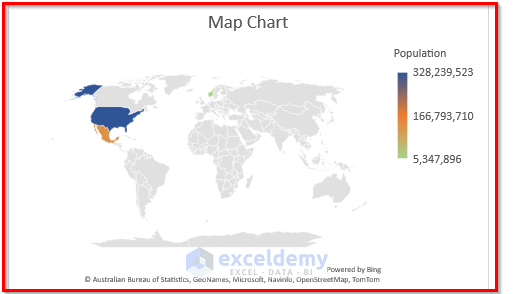
- Select the Country and Population columns.
- From the Insert tab >> go to Maps under the Charts group section >> choose Filled Map chart.
You will see the Map chart.
- Double-click on the Chart field.
A new window named Format Data Series will open at the rightmost corner of the Excel sheet.
- Select Series Options.
- Choose Diverging (3-color) from the Series Color. Change the colors if desired.
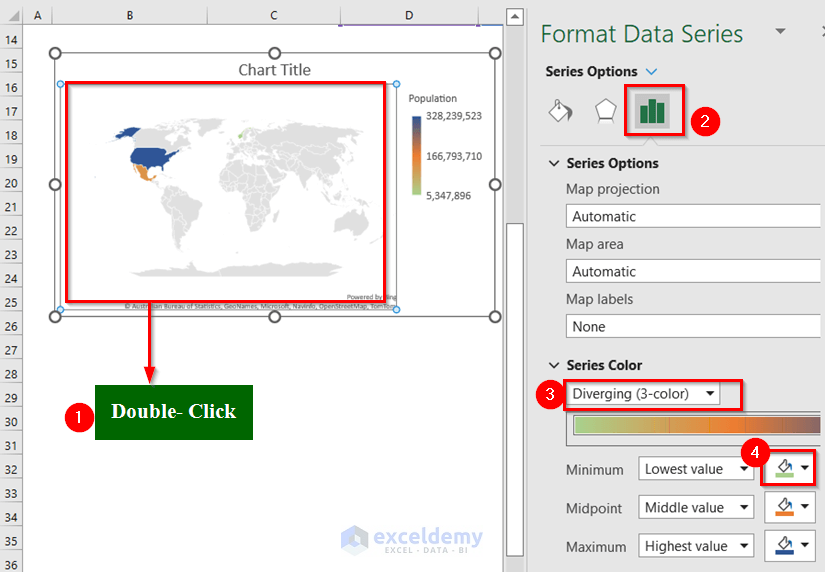
You will get the following Map chart.
Read More: How to Lookup ZIP Code in Excel
How to Plot ZIP Codes on a Map in Excel
Steps:
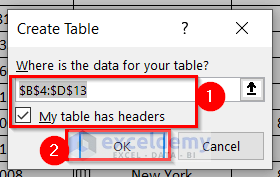
- Select the data.
- From the Insert tab >> choose Table.
A dialog box named Create Table will appear.
- Ensure you have selected the data range in the Where is the data for your table? box. If you select the data range before, this box will auto-fill.
- Check the My table has headers option.
- Press OK.
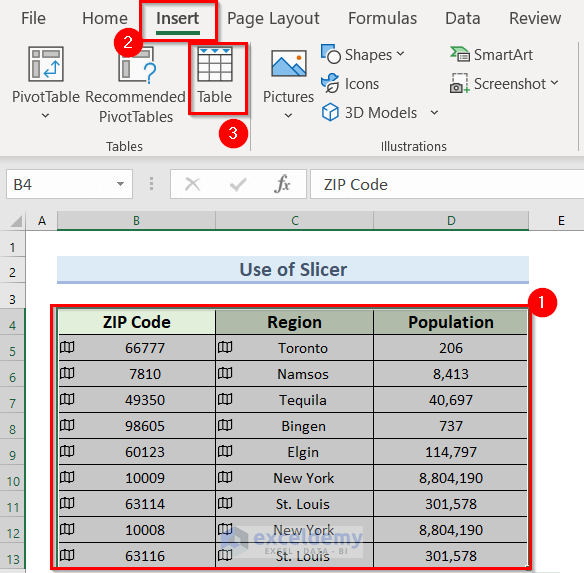
- Select the created Table.
- From the Insert tab >> go to Maps under the Charts group section >> choose Filled Map chart.
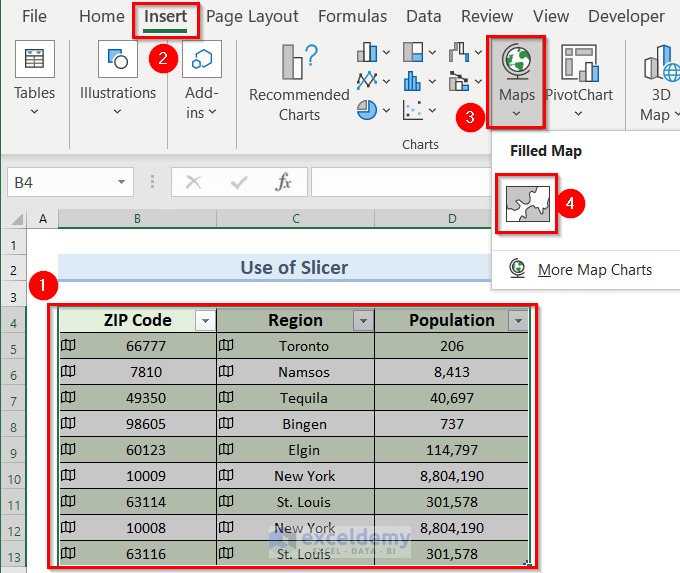
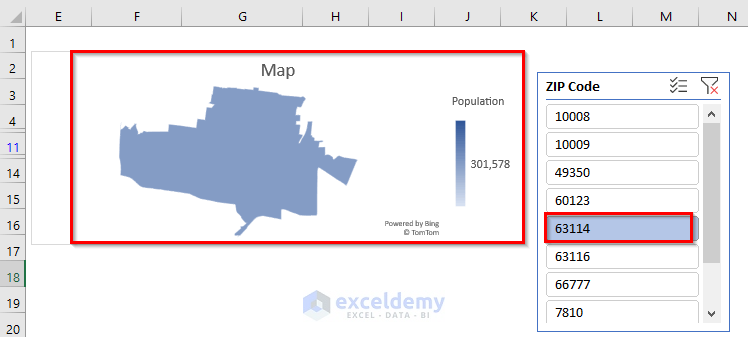
You will get the following map.
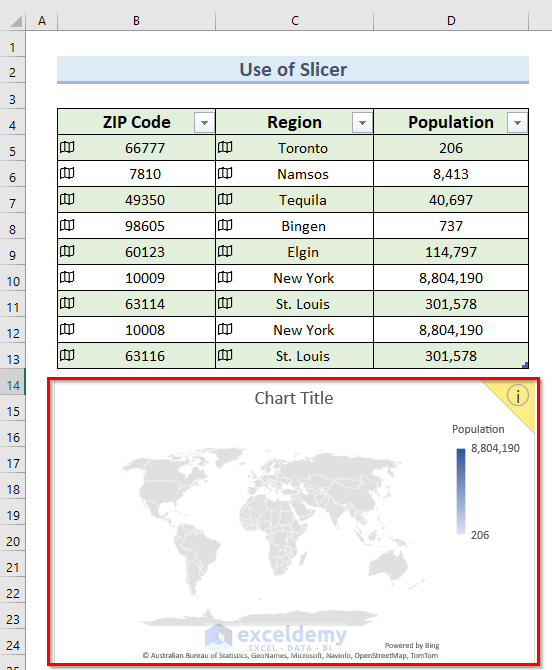
For ZIP codes, we will insert a Slicer.
- Select any cell within the table.
- From the Insert tab >> go to the Filters option.
- Choose Slicer.
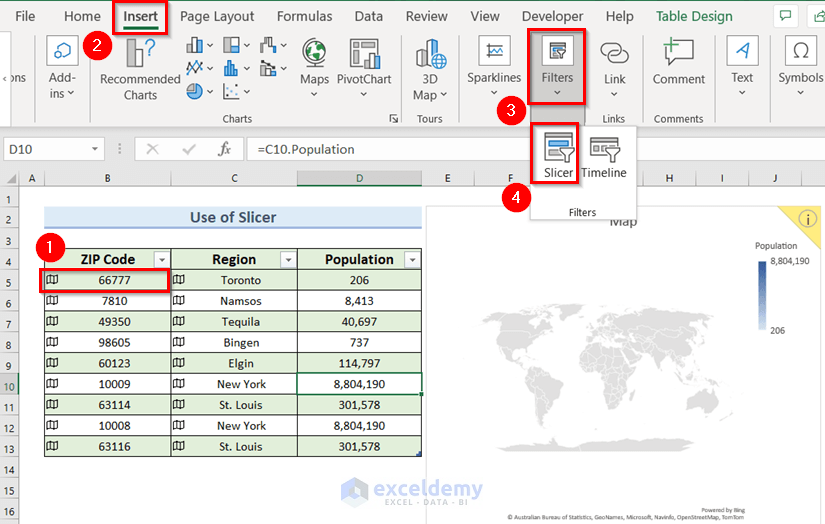
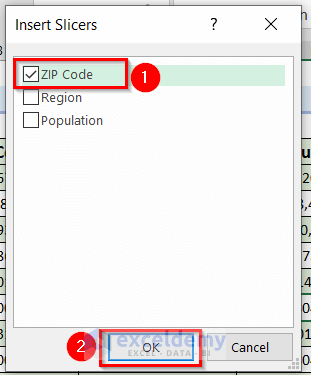
A new dialog box named Insert Slicers will appear.
- Check the ZIP Code.
- press OK.
You will see the special ZIP Code filter column on the Excel sheet.

If you choose any of the ZIP Codes, the map will show you only that region.
Read More: How to Lookup County from Zip Code in Excel
Things to Remember
- Here, you can refresh your Excel sheet and get up-to-date values using geographic data type.
- Furthermore, if you have big data, your Excel file for mapping charts will take up a lot of space.
Practice Section
Now, you can practice what you’ve learned.
Download the Practice Workbook
You can download the practice workbook from here:
Related Articles
- How to Convert Zip Code to State with VLOOKUP in Excel
- Excel Formula to Change Zip Code to State
- How to Auto Populate Zip Codes in Excel
<< Go Back to Zip Code in Excel | Number Format | Learn Excel
Get FREE Advanced Excel Exercises with Solutions!
