What Is VBA Cells Property?
Cells property refers to a cell for any operation in VBA. It can access or modify cells based on row and column indexing.
Cells property can be used as a part of the Range object, the Worksheet object, or by itself.
- Range.Cells
Range.Cells refer to a cell in any specified range. We can use the Cells property to specify a single cell in that range. Cells property with the Range object is commonly used to access individual cells with a loop for a specific operation.
- Worksheet.Cells
Worksheet.Cells refer to a cell in any specified worksheet. We can access any cell of that worksheet by specifying the row and column number. This property is useful for performing a cell-by-cell dynamic operation on an entire sheet.
What Is the Syntax of Cells Property in Excel VBA?
The generic syntax of the Cells property is:
With any application object, the syntax is:
Expression is replaced with Range, Worksheet, Sheets, etc. objects.
Example of Cells function :
This code will define cell “A1” in the active worksheet. We can define different cells by changing the RowIndex and ColumnIndex.
Example of Cells property with Worksheet object :
This code will define the “A1” cell of the worksheet named “Sheet1”.
Example of Cells property with Range object:
This code will define the “B4” cell in the B4:C10 cell range.
What Is the Difference Between Ranges and Cells Properties in Excel VBA?
The difference between Range and Cells is that Range can refer to one or more cells, while Cells can only refer to one cell at a time. The hierarchical relation between these two objects is:
Workbook → Worksheet → Range → Cells
Cells are used for root-level change in a particular cell, while the Range covers multiple cells for any operation. Both Cells and Range can refer to a single cell like the examples below.
To refer to the cell “A1”, the Cells function code will be: Cells(1, 1)
Using Range, the code will be: Range(“A1”)
Range can be used to define an entire range of cells and non-contiguous cells which is not possible using only the Cells function.
For example, the code Range(“A1:B4”) will refer to all cells in the A1 to B4 range. For referring to non-contiguous cells, the range function can be used like this: Range(“A1”, ”C1”, ”E1”). This will refer to the non-adjacent cells A1, C1, and E1.
How to Select Cells in Excel Using VBA
Use the Cells.Select method to select cells in Excel VBA. This property allows us to select specific cells or cells based on conditions. Here, we will demonstrate three examples of using the Cells.Select method to select cells.
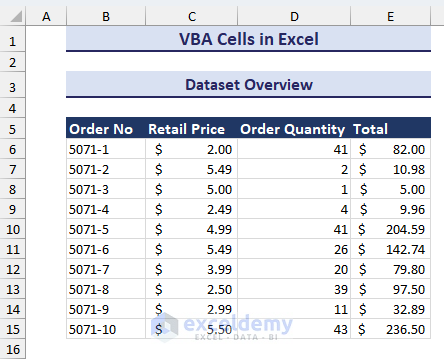
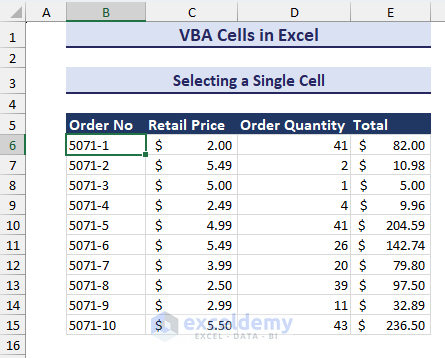
To demonstrate these examples, we will use the following dataset that contains the Order No, Retail Price, Order Quantity, and Total of a random shop.
Selecting A Single Cell
We will select a single cell using the Cells function in VBA. Follow the steps below.
- Go to the Developer tab → you will see the Visual Basic option under the Code group of command.
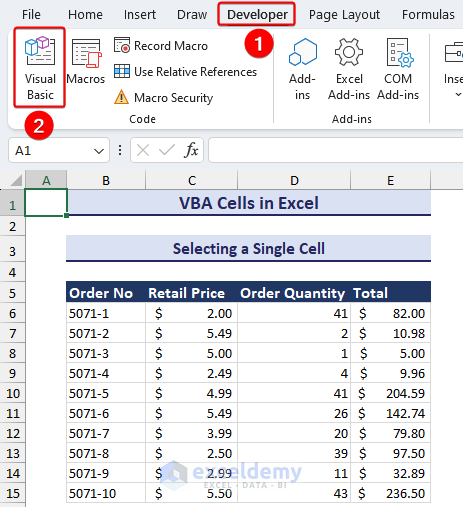
- Click the Visual Basic option to open the Microsoft Visual Basic for Applications window.
- Click the Insert menu, and you will see the Module option.
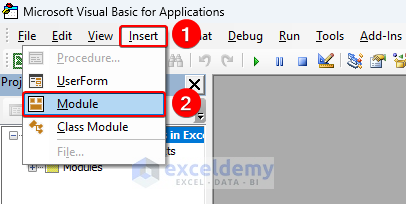
- Select the Module option, and you will get Module1. Enter the following code in this module.
Sub Selecting_a_Single_Cell()
Cells(6, 2).Select
End Sub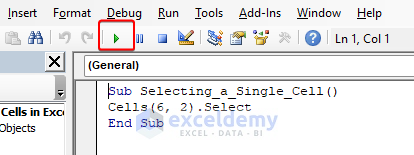
- Click the Run button (or press F5 on the keyboard) and see that cell B6 is selected in the worksheet like in the image below.
Selecting All Cells with Data
If the worksheet has data scattered all over it, selecting them individually might be difficult. However, we can use a VBA code to quickly select all cells with data. Apply the following steps:
- Enter the following code in a module.
Sub Selecting_Cells_With_Data()
Set data_rng = ThisWorkbook.ActiveSheet.UsedRange
data_rng.Cells(1, 1).Select
For rw = 1 To data_rng.Rows.Count
    For col = 1 To data_rng.Columns.Count
        If data_rng.Cells(rw, col).Value <> "" Then
            Union(Selection, data_rng.Cells(rw, col)).Select
        End If
    Next col
Next rw
End Sub- After clicking the Run button, the above code will select all the cells with data shown in the gif below.
Selecting Last Cell in a Column
Sometimes you may need to go to the last cell in a column. For large datasets, doing this manually may take some time. We can use the Cells property in VBA to quickly select the last cell in a column.
You can apply the steps below to select the last cell in a column using VBA.
- Enter the following VBA code in a Module.
Sub Selecting_Last_Cell_in_a_Column()
Dim reference_cell As Range
' Taking a cell as input to identify the column
Set reference_cell = Application.InputBox("Select any cell of the desired column:", Type:=8)
If reference_cell.Cells.Count > 1 Then
MsgBox "Please select one cell"
Exit Sub
End If
Dim lastRow As Integer
lastRow = Cells(Rows.Count, reference_cell.Column).End(xlUp).Row
Cells(lastRow, reference_cell.Column).Select
End Sub- After pressing F5 or running the code, an input box asks you to select a cell of the column you want to find the last cell with data.
We selected cell D10.
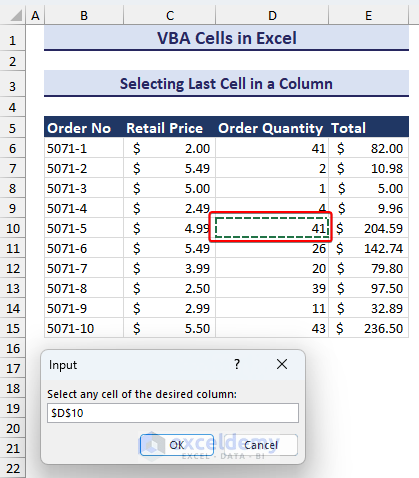
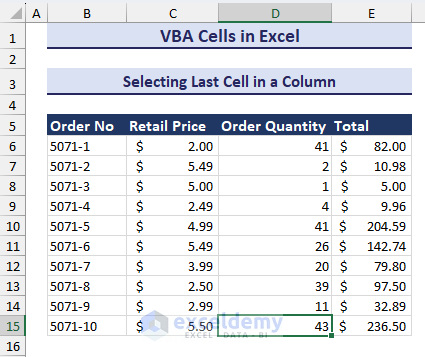
- After selecting the cell and clicking on OK, the last cell of the column containing data will be selected like in the image below.
How to Get Cell Value Using VBA in Excel
Reading Cell Value
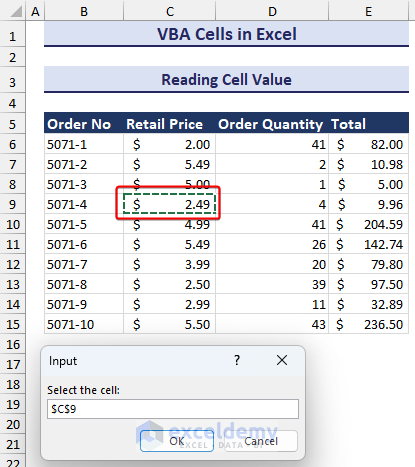
We will show a cell’s value in a message box. We will take a cell as an input and read its value to display it in a message box.
- Insert the following VBA code in a module.
Sub Reading_Cell_Value()
Dim ref_cell As Range
Set ref_cell = Application.InputBox("Select the cell:", Type:=8)
If ref_cell.Cells.Count > 1 Then
MsgBox "Please select only one cell"
Exit Sub
End If
MsgBox ref_cell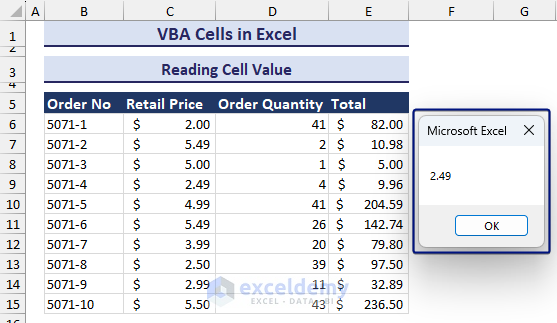
End Sub- Running this code will trigger the input box asking for a cell input to read. It will show an error message if you select more than one cell. We selected the C9 cell.
- After entering the desired input cell, you will see the cell value in a message box, as in the image below.
Getting Cell Value Into Variable
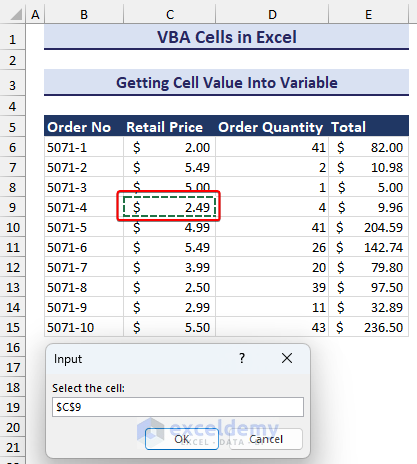
We will get data into a string variable from the Retail Price column. Then we will show the variable value in a message box.
- Insert the following code into a module.
Sub Getting_Cell_Value_Into_Variable()
Dim ValStr As String
Dim ref_cell As Range
Set ref_cell = Application.InputBox("Select the cell:", Type:=8)
If ref_cell.Cells.Count > 1 Then
MsgBox "Please select only one cell"
Exit Sub
End If
ValStr = ref_cell.Text
MsgBox ValStr
End Sub- Writing the code, press the run button or press F5 on the keyboard. This will trigger the input box. Select the desired cell for getting the cell value into the variable. We selected the C9 cell.
- After selecting the cell and pressing OK, you will see a message box showing the value like in the image below.

How to Format Cells in Excel Using VBA
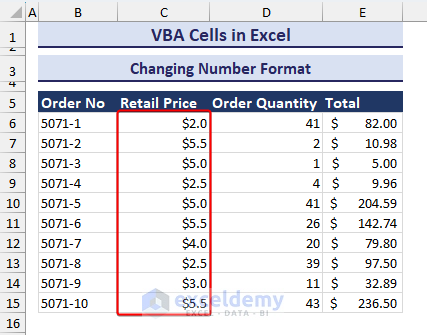
Changing Number Format
In our dataset, the Retail Price is in General format. We will change that to a custom format with one decimal place and a dollar sign ($) at the front. We will use the Cells.NumberFormat property.
- Insert the following code in a module.
Sub Changing_Number_Format()
Dim rng As Range
Set rng = Application.InputBox("Select the range of cells to change number format:", Type:=8)
If rng.Cells.Count = 0 Then
MsgBox "No values found in this range"
Exit Sub
End If
rng.Cells.NumberFormat = "$###0.0"
End Sub- The code will trigger an input box asking for the range to change. Select the range you want to change the number format for. We selected the cell range C6:C15.
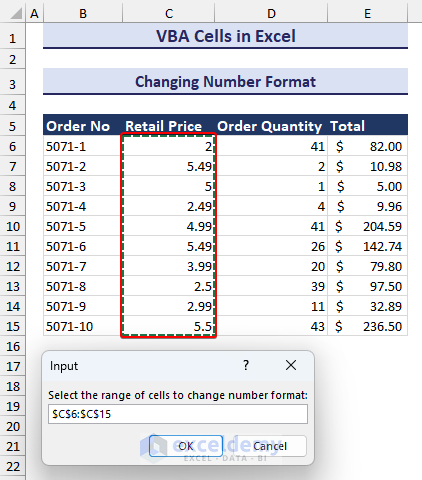
- After providing input and clicking on OK, you will see the change in number format in the Retail Price column, as shown in the image below.
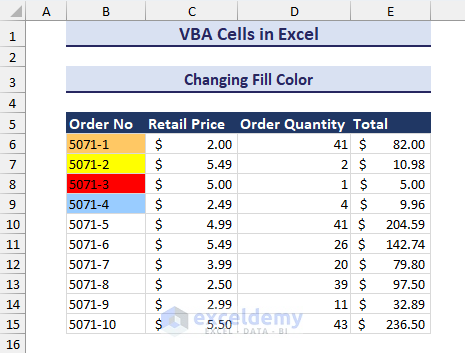
Changing Fill Color
- Insert the following code in a module.
Sub Changing_Fill_Color()
' Changing color using RGB value
Cells(6, 2).Interior.Color = RGB(255, 200, 100)
' Changing color using color constants
Cells(7, 2).Interior.Color = vbYellow
' Changing color using color code
Cells(8, 2).Interior.Color = 255
' Changing color using color index
Cells(9, 2).Interior.ColorIndex = 37
End Sub- Run this code. This will format the cells with different colors based on the RGB value, color constants, color code, and color index.
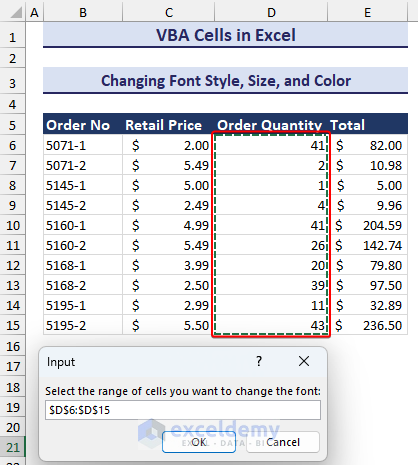
Changing Font Style, Size, and Color
- Insert the code below into a Module.
Sub Changing_Font_Style_Size_Color()
Dim rng As Range
Set rng = Application.InputBox("Select the range of cells you want to change the font:", Type:=8)
If IsEmpty(rng) Then
MsgBox "Please insert some values first"
Exit Sub
End If
With rng.Cells.Font
.Name = "Times New Roman"
.Size = 12
.Color = vbRed
.Bold = True
.Italic = True
End With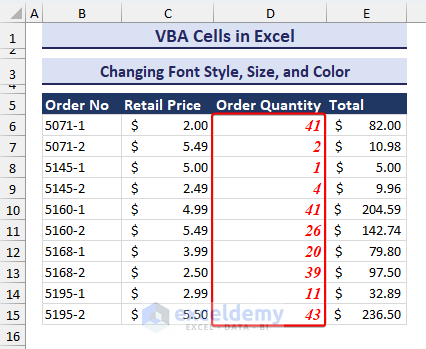
End Sub- Run the code. Upon running the code, an input box will pop up, asking you to select the range to be formatted. We selected the D6:D15 cell range.
- Selecting the range and pressing OK, you will see the changes in font properties like in the image below.
How to Copy and Paste Cells in Excel Using VBA
- Insert the following code into a module.
Sub Copy_and_Paste()
Dim rng As Range
Dim des As Range
Set rng = Application.InputBox("Select the range you want to copy:", Type:=8)
Set des = Application.InputBox("Select the first cell where you want to paste the values:", Type:=8)
If des.Cells.Value <> 0 Then
MsgBox "The destination cell is not empty"
Exit Sub
End If
rng.Cells.Copy Destination:=des
End Sub- It will first ask to select a range to copy. It will ask to select the destination cell. The output will be like the following GIF.
How to Count Cells in Excel Using VBA
Counting Cells in a Range
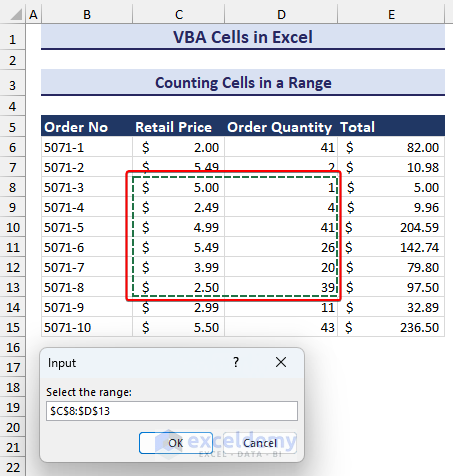
We want to count the number of cells in a given range and then display the result in a message box.
- Insert the following code into a module.
Sub Counting_Cells_in_Range()
Dim rng As Range
Dim num As Integer
Set rng = Application.InputBox("Select the range:", Type:=8)
num = rng.Cells.Count
MsgBox "The number cells in the range is " & num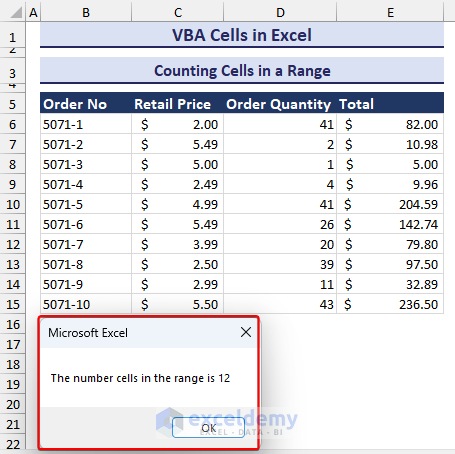
End Sub- Run the code. A message box will ask you to select the range of cells to count. We selected C8:D13.
- After selecting the range and pressing OK, you will see the number of cells in a message box like in the image below.
Counting Cells Based on Criteria
- Insert the following code into a module.
Sub Counting_Cells_with_Criteria()
Dim rng As Range
Dim num As Integer
Dim min As Integer
num = 0
Set rng = Application.InputBox("Please select the Range:", Type:=8)
If rng.Cells.Count <= 1 Then
MsgBox "Please select more than one cell"
Exit Sub
End If
min = Application.InputBox("Put the minimum criteria:", Type:=1)
rng.Cells(1, 1).Select
For i = 1 To rng.Rows.Count
For j = 1 To rng.Columns.Count
If rng.Cells(i, j).Value >= min Then
num = num + 1
End If
Next j
Next i
MsgBox "Count of Cells Having More Than the Value " & min & " is: " & num
End Sub- Run the VBA code. After selecting the cell range and giving the minimum value for the criteria, the output will be shown in a message box like in the gif below.
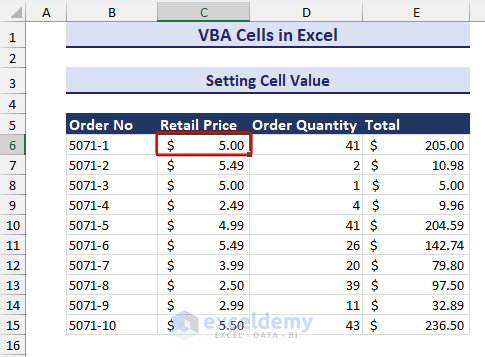
How to Set Cell Value with Excel VBA
- Insert the following code in a module.
Sub Setting_Cell_Value()
Cells(6, 3).Value = 5
End Sub- After running the code, we will see that the value of cell C6 has been changed to 5, as in the image below.
How to Clear Cells Using Excel VBA
We will clear the Total column values. So we will use the Cells.Clear property. This clears the cell data along with their formatting.
- Insert the following code in a module.
Sub Clearing_Cells()
Dim rng As Range
Set rng = Application.InputBox("Please select the range of cells you want to clear:", Type:=8)
rng.Cells.Clear
End Sub- Running the code will trigger the input box, asking you to select the range of cells you want to clear. We selected the E6:E13 cell range.
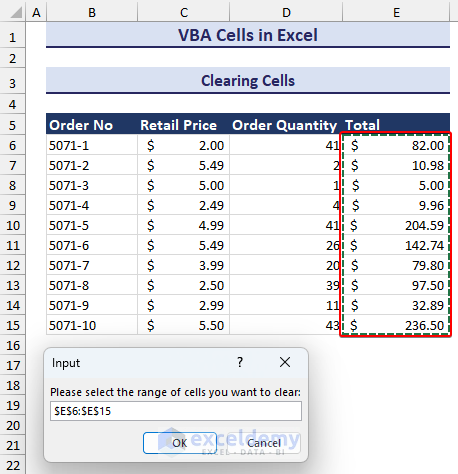
- The range and clicking OK, you will see the range of cells has been cleared along with formatting like in the image below.

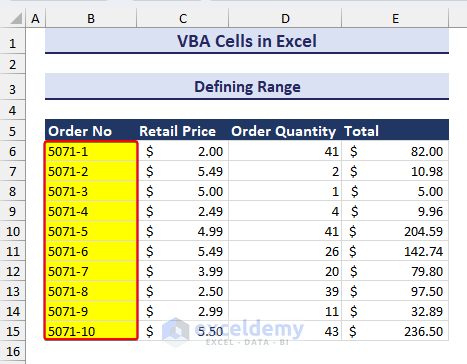
How to Define Range with Excel VBA
- Insert the following code in a module.
Sub Defining_Range()
Range(Cells(6, 2), Cells(15, 2)).Interior.Color = vbYellow
End Sub- Running this code will change the fill color of the specified range to Yellow like in the image below.
How to Extract Comments from Cells
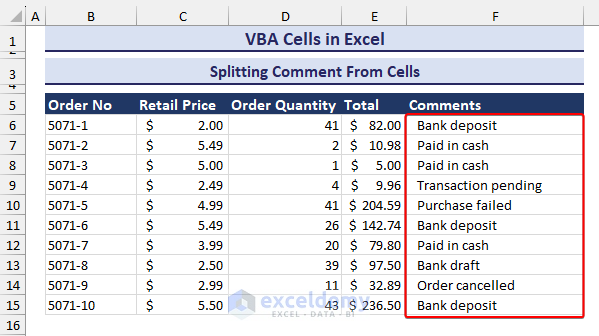
We will extract comments from the cells in the Total column. We can use the Cells.CommentThreaded property.
The Total column contains comments like in the image below.

- Insert the VBA code in a module.
Sub Split_Comment()
Dim input_range As Range
Set input_range = Application.InputBox("Extract comment from which range of cells:", Type:=8)
For i = 1 To input_range.Rows.Count
If Not input_range.Cells(i, 1).CommentThreaded Is Nothing Then
input_range.Cells(i, 2).Value = input_range.Cells(i, 1).CommentThreaded.Text
input_range.Cells(i, 1).CommentThreaded.Delete
End If
Next i
End Sub- An input box asks you to select a specified range for splitting comments. We selected the cell range E6:E15.
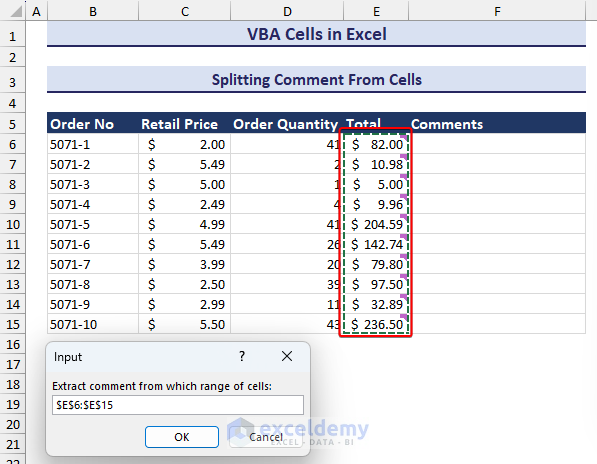
- After selecting the range and clicking on OK, the comments will appear in a separate column, as in the image below.
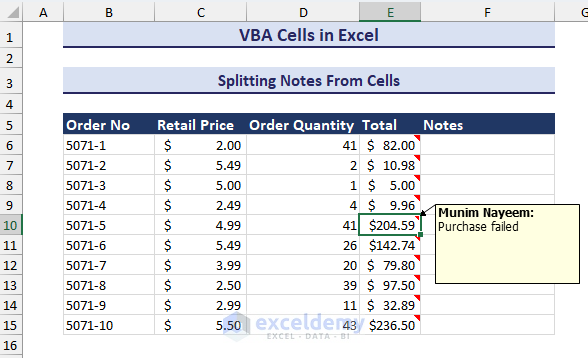
How to Extract Notes from Cells with VBA
We can split the notes from a range of cells, just like splitting comments, if they contain notes, as in the image below.
Use the code below to split notes from a specific cell range.
- Insert the following code in a module.
Sub Split_Notes()
Dim input_range As Range
Set input_range = Application.InputBox("Extract note from which range of cells:", Type:=8)
For i = 1 To input_range.Rows.Count
If Not input_range.Cells(i, 1).Comment Is Nothing Then
input_range.Cells(i, 2).Value = input_range.Cells(i, 1).Comment.Text
input_range.Cells(i, 1).Comment.Delete
End If
Next i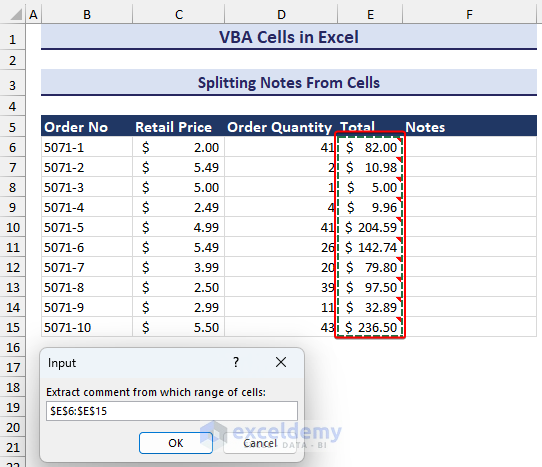
End Sub- After running the code, you will see an input box asking for the specified range. We selected the cell range E6:E15.
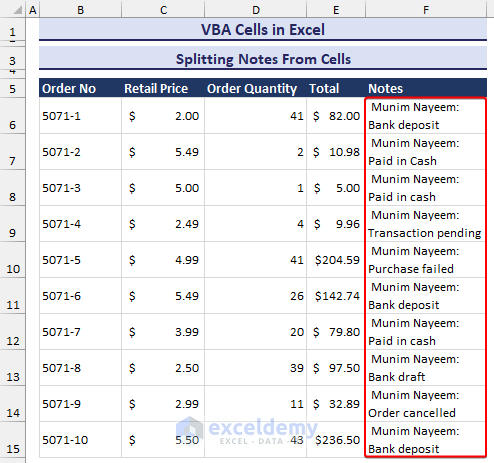
- After selecting the specified range and clicking on OK, the notes will appear in a new column, as in the image below.
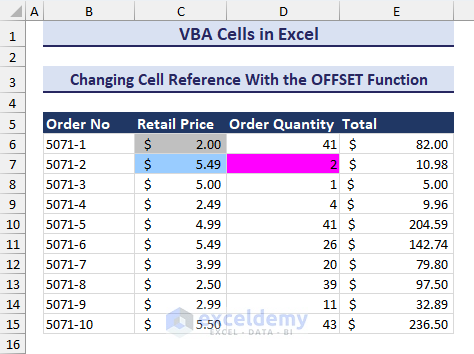
How to Change Cell Reference With the Offset Function Using VBA
We can use the Offset function with the Cells object to change the cell reference to another cell. For example, Cells(1,1).Offset(2,3) refers to Cell(3,4). The Offset function has moved specified cells’ row index 2 rows down and column index 2 columns down.
Change the references with the help of the VBA Offset function and then highlight different cells. Use the VBA code below.
- Insert the following code in a module.
Sub Changing_Cell_Ref_With_Offset()
Cells(6, 2).Offset(0, 1).Interior.ColorIndex = 15
Cells(6, 3).Offset(1, 0).Interior.ColorIndex = 37
Cells(6, 3).Offset(1, 1).Interior.ColorIndex = 7
End Sub- You will notice that cell references are now different colors, as in the image below.
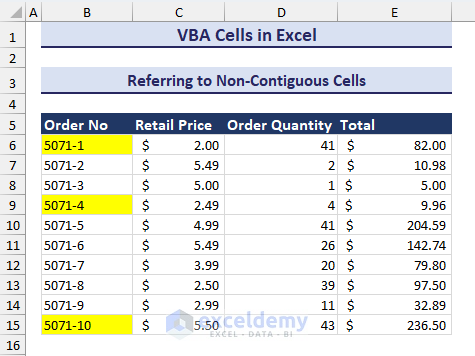
How to Refer Non-Contiguous Cells with Excel VBA
We will highlight some non-contagious cells using the Cells property with the Union function.
- Insert the following code in a module.
Sub Refer_to_Non_Contigious_Cells()
Union(Cells(6, 2), Cells(9, 2), Cells(15, 2)).Interior.Color = vbYellow
End Sub- Run the VBA code and you will see the non-contagious cells are highlighted like in the image below.
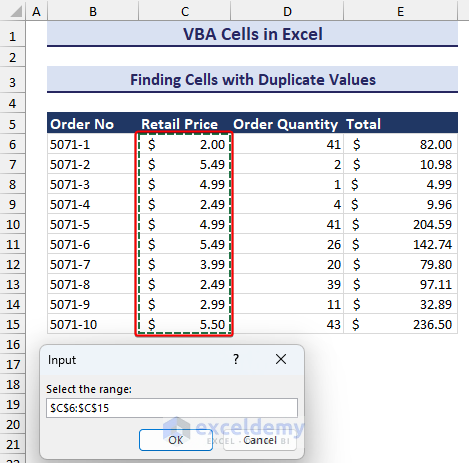
How to Find Cells with Duplicate Values Using VBA
We will use the following code to highlight duplicate values in a selected range. We will use Interior.Color with Cells object.
- Insert the following VBA code module:
Sub Finding_Duplicate_Cells()
Dim rng As Range
Dim i As Integer
Dim j As Integer
Set rng = Application.InputBox("Select the range:", Type:=8)
For i = 1 To rng.Rows.Count
For j = 1 To rng.Columns.Count
If WorksheetFunction.CountIf(rng, rng.Cells(i, j).Value) > 1 Then
rng.Cells(i, j).Interior.Color = vbYellow
End If
Next j
Next i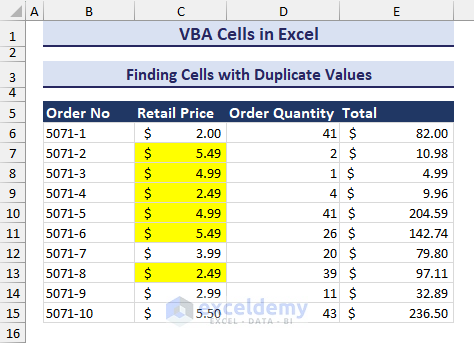
End Sub- Running this code will trigger an input box asking you to select the range where you want to find the duplicates. We selected the cell range C6:C15.
- The range and clicking on OK, the duplicates will be highlighted, as in the image below.
Download Practice Workbook
Get FREE Advanced Excel Exercises with Solutions!
