Method 1 – Creating it Manually
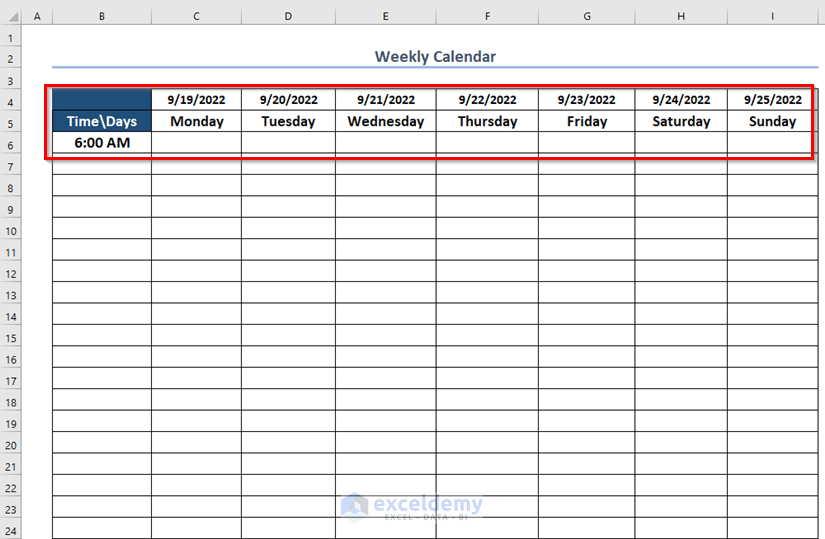
- List all the days of the week along with their corresponding dates in an Excel sheet.
- Include the initial time for each day (e.g., 8:00 AM).
- To create a calendar for every hour of the day, follow these steps:
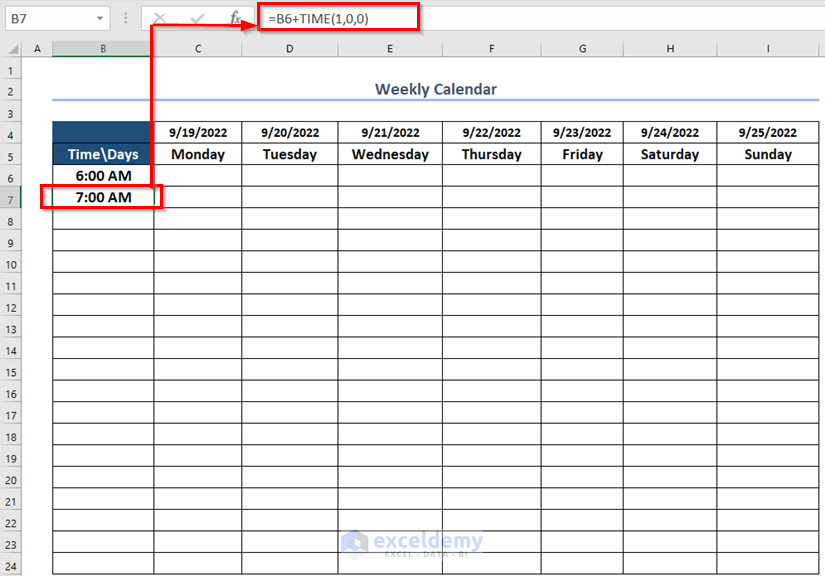
- In cell B7, enter the following formula:
=B6+TIME(1,0,0) This formula adds 1 hour to the previous time (TIME function).
-
- Press ENTER to get the result.
-
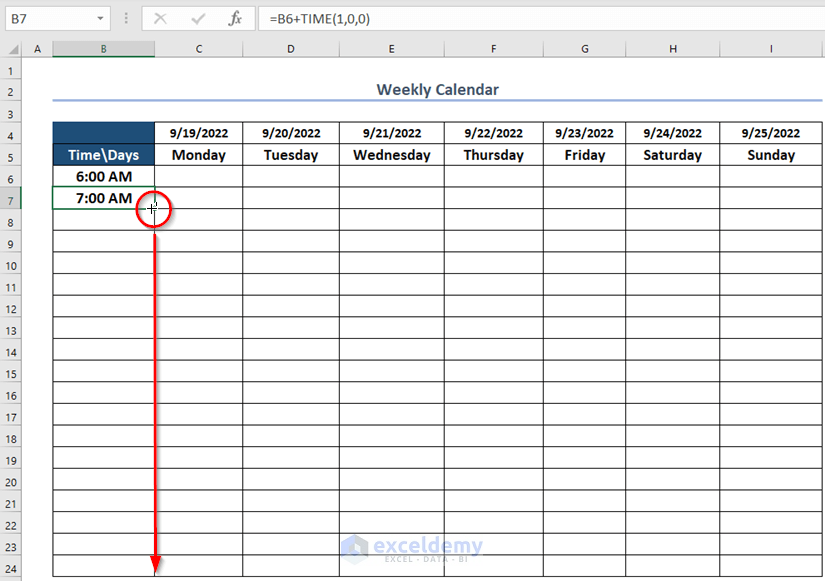
- Copy the same formula using relative cell references:
- Select cell B7.
- Click and drag the Fill Handle icon (located in the bottom-right corner of cell B7) down to cell B24.
- Copy the same formula using relative cell references:
-
- Alternatively, manually fill a few cells (e.g., 2 or 3) and then drag the Fill Handle icon to complete the time period.

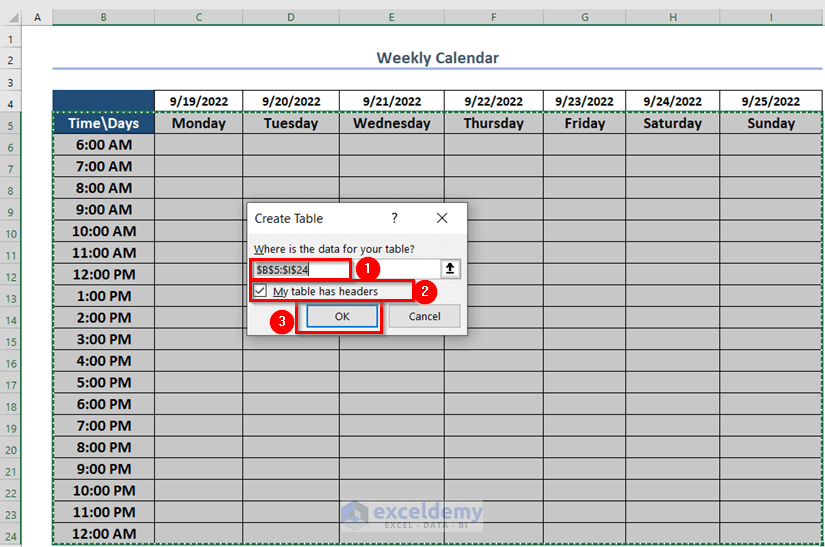
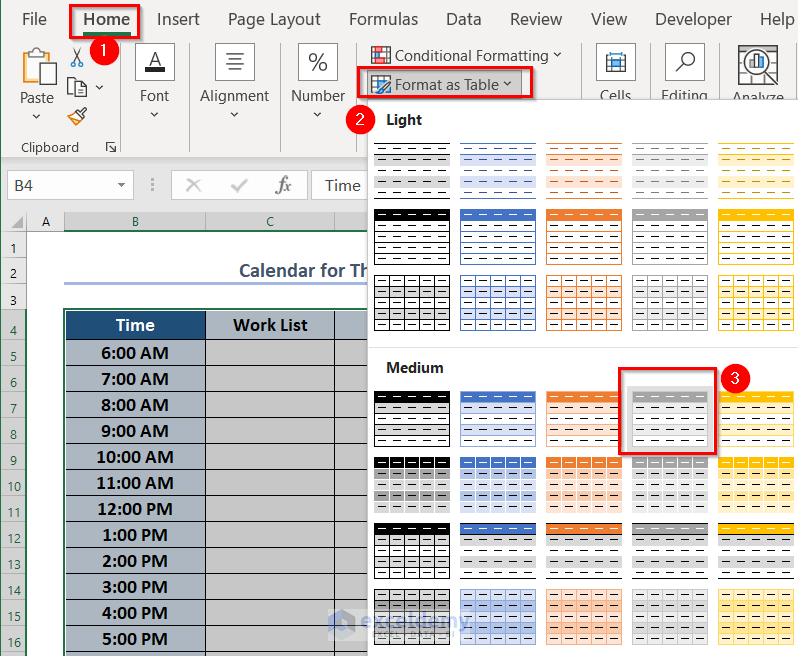
- Select the entire data range.
- Go to the Home tab and choose Format as Table.
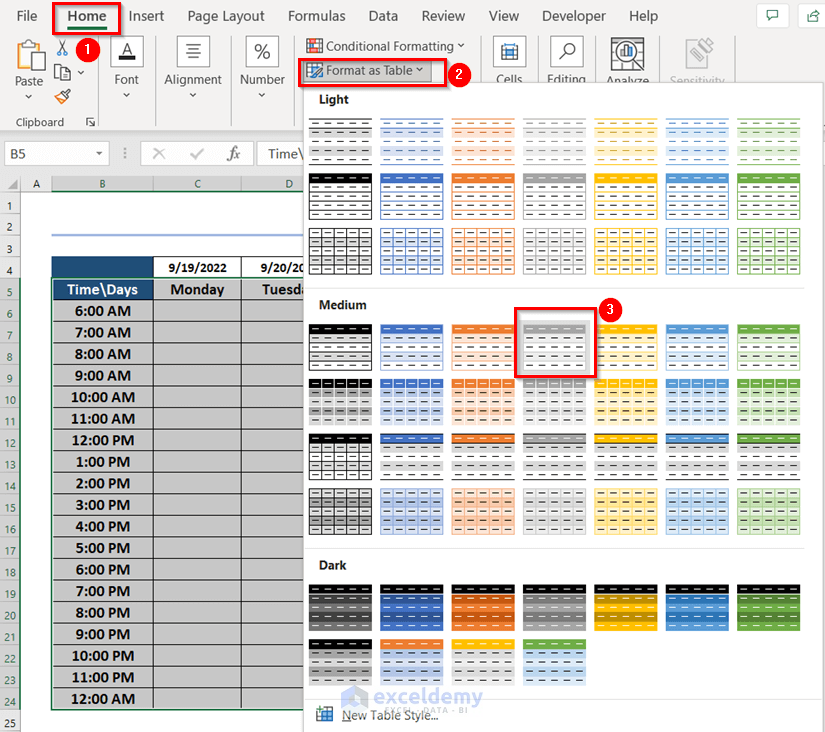
- Pick your preferred color combination in the Create Table dialog box.
- Ensure that you’ve selected the full data range.
- Check the My table has headers option.
- Press OK.
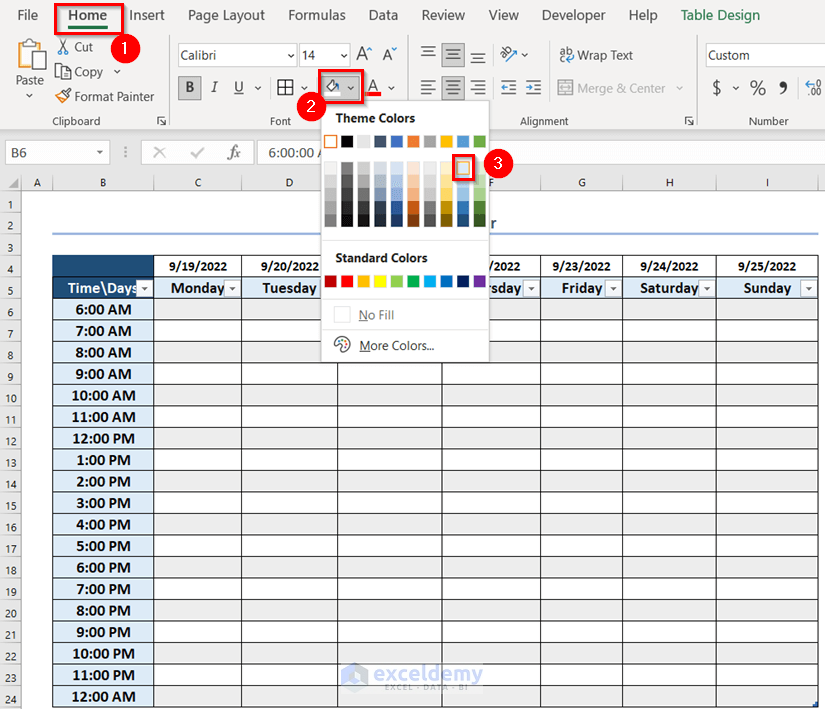
- Format your weekly calendar by selecting cells where you want to apply the same color.
- Go to the Home tab and choose Fill Color.
- Select a preferable Theme color.
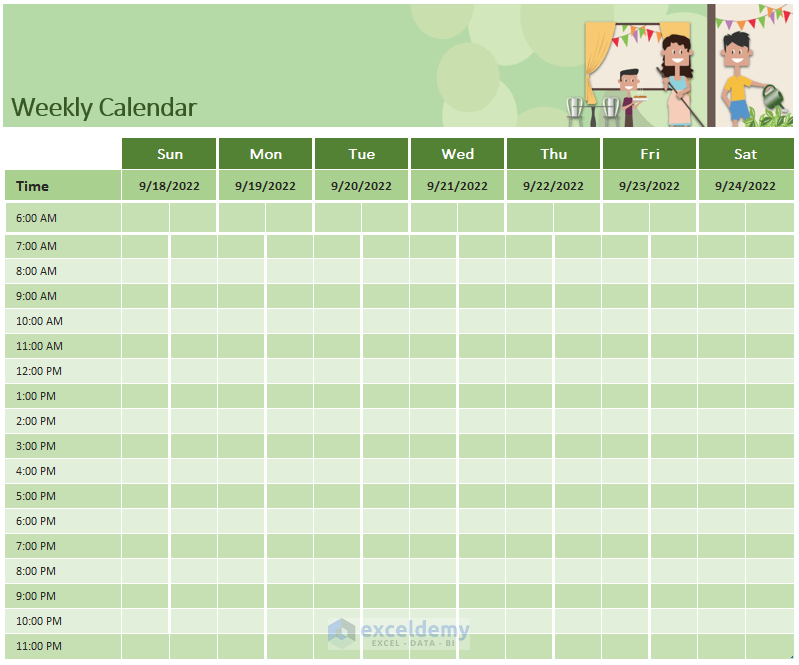
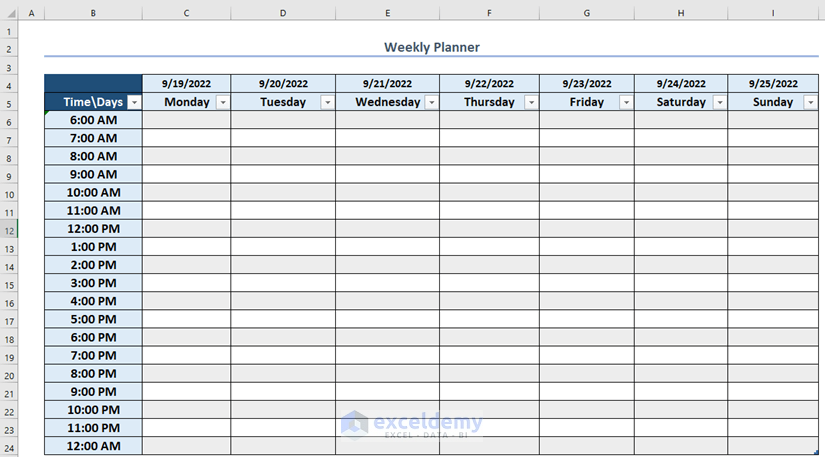
Example of a Weekly Calendar in Excel
This example should help you visualize how to create your own weekly calendar. Feel free to customize it further based on your needs.

Method 2 – Using the Data Validation Feature
- Write down the necessary terms for your calendar in a new worksheet. You can refer to Method 1 for guidance.
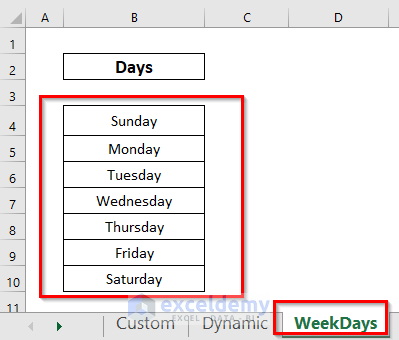
- In the Dynamic worksheet, list all the days of the week.
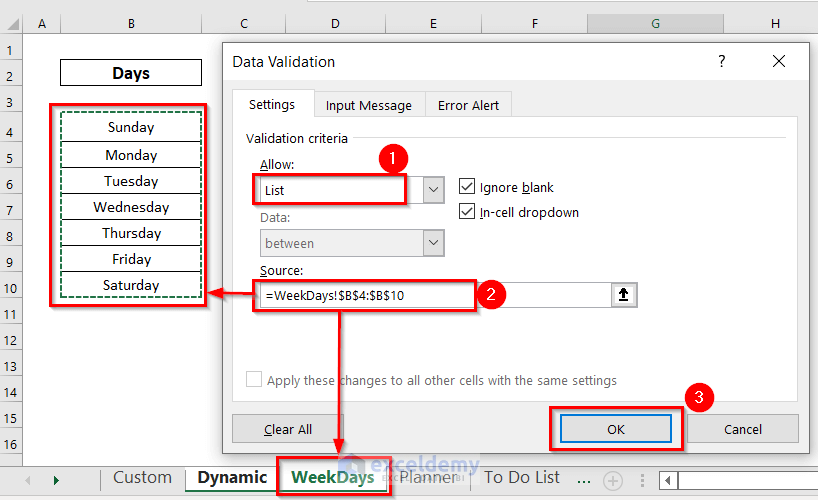
- Create a separate worksheet called WeekDays and enter the day names.
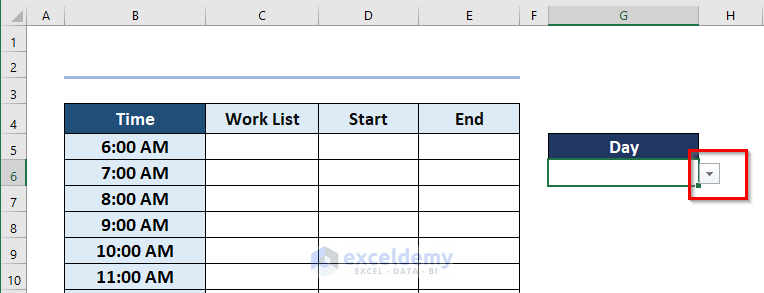
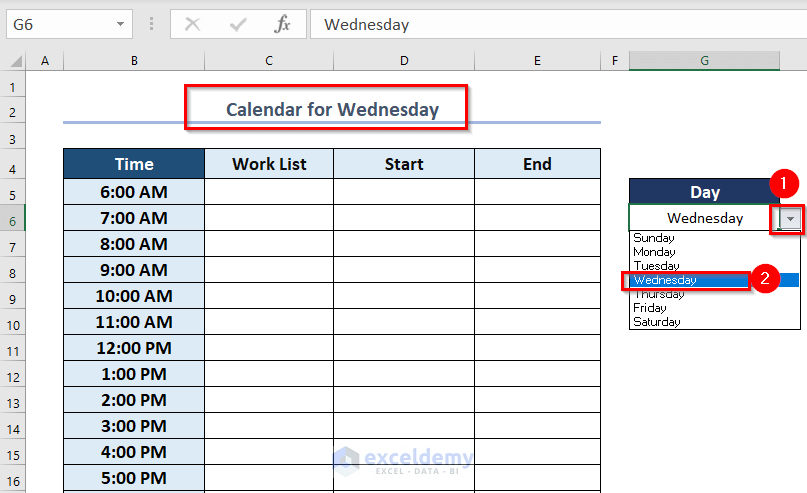
- Return to the Dynamic worksheet and select cell G6.
- From the Data tab, go to the Data Tools command, and then choose Data Validation.
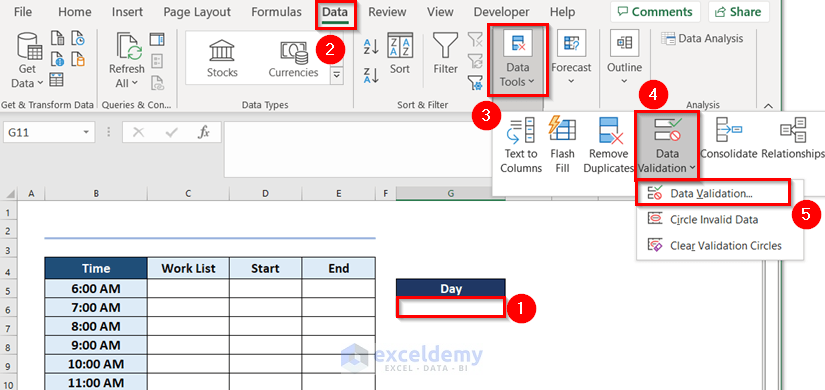
- In the Data Validation window:
- Select List in the Allow box.
- Set the reference in the Source box to the range B4:B10 in the WeekDays worksheet.
- Press OK.
- You’ll now see a drop-down arrow next to cell G6.
- Merge & Center cells B2:E2 in the Dynamic worksheet.
- In the cell, enter the following formula:
="Calendar for " & G6This combines the text with the value from cell G6 using the Ampersand operator (&).
- Press ENTER.
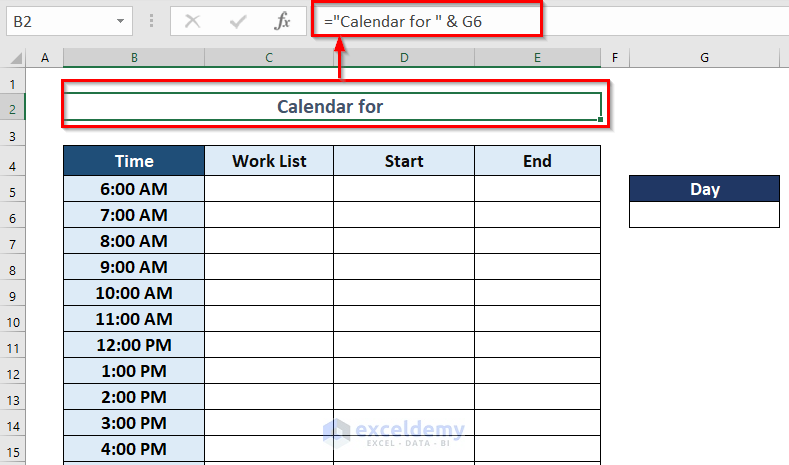
- When you select any day from the drop-down arrow, the calendar title will update accordingly.
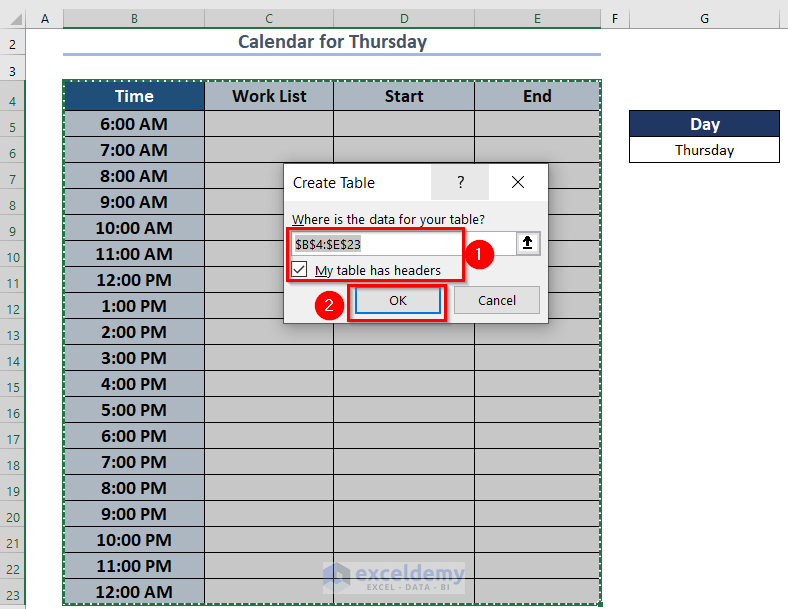
- Select the entire data range.
- Go to the Home tab and choose Format as Table.
- Pick your preferred color combination in the Create Table dialog box:
- Ensure you’ve selected the full data range.
- Check the My table has headers option.
- Press OK.
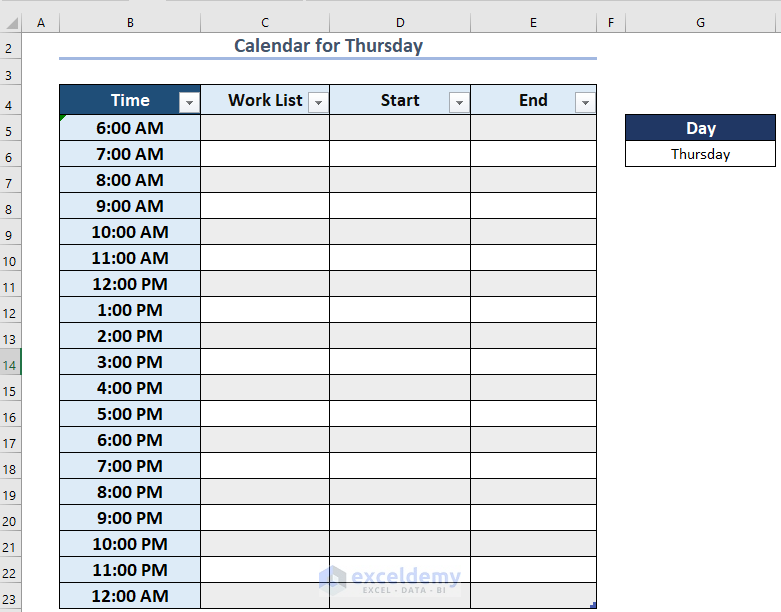
You now have a dynamic weekly calendar.
Method 3 – Using Excel Templates
- Excel provides built-in templates for various purposes, including weekly calendars.
- Open an Excel workbook.
- Go to the File tab in the top ribbon.
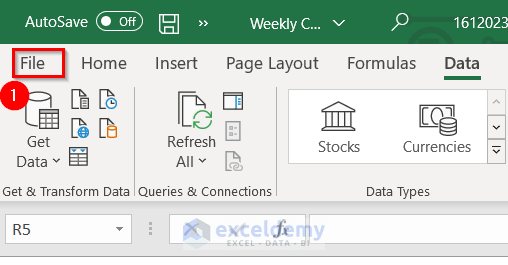
- From the New menu, choose Weekly chore schedule.

- A new window named Weekly chore schedule will appear.
- Click on the Create option.
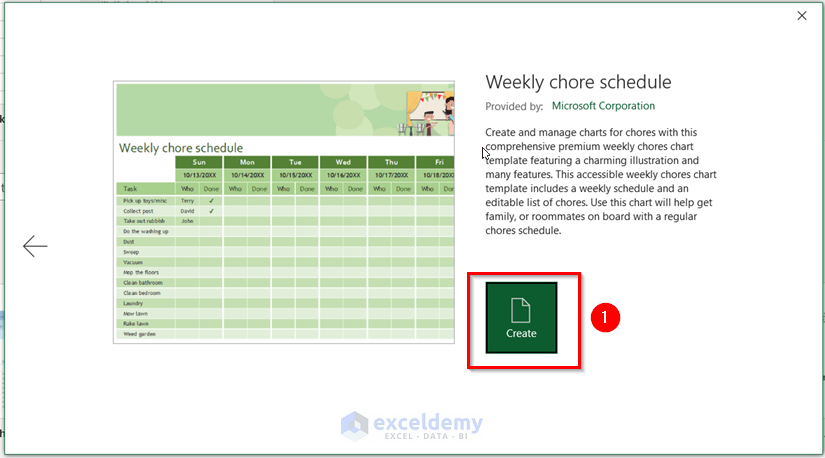
- You’ll get a pre-designed weekly chore schedule template.
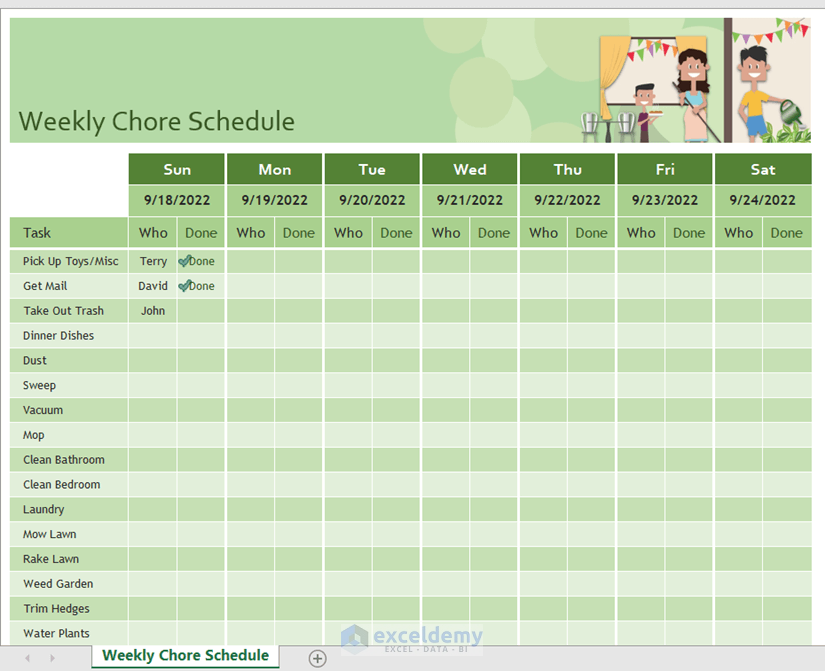
- Customize it as needed—every term in this template is editable.
- I recommend changing the title to Weekly Calendar and adding time slots if desired.

- Feel free to delete any unnecessary columns (e.g., the Task column).
Read More: How to Make a Calendar in Excel Without Template
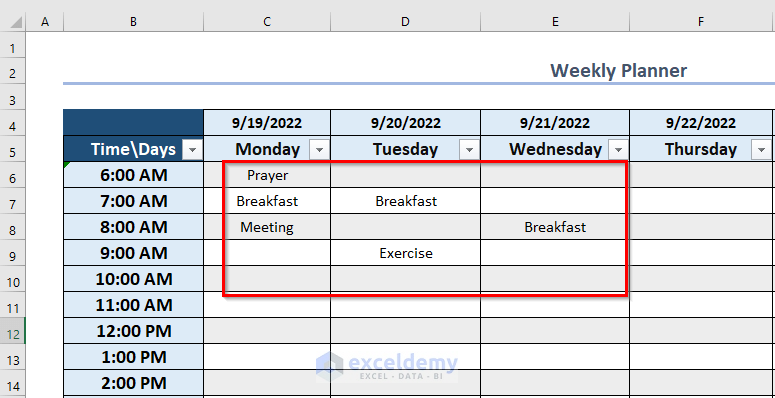
Creating a Weekly Planner in Excel
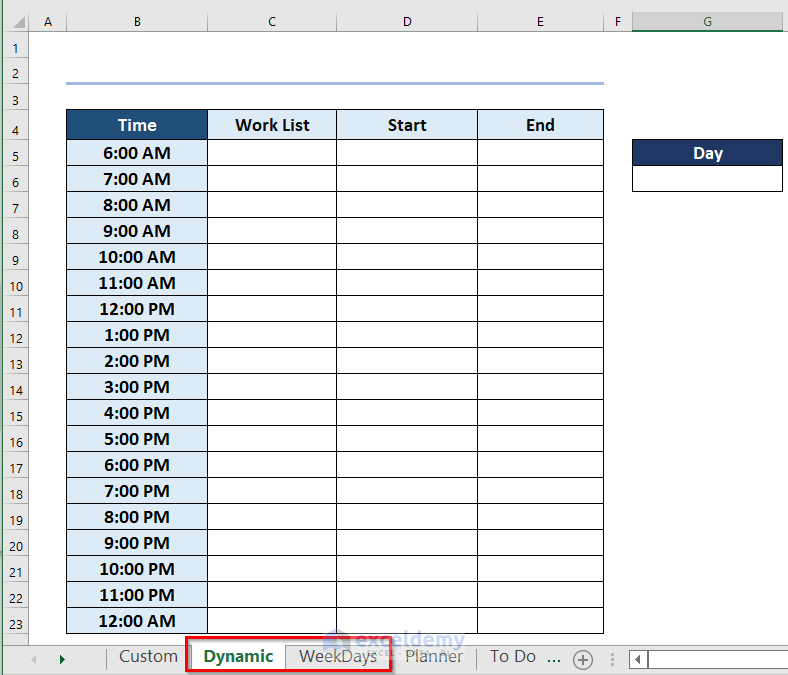
- Create a weekly calendar (you can follow Method 1 for this).
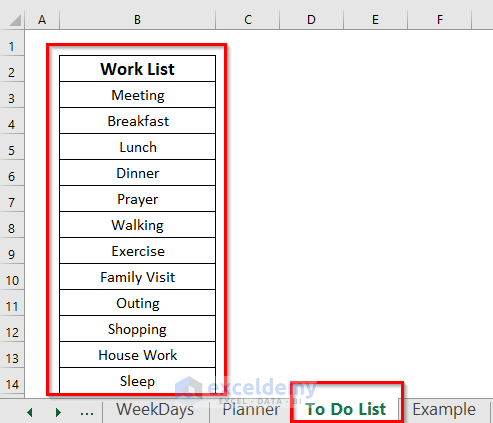
- Open a new worksheet.
- Enter your work list in this worksheet (e.g., tasks, appointments, or events).
- Name this worksheet To Do List.
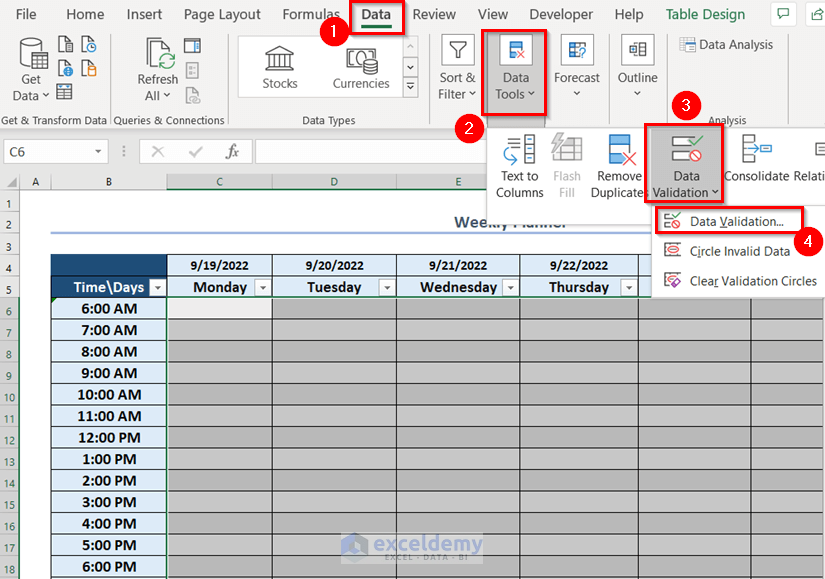
- Return to the Planner worksheet (where you have your weekly calendar).
- Select the data range corresponding to the calendar.
- From the Data tab, go to the Data Tools command, and choose Data Validation.
- In the Data Validation window:
- Select List in the Allow box.
- Set the reference in the Source box to the range B3:B14 in the To Do List worksheet.
- Press OK.
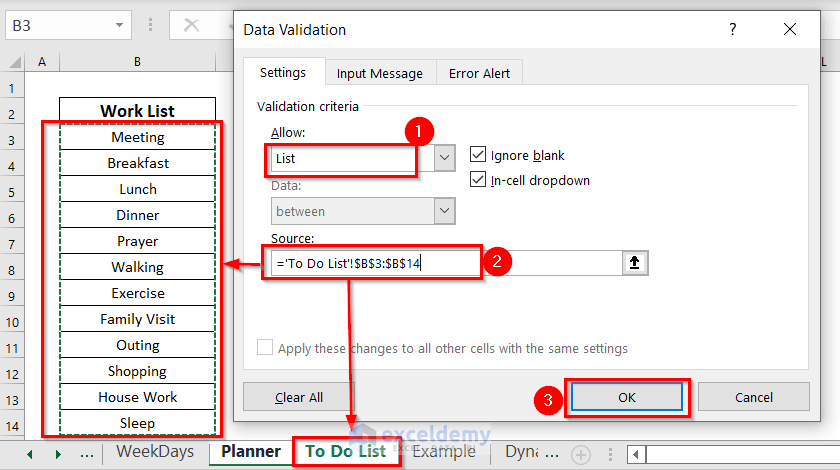
- There will be a drop-down arrow next to all the cells in your calendar.
- You can select any work item from the drop-down list.
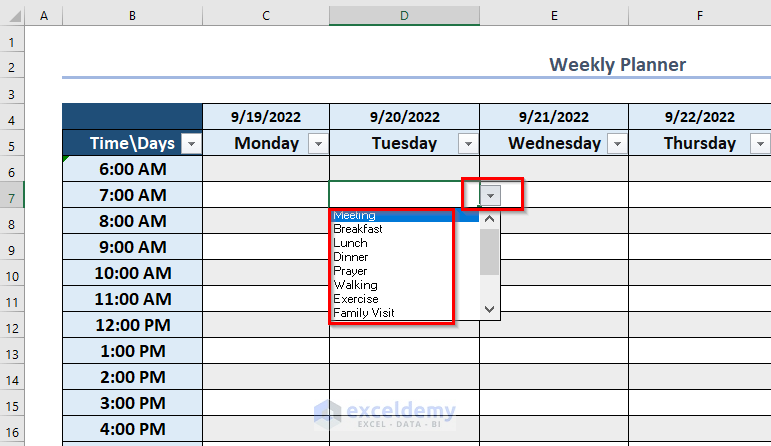
- Remember: To add new work, enter it in the To Do List worksheet.
- You cannot directly insert text or values into the cells of your weekly calendar; you must choose from the predefined works.
Download Practice Workbook
You can download the practice workbook from here:
Related Articles
- How to Create a Monthly Calendar in Excel
- How to Create a Yearly Calendar in Excel
- How to Make an Interactive Calendar in Excel
- How to Make a Blank Calendar in Excel

