The article demonstrates how to create a VBA macro that automates the Text to Columns process and converts text dates into Excel date format.
Download Practice Workbook
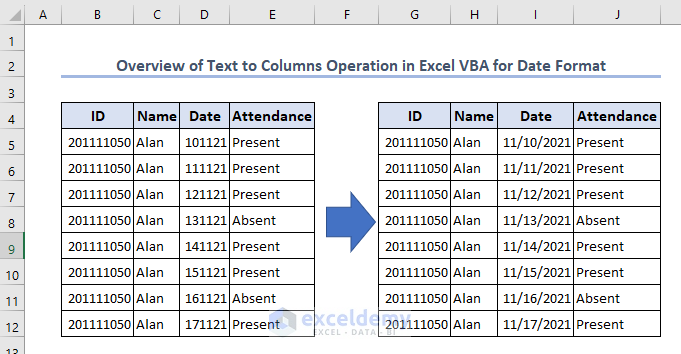
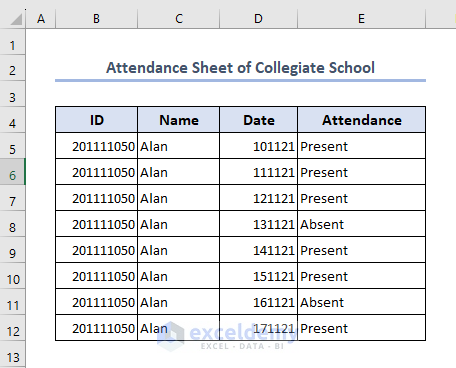
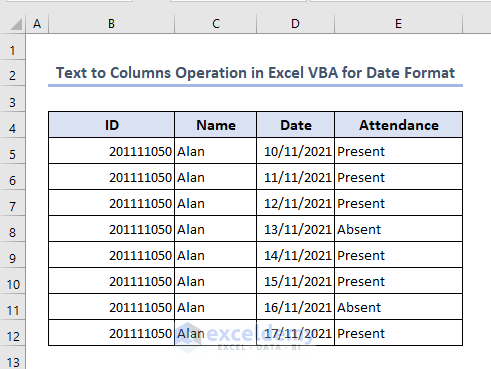
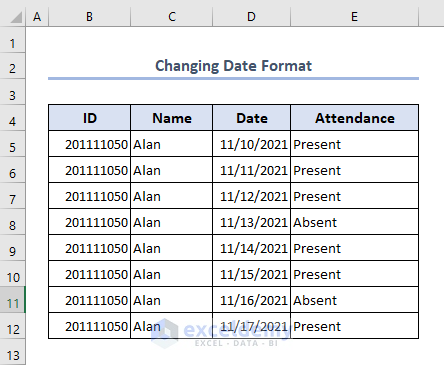
The dataset we’ll use to illustrate our examples is an attendance sheet for a student named Alan, including his ID number, name, and attendance record for various dates. Let’s apply some VBA code to convert the numbers in the Date column into a proper date format.
Example 1 – Using VBA Text to Columns to Convert a Number into Date Format
There are many possible date formats. Here, we’ll just cover two of the most commonly used.
1.1 – Converting to DD-MM-YYYY Format
Steps:
- Go to the Developer tab in the ribbon.
- Select the Visual Basic tab.
The Visual Basic window will open.
- Click Insert then Module.
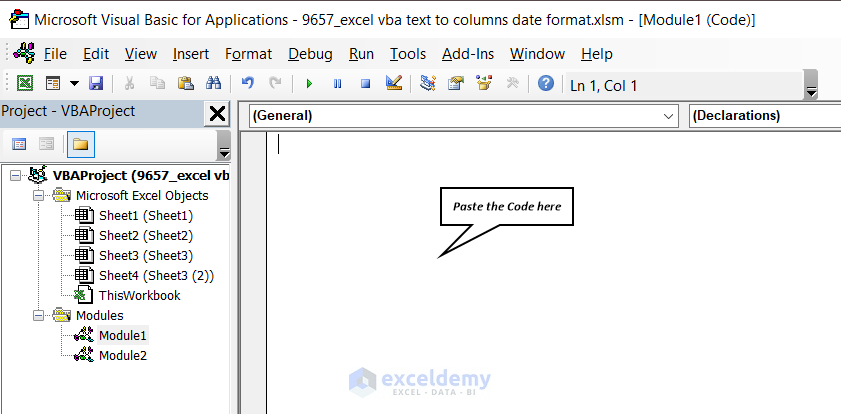
A module window opens like in the image above.
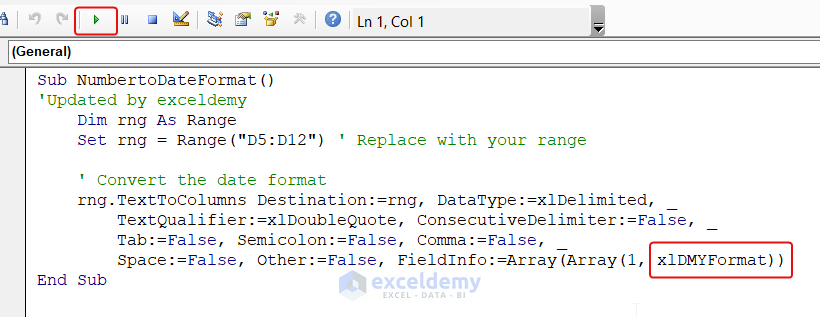
- Copy the following code and paste it in the module:
Code:
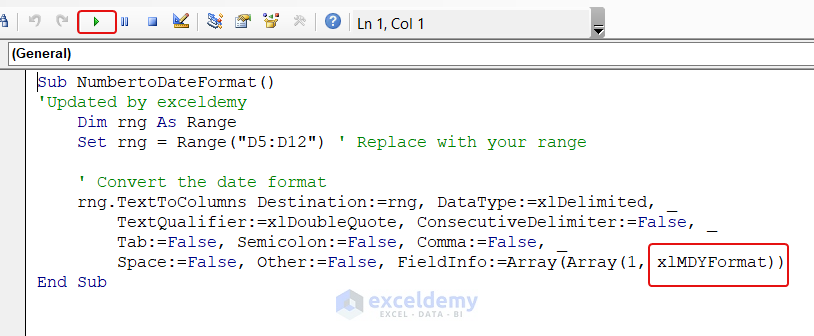
 Sub NumbertoDateFormat()
'Updated by exceldemy
    Dim rng As Range
    Set rng = Range("D5:D12") ' Replace with your range
    ' Convert the date format
    rng.TextToColumns Destination:=rng, DataType:=xlDelimited, _
        TextQualifier:=xlDoubleQuote, ConsecutiveDelimiter:=False, _
        Tab:=False, Semicolon:=False, Comma:=False, _
        Space:=False, Other:=False, FieldInfo:=Array(Array(1, xlDMYFormat))
End Sub- After pasting the code click Run or press F5 on the keyboard to run the code.
xlDMYFormat is marked in the code. This indicates that the date format will be (dd-mm-yyyy).
The numbers in the Date column are now transformed into a proper date format, (dd-mm-yyyy) [UK date format].
1.2 – Converting to MM-DD-YYYY Format
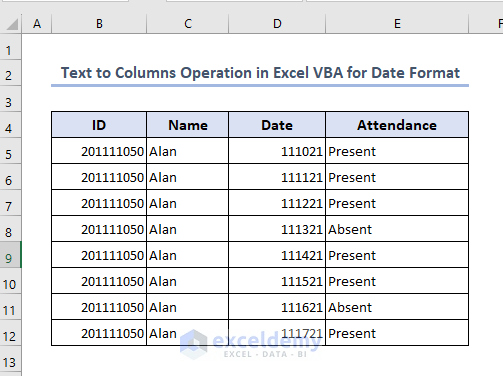
Here, we modified the numbers in the dataset in the Date column so that they support the (mm-dd-yyyy) format.
- Launch VBA and insert a Module in Microsoft Excel.
- Copy the following code and past it into the module:
Code:
Sub NumbertoDateFormat()
'Updated by exceldemy
    Dim rng As Range
    Set rng = Range("D5:D12") ' Replace with your range
    ' Convert the date format
    rng.TextToColumns Destination:=rng, DataType:=xlDelimited, _
        TextQualifier:=xlDoubleQuote, ConsecutiveDelimiter:=False, _
        Tab:=False, Semicolon:=False, Comma:=False, _
        Space:=False, Other:=False, FieldInfo:=Array(Array(1, xlMDYFormat))
End Sub- After pasting the code, click the Run option or press F5 on the keyboard to run the code.
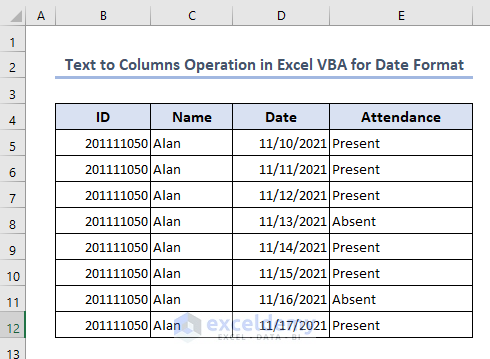
xlMDYFormat is marked in the code. This indicates that the date format will be (mm-dd-yyyy) [USA format].
Note: If the numbers in the Date column don’t match with the (mm-dd-yyyy) format, you won’t get the expected output.
Example 2 – Using VBA Text to Columns to Change Date Format
In the dataset, the date format is (mm-dd-yyyy)[USA Format]. Let’s change it into (dd-mm-yyyy)[UK Format] with VBA.
- Launch VBA and open a module
- Copy the code below and paste it in the module window:
Code:
Sub ConvertUSDateToUKDateInRange()
    Dim Cell As Range
    Dim DateRange As Range
    ' Change "D5:D12" to the range that you want to convert
    Set DateRange = Range("D5:D12")
    For Each Cell In DateRange
        If IsDate(Cell.Value) Then
            Cell.Value = Format(Cell.Value, "dd/mm/yyyy")
        End If
    Next Cell
End Sub- Click the Run option or press F5 on the keyboard to run the code.
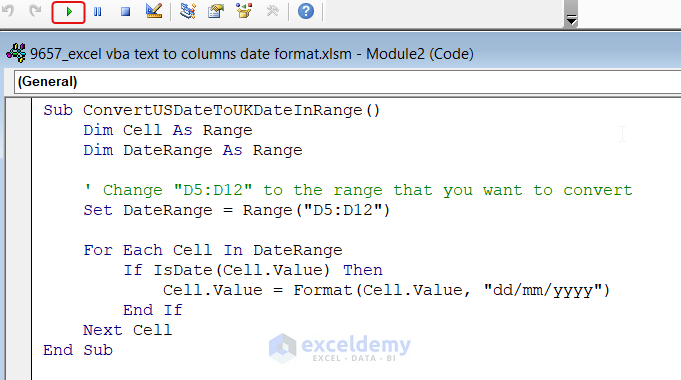
The outcome will look like the below image. The date is in UK format now.

Frequently Asked Questions
1. How do I format a date in Excel using text to columns?
- Click on the “Text to Columns” button in the “Data Tools” group.
- From the Convert Text to Columns Wizard dialog box, select Delimited, and click Next.
- Uncheck all delimiter boxes and then click Next.
- Select Date under Column data format and the format that best fits your dates.
- Click Finish
2. How to convert text to date format in VBA?
By using the CDate function, which converts a valid date expression, such as a string, into a Date data type.
3. How to add a date in VBA?
The DateAdd Function allows you to add a date or time interval to a date or time, and returns the new date or time. The DateAdd Function’s syntax is
DateAdd(interval, number, date)The “interval” argument specifies the time interval to add, such as “d” for days, “m” for months, or “yyyy” for years. The ”number” argument specifies the number of intervals to add or subtract. The “date” argument is the starting date.
Things to Remember
- Always back up your data before making any changes, especially if you’re working with large datasets.
- Test your VBA macro on a small subset of data before applying it to your entire dataset.
- If you encounter any issues, review the error messages generated by Excel and adjust your VBA code accordingly.

