Here we’ve got a dataset with the Names of some students and their Student IDs of any class. We need to remove the first character (the ‘S’) from each Student ID.

Method 1 – Using RIGHT and LEN Functions to Remove the First Character in Excel
Steps:
- Insert a new column next to the Student ID column.

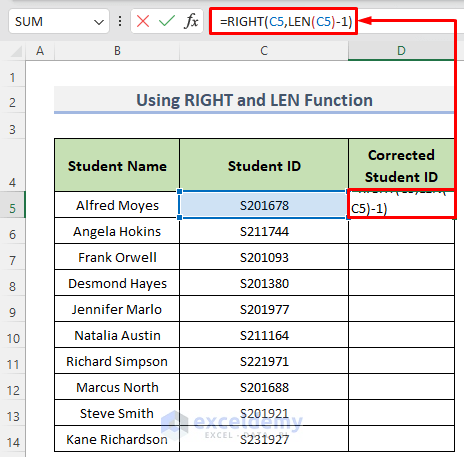
- Select the first cell in the new column, D5.
- In that cell, copy the following formula:
Formula Breakdown
- LEN(C5)-1 returns a number one less than the length of the string C5.
- Here, the length of the string S201678 is 7. So LEN(C5)-1 returns 6.
- RIGHT(C5,LEN(C5)-1) now becomes RIGHT(C5,6) and returns 6 characters from the right of the string C5.
- Thus, it returns the string removing the first character.
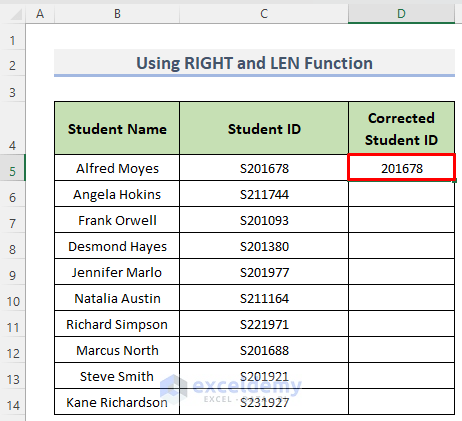
- Press Enter to get the following result where the ‘S’ is removed from the data in cell C5.
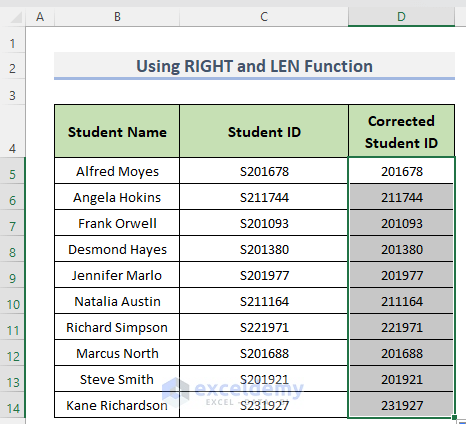
- Drag the Fill Handle to do the same for the rest of the cells as well.

- We will get results like the following.
Read More: How to Remove First 3 Characters in Excel
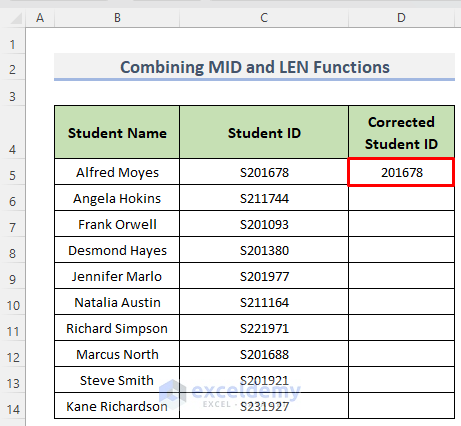
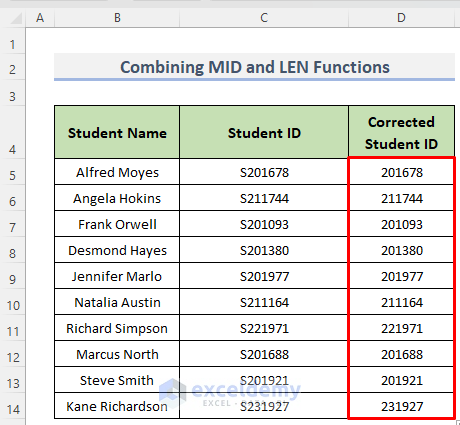
Method 2 – Delete the First Character by Combining MID and LEN Functions in Excel
Steps:
- Create a new column for the results.
- Select the cell D5 and input the following formula:

Formula Breakdown
- LEN(C5)-1 returns a number one less than the length of the string C5.
- Here the length of the string S201678 is 7. So LEN(C5)-1 returns 6.
- MID(C5,2,LEN(C5)-1) now becomes MID(C5,2,6) and returns 6 characters starting from the 2nd character of the string C5.
- Thus, it returns the string removing the first character.
- Press Enter.
- Double-click the Fill handle.
Read More: How to Remove Last Character in Excel
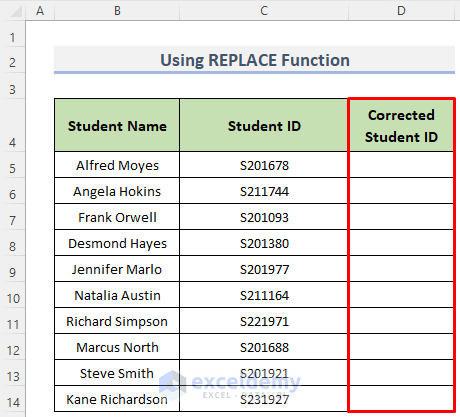
Method 3 – Using the REPLACE Function to Remove the First Character in Excel
Steps:
- Create a separate column for Corrected Student IDs.
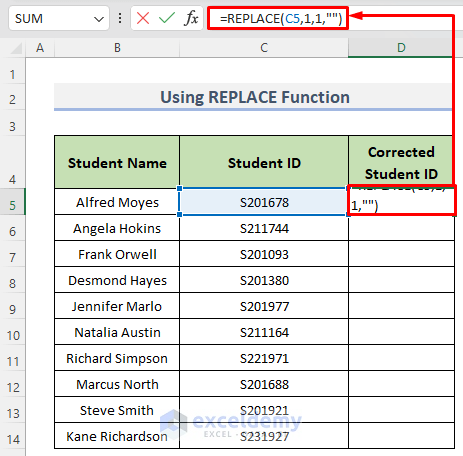
- Select the first cell of the column, D5, and input the following formula:
=REPLACE(C5,1,1,"")
Formula Breakdown
- REPLACE(C4,1,1,””) replaces the first character of the string C5 with an empty character (“”).
- Thus, it returns the string removing the first character.
- Press Enter to get the result.
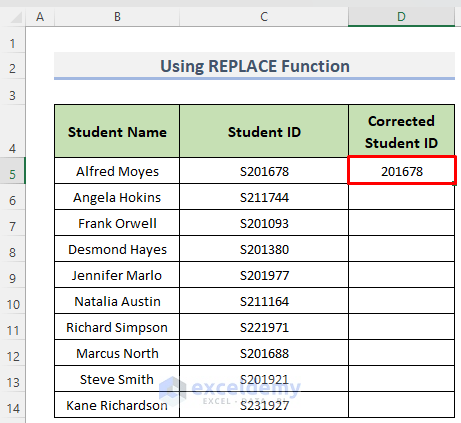
- Drag the Fill Handle to get the full results for the column.

Read More: How to Remove Last Digit in Excel
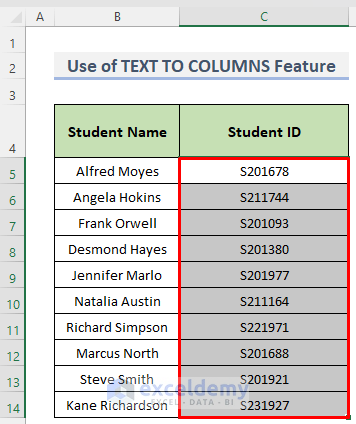
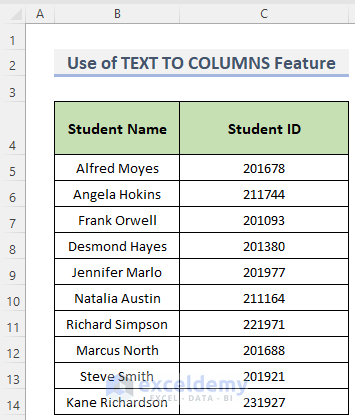
Method 4 – Using Excel Text to Columns Feature to Remove the First Character
Steps:
- Select all the data from where you want to remove the first characters.
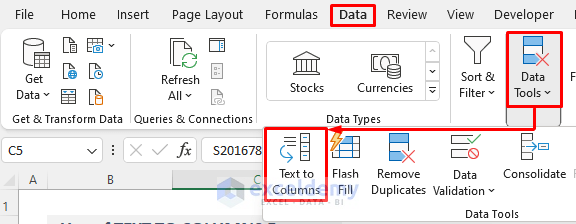
- Go to the Data tab in the Ribbon and select the Text to Column option under the Data Tools section.
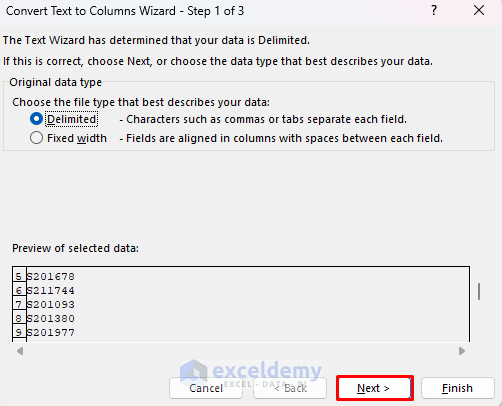
- You will get a dialogue box called Convert Text to Column Wizard. Click on Next.
- In the second dialogue, select Other and write S in the box next to it. The S will be excluded from the data in the Data Preview section.
- Click on Next.
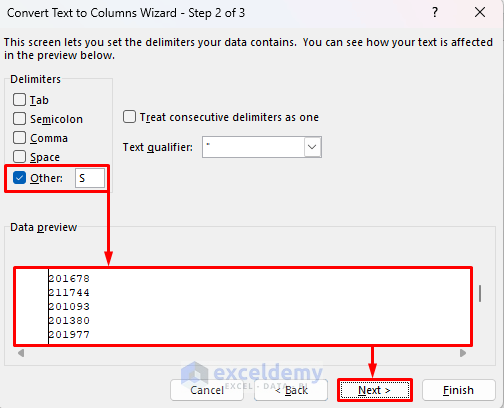
- In the third dialogue, click on the Do not import column (skip) option and press Finish.
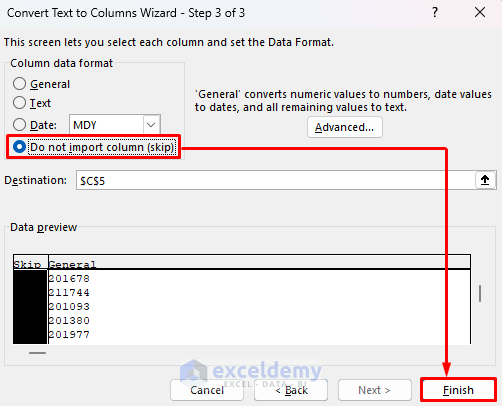
- We will get results like the following.
Method 5 – Applying Auto Fill Feature to Remove the First Character in Excel
Steps:
- Create a separate column for the results.
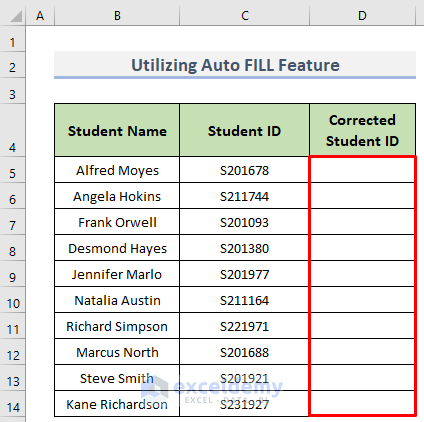
- Manually write the data without the first character. We will write the Student ID of cell C5 in cell D5 without the ‘S’.
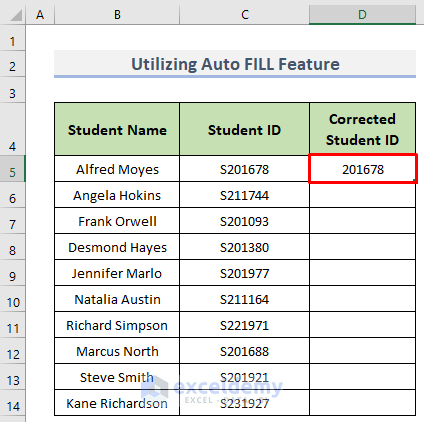
- Drag the Fill Handle for the rest of the cells.
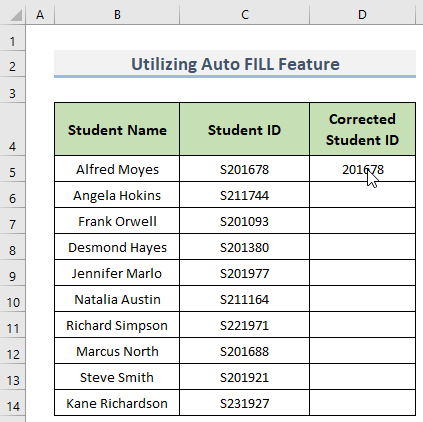
- All the cells will initially contain the same data.
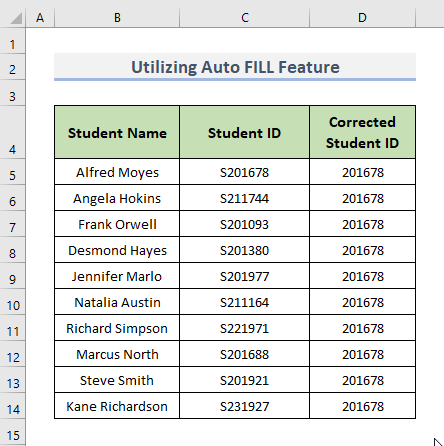
- To get the actual result, click on the small box at the bottom and select Fill Series.
Shortcut
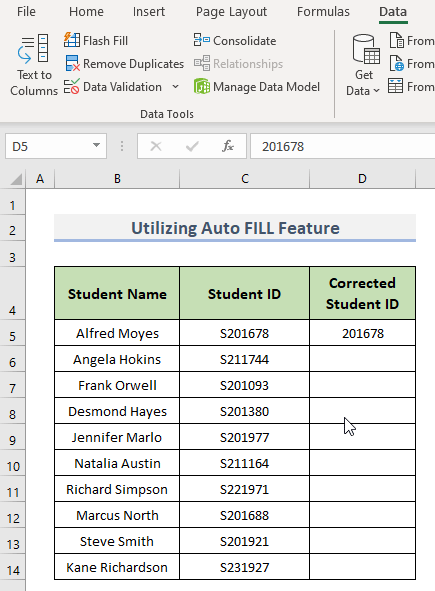
A smarter version of Auto Fill is the Flash Fill feature. After inserting the first result, go to the Data tab in the Ribbon and select Flash Fill under the Data Tools section.
Method 6 – Using VBA Code to Remove First Character in Excel
Steps:
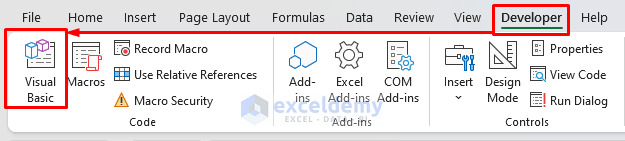
- Go to the Developer tab in the Ribbon and click on Visual Basic. It will open the VBA window called Microsoft Visual Basic for Applications.
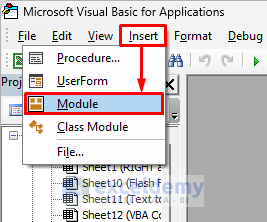
- Click on Insert and then on Module. A module box will appear.
- In the box, copy the following code:
Sub Remove_First_Characters()
For i = 1 To Selection.Rows.Count
    Selection.Cells(i, 1) = Replace(Selection.Cells(i, 1), Left(Selection.Cells(i, 1), 1), "")
Next i

End Sub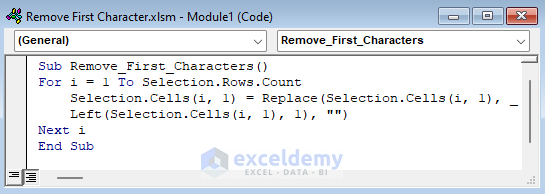
Code Breakdown
- We have created a Subroutine named Remove_First_Characters.
- We used a loop to change each of the data points.
- For a specific selection, we have replaced the first character with a blank space using the REPLACE and LEFT functions like we used in the earlier methods.
- Exit the window and go to the Excel sheet.
- Select the cell range.

- Go to the Developer tab in the Ribbon and select Macros.
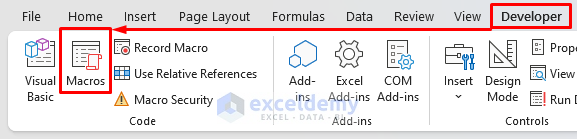
- Click on Remove_First_Characters and press on Run.

- We will get results like the following.

Read More: How to Remove Last Character from String Using VBA in Excel
How to Remove First (or Last) n Characters in Excel
Let’s say we want to remove the first 4 (n=4) characters from the cells in our dataset.
Steps:
- Select the destination cell and copy the following formula.
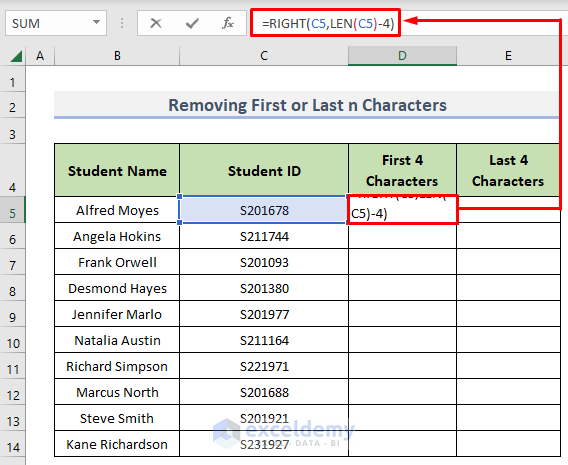
Here, C5 is the reference cell that contains the data we want to change. The RIGHT function takes the data from the right side while the length of the data is determined by the LEN function. So, we get the data without the first 4 characters.
- Press Enter to see the result.
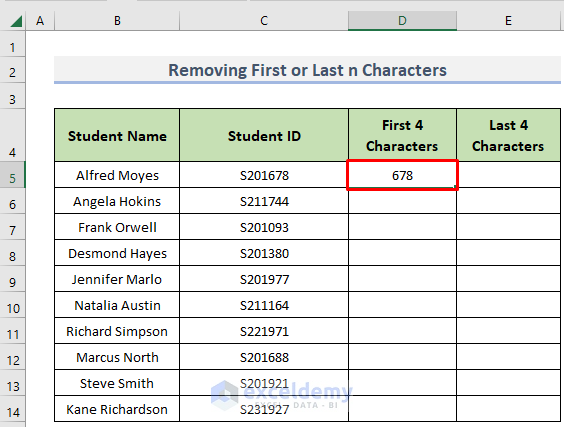
- Drag the Fill Handle to fill up the rest of the cells.
- Similarly, for the last 4 characters, we can use the following formula and repeat the previous steps:
The LEFT function starts taking data from the left side.

Read More: How to Remove the Last 3 Characters in Excel
Download Practice Workbook
<< Go Back To Excel Remove Characters From Left | Excel Remove Characters | Data Cleaning in Excel | Learn Excel
Get FREE Advanced Excel Exercises with Solutions!

None of these worked. Using Office 365, whatever the latest version is, semicolons are used rather than commas, and even so the MID Function does not work properly. Maybe it’s because it’s an international numbering system (this should be mentioned more in help forums, the use of commas, decimals, and semicologs across national border)
Maybe I’ll figure it out.
Hello, John!


I hope you are doing well.
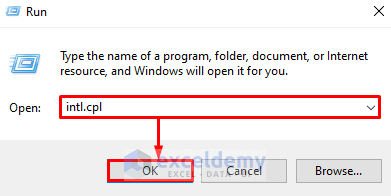
About your problem, I think your windows list separator is set to semicolon instead of comma. In this regard, follow the steps below to solve your problem.
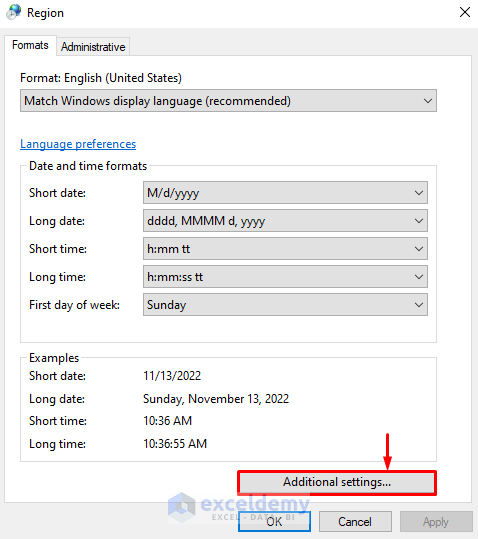
1. Go to your Windows menu and search for the Run window.
2. Afterward, open the Run window.
3. Now, write intl.cpl in the Open: text box.
4. Subsequently, click on the OK button.
5. As a result, the Region window will appear.
6. Following, click on the Additional settings… button.
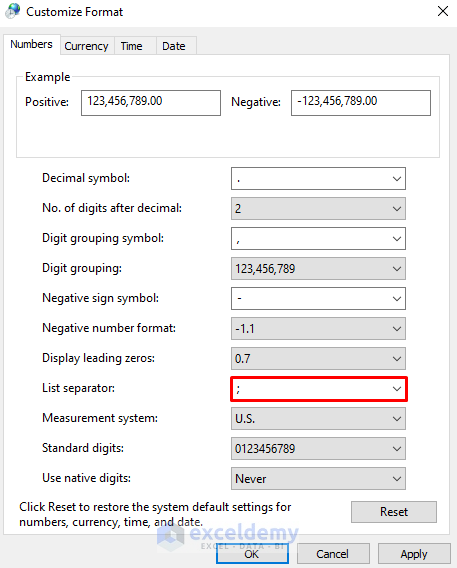
7. Consequently, the Customize Format window will appear. Here, you would see the List separator: option is selected as semicolon (;).
8. Following, change the List separator: option to comma (,) >> click on the Apply button >> click on the OK button.
9. Now close your Excel app and reopen the file. The formula will work fine.
Thus, I hope your problem would be solved now. If it doesn’t, please let us know in the comment section again.
Thanks,
Tanjim Reza