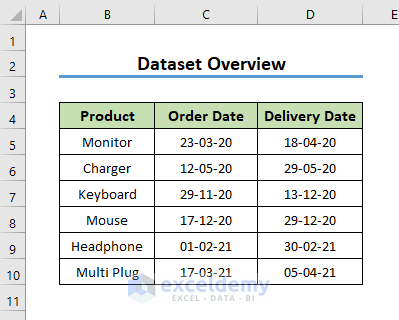
Consider the dataset below. Some products of an online store, their order, and delivery dates are provided.
Example 1 – Getting the Year, Quarter, Month, and Day
Steps:
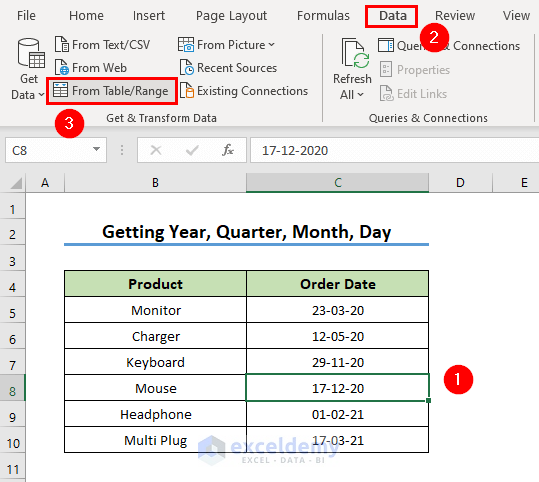
- Click a random cell on the data, go to the Data tab, and then click From Table/Range.
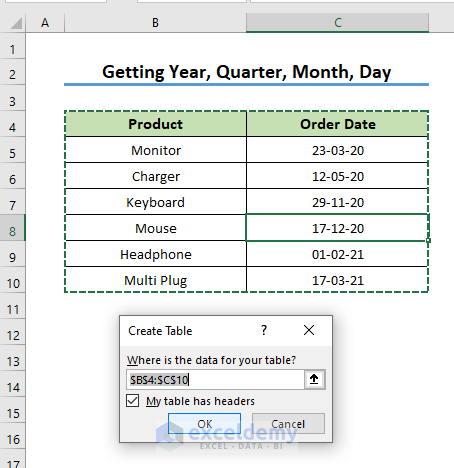
- The Create Table dialog box will come up. Click OK.
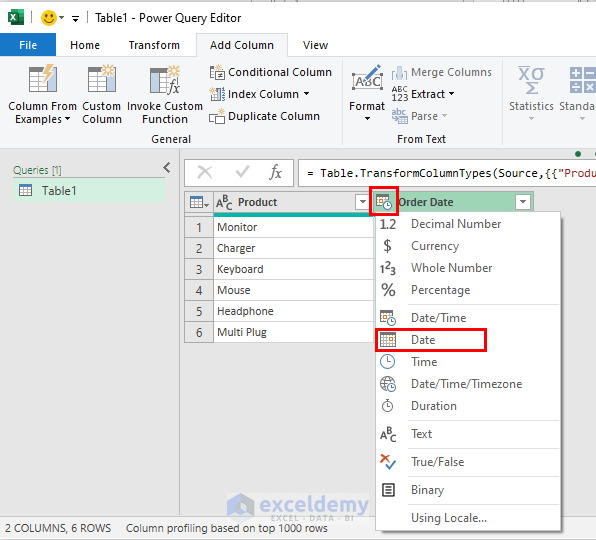
- The Power Query Editor window will show up. You will see your dataset in that window. The date has been shown with time here.

- In the Order Date column, click the icon (clock-calendar icon) at the top-left corner.
- Select Date from the dropdown.
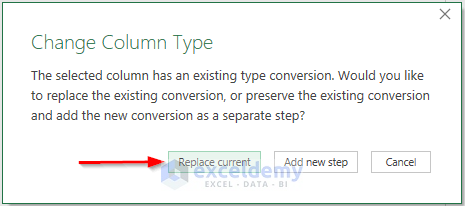
- You will see a new pop-up named Change Column Type. Here, click Replace Current.
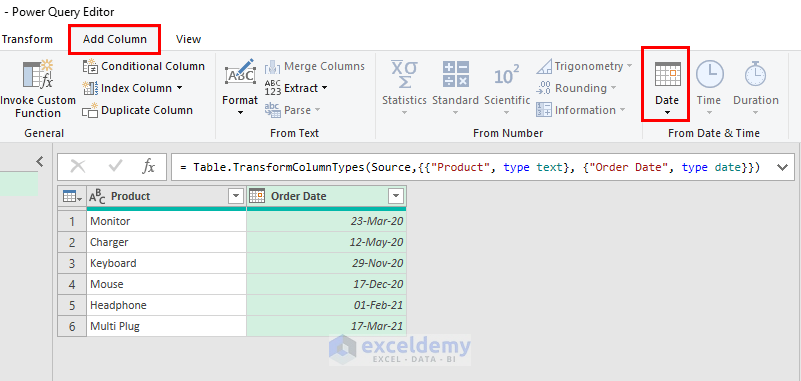
- The data type will be changed to Date.
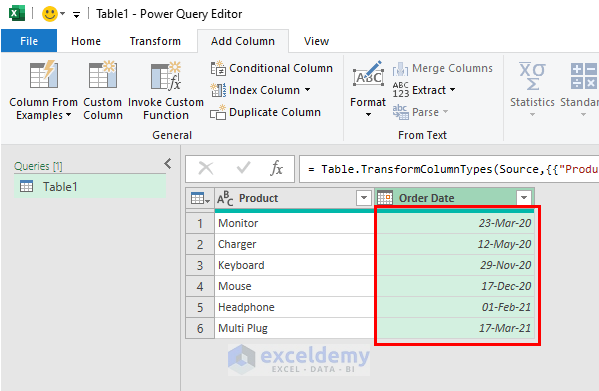
- Go to the Add Column tab in the Power Query Editor.
- You will see the Date. This icon has the desired Date functions.
- Click the dropdown.
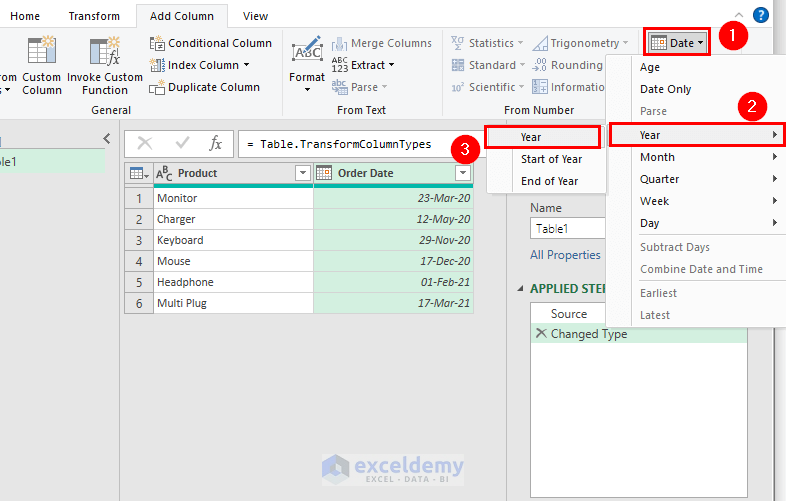
- In the dropdown list of the Date icon, you will see a couple of functions like Age, Year, Quarter, Month, Week, and Day.
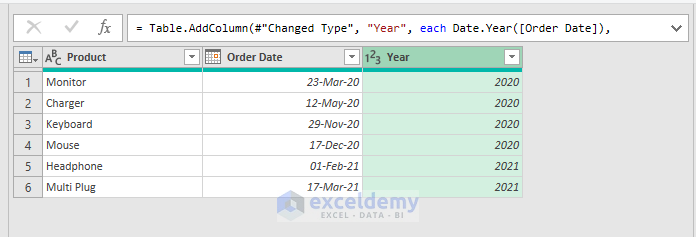
- To extract the Year from your date, click the drop-right arrow of the Year option, then select Year.
- A new column has been inserted mentioning the Year from the date list (i.e. 2020 has been extracted from the date 23-Mar-20).
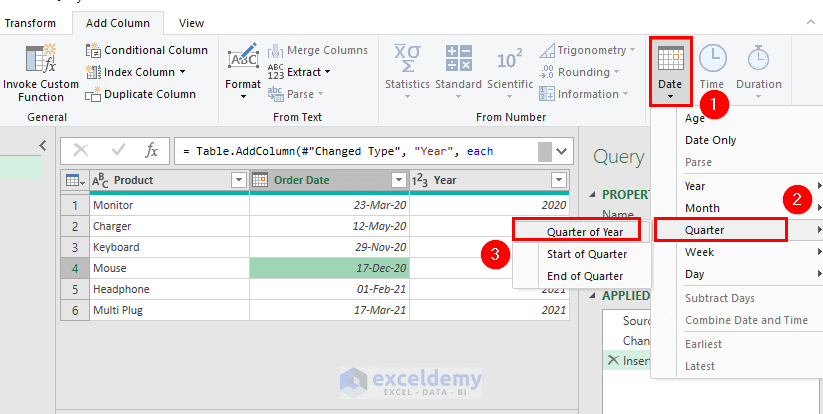
- If you want to get in which Quarter of the concerned year your date exists, go to the Date icon and select Quarter then Quarter of Year.
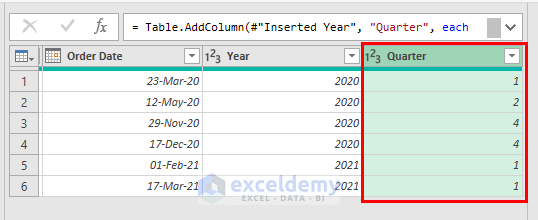
- You will see the Quarter column beside the Year.
- Repeat the process for extracting the Month.
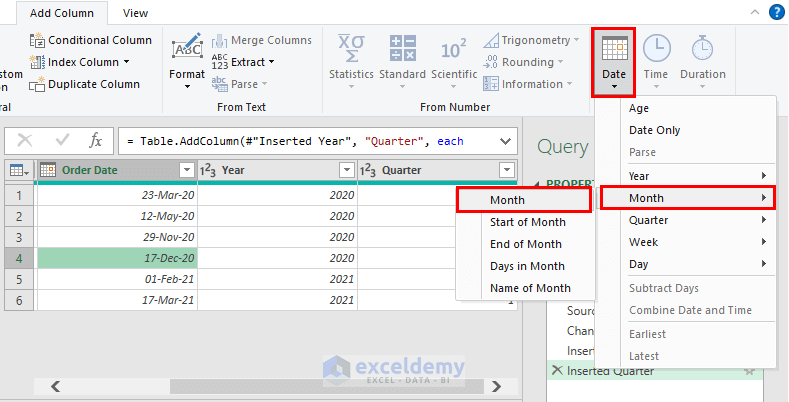
- You will get the Month column added beside the previous column.
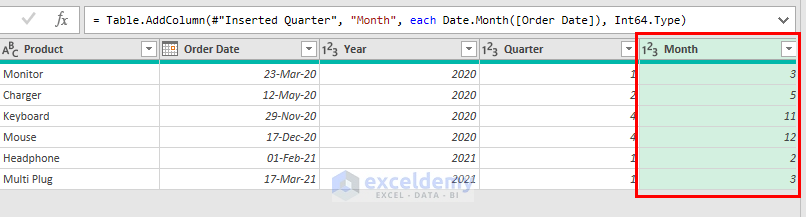
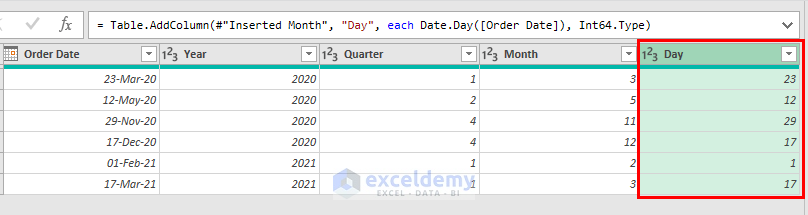
- Similarly, get the Day from the date.
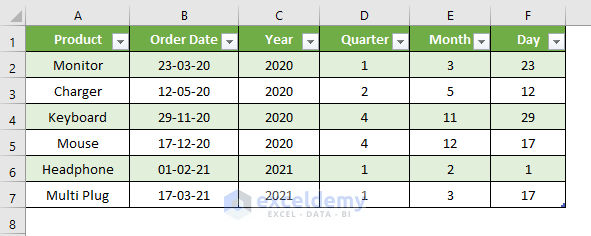
- Go to the Home tab of the Power Query window and click Close & Load.

- This command will load the data to the Excel worksheet window.
Example 2 – Finding the Differences Between Two Dates
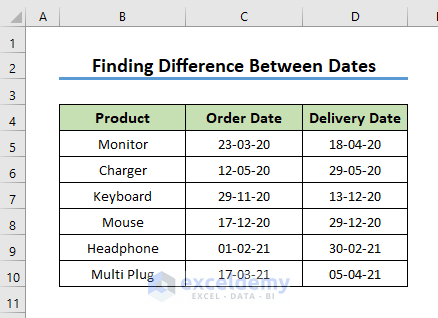
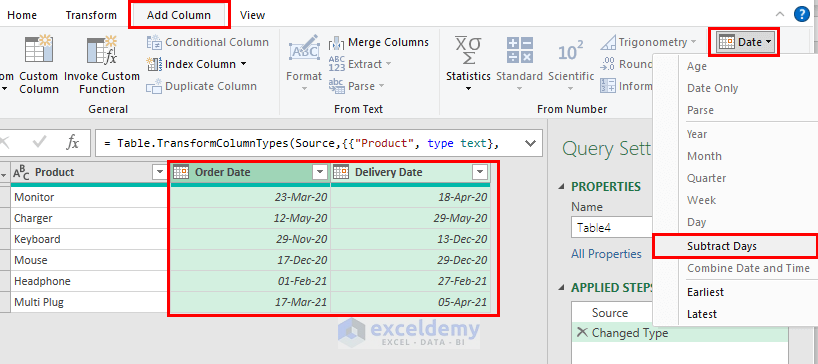
Consider this dataset. We want to find the difference between the order date and the delivery date.
Steps:
- Import the data to the Power Query Editor window following the same steps as Method 1.
- Select the Order Date column and Delivery Date column together by holding the Ctrl key.
- Go to the Add Column tab and click the dropdown of the Date icon, then select Subtract Days.
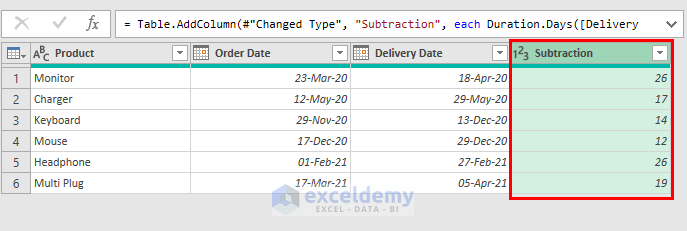
- A new column named Subtraction has been inserted calculating the difference between the two dates.
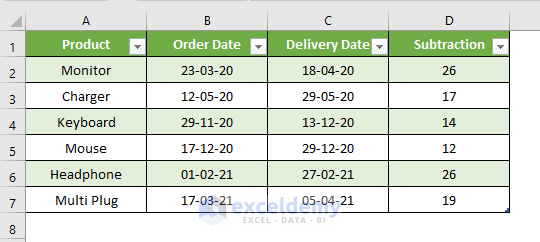
- Apply the Close & Load command to load this data to the Excel worksheet.
Example 3 – Getting the Name of the Day and the Month
Steps:
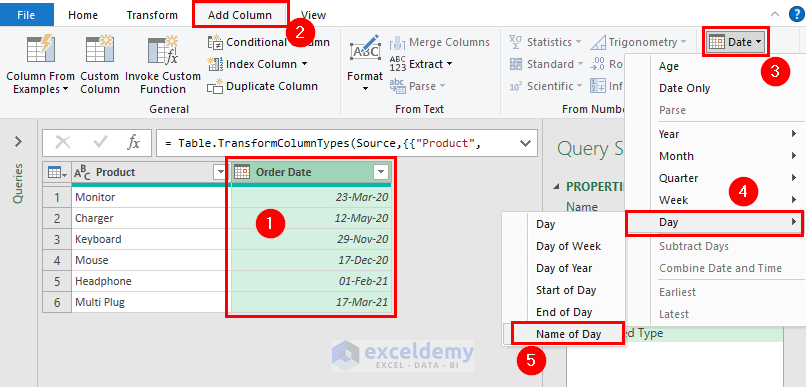
- Import the data to the Power Query window.
- Go to Add Column.
- Click the drop-down for Date.
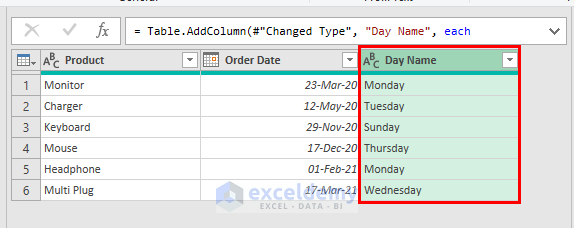
- Select Day and click Name of Day.
- The Name of the corresponding Date has been inserted beside the Date.
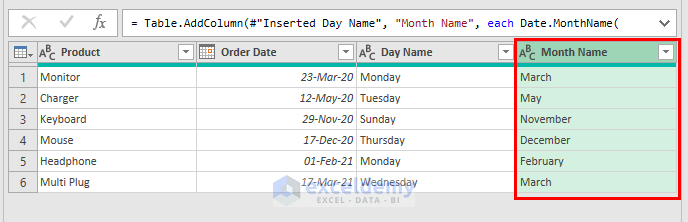
- Similarly, find the Month name and add a new column named Month Name.
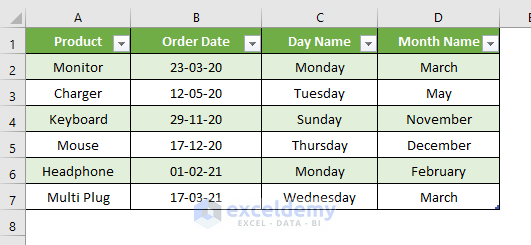
- Load the data to the Excel window and you’re done.
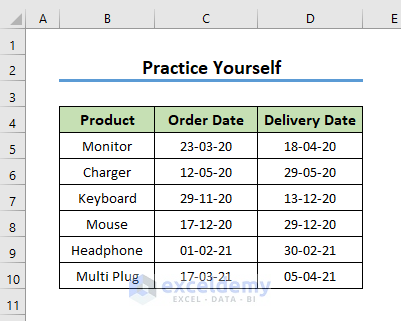
Practice Section
We’re providing you with a practice sheet so that you can practice yourself. Try to find out anything you want by applying the Power Query Date functions.
Download the Practice Workbook
<< Go Back to Power Query Excel | Learn Excel
Get FREE Advanced Excel Exercises with Solutions!
