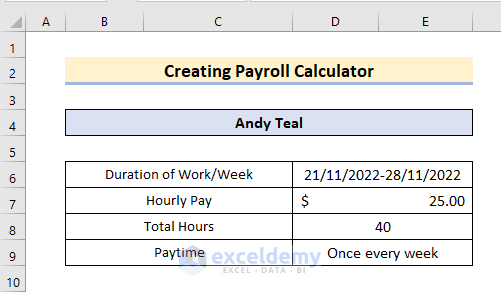
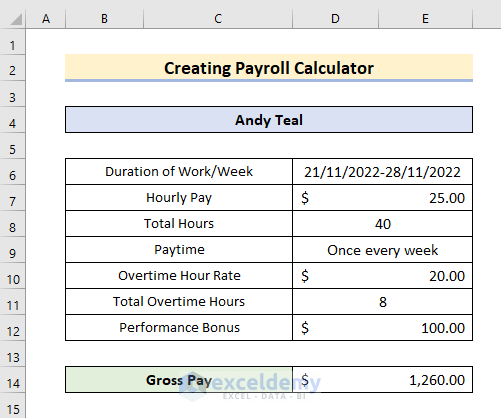
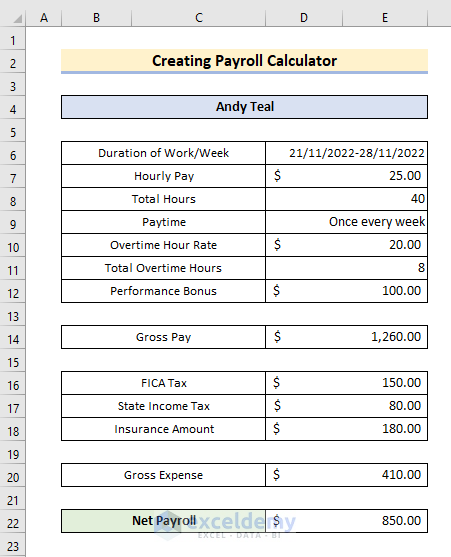
Step 1- Set up Employer Data
- Create a header.
- Create 2 columns and enter the sub-header.
- Enter the Duration of Work/Week, Hourly Pay, Total Hours & Paytime.
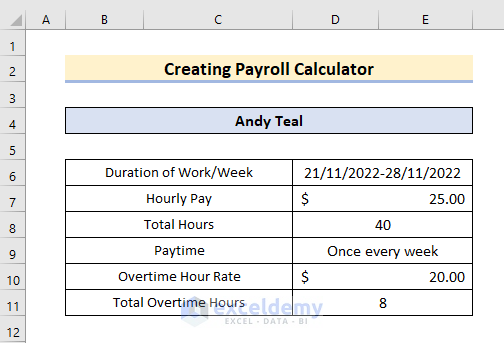
Step 2 – Enter Overtime Working Hours
- Enter the subheader of overtime hourly rate and total overtime hours.
- Enter the overtime hourly rate and total overtime hours.
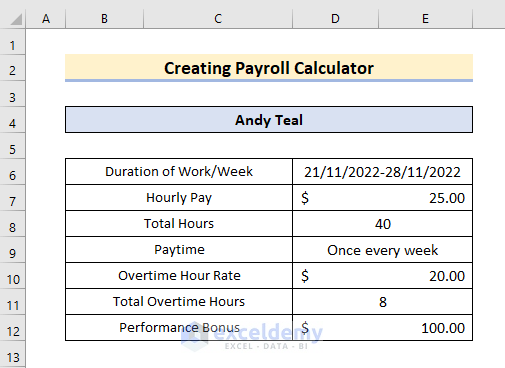
Step 3 – Include Employee Compensation
- In row 12, add the performance bonus header and the amount.
Step 4 – Calculate the Gross Pay
- In D14, enter the formula,
=D8*D7+D10*D11+D12
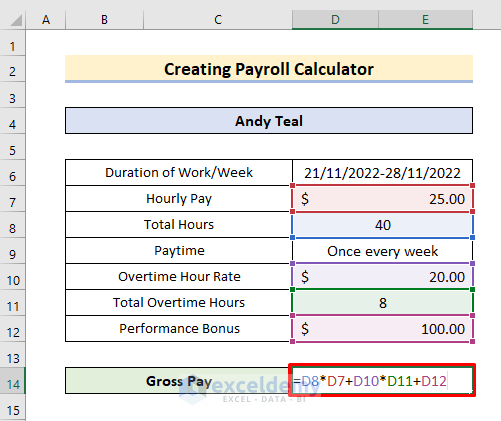
- Press Enter to see the result.
Formula Breakdown
- D8*D7 multiplies Hourly Pay and Total Hours to get the total payment.
- D10*D11 multiplies Overtime Hour Rate & Total Overtime Hours to see the total overtime amount.
- D8*D7+D10*D11+D12 adds the Performance Bonus to the obtained amounts to get the Gross Pay.
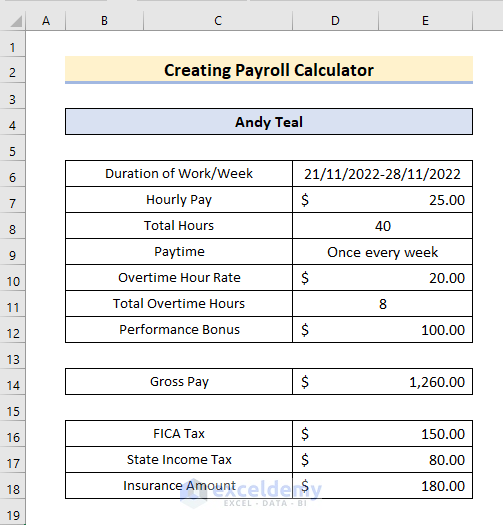
Step 5 – Insert Tax Information
- Add FICA Tax, State Income Tax, and Insurance Amount as sub-headers.
- Enter the tax amount in the right-side columns.
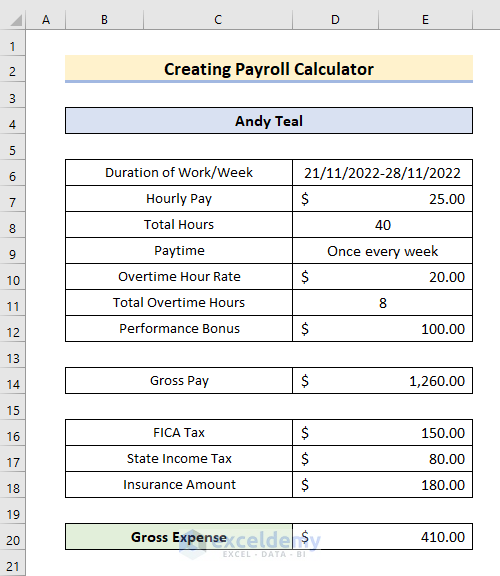
Step 6 – Sum Gross Expenses
- Enter Gross Expense as the sub-header.
- In D20, enter the following formula
=D16+D17+D18- Press Enter.
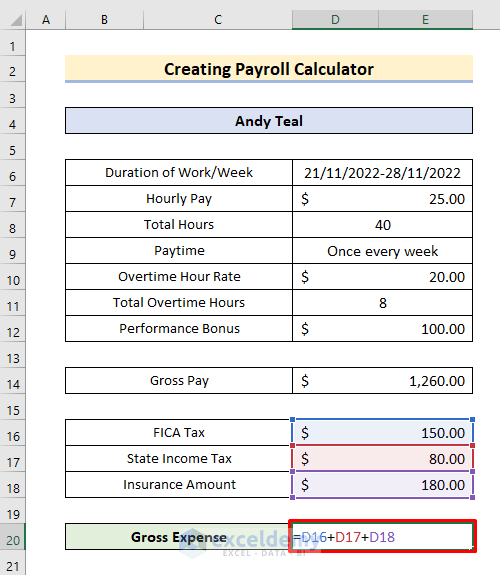
This is the gross expense.
Step 7 – Calculate the Net Payroll
- In D22, enter the formula,
=D20-D14- It subtracts Gross Expense from Gross Pay.
- Press Enter.

The net pay is displayed.
Download Practice Workbook
Download the workbook.
Related Articles
<< Go Back to Excel Payroll Templates | Excel HR Templates | Excel Templates
Get FREE Advanced Excel Exercises with Solutions!

Interesting. However, why is overtime rate less than hourly rate? Is that the overtime premium? In the U.S. the overtime rate is usually 1.5 times the hourly rate. So in this example, overtime hours would receive 37.5 as a overtime rate.
Hello Joe,
In the article’s example, the overtime rate shown is simply a sample figure for demonstration purposes, not based on U.S. labor law. If you want to apply the standard U.S. calculation, you can set the overtime rate formula to:
=Hourly_Rate * 1.5
That way, if your regular hourly rate is 25, the overtime rate will automatically calculate as 37.5.
Regards
ExcelDemy