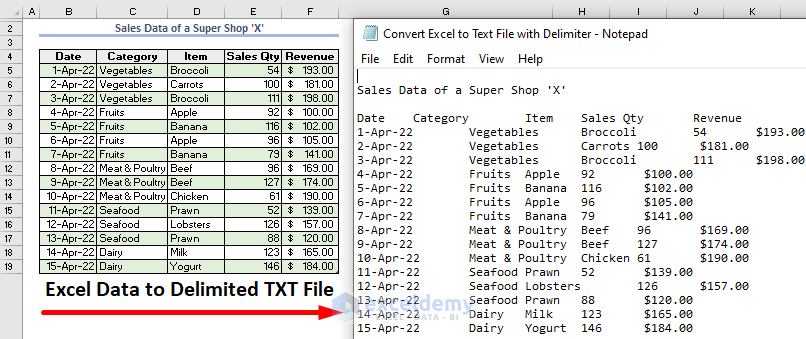
Text files consume less memory and are faster than Excel spreadsheets. Delimiters make text files more readable, especially those that have numeric data in them. To get a quick idea of the differences, please look at the following image.
How to Convert an Excel Spreadsheet to a Text File with Delimiters: 2 Suitable Ways
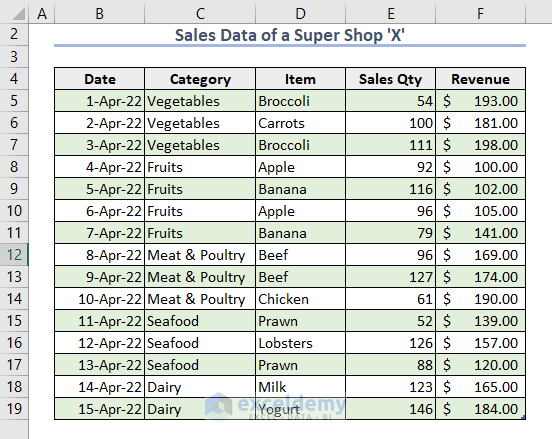
The following dataset contains the sales data of a shop. We will convert it into a .txt format with a delimiter.
Method 1 – Convert an Excel File to a Text File with a Tab Delimiter
Steps:
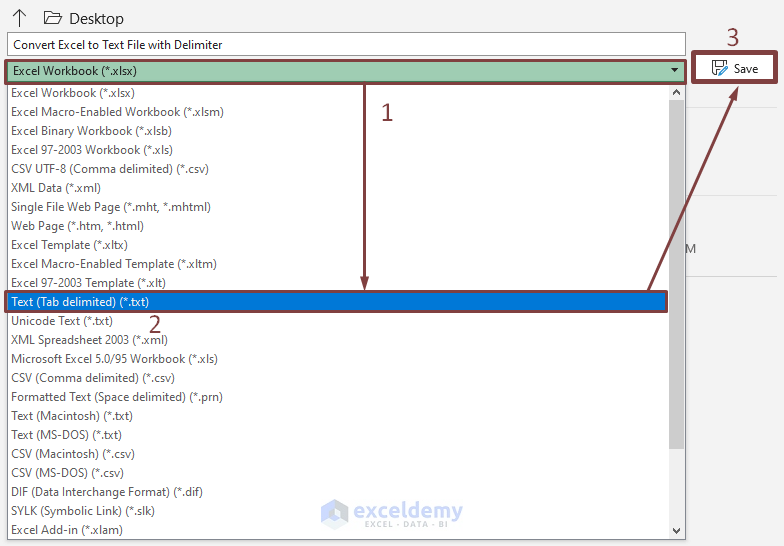
- Open your Excel file and go to the File tab.
- Click on the Save as option.
- From the Save window, click on File type and select Text (Tab delimited) (*.txt) file type.
- Choose a suitable location and press the Save button.
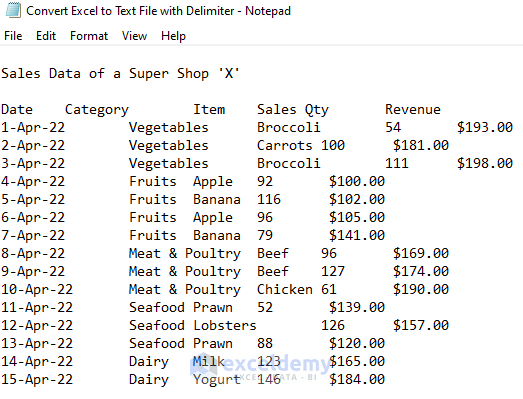
- Go to the folder where you’ve saved the text file and open it.
Method 2 – Convert an Excel File to a Text File with a Custom Delimiter (Pipe, Comma, etc.)
Steps:
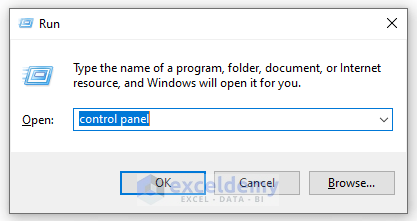
- Go to the Control Panel. You can get to it by pressing Windows + R, then typing control panel in the search bar, and pressing OK.
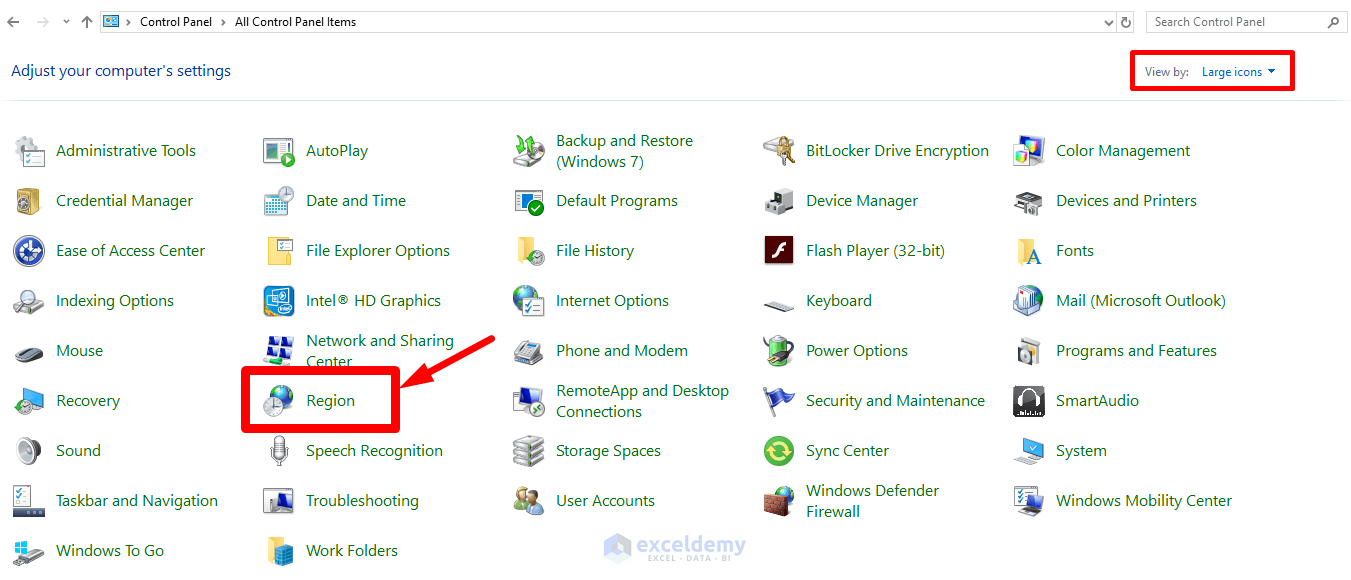
- Choose Large icons or Small icons from the View by drop-down button. All the features in the Control Panel will be visible. Click on the Region menu.
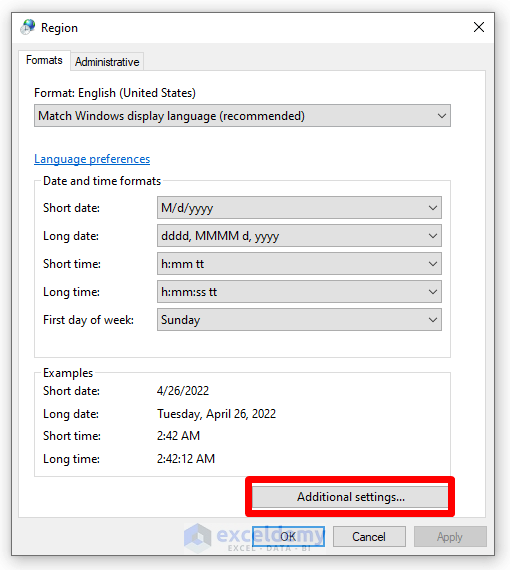
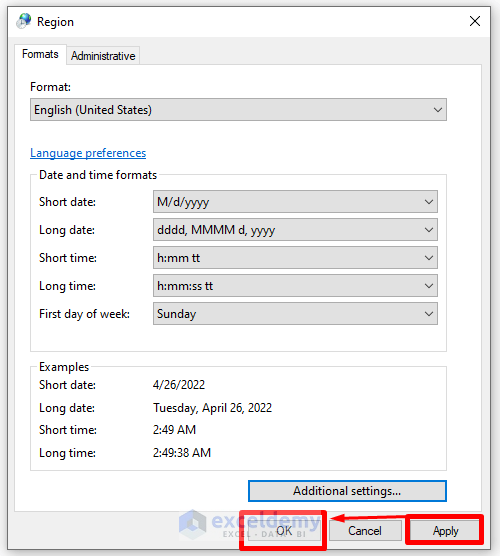
- The Region window will appear. Click on Additional settings.
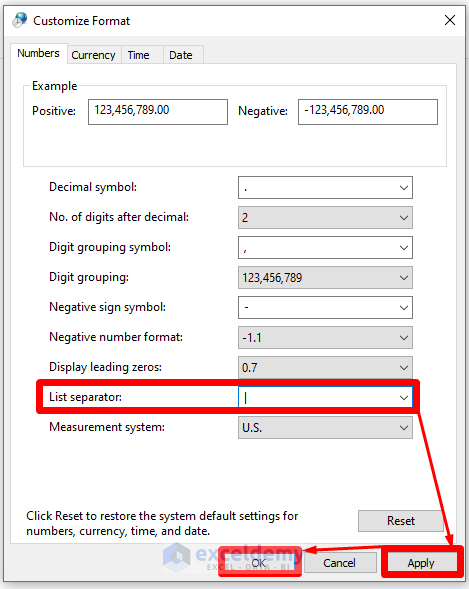
- The Customize Format window will appear this time. Go to the List separator section and change the default separator to a Pipe ‘|’ delimiter.
- You can type the Pipe delimiter by pressing the Shift + Backslash keys simultaneously. The Backslash key is situated just above the Enter key.
- Press Apply and hit OK.
- Press Apply and OK again.
- Open Excel and go to the File tab.
- Click on Save as and select the file type as CSV UTF-8 (Comma delimited) (*.csv).
- Press the Save button.

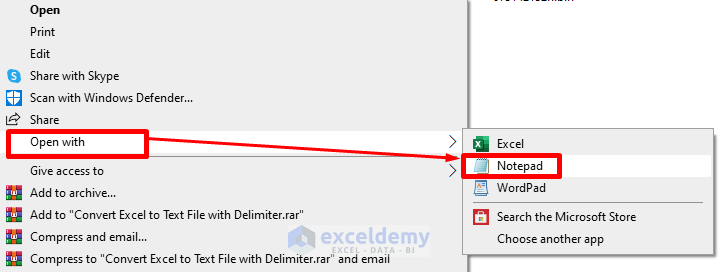
- Go to the folder where the file is saved and right-click on the file name. Choose Notepad or any other suitable application you have.
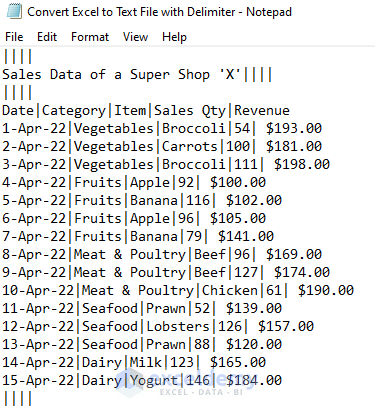
- The text file has the data delimited with pipe characters.
Read More: How to Convert Excel to Text File with Pipe Delimiter
Download the Practice Workbook
<< Go Back to Export Excel to Txt | Export Data from Excel | Learn Excel
Get FREE Advanced Excel Exercises with Solutions!
