In most office applications adding a new line, paragraph or space down is not a problem. But Microsoft Excel is different in this case. We will see how to space down in Excel in 3 different methods. For your better understanding, we will use a sample dataset.
How to Space Down in Excel: 3 Ways
In this article, we will see a shortcut, then a formula, and the Find and Replace option to space down in Excel.
Method 1: Using Shortcut to Space Down in Excel
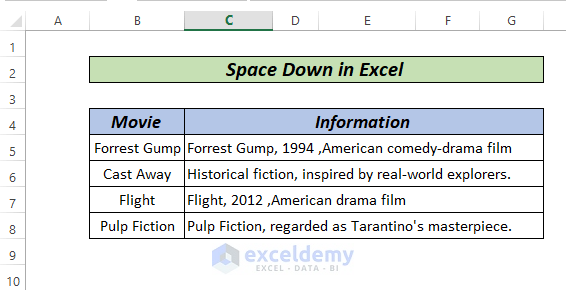
As you can see, we have information about some movies, but the information sentences are in a single cell displayed as a line. We want this info in that specific cell but in different paragraphs.
Steps:
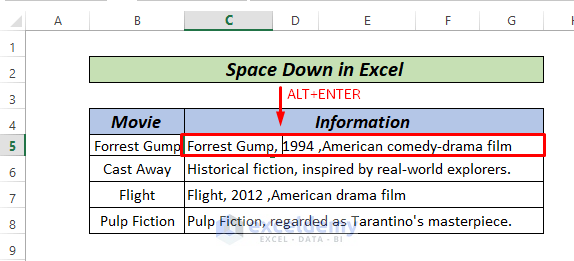
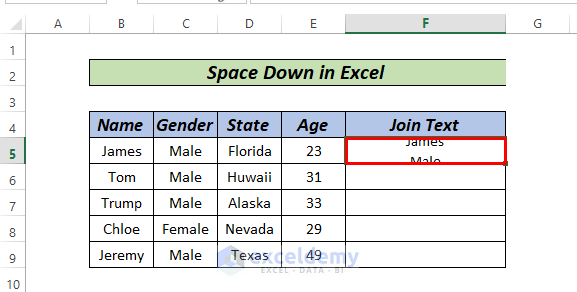
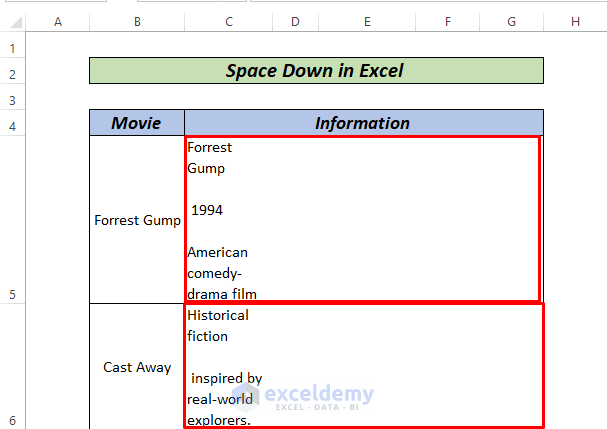
- Double-click on Cell C5 and click before the text 1994 as we want to space it down and press ALT+ENTER.
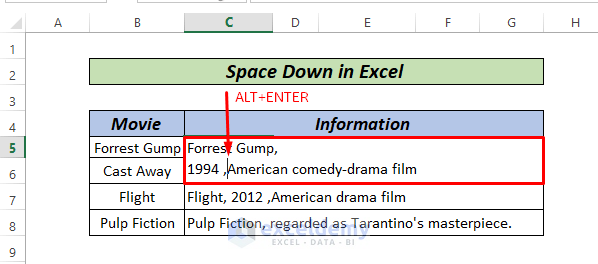
- As a result, the line will move to the next paragraph, this time again press ALT+ENTER pointing the cursor before the word American.
- After that, press the ENTER key and we get the following result.
- What we have to do now is Adjust the Row Heights, manually or by double-clicking on the row border.
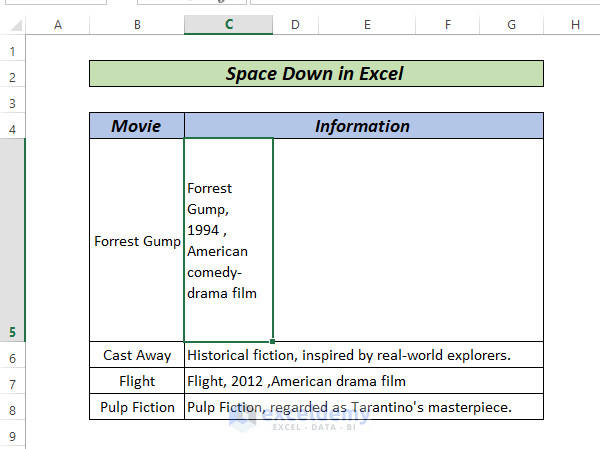
That’s it. Easy.
Read More: How to Make Excel Go to the Next Line Automatically
Method 2: Space Down Using Formula
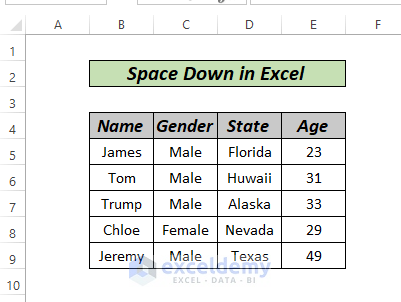
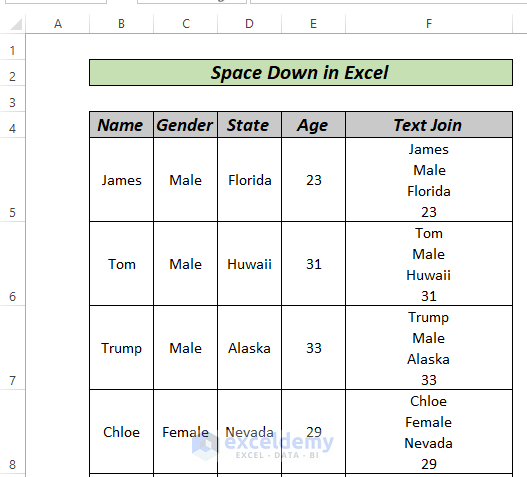
When we have Text in different columns but we want to display them in a single cell in different paragraphs by spacing down, we can use this method. Suppose, we have a dataset like the image below. We will use the CHAR function here for joining text.
Steps:
- First, click on cell F5 and type the following formula.
=A2&CHAR(10)&B2&CHAR(10)&C2&CHAR(10)&D2&CHAR(10)&E2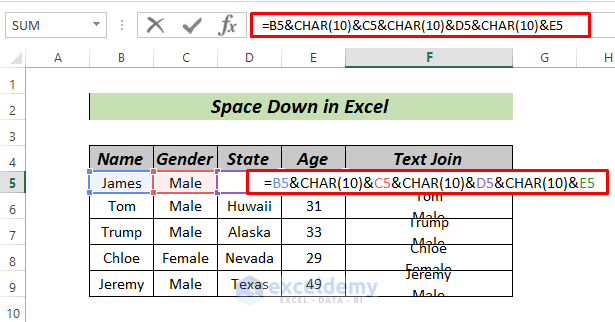
CHAR(10) denotes a line break. Here, we’ve concatenated the text with a line break to space down within the final result.
- Now, press the ENTER key.

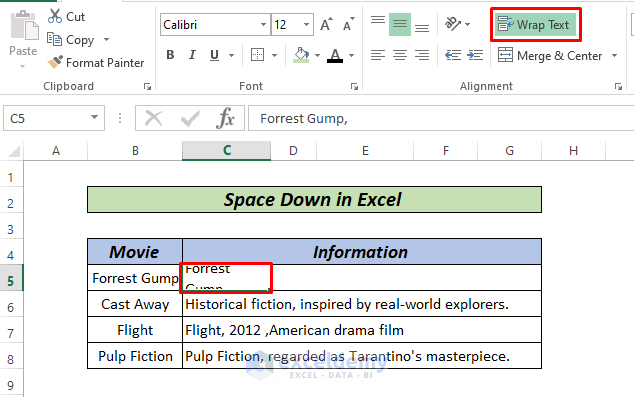
- What we have to do now is, just go to HOME > Wrap Text.
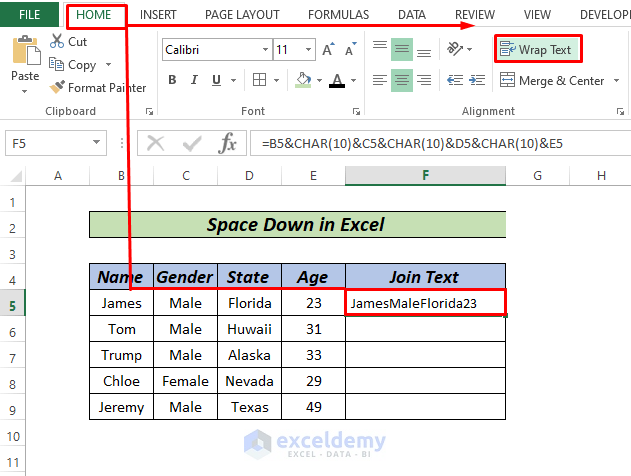
- We will get the result as follows.
- Now, we can drag down to AutoFill for the rest of the series.

- After adjusting row heights our final result will be like the image below.
Read More: How to Do a Line Break in Excel
Method 3: Space Down in Excel after a Specific Character
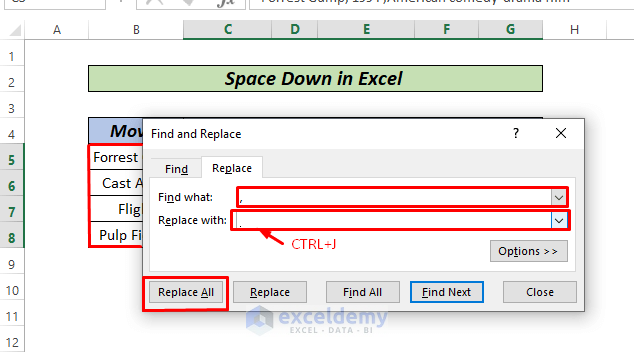
Another easy way to space down in Excel is, the Find and Replace option. We’ll use that option to space down after a particular character in Excel.
Steps:
- First, select the data range and press CTRL+H and a dialogue box will pop up. In the dialogue box type a comma (,) in the Find what box and press CTRL+J in the Replace with box.
Here, we are replacing all the commas with a line break.
- After, clicking Replace all we will find the output like the following image.
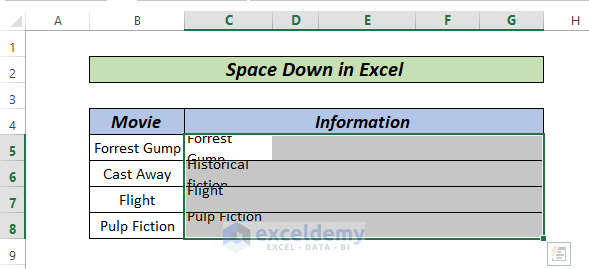
- Finally, adjust row heights and our result will be ready.
Read More: Find and Replace Line Breaks in Excel
Practice Section
The single most crucial aspect in becoming accustomed to these quick approaches is practice. As a result, we’ve attached a practice workbook where you may practice these methods.

Download Practice Workbook
Conclusion
That’s all for the article. These are 3 different methods to space down in Excel. Based on your preferences, you may choose the best alternative. Please leave them in the comments area if you have any questions or feedback.
Related Articles
- How to Remove Line Breaks in Excel
- How to Replace Line Break with Comma in Excel
- How to Replace a Character with a Line Break in Excel
- [Fixed!] Line Break in Cell Not Working in Excel
<< Go Back to Line Break in Excel | Text Formatting | Learn Excel
Get FREE Advanced Excel Exercises with Solutions!
