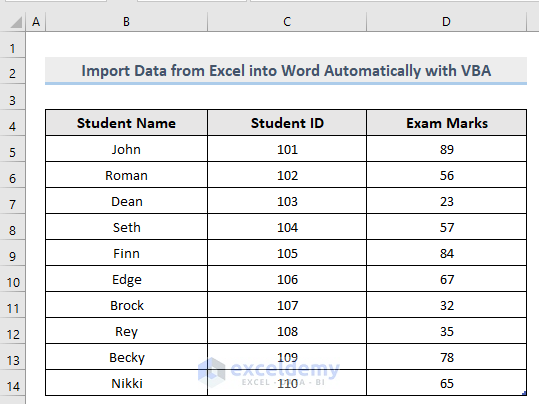
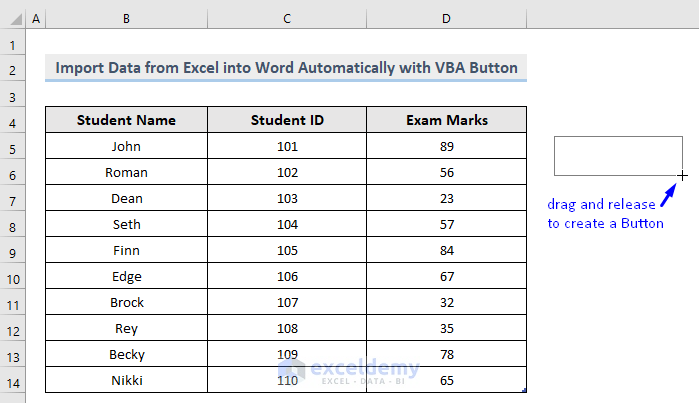
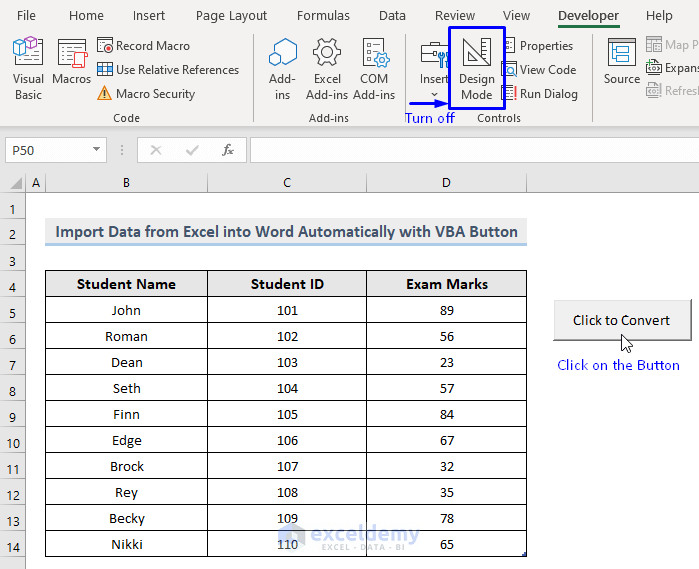
Once you’ve read these methods, you will learn how to import data from an Excel file into a Word file automatically after running VBA code and by simply clicking a button. The below is the example dataset that our Excel workbook has. We will import this data into word automatically using VBA.
Method 1 – Embed VBA to Import Data from Excel into Word Automatically
This section will let you know how you can import data from an Excel file into a Word file automatically by executing VBA code. To successfully execute this code, your system must have a word file, where the data from the Excel file will be imported.
Consider the following image:

Our system already has a word file named “Excel to Word” in the “ExcelDemy” folder inside Drive C. We will import the data from our Excel file into this “Excel to Word” file with VBA code.
Steps:
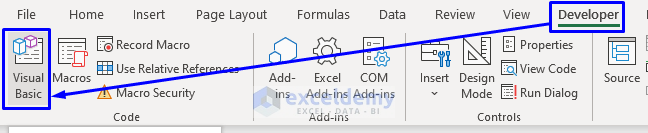
- Press Alt + F11 on your keyboard or go to the tab Developer -> Visual Basic to open Visual Basic Editor.
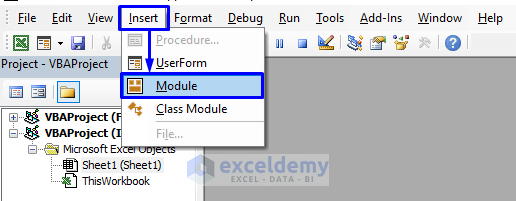
- In the pop-up code window, click Insert -> Module from the menu bar.
- Copy the following code and paste it into the code window.
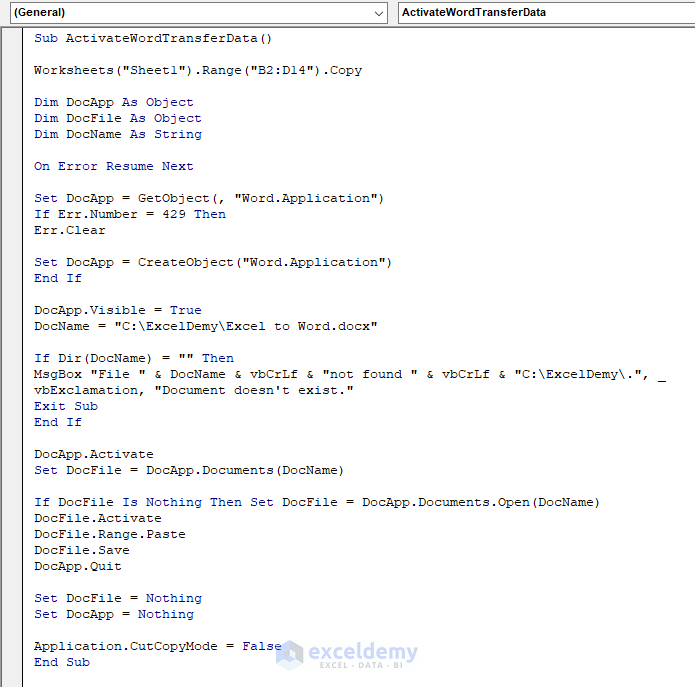
Sub ActivateWordTransferData()
Worksheets("Sheet1").Range("B2:D14").Copy
Dim DocApp As Object
Dim DocFile As Object
Dim DocName As String
On Error Resume Next
Set DocApp = GetObject(, "Word.Application")
If Err.Number = 429 Then
Err.Clear
Set DocApp = CreateObject("Word.Application")
End If
DocApp.Visible = True
DocName = "C:\ExcelDemy\Excel to Word.docx"
If Dir(DocName) = "" Then
MsgBox "File " & DocName & vbCrLf & "not found " & vbCrLf & "C:\ExcelDemy\.", vbExclamation, "Document doesn't exist."
Exit Sub
End If
DocApp.Activate
Set DocFile = DocApp.Documents(DocName)
If DocFile Is Nothing Then Set DocFile = DocApp.Documents.Open(DocName)
DocFile.Activate
DocFile.Range.Paste
DocFile.Save
DocApp.Quit
Set DocFile = Nothing
Set DocApp = Nothing
Application.CutCopyMode = False
End Sub
Your code is now ready to run.
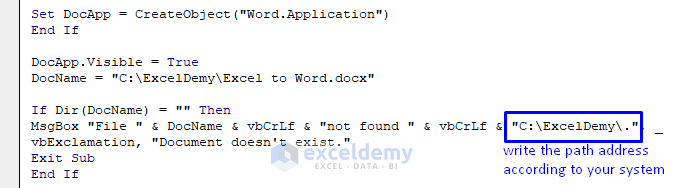
Consider the part from the code shown in the image below.
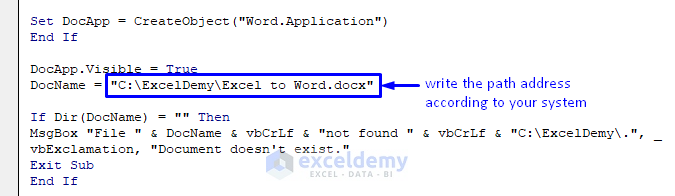
In line 13 of the code, we wrote DocName = “C:\ExcelDemy\Excel to Word.docx”.
Here, C:\ExcelDemy\Excel to Word.docx is the word file path that our computer system has – in Drive C, “ExcelDemy” folder, word file name “Excel to Word.docx”. In this line of code, you must provide the path address that your word file holds.
Similarly, in line 15 of the code, make the change accordingly.
You must have an existing word file where you will import the data from the Excel workbook, and you must write the file directory address correctly in the code. Otherwise, you will get a “File not found” and/or “Document doesn’t exist” message.
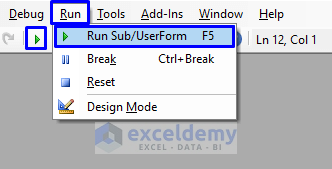
- Press F5 on your keyboard or select Run -> Run Sub/UserForm from the menu bar. You can also just click on the small Run icon in the sub-menu bar to run the macro.
After successful code execution, go back to the word file to check whether the data from the Excel file was copied there or not.
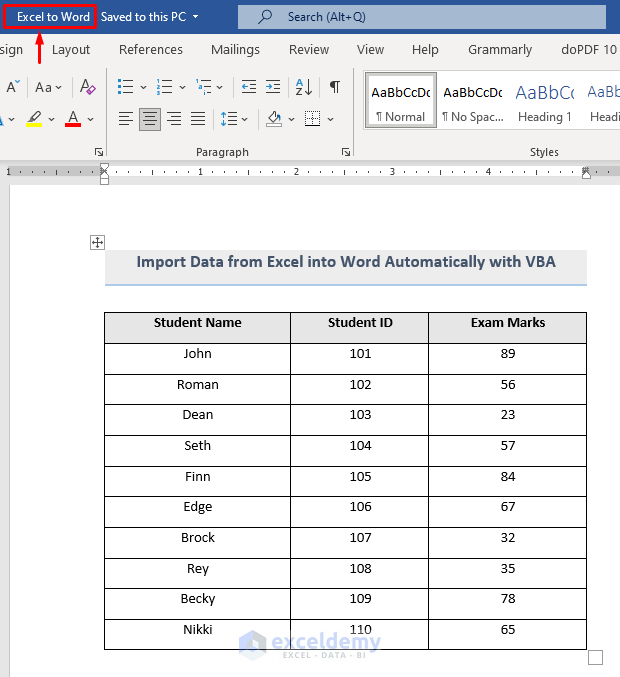
As you can see from the above image, the exact data from our Excel workbook was copied into the Word file automatically.
VBA Code Explanation
Worksheets("Sheet1").Range("B2:D14").CopyDefine the worksheet name (“Sheet1” is the sheet name in our dataset) and the range (“B2:D14” is the range that stores the data) that will be imported.
Dim DocApp As Object
Dim DocFile As Object
Declare object variables for word application and word file.
Dim DocName As StringDeclare a string variable for the file name and path directory.
On Error Resume NextIf an error occurs, then go to the next statement.
Set DocApp = GetObject(, "Word.Application")Pass the word application in the GetObject function as a parameter and store that in the defined application variable. GetObject requires two parameters, the first one is optional and the second one is mandatory.
If Err.Number = 429 Then
Err.Clear
If the component cannot create the object (error number 429), then the object will be reset.
Set DocApp = CreateObject("Word.Application")
End If
Create a new instance of the Word application before exiting the condition.
DocApp.Visible = TrueTo make the application visible.
DocName = "C:\ExcelDemy\Excel to Word.docx"Storing the path address for our Word file.
If Dir(DocName) = "" Then
MsgBox "File " & DocName & vbCrLf & "not found " & vbCrLf & "C:\ExcelDemy\.", vbExclamation, "Document doesn't exist."
Exit Sub
End If
If the file address doesn’t match or is found, then it returns an error message. Exit the procedure and the condition.
DocApp.ActivateActivate the previously created Word application instance.
Set DocFile = DocApp.Documents(DocName)Declare the Word file in the defined variable.
If DocFile Is Nothing Then Set DocFile = DocApp.Documents.Open(DocName)If the file is not open, then we open it.
DocFile.ActivateTo activate the Word file.
DocFile.Range.PasteTo paste the copied range from the Excel file into the Word file.
DocFile.SaveAutomatically save the Word file after importing data from the Excel workbook.
DocApp.QuitAfter importing data, close the Word file.
Set DocFile = Nothing
Set DocApp = Nothing
To free the memory allocated to the two object variables.
Application.CutCopyMode = FalseRemoves the selection from the range.
Method 2 – Import Data into a Word File from Excel with VBA Button
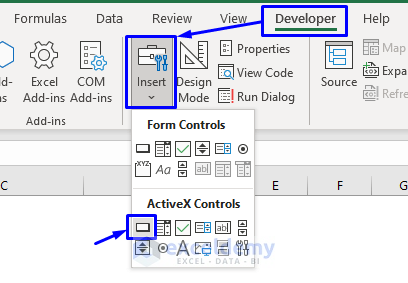
- Go to the Developer tab.
- Click Insert and select Button under the ActiveX Controls group.
- There will be a plus symbol (+). Drag and release the symbol to create a button in any size anywhere in your spreadsheet.
- After release, this will be the first look of our VBA Button.
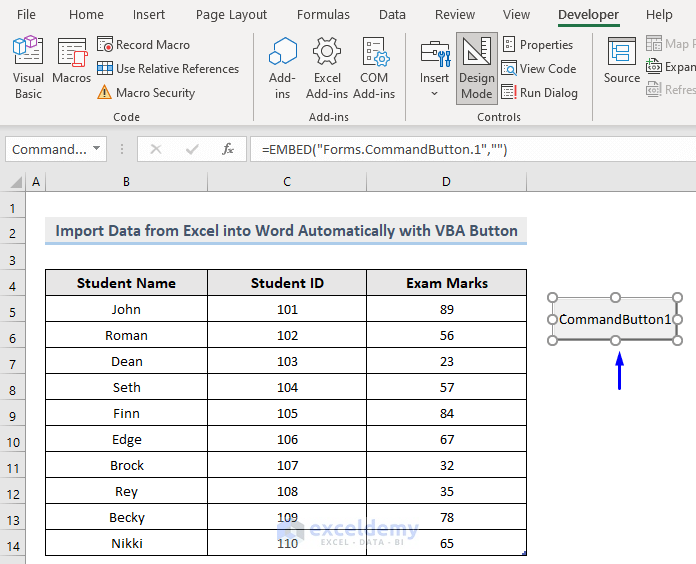
- Right-click on the button to modify it.
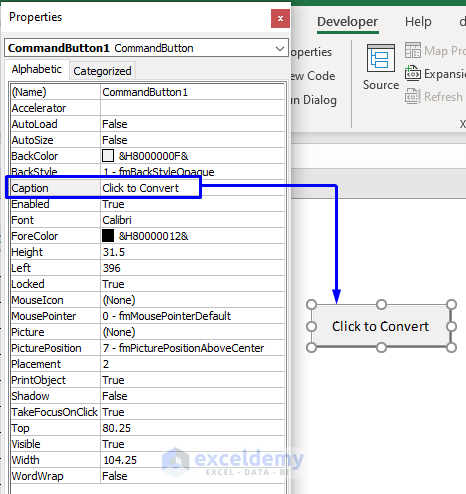
- Select Properties.
- Make sure you have the Design Mode on from the Controls group in the menu bar. To turn on or off the Design Mode, you just need to click on it.
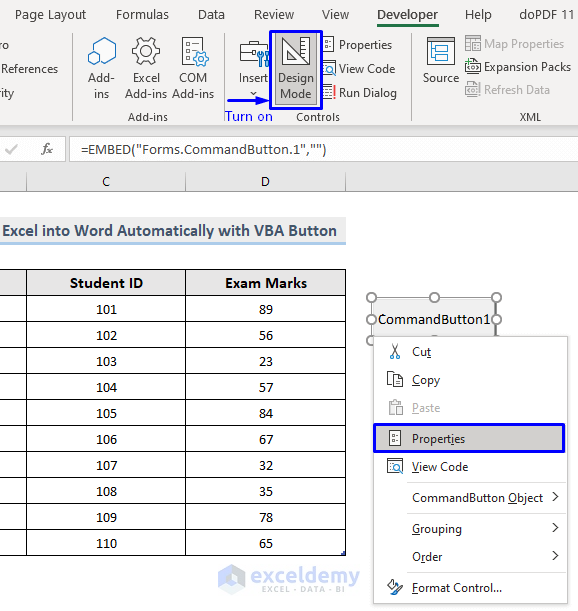
- A Properties pop-up window will open.
- Write the name that you want your Button to display in the Caption (we used “Click to Convert”)
Steps to Execute the VBA Macro:
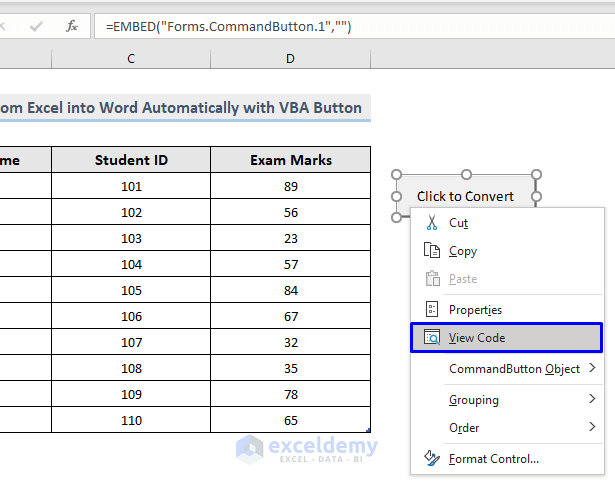
- Right-click on the Button and choose View Code from the options. You can also double click on the Button to go to the code window.
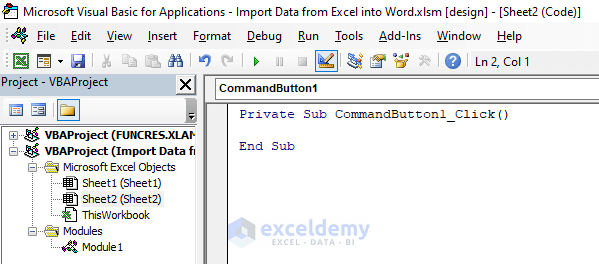
- You will be redirected to an automatically generated code window with a couple of auto-generated lines of code.
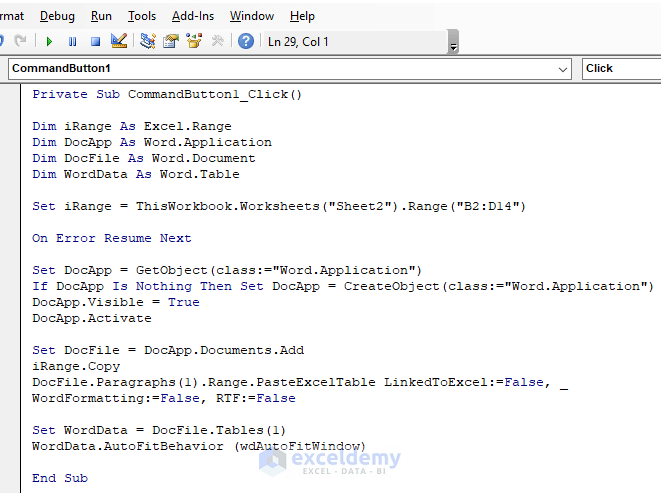
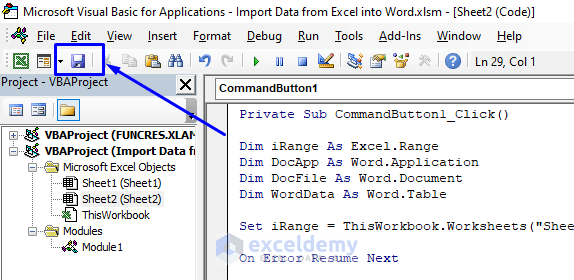
- Copy the following code and paste it into the code window.
Private Sub CommandButton1_Click()
Dim iRange As Excel.Range
Dim DocApp As Word.Application
Dim DocFile As Word.Document
Dim WordData As Word.Table
Set iRange = ThisWorkbook.Worksheets("Sheet2").Range("B2:D14")
On Error Resume Next
Set DocApp = GetObject(class:="Word.Application")
If DocApp Is Nothing Then Set DocApp = CreateObject(class:="Word.Application")
DocApp.Visible = True
DocApp.Activate
Set DocFile = DocApp.Documents.Add
iRange.Copy
DocFile.Paragraphs(1).Range.PasteExcelTable LinkedToExcel:=False, WordFormatting:=False, RTF:=False
Set WordData = DocFile.Tables(1)
WordData.AutoFitBehavior (wdAutoFitWindow)
End Sub
Make sure your code aligns with your dataset. For instance, change “Sheet2” according to your sheet name and “B2:D14” according to the range in your worksheet.
- Save the macro.
- Go back to the worksheet where your data is located and turn off the Design Mode from the Controls group in the menu bar
- Click on the Button to check if it works.
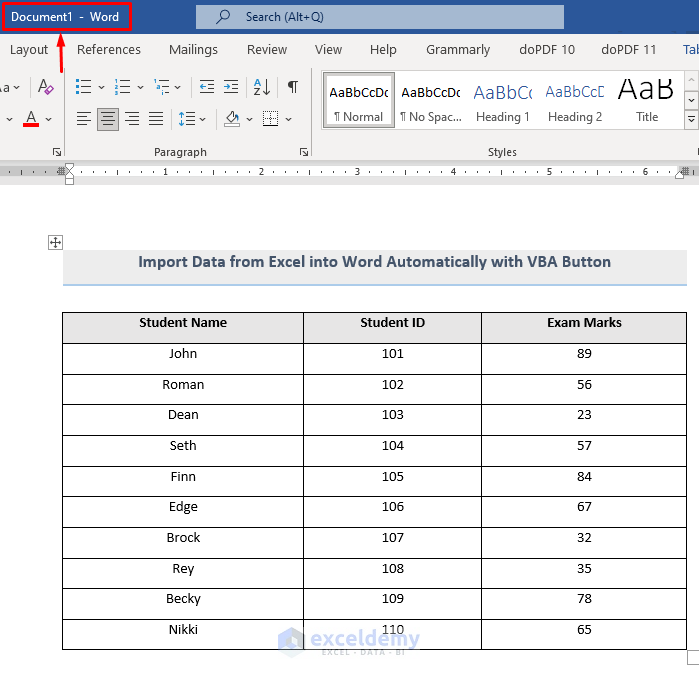
As you can from the above image, there is a new Word file created with the exact data from the Excel workbook just by clicking the Button in Excel VBA.
VBA Code Explanation
Dim iRange As Excel.Range
Dim DocApp As Word.Application
Dim DocFile As Word.Document
Dim WordData As Word.Table
Declare the variables and objects to hold the range and control the Word application.
Set iRange = ThisWorkbook.Worksheets("Sheet2").Range("B2:D14")Store the worksheet name (“Sheet2” is the sheet name in our dataset) and the range (“B2:D14” is the range that stores the data) that will be imported to the defined range variable.
On Error Resume NextIf an error occurs, go to the next statement.
Set DocApp = GetObject(class:="Word.Application")Pass the Word application in the GetObject function as a parameter and store that in the defined application variable. This can be accomplished by the special “class” reference with the VBA GetObject command.
If DocApp Is Nothing Then Set DocApp = CreateObject(class:="Word.Application")If the file is not open, we open it by creating an instance of the Word application.
DocApp.Visible = TrueTo make the application visible.
DocApp.ActivateTo activate the Word file.
Set DocFile = DocApp.Documents.AddCreate a new document or file inside the Word application.
iRange.Copy
DocFile.Paragraphs(1).Range.PasteExcelTable LinkedToExcel:=False, WordFormatting:=False, RTF:=False
Copy and paste the range into a new table in the Word file. The actions performed here will be as follows:
- The table will be non-linked.
- The source format will be Excel format, not Word format.
- The text will not use the rich text format.
Set WordData = DocFile.Tables(1)
WordData.AutoFitBehavior (wdAutoFitWindow)
If the Excel range is wider than the document, then these lines of code will autofit the new data to fit the range within the margins of the newly created Word file.
Important Things to Consider
If you get the word.application not defined error, then you must follow the steps shown below.
- Select Tools -> References… from the menu bar in the code editor.
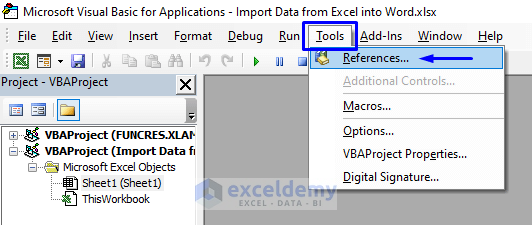
- A References – VBAProject pop-up window will appear. Check the box of Microsoft Word 16.0 Object Library.
- Click OK.
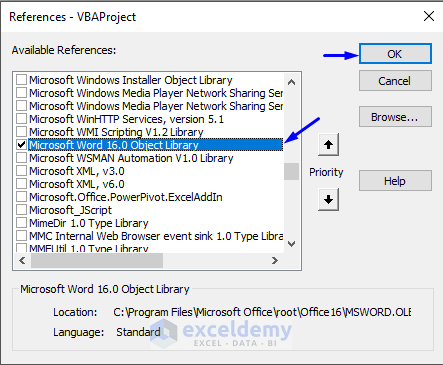
This will add the word object library reference to your project, eliminating the error when you execute the code again.
Download Workbook
You can download the free practice Excel workbook from here.
Related Articles
- Excel VBA: Open Word Document and Replace Text
- Excel VBA: Open Word Document and Paste
- Open Word Document and Save As PDF or Docx with VBA Excel
- How to Generate a Word Document from an Excel Macro

