The ability to link the data in Word files and Excel worksheets, such as Mail Merge Labels, is a powerful and beneficial feature for users of MS Office apps. Labels are essential when sending emails to our desired recipients. In this article, we’ll demonstrate how to mail merge labels from Excel to Word step-by-step.
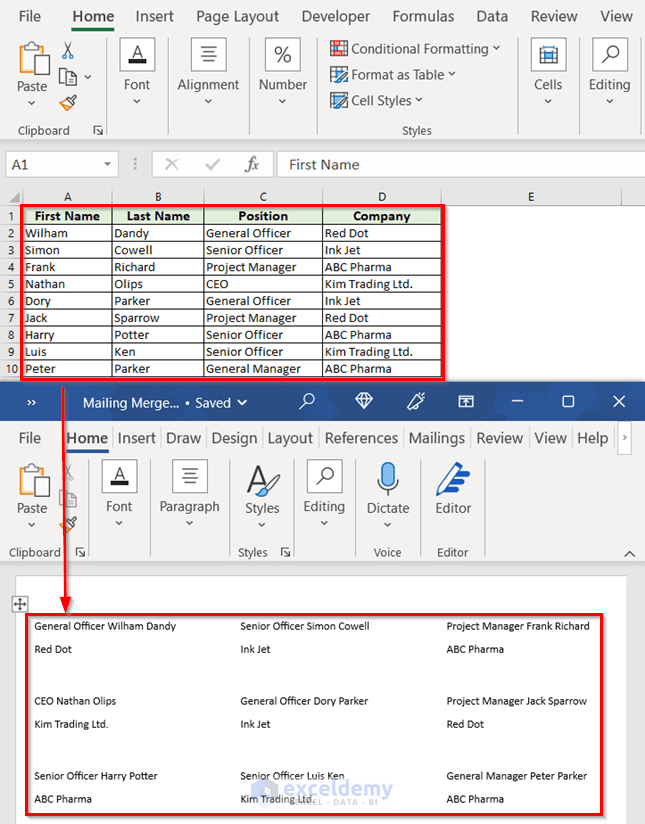
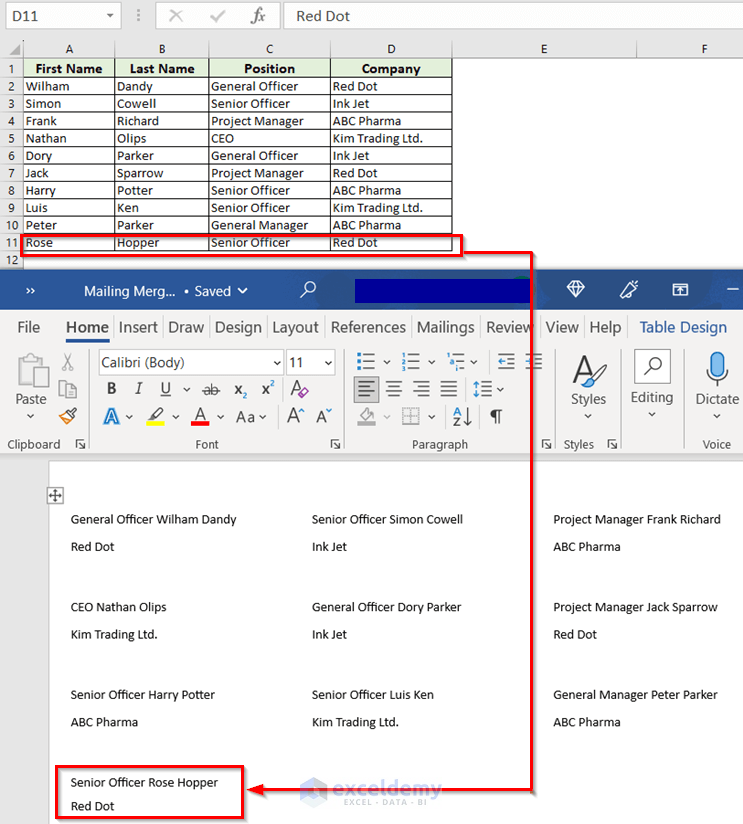
As in the image above, we will merge the source data from Excel to create mail merge labels in Word. MS Word’s Mail Merge feature allows us to import the necessary labels from Excel to Word.
Step 1 – Prepare the Excel File for Mail Merge
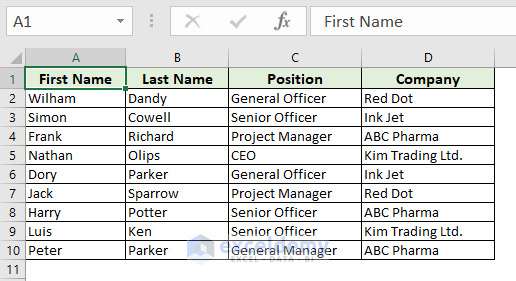
- Open an Excel workbook.
- Input the necessary fields to create the Label.
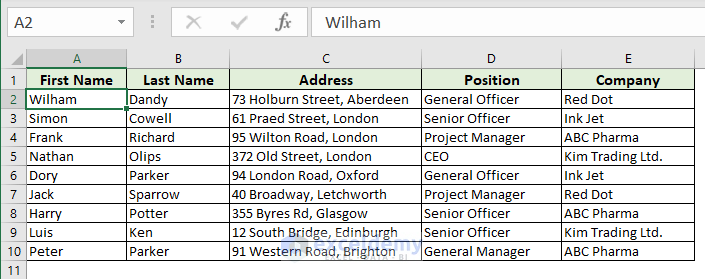
In this example, we insert First Name, Last Name, Position, and Company.
Step 2 – Insert the Mail Merge Document in Word
Now we’ll set up Word to merge the Excel file in order to insert the Mail Merge Document.
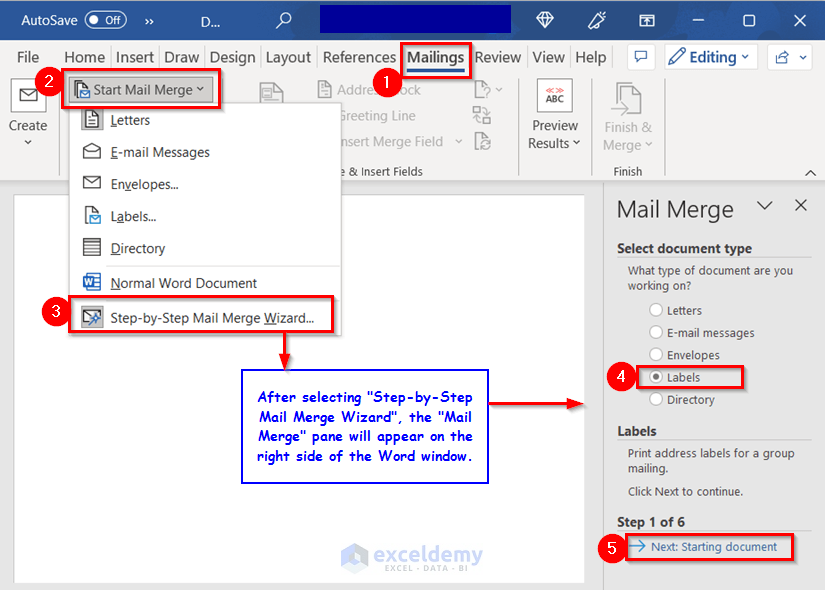
- Open a Word window and go to the Mailings tab.
- Select Step-by-Step Mail Merge Wizard from the Start Mail Merge drop-down.
The Mail Merge pane will appear on the right side of the Word window.
- Choose Labels from Select document type and click Next: Starting document.
Step 2 of the Mail Merge will open.
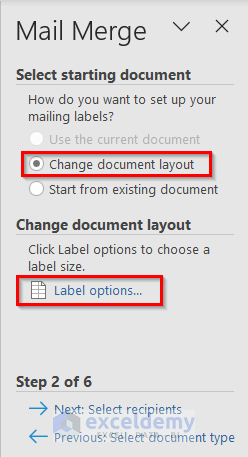
- Check the circle for Use the current document.
- If that option is inactive, choose Change document layout.
- Click on Label options.
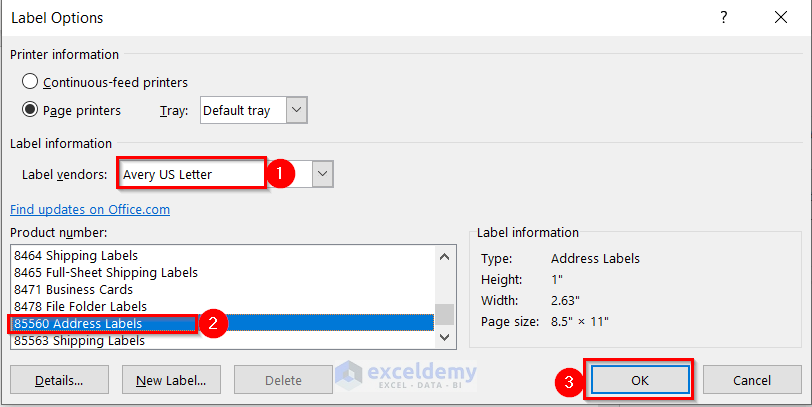
The Label Options dialog box will pop up
- From Label vendors >> choose Avery US Letter >> select your desired Product number >> click OK.
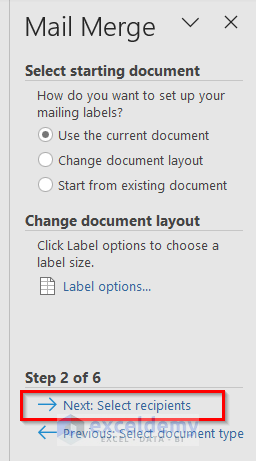
- Click on Next: Select recipients.
Read More: How to Create Labels in Word from Excel List
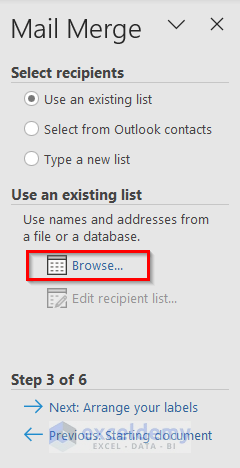
Step 3 – Link Word and Excel for Merging Mail Labels
Now we need to link the Excel file to Word. Notice that Use an existing list from Select recipients is checked.
- Click Browse.
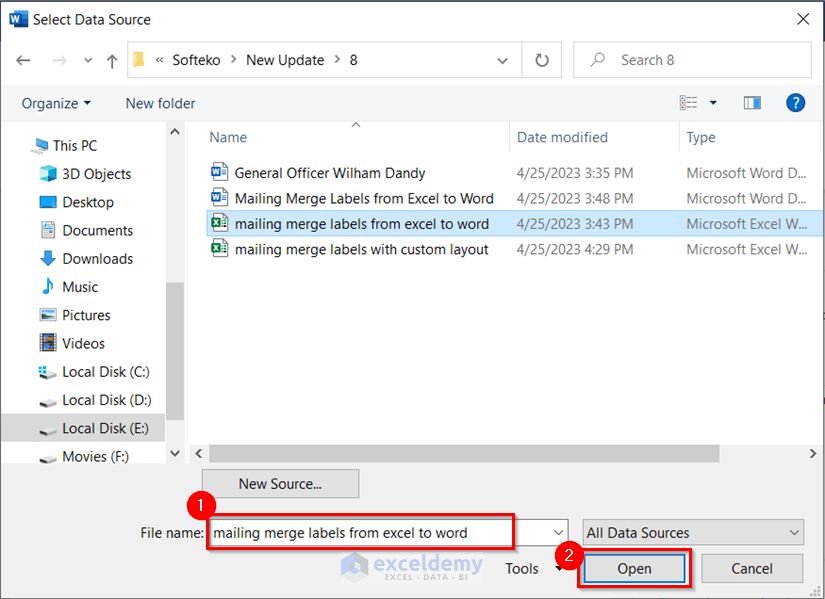
The Select Data Source dialog box will open.
- Choose the desired Excel file and press Open.
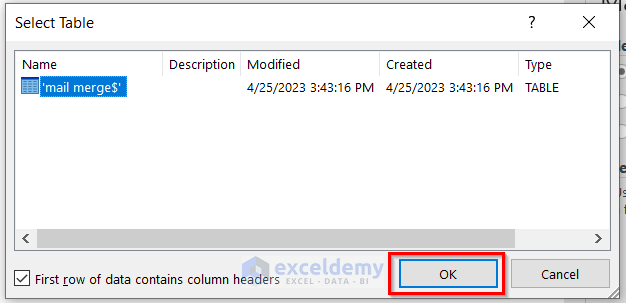
The Select Table box will pop out.
- Click OK.
Read More: How to Convert Excel to Word Labels
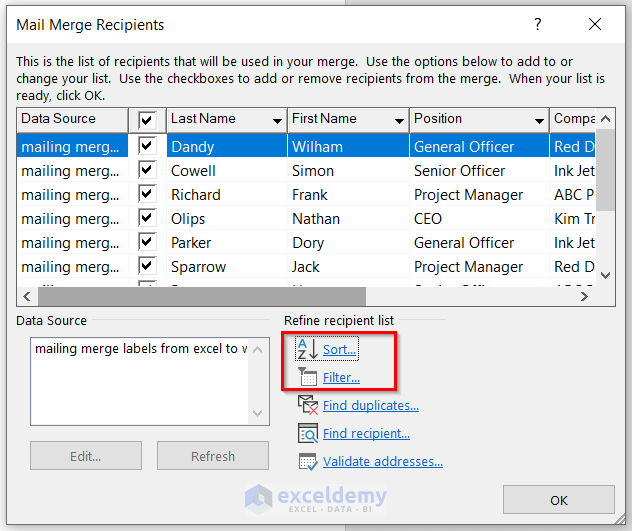
Step 4 – Select Recipients
After Step 3, the Mail Merge Recipients window will open.
- Exclude any particular field by unchecking the box beside it.
- If you need, click the drop-down icon beside the column headers to apply the Filter feature or perform a Sort operation.
- After making the necessary changes, click OK.

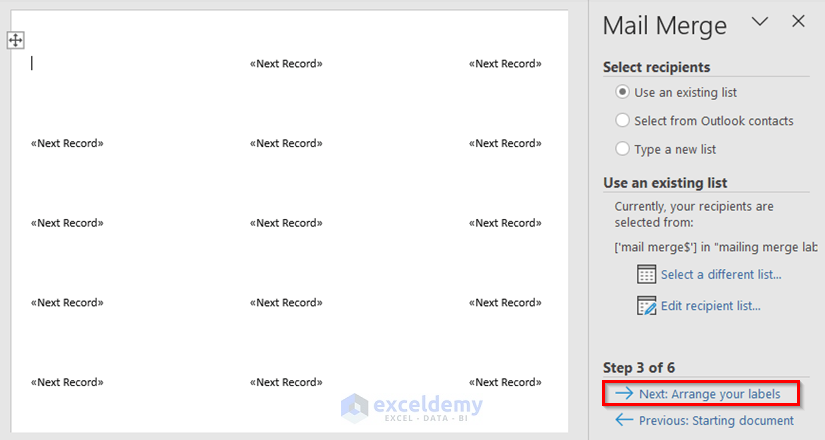
- Click on the next step, Arrange your labels.
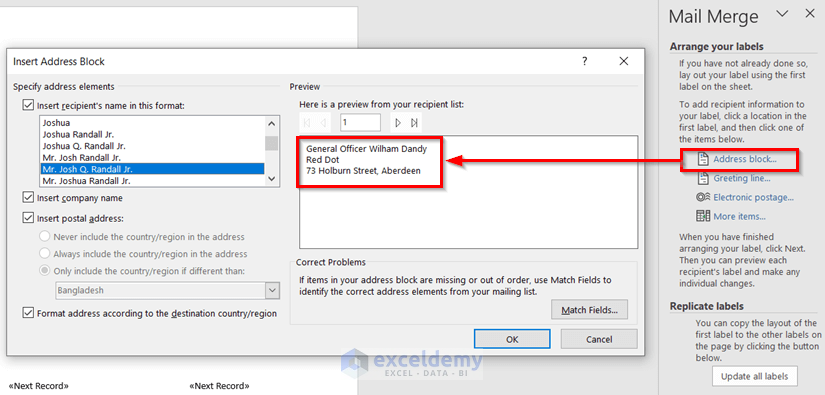
Step 5 – Edit Address Labels
Now we’ll organize the Address block to make changes to the Label.
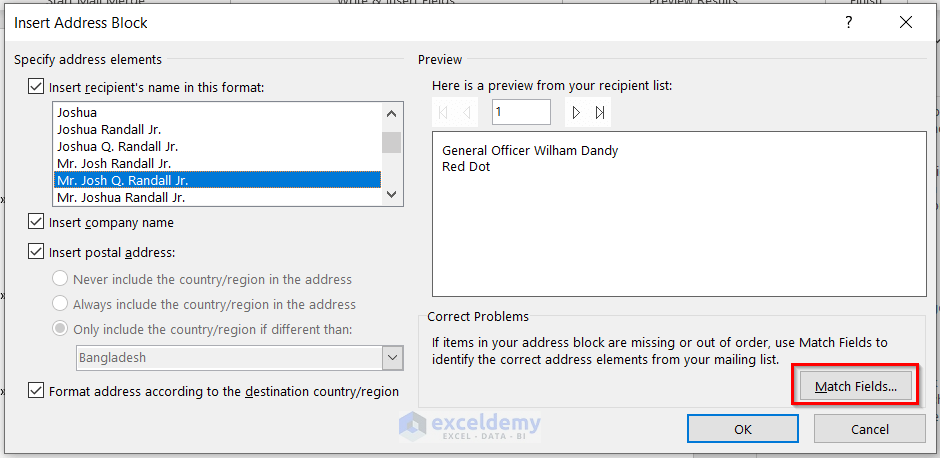
- Select the Address block in the Mail Merge pane.
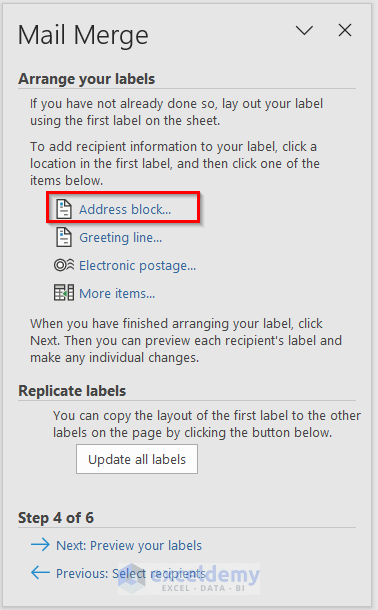
The Insert Address Block dialog box will open.
- Choose your desired format.
- Check that the output is correct in the Preview section.
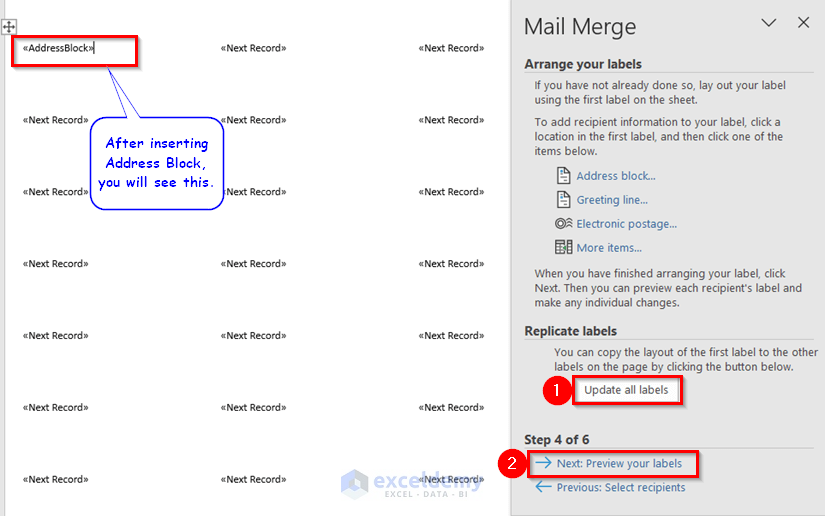
- Click OK.

- Click Update all labels.
- Click on the next step, Preview your labels.
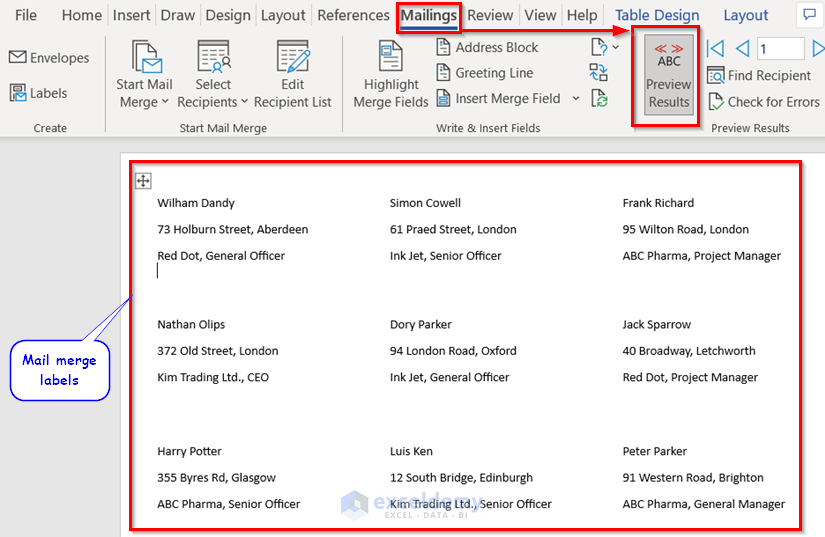
Step 6 – Display Mail Merge Labels
In the Preview your labels box, the preview of the labels will be presented.
- Click on the next step, Complete the merge.

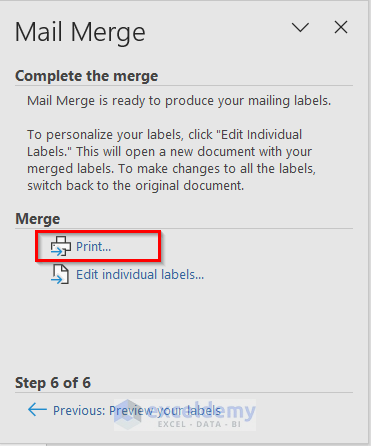
Step 7 – Print the Mailing Label
To print the Mailing Labels:
- In the Complete the merge step, click on Print.
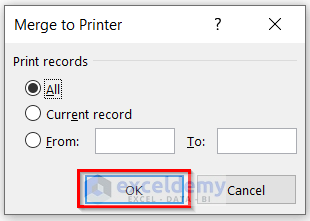
The Merge to Printer dialog box will pop up.
- Choose your desired setup and click OK.
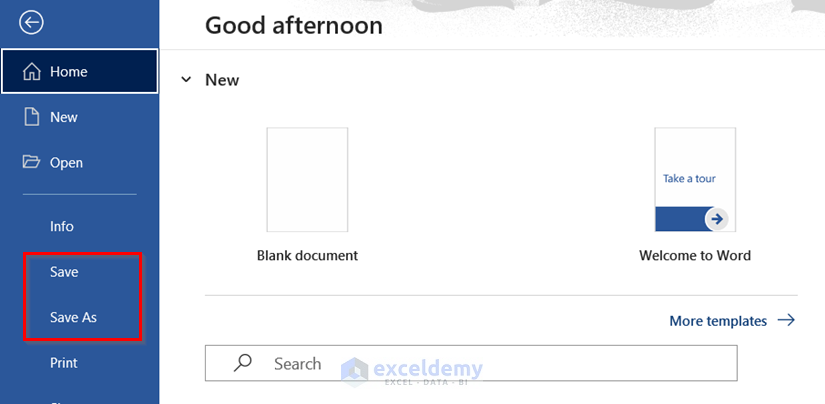
Step 8 – Save Mailing Labels for Future Use
Finally, we’ll Save the Mailing Labels in the Word file for future use.
- Go to the File tab >> choose any Save option (the file will be saved with the built-in name and format). Or choose Save As to set the file name and location.
- Alternatively, press the Ctrl and S keys to save the file.
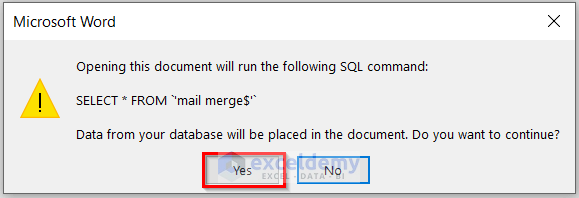
Whenever you open the Word file from now on, a warning dialog box will be displayed as in the figure below.
- Click Yes to Mail Merge Labels from Excel to Word. Click No otherwise.
Now, if you update the linked Excel file, the Labels in Word will be updated automatically.
How to Create a Custom Layout for Mail Merge Labels from Excel to Word
In the image below is a modified dataset including the employees’ addresses.
Follow the whole process for mail merging above. But in the case of inserting an address block, fewer formatted options will be offered.
To create a new, different layout:
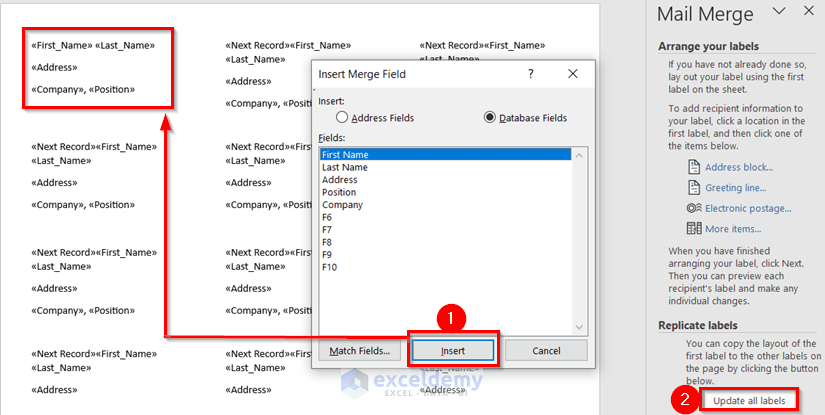
- In step Arrange your labels (Step 4 of 6), click on More items instead of on Address block.
A new dialog box named Insert Merge Field will open.
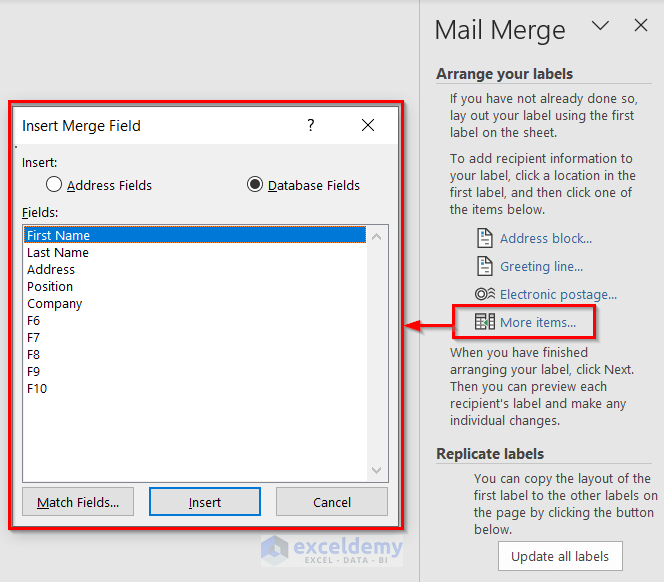
- From Insert Merge Field >> select the required field >> click the Insert button >> click Close.
- To create a line gap >> press the SHIFT key >> from Insert Merge Field select another required field >> click Insert >> click Close.
- Repeat this process for each field to create a custom layout.
- Click Update all labels.
We now have the following layout:
How to Include Address Details on Mailing Labels from Excel to Word
If there is a lack of information in your Excel dataset, Microsoft Word can still guess the missing values based on the dataset. For this, the dataset should be real, and contain all the detailed information like Street name, City name, and Zip Code.
- In step Arrange your labels (Step 4 of 6), click on the Address block.
- A new dialog box named Insert Merge Field will open.
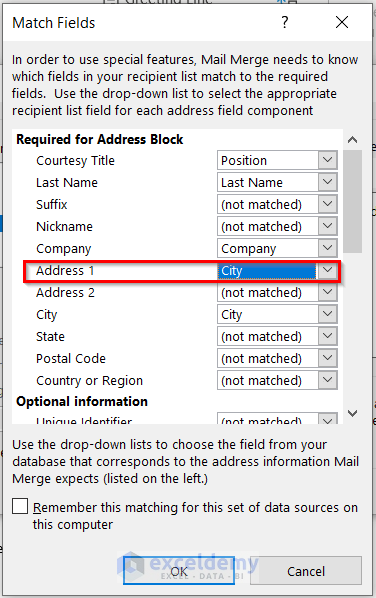
- Choose your required layout and click on Match Fields.
- Another dialog box named Match Fields will open.
- From Required for Address Block, choose the field (where you need to add the guessed value) and click OK.
- Complete the other steps to get the mail merged labels.
Frequently Asked Questions
1. How do I import a label template into Word?
In the Label Options dialog box (Step 2), select the required label information for your template. Add a new label if needed. Then browse (Step 3) for the template in the saved location and insert it.
2. What is Mail Merge?
Mail merge is a feature that permits the creation of a customized list or document where some needed information (from a data source) will be merged. You can use an Excel worksheet as the data source and do the mail merge in Microsoft Word.
3. Can I filter or sort my data source to only include certain recipients?
Yes. Go to the Mailings tab in Word. From Edit Recipient list, press on the required Sort or Filter button, then select the field and complete the process.
Download Practice Workbook
Related Articles
<< Go Back To Mailing Labels in Excel | Mail Merge Excel | Learn Excel
Get FREE Advanced Excel Exercises with Solutions!

This has been one of the most stressful things on the to do list for Christmas is doing the labels for our 100 or more cards. You have enabled me to complete that in under 15 minutes. Thank you!!! Merry Christmas!!
Hello Brenda Gale Austin-Sanders,
You are most welcome.
Regards
ExcelDemy
This post was super helpful! I always struggled with mail merging before, but your clear steps made it so easy to follow. Can’t wait to try it out for my next project! Thanks for sharing!
Hello,
You are so welcome. Thanks for your feedback and appreciation. Glad to hear that the step by step guide is easy to follow for mail
merging. Keep learning Excel with ExcelDemy!
Regards
ExcelDemy