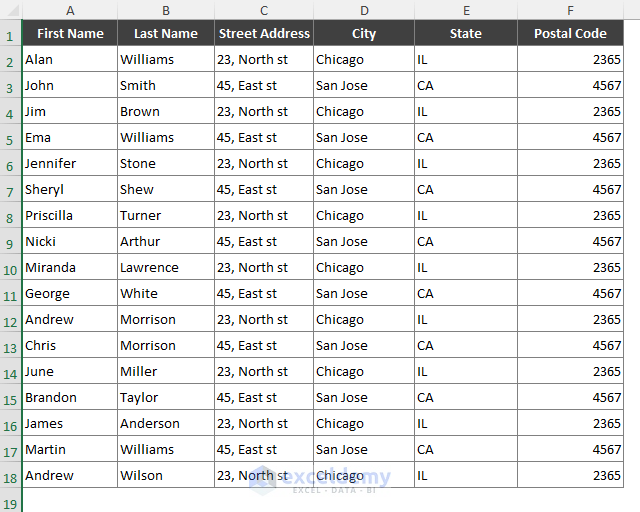
Step 1 – Prepare an Excel File with Labels Data
- Organize the data for your mailing labels in an Excel spreadsheet. For instance, include fields like First Name, Last Name, Street Address, City, State, and Postal Code.
- Once you’ve listed your data in Excel, your file will resemble the screenshot below.
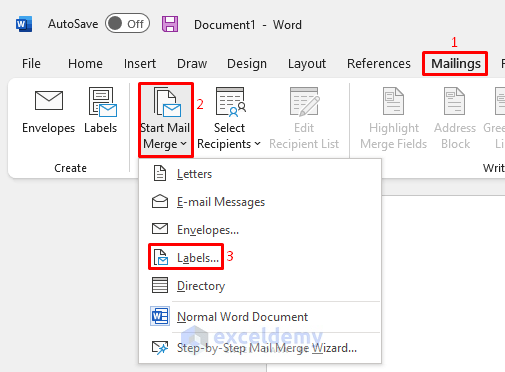
Step 2 – Insert Labels into Word
- Open a new Word document and navigate to the Mailings tab.
- From the Start Mail Merge dropdown menu, select Labels.
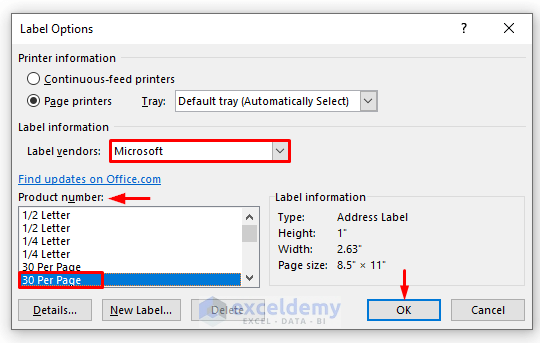
- This action will prompt the Label Options dialog to appear.
- Set the Label vendors and Product number according to your requirements.
- Then press OK.
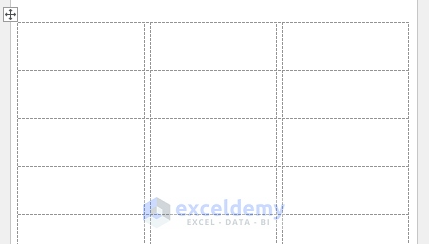
- You’ll now see the label format outlined in Word.
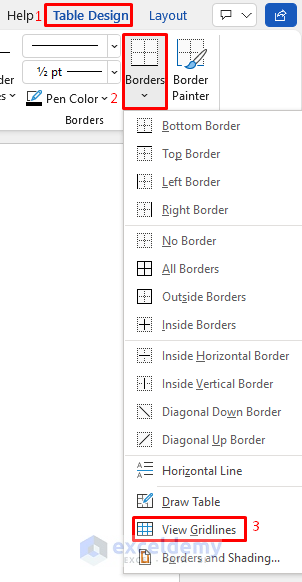
Note:
If the outline isn’t visible, navigate to Table Design, select Borders and click on View Gridlines.
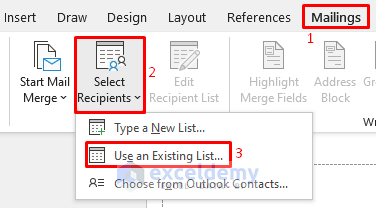
Step 3 – Link Excel Data to Word Labels
- To link your Excel data with Word, go to the Mailings tab, expand the Select Recipients dropdown, and choose Use an Existing List.
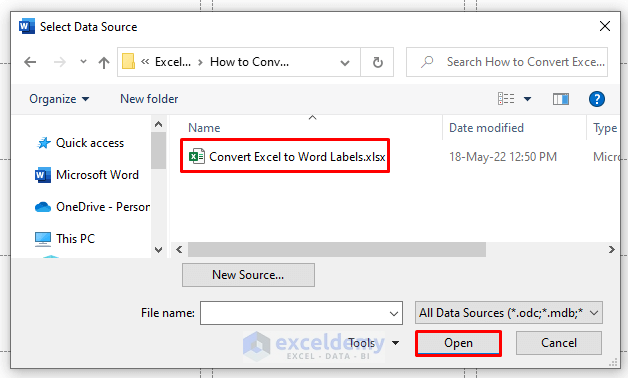
- Navigate to the file path where your Excel file is located and click Open.
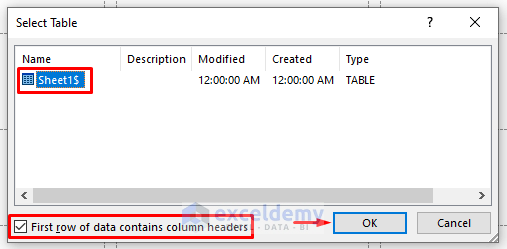
- Word will display the worksheet from your selected Excel file.
- Choose the appropriate sheet and ensure to check First row of data contains column headers.
- Click OK.
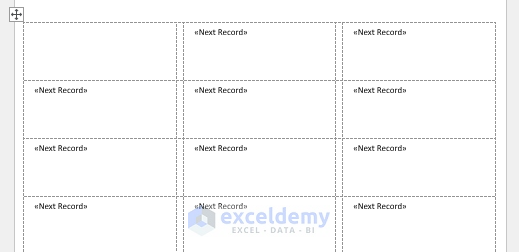
- You’ll notice <<Next Records>> in all labels except the first one, indicating successful linkage to the Excel worksheet.
Read More: How to Create Labels in Word from Excel List
Step 4 – Map Fields for Excel Data Conversion
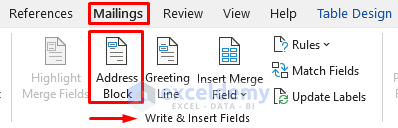
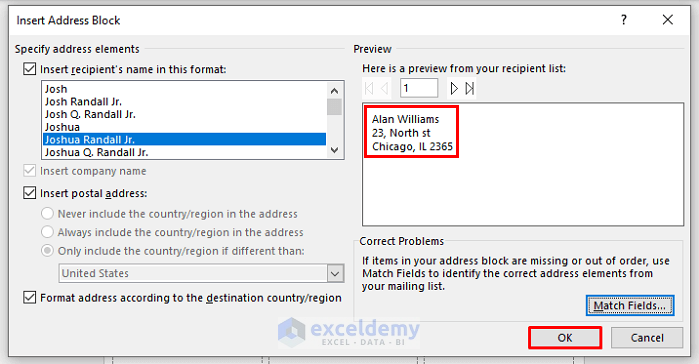
- Add mail merge fields to the labels by selecting the first label and going to Mailings and selecting Address Block.
- The Insert Address Block dialog will appear, showing a Preview of individual labels.
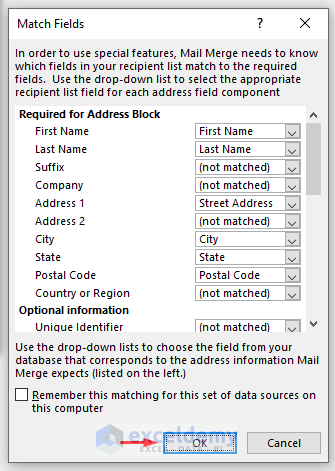
- If needed, adjust the arrangement by clicking on Match Fields.
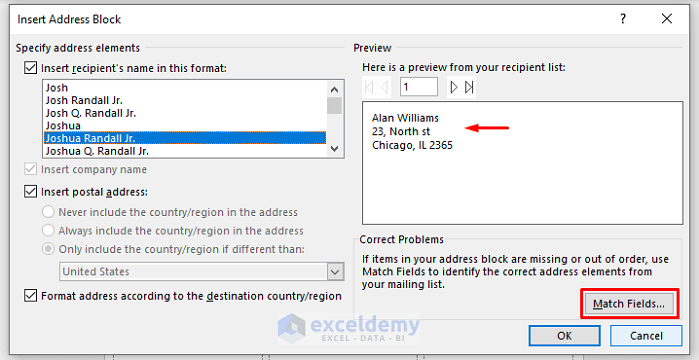
- Review and ensure the column data from your Excel file matches the fields in the Required for Address Block section.
- Once done, click OK.
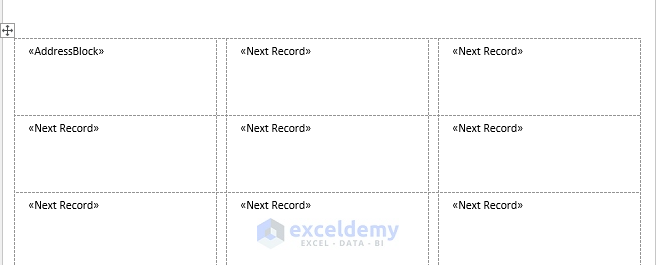
- After matching the fields, you’ll see a final preview of labels.
- Click OK.
- You’ll now observe <<AddressBlock>> displayed in the first label.
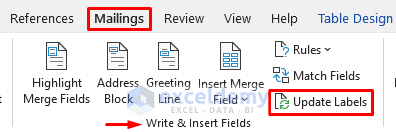
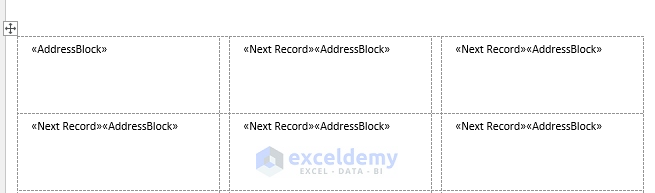
- Add the AddressBlock to each label by going to Mailings and selecting Update Labels.
Read More: How to Create Labels Without Word in Excel
Step 5 – Complete the Merge
- To finalize the conversion of Excel data into Word labels, go to the Mailings tab, click Finish & Merge, and select Edit Individual Documents.
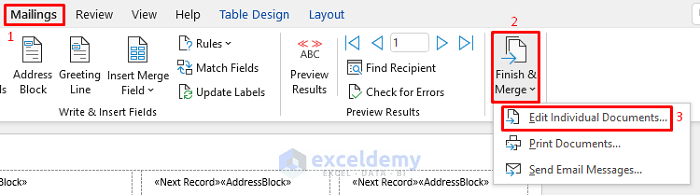
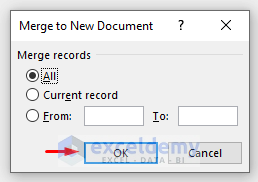
- In the Merge to New Document dialog, select All and click OK.
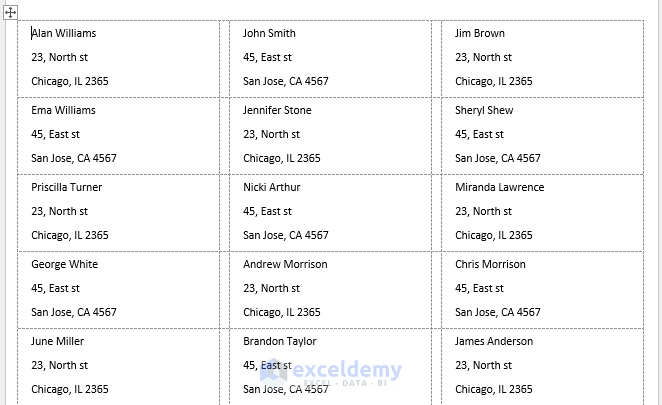
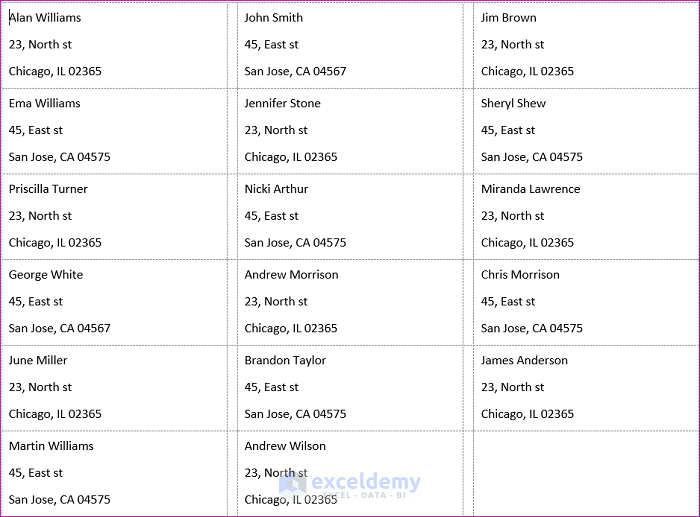
- You’ll see all Excel data merged below with the labels in Word.
Read More: How to Merge Excel File to Mailing Labels
Print Labels from Word
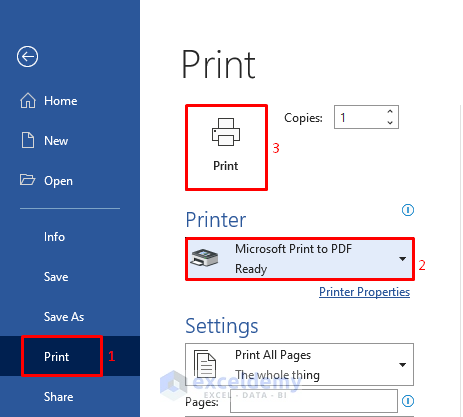
- To print the labels, simply press Ctrl + P or navigate to the File tab in Word and select Print.
- Choose the printer and print the labels.
Things to Remember
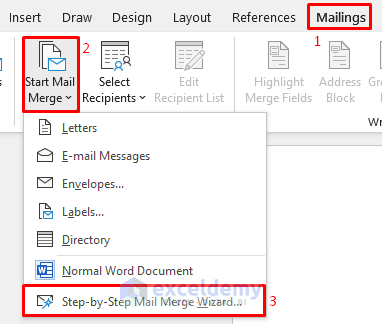
- Utilize the Step-by-Step Mail Merge Wizard for converting Excel data to Word labels.
- Avoid including blank columns/rows in the Excel list containing mailing data.
Download Practice Workbook
You can download the practice workbook from here:
<< Go Back To Mailing Labels in Excel | Mail Merge Excel | Learn Excel
Get FREE Advanced Excel Exercises with Solutions!

Why does the leading “0” in the zip code not transfer to the labels? Will the post office accept the 4 number postal code?
Hello Charlotte Fahey
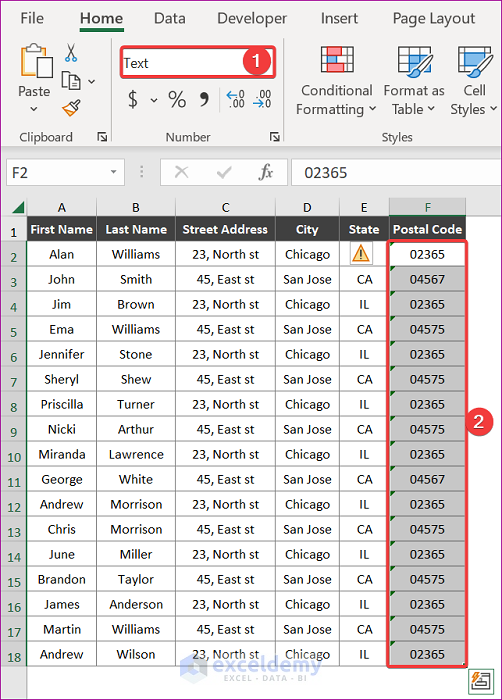
Thank you for reporting on this fascinating issue. I experience the same problems when a postal code begins with 0, and it is essential to preserve the leading zero when entering data into the system or application.
The Postal Code column must be formatted as text. Following that, insert the desired data.
Now, adhere to the methods mentioned in this article. Ideally, you will observe the desired results.
Regards
Lutfor Rahman Shimanto