What Is Compatibility Mode in Excel?
Compatibility mode is a type of viewing mode of any Excel file. An Excel file turns into compatibility mode when it is saved to an older version than the present one. When a file is in compatibility mode, it may face some difficulties in displaying every type of data and formula. For example, any new feature saved in Excel 365 may not be compatible with the earlier version like Excel 2016 or Excel 2013.
Check Compatibility Mode in Excel Workbook
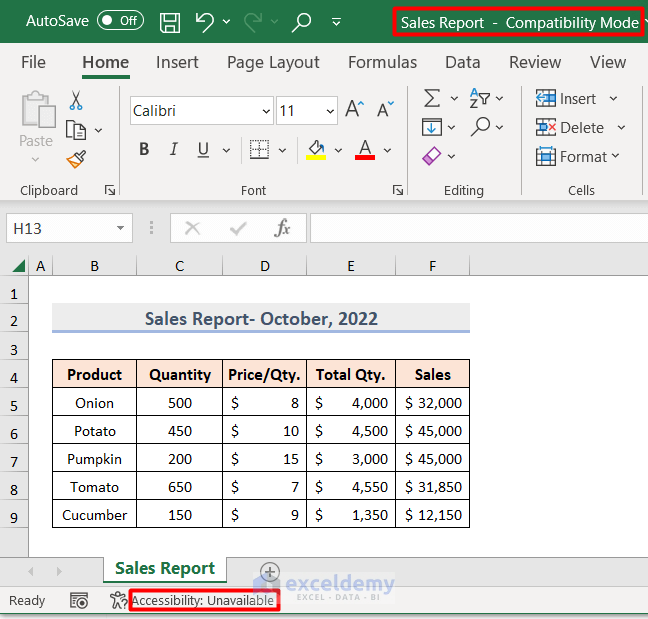
- The workbook name has Compatibility Mode just beside the file name.
- The Accessibility is showing Unavailable at the bottom which denotes that it is in compatibility mode.
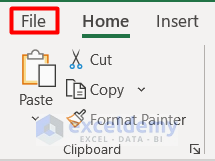
- Go to the File tab on the workbook.
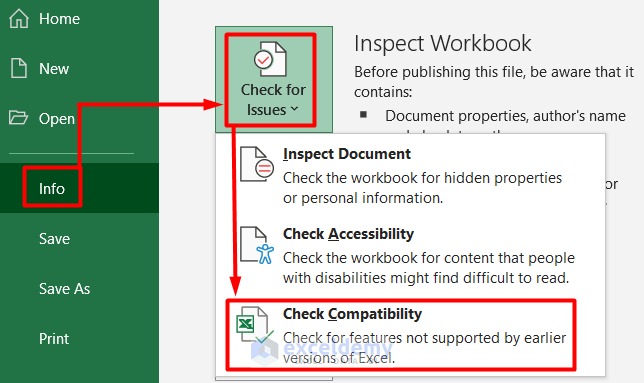
- Select Info > Check for Issues > Check Compatibility.
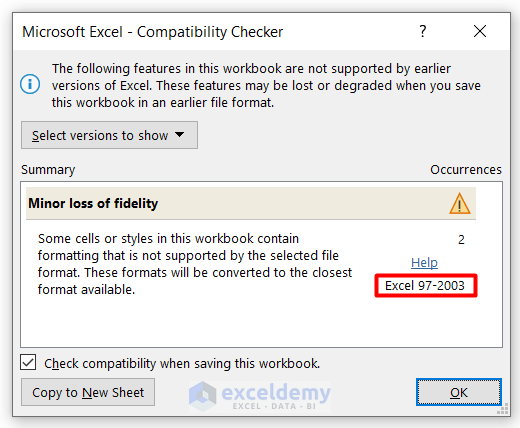
- In the Microsoft Excel – Compatibility Checker window, the file is saved in the Excel 97-2003 version.
How to Change Compatibility Mode in Excel: 2 Easy Ways
Method 1 – Use the Save As Option to Change Compatibility Mode to Normal Mode in Excel
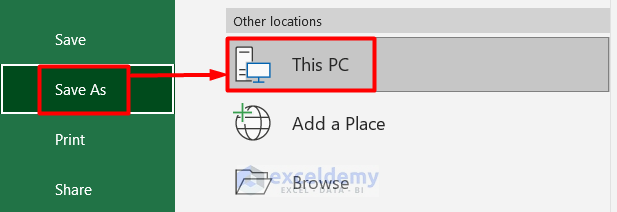
- Go to the File tab on your workbook.
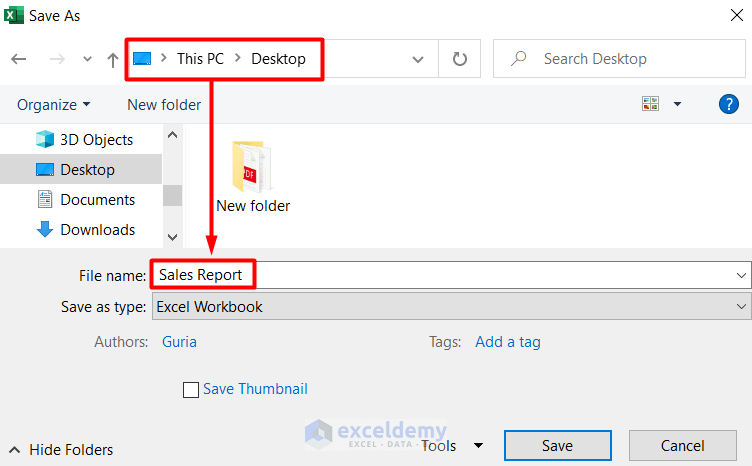
- Go to the Save As option on the Overview tab and select This PC.
- It denotes the location where the file is already stored.
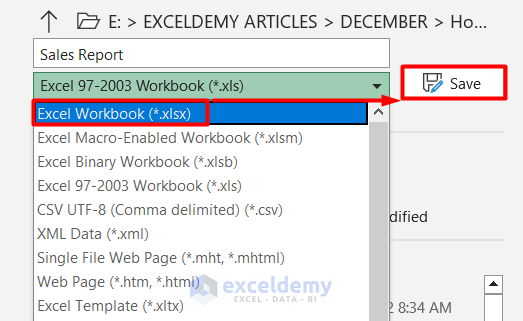
- Select the version as Excel Workbook (*.xlsx) and click on Save.
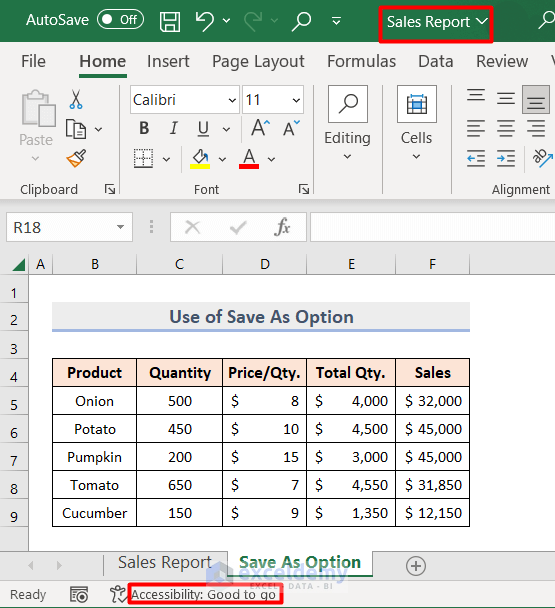
- You will have a new workbook along with the old one.
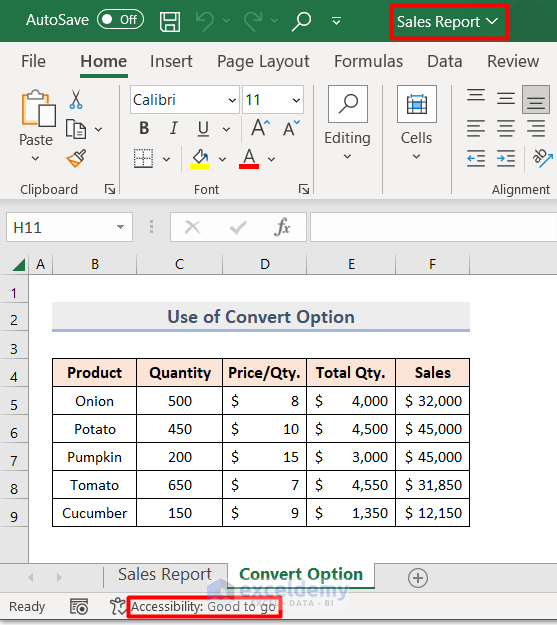
- Open it and you will notice that it is not showing Compatibility Mode anymore. The Accessibility is showing Good to go which defines that the file is in normal mode now.
Method 2 – Permanently Change Compatibility Mode Using the Convert Option in Excel
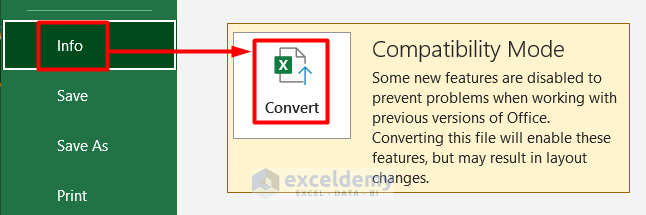
- Go to the File tab.
- Go to the Info section and select Convert.
- You will be directed to the file location.
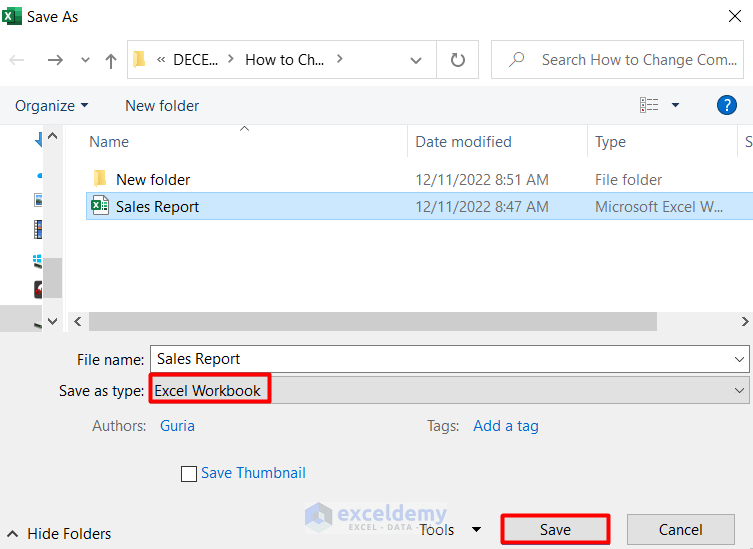
- Select Excel Workbook as the Save as type.
- Click on Save.
- You will get a confirmation message on the conversion in the Microsoft Excel window
- Click on Yes to agree on the conversion.

- The Excel file will change from compatibility mode to normal mode like this.
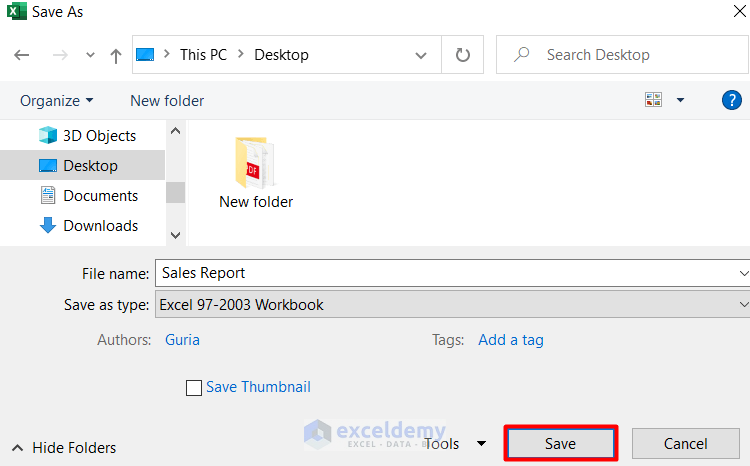
How to Save a Workbook in Compatibility Mode in Excel
- Go to the File tab on your workbook.
- Select Browse from the Save As section.

- Select your preferred location to save the file on your device.
- Type a name in the File name box.
- Select Excel 97-2003 Workbook in the Save as type box.
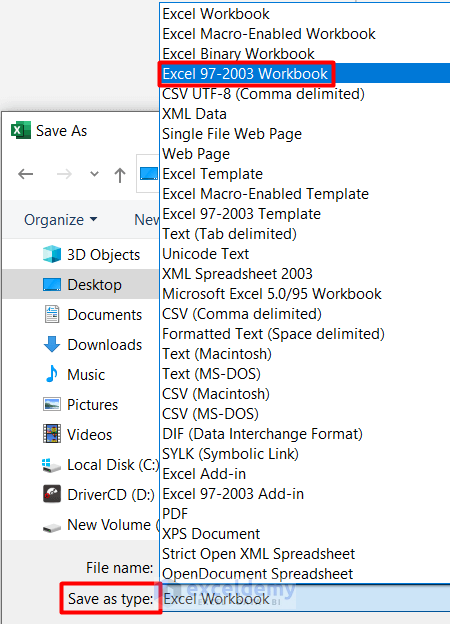
- Press Save to store the file in Compatibility Mode.
Download the Practice Workbooks
Related Articles
<< Go Back to Compatibility Mode | Workbook in Excel | Learn Excel
Get FREE Advanced Excel Exercises with Solutions!
