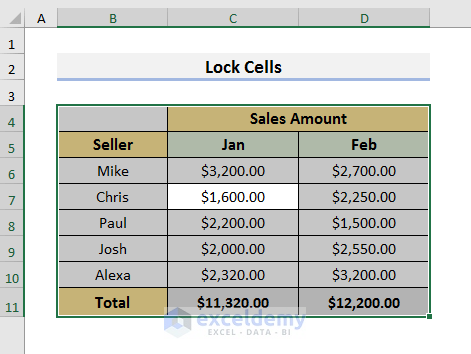
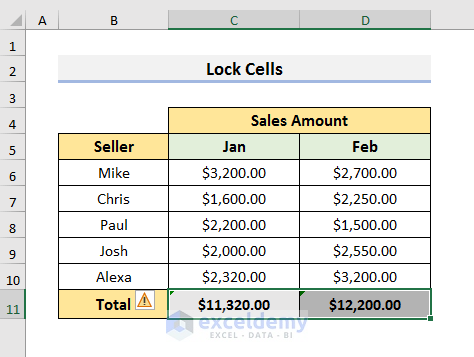
Method 1 – Locking Cells to Prevent Formula from Being Deleted in Excel
STEPS:
- Select a cell in your dataset and press Ctrl + A to select all the used cells.
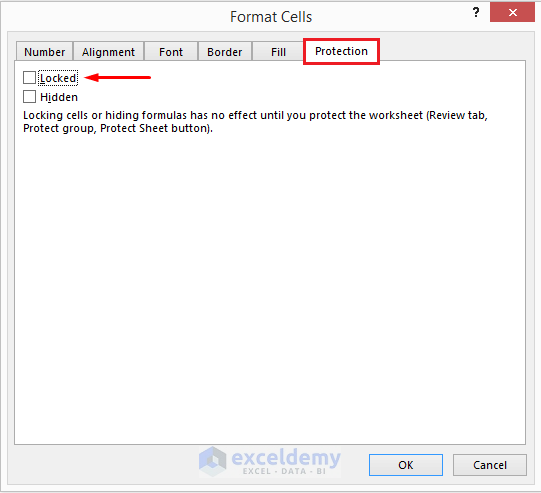
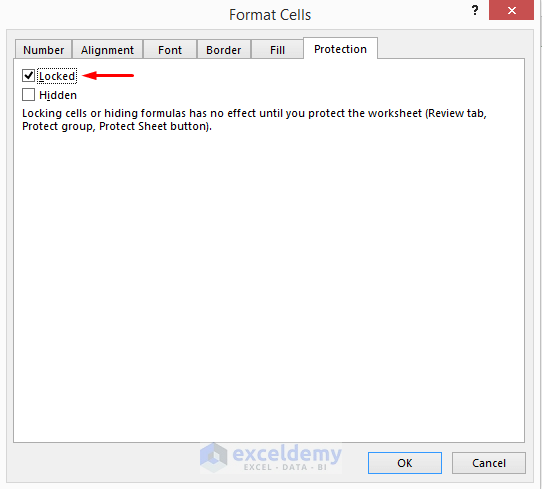
- Press Ctrl + 1 to open the Format Cells window.
- In the Format Cells window, select Protection and deselect the Locked field.
- Press OK.
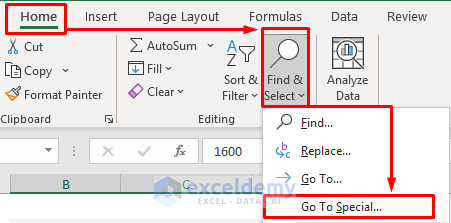
- Go to the Home tab and click on ‘Find & Select’. A drop-down menu will occur.
- Select Go To Special from the drop-down menu.
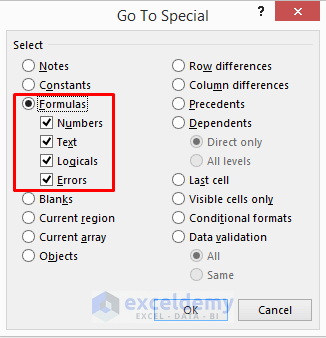
- In the Go To Special window, select Formulas. Make sure Numbers, Text, Logicals & Errors are also selected.
- Click OK to proceed.
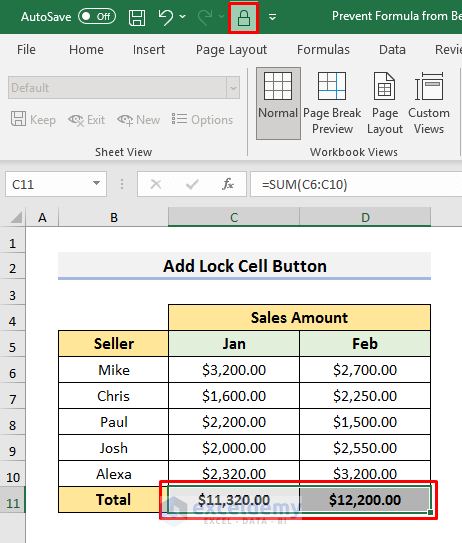
- After clicking OK, we can see the selected formula cells. Cell C11 and D11. Don’t worry if you see any error signs.
- Press Ctrl + 1 to open the Format Cells window and select Protection.
- Select Locked and, click OK to proceed.
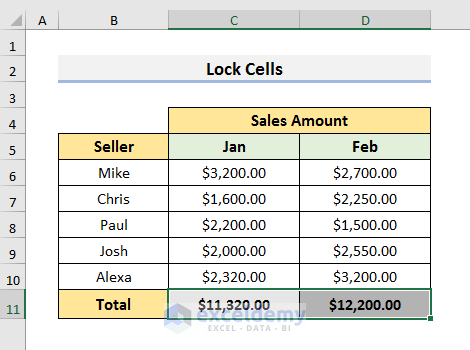
- After clicking OK, there will be no error like the picture below.
- Protect the sheet.
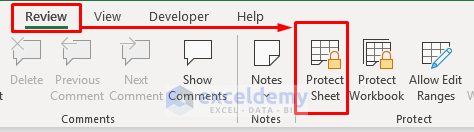
- Go to the Review tab and select Protect Sheet. It will open a dialog box.

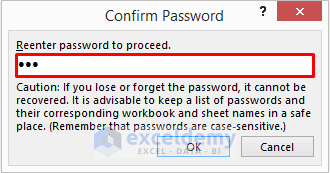
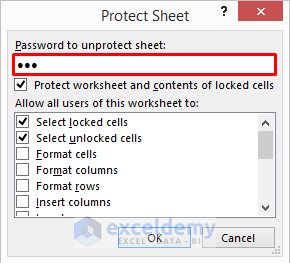
- Enter a password and click OK. Select the ‘Protect worksheet and contents of locked cells’ field.

- Re-enter your password and click OK.
- A message box will pop up if you try to delete the formula.

Method 2 – Adding a Lock Cell Button in Quick Access Toolbar to Prevent Deleting
STEPS:
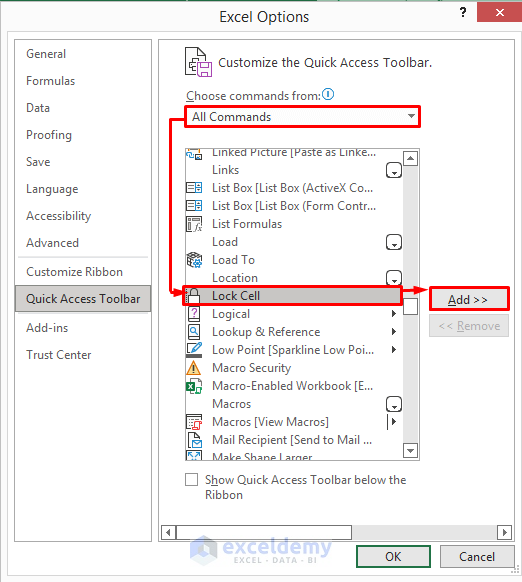
- Click on the Customize Quick Access Toolbar icon and select More Commands. It will open the Excel Options window.
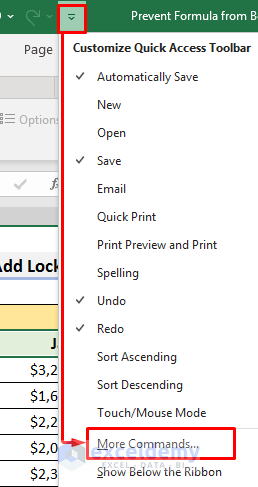
- Select All Commands in the ‘Choose commands from’ field.
- Select Lock Cell and click on Add.
- Click OK to proceed.
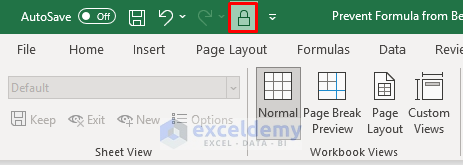
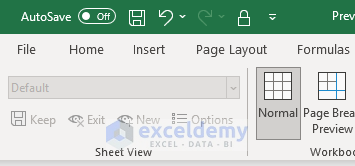
- After clicking OK, a Lock Cell icon will appear like the picture below.
- Select a cell in the dataset and press Ctrl + A to select all used cells.
- Click on the Lock Cell icon to unlock the selected cells.
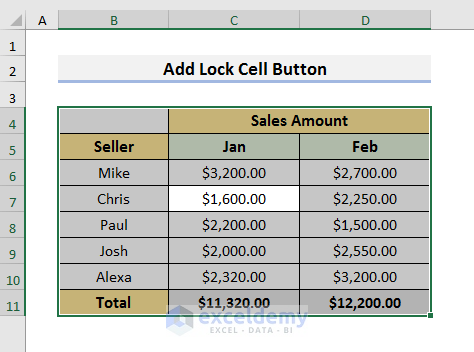
- Select the cells that contain the formula. We elected Cell C11 & D11.
- Click on the Lock Cell icon again to lock Cell C11 & D11.
- After locking Cell C11 & D11, you need to protect the sheet.
- Go to the Review tab and select Protect Sheet.
- Enter a password in the ‘Protect Sheet’ dialog box and click OK. Select the ‘Protect worksheet and contents of locked cells’ field.
- Enter the password to confirm it and click OK.

- Try to delete the formula, a message box will pop up like the picture below and you won’t be able to make any changes.

Method 3 – Preventing Formula from Being Deleted with Excel VBA
STEPS:
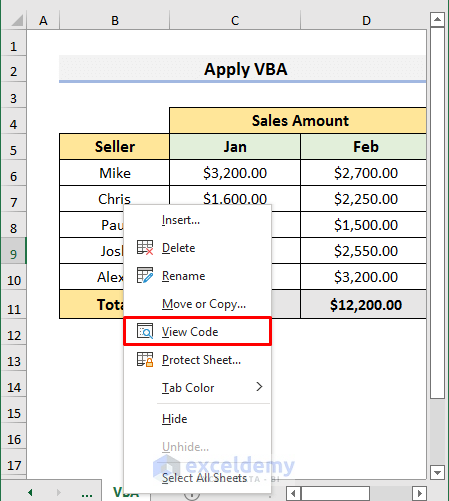
- Right-click on the sheet name in the Sheet Bar and select View Code from the Context Menu.
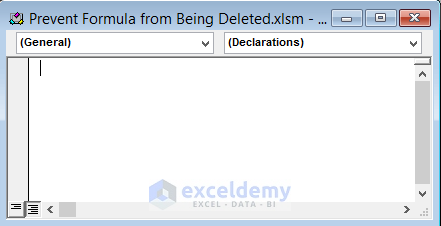
- A Code window will appear.
- Type the code in the Code window:
Private Sub Worksheet_Change(ByVal Lock_Formula As Range)
If Intersect(Lock_Formula, Range("C11,D11")) Is Nothing Then Exit Sub
On Error GoTo ExitPoint
Application.EnableEvents = False
If Not IsDate(Lock_Formula(1)) Then
    Application.Undo
    MsgBox " You can't delete formulas from this range " _
    , vbCritical, "Microsoft Excel"
End If
ExitPoint:
Application.EnableEvents = True
End Sub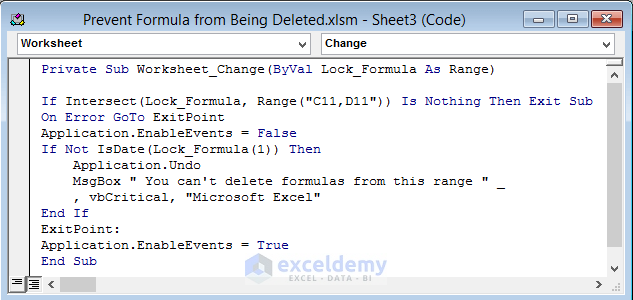
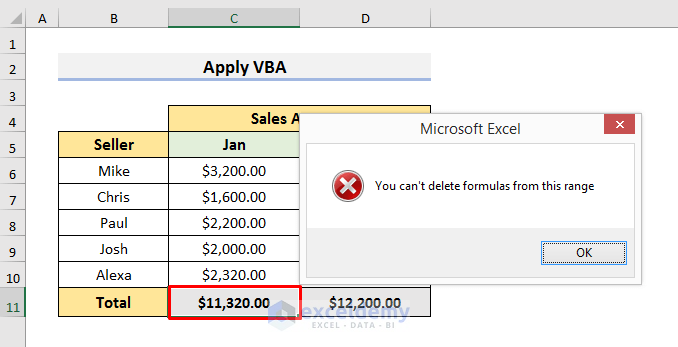
Our dataset contains formulas in Cell C11 & D11. So, we have written Intersect(Lock_Formula, Range(“C11,D11”)) inside the code. You need to edit this part before applying the code. If your dataset contains formulas in the range D5:D9, then write Intersect(Lock_Formula, Range(“D5:D9”)). If the dataset includes formulas in different cells, like in Cell C5, D4, and E6, then write Intersect(Lock_Formula, Range(“C5,D4,E6”)).
- Press Ctrl + S to save the code and close the Visual Basic window.
- If you try to remove formulas from Cell C11 & D11, a message box will occur like the picture below.
Things to Remember
There are certain things you need to remember when you are trying to prevent the formula from deleting in Excel.
- In Method-1 & 2, don’t forget to protect the sheet.
- In Method-3, insert the correct cells inside the code.
Download Practice Book
Download the practice book here.
Related Article
<< Go Back to Excel Protect Formulas | Excel Formulas | Learn Excel
Get FREE Advanced Excel Exercises with Solutions!
