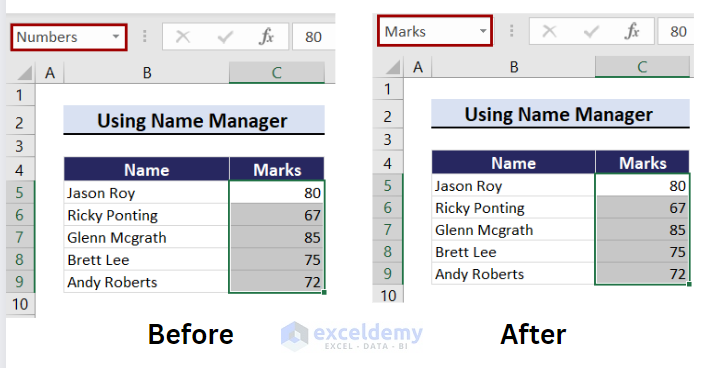
In our dataset, we have a list of students and their marks.
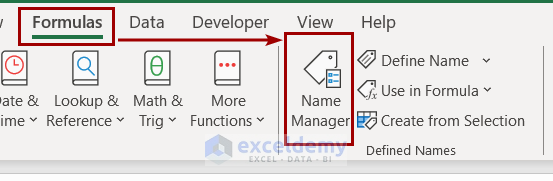
Step 1: Open Name Manager Dialog Box
- Go to the Formulas tab > Name Manager.
Step 2: Select the Defined Name
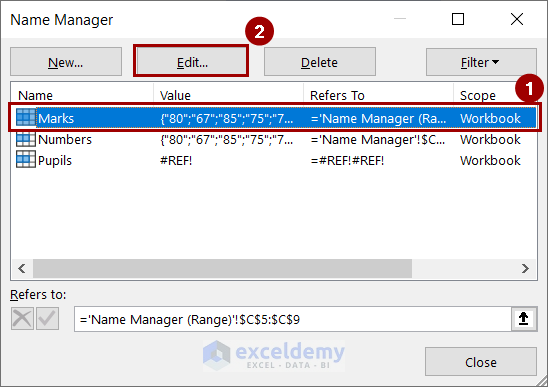
After the Name Manager dialog box appears, it will show your defined name list.
- Select the Name to be edited and click on the Edit button.
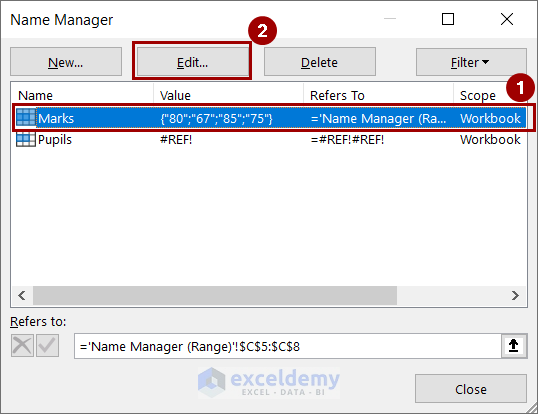
- You will get the Edit Name dialog box.
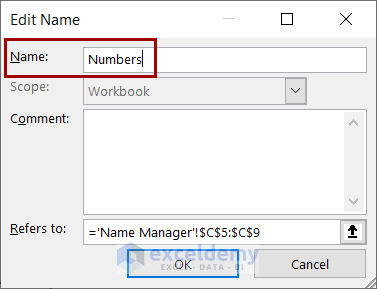
Step 3: Edit the Name
In the Edit Name dialog box:
- Type the new name in the Name box.
- Press OK.
The Name Box is edited.

Note: The Name Manager tool is available in Microsoft Excel 2007 and later versions.
How to Edit a Name Box Range in Excel
Steps:
- Go to the Formulas tab > Name Manager
- From the Name Manager dialog box:
- Select the defined name to be edited.
- Click on the Edit button.
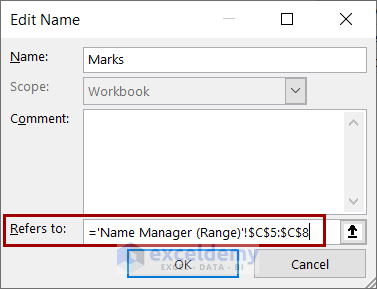
- From the Edit Name dialog box, In the Refers to box, change the cell reference.
- Press OK.
-
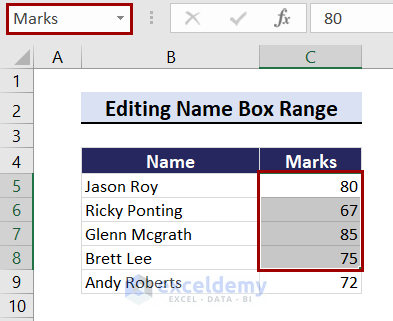
The range of the Name Box is changed. For a better understanding, observe the image below.
Download the Practice Workbook
Get FREE Advanced Excel Exercises with Solutions!
