When working with Excel, sometimes You might need to prepare your dataset in the same format of text casing. In this regard, you need to know how to change the case of the selected text. In this article, I will show you 6 Excel VBA examples to change case of selected text to multiple cases possible.
Download Practice Workbook
You can download our practice workbook from here for free!
6 Examples of VBA to Change Case of Selected Text in Excel
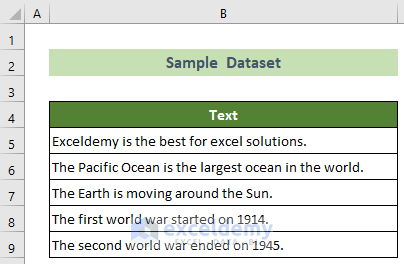
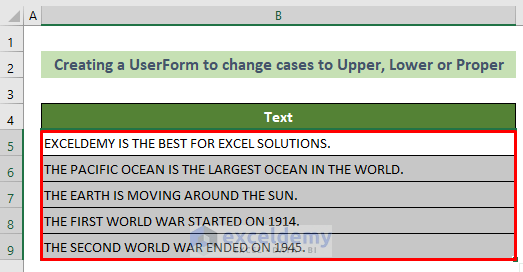
Say, you have some texts in several cells of your Excel sheet. Now, you need to change the casing of the text of the cells. Use the VBA examples below to accomplish your desired result.
Example 1: Transform Text Cases to Upper Case
The uppercase text means you will get every letter of your text in capital letters. To accomplish this, follow the steps below.
📌 Steps:
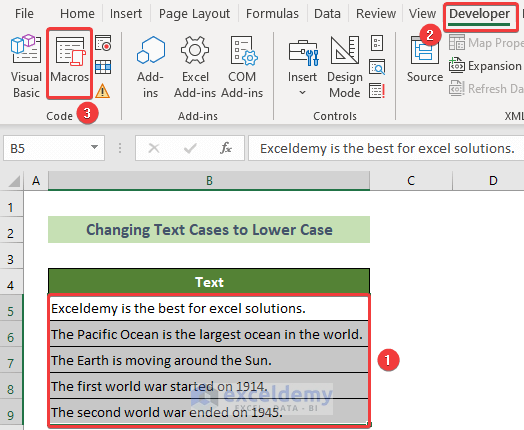
- At the very beginning, go to the Developer tab >> Visual Basic tool.

- Afterward, the Microsoft Visual Basic for Applications window will appear.
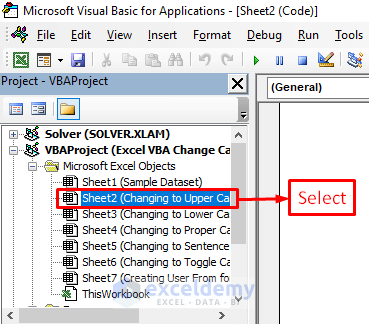
- Subsequently, select Sheet2 from the VBAProject options.
- Following, write the VBA code below and press CTRL + S.
Sub Change_Selected_Text_to_Upper_Case()
On Error Resume Next
Dim ChangeCell As Range
For Each ChangeCell In Selection.Cells
ChangeCell.Value = UCase(ChangeCell.Value)
Next
On Error GoTo 0
End Sub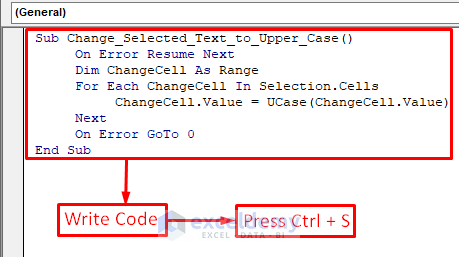
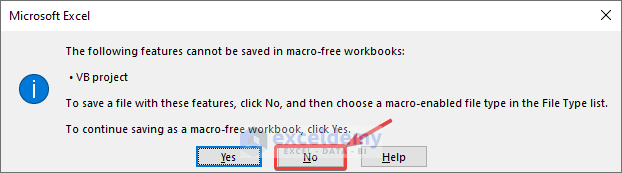
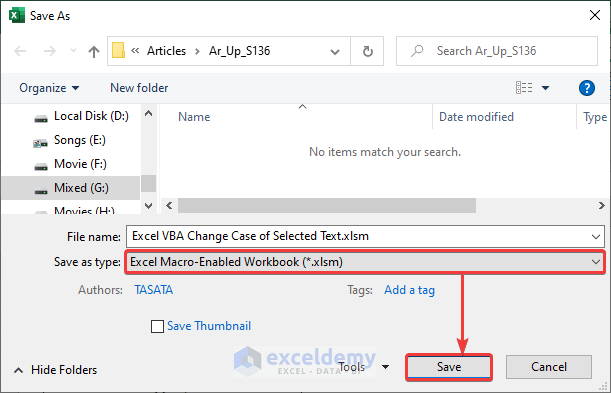
- As a result, a Microsoft Excel dialogue box will appear. Click on the No button.
- At this time, the Save As dialogue box will appear.
- Now, choose the Save as type: option as .xlsm format and click on the Save button.
- At this time, close the code window and select the text cells where you want to change the cases.
- Afterward, go to the Developer tab >> Macros tool.

- As a result, the Macros window will appear.
- Now, choose Sheet2.Change_Selected_Text_to_Upper_Case macro and click on the Run button.
Thus, you can change the case of the selected text to the upper case. And, the outcome would look like this.

Example 2: Convert Text to Lower Case
Along with uppercasing, you can also convert your text into lowercase letters. Go through the steps below to achieve this.
📌 Steps:
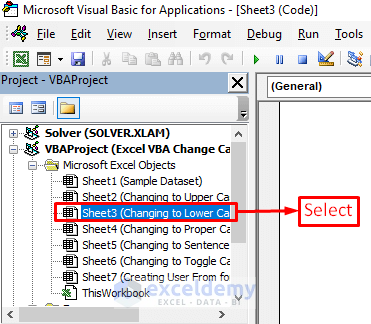
- First, follow the previous methods step 1 to open the Microsoft Visual Basic for Applications window.
- Now, choose Sheet3 from the VBAProject options.
- Afterward, write the following VBA code and press Ctrl + S on your keyboard.
Sub Change_Selected_Text_to_Lower_Case()
On Error Resume Next
Dim ChangeCell As Range
For Each ChangeCell In Selection.Cells
ChangeCell.Value = LCase(ChangeCell.Value)
Next
On Error GoTo 0
End Sub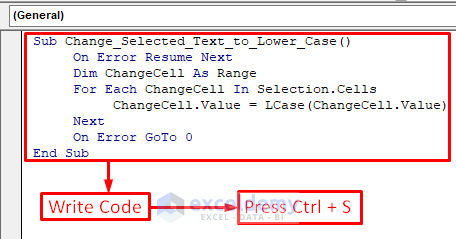
- Following, close the code window.
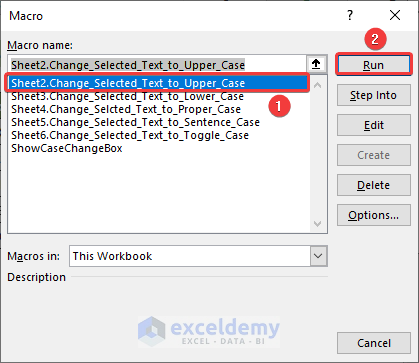
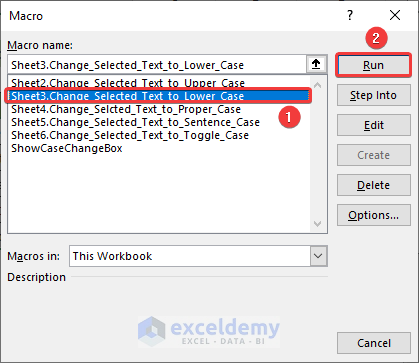
- Next, select the texts you want to convert >> go to the Developer tab >> Macros tool.
- As a result, the Macros window will appear.
- Click on Sheet3.Change_Selected_Text_to_Lower_Case option and click on the Run button.
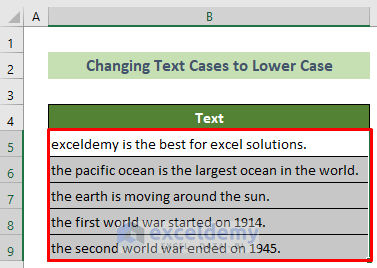
Consequently, you will see that you have converted the texts into lowercase letters successfully. For instance, the result should look like this.
Example 3: Change a Selected Text to Proper Case Text
Proper casing means capitalizing the first letter of every word and lowercasing all the other letters. Follow the steps below to proper case your text.
📌 Steps:
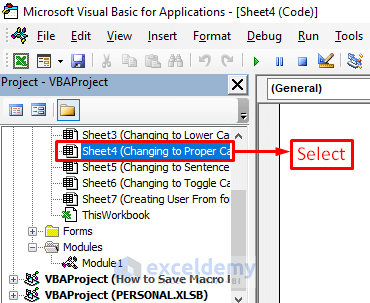
- First and foremost, follow the first method’s step 1 to open the Microsoft Visual Basic for Applications window.
- Following, select Sheet4 from the VBAProject options.
- Afterward, write the following code in the code window and press Ctrl + S on your keyboard.
Sub Change_Selcted_Text_to_Proper_Case()
On Error Resume Next
Dim ChangeCell As Range
For Each ChangeCell In Selection.Cells
ChangeCell.Value = WorksheetFunction.Proper(ChangeCell.Value)
Next
On Error GoTo 0
End Sub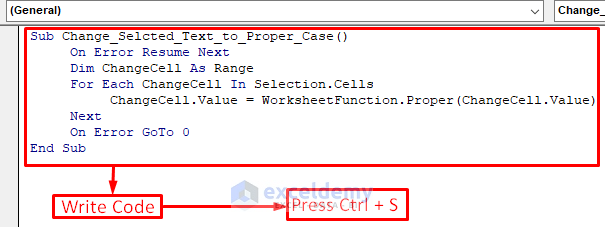
- Afterward, close the code window and select the cells that you want to convert.
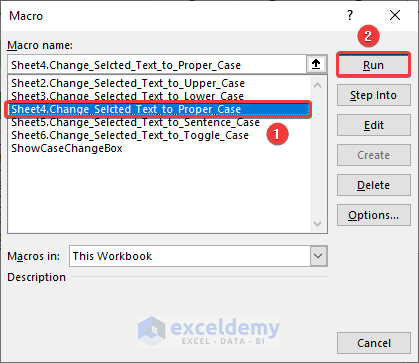
- Subsequently, go to the Developer tab >> Macros tool.
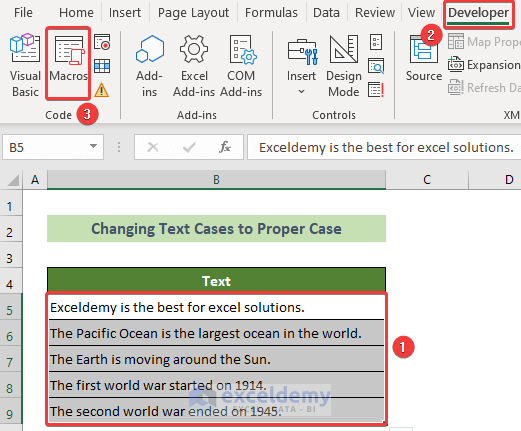
- Consequently, the Macros window will appear.
- Choose Sheet4.Change_Selected_Text_to_Proper_Case macro and click on the Run button.
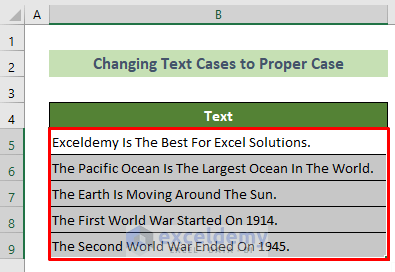
As a result, you will be able to change your selected texts into proper case format. And, the output should look like this.
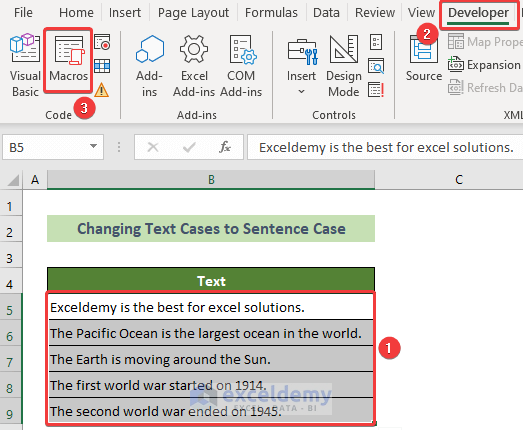
Example 4: Convert to Sentence Case
Another important case for texts is the sentence case. In this casing, only the first letter of each sentence would be capitalized and all other letters will be in smaller words. Go through the steps below to achieve this.
📌 Steps:
- Initially, open the Microsoft Visual Basic for Applications window using the first method’s step 1.
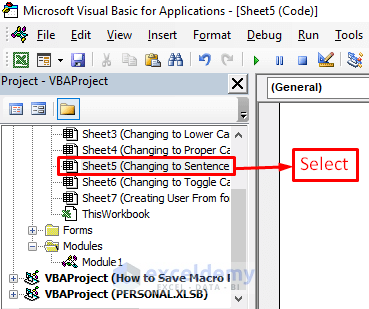
- Afterward, choose Sheet5 from the VBAProject options.
- Next, write the following code in the code window and press Ctrl + S on your keyboard.
Sub Change_Selected_Text_to_Sentence_Case()
On Error Resume Next
Dim ChangeCell As Range
For Each ChangeCell In Selection.Cells
If Len(ChangeCell.Value) >= 2 Then
ChangeCell.Value = UCase(Left(ChangeCell.Value, 1)) & _
LCase(Right(ChangeCell.Value, (Len(ChangeCell.Value) - 1)))
End If
Next
On Error GoTo 0
End Sub
- Following, closing the code window.
- Subsequently, select your text cells >> go to the Developer tab >> Macros tool.
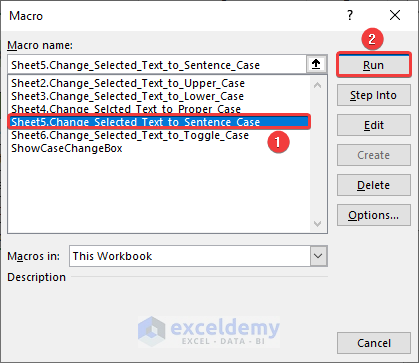
- Afterward, choose Sheet5.Change_Selected_Text_to_Sentence_Case from the Macro window and click on the Run button.
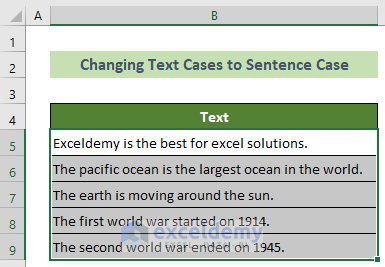
Thus, you can apply Excel VBA to change the case of the selected text and the output would look like this.
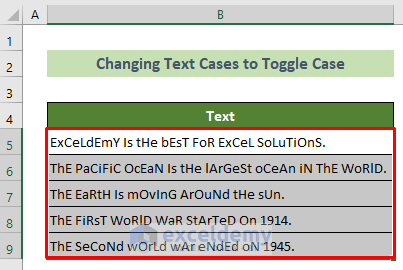
Example 5: Change Selected Text to Toggle Case
Another interesting case for text is the toggle case. In this casing system, you will get one capital, one smaller, one capital letter, and so on. So, you will find a series of capital and smaller letters each one after each one. To apply this casing, follow the steps below.
📌 Steps:
- At the very beginning, open the Microsoft Visual Basic for Applications window according to step 1 of the first method here.
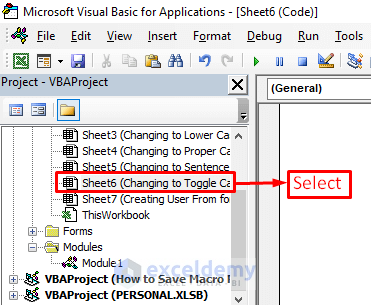
- Subsequently, click on the Sheet6 option from the VBAProject options.
- Following, write the code below in the appearing code window and press Ctrl + S.
Sub Change_Selected_Text_to_Toggle_Case()
  Dim ChangeCell As Range
  Dim n As Integer
  On Error Resume Next
  For Each ChangeCell In Selection.Cells
     If Len(ChangeCell.Value) >= 2 And IsNumeric(ChangeCell.Value) = False And _
     IsEmpty(ChangeCell.Value) = False And IsNull(ChangeCell.Value) = False Then
          For n = 1 To Len(ChangeCell.Value) Step 2
               ChangeCell.Characters(n, 1).Text = UCase(ChangeCell.Characters(n, 1).Text)
          Next
          For n = 2 To Len(ChangeCell.Value) Step 2
               ChangeCell.Characters(n, 1).Text = LCase(ChangeCell.Characters(n, 1).Text)
          Next
     End If
  Next
  On Error GoTo 0
End Sub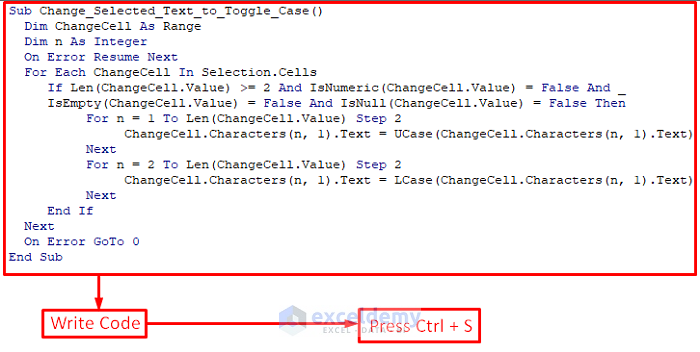
- Afterward, close the code window and select your text cells.
- Following, go to the Developer tab >> Macros tool.
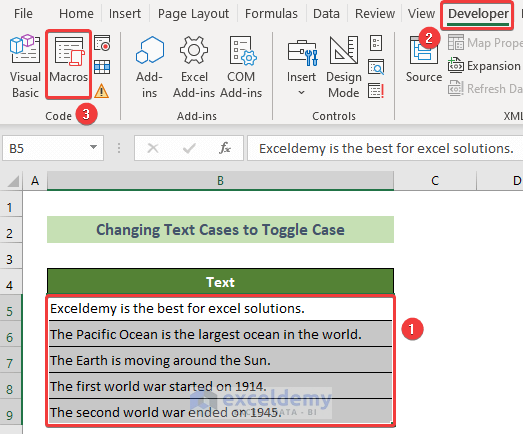
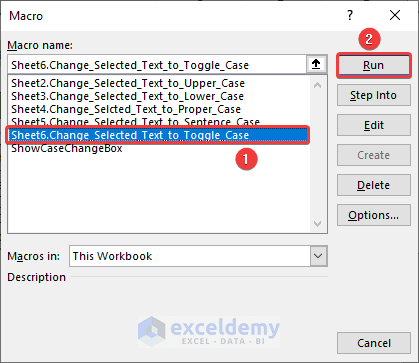
- Consequently, the Macro window will appear.
- Choose Sheet6.Change_Selected_Text_to_Toggle_Case macro from the list and click on the Run button.
As a result, your task will be accomplished and you will get the result as follows.
Example 6: Create a UserForm Using VBA That Will Change Cases to Upper, Lower or Proper
Now, sometimes you might need to change text casings dynamically which will involve user form and buttons. Now, I will show you step-by-step guidelines on creating a user form that will change the selected text’s cases to upper, lower, or proper cases.
📌 Step 1: Creating a UserForm
This UserForm will take one piece of information from the user: the type (Upper, Lower or Proper) the user wants to apply to the text. OptionButton controls are appropriate for this type of selection.
Use the following steps to create the Userform:
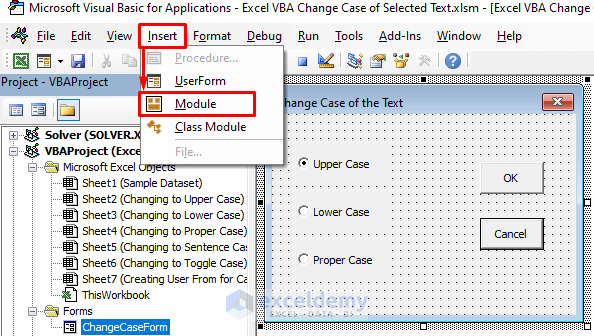
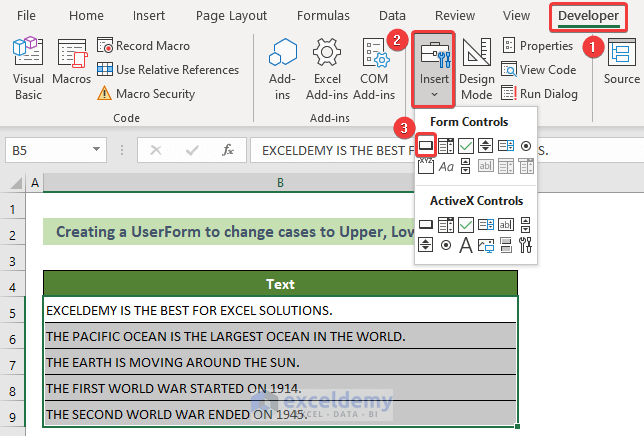
- Go to the Developer tab >> Code group >> Visual Basic tool to open the VB Editor window.

- As a result, the Microsoft Visual Basic for Applications window will appear.
- Following, go to the Insert tab >> UserForm option.
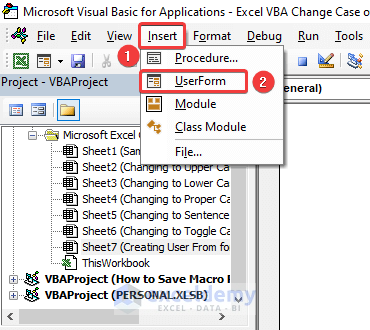
- Consequently, The VB Editor creates an empty new form named UserForm1 and the Toolbox is displayed.
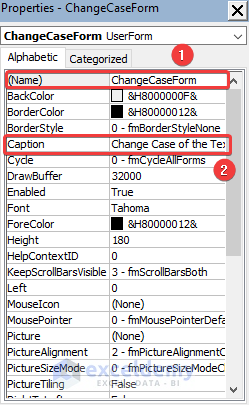
- Press the F4 key to open the Properties window. Properties window has so many options you can manipulate. For now, just change the following:
(Name) = ChangeCaseForm
Caption = Change Case of the Text
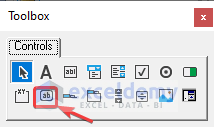
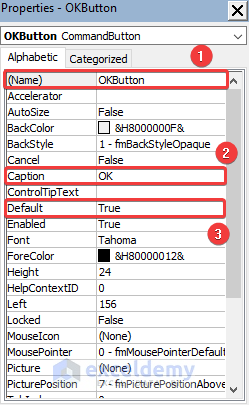
- Now, add a CommandButton control from the Toolbox to the UserForm and then change the following properties for the CommandButton.
- For the first command button, change the properties as follows:
(Name) = OKButton
Caption = OK
Default = True
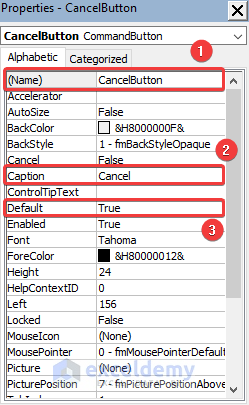
- Afterward, add another CommandButton control in the UserForm and then change the following properties:
(Name) = CancelButton
Caption = Cancel
Default = True
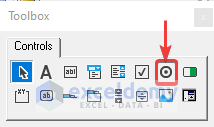
- Now, add an OptionButton control from the toolbox.
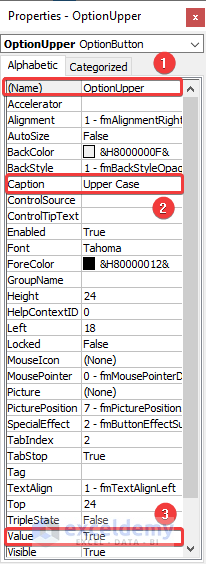
- For the first option button, change the following properties:
(Name) = OptionUpper
Caption = Upper Case
Value = True
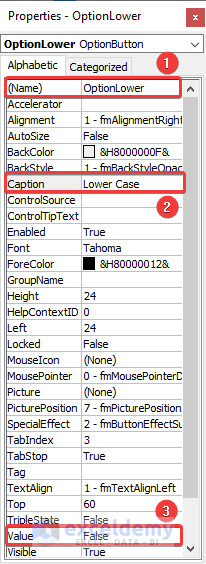
- Add a second OptionButton control and then change the following properties:
(Name) = OptionLower
Caption = Lower Case
Value = True
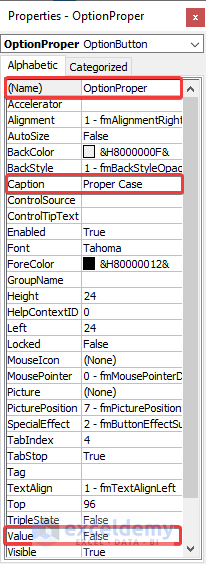
- Add a third OptionButton control and then change the following properties:
(Name) = OptionProper
Caption = Proper Case
Value = True
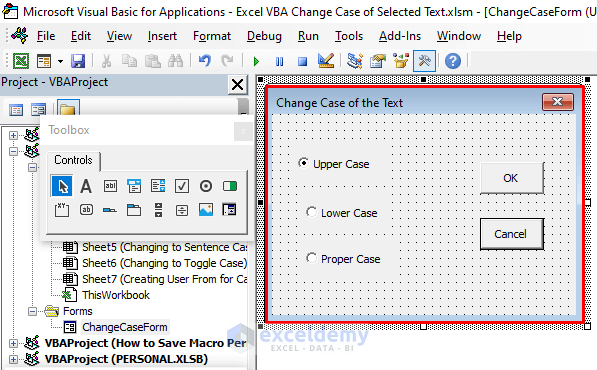
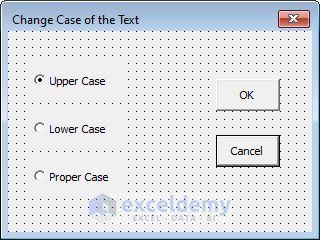
- Last but not least, adjust the size and position of the controls and the form until your UserForm looks like the UserForm shown in the figure below. The controls must not overlap.
The UserForm looks like this after adding some controls and properties.
📌 Step 2: Formatting Several Controls in the UserForm
We’re going to give three OptionButtons and two CommandButtons the same size and alignment.
- Pressing CTRL, select two Commanduttons, and right-click on the selection.
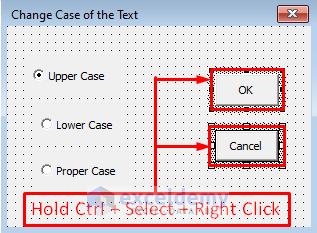
- You can also format choosing a command from the Format menu.
- Now, choose the Make Same Size option >> Both option from the context menu.
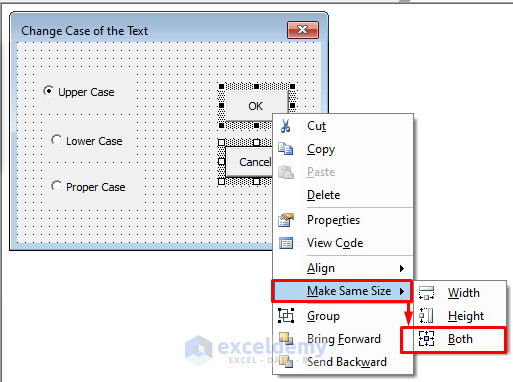
- Afterward, choose Align >> Lefts from the context menu.
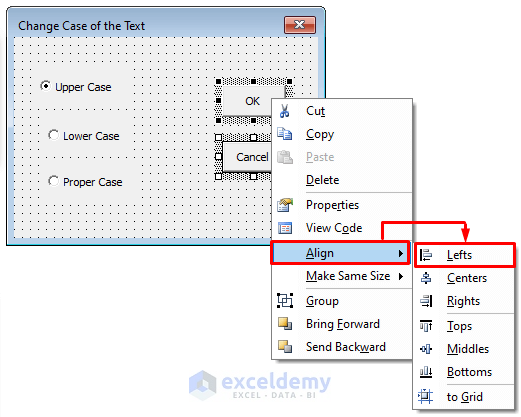
Similarly, align and size the three OptionsButton. Finally, the user form will look like this.
📌 Step 3: Creating Event Handler Procedures
An event handler is a private type Sub procedure that is executed when we perform the relevant event with the object.
Now, we shall create two event handler procedures: one will handle the Click event for the CancelButton, and the other will handle the Click event for the OKButton.
Read More: Why We Use Form Controls on a Worksheet?
Event handlers for the OptionButton controls are not necessary. They will be handled internally in the OKButton Sub procedure.
To create the Sub procedure to handle the Click event for the OKButton, use the following steps:
- Activate the ChangeCaseForm by double-clicking its name in the Project window.
- Following, double-click on the OKButton control.
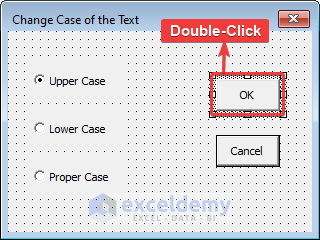
- As a result, The VB Editor will start a new procedure called OKButton_Click.
- Following, enter the VBA code below.
Private Sub OKButton_Click()
Dim WorkRange As Range

    Dim cell As Range
    ChangeCaseForm.Hide

'   Exit if a range is not selected
    If TypeName(Selection) <> "Range" Then Exit Sub
    Application.ScreenUpdating = False

'   Avoid processing cells out of the used area
    Set WorkRange = Intersect(Selection, ActiveSheet.UsedRange)

'   Upper case
    If OptionUpper Then
        For Each cell In WorkRange
        If Not cell.HasFormula Then
        cell.Value = StrConv(cell.Value, vbUpperCase)
        End If
        Next cell
    End If

'   Lower case
    If OptionLower Then
        For Each cell In WorkRange
        If Not cell.HasFormula Then
        cell.Value = StrConv(cell.Value, vbLowerCase)
        End If
        Next cell
    End If

'   Proper case
    If OptionProper Then
        For Each cell In WorkRange
        If Not cell.HasFormula Then
        cell.Value = StrConv(cell.Value, vbProperCase)
        End If
        Next cell
    End If

End Sub- The macro demands that the user will select a cell or a range of cells. If a range is not selected, the procedure ends. The procedure then uses three separate blocks. Only one block is executed, dependent on which OptionButton is selected. The selected OptionButton has a value of True. Finally, when the user clicks OK, the UserForm is unloaded.
- The next step is to write code to handle the Click event for the CancelButton control.
- Similarly, write the VBA code below to handle the CancelButton click event.
Private Sub CancelButton_Click()
    Unload ChangeCaseForm
End Sub
This procedure will be executed when someone will click the Cancel button (CancelButton). The dialog box will vanish when this code executes.
📌 Step 4: Testing the UserForm
To test the UserForm, follow these steps:
- Initially, go to the Developer tab >> Visual Basic tool.
- Following, insert a VBA module by choosing Insert >> Module.
- In the empty module, enter the following code.
Sub ShowCaseChangeBox()
   ChangeCaseForm.Show
End Sub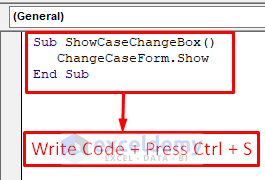
- Now, activate Excel.
- Enter some text into a range of cells.
- Select the range with the text.
- Choose Developer tab >> Macros tool or press Alt+F8.
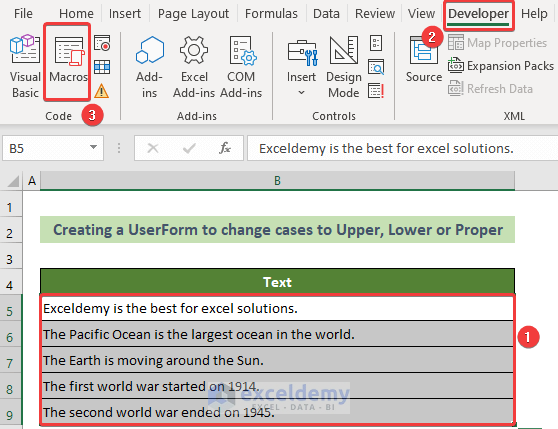
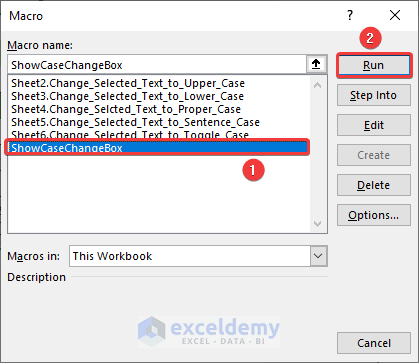
- As a result, The Macros dialog box appears.
- Select ShowCaseChangeBox macro from the list, and then click Run.
- Thus, the UserForm appears. Make your choice (Upper Case, Lower Case, or Proper Case), and click OK.
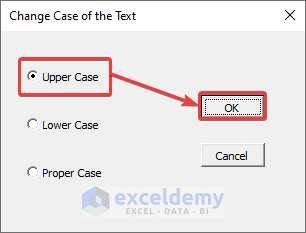
Thus, you will get the desired case for your text. If you click Cancel, the UserForm is dismissed and no changes happen.
Read More: How to add a macro to your Quick Access toolbar in Excel
Making the Macro Available from a Worksheet Button:
However, I want to make an easy way though I can execute the macro in one click. A good way to execute this macro would be to set a button form on the worksheet. You can use the following steps:
- Choose Developer >> Controls >> Insert and click the Button control in the Form Controls group.
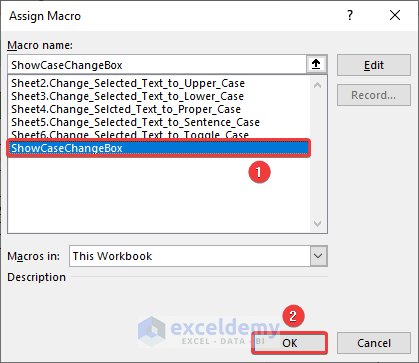
- Click and drag in the worksheet to create the button. The Assign Macro dialog box appears.
- Select the ShowCaseChangeBox macro, and then click OK.
- The button is still selected, so you can change the text to make it more descriptive. You can also right-click the button at any time to change the text.
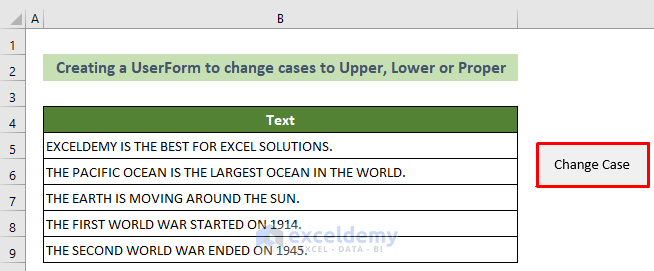
Now you can execute the macro to show the UserForm just by clicking the Change Case button. You can also change other formats like color, the size of text and etc. See the figure below.
Conclusion
In a nutshell, in this article, I have shown you Excel VBA examples to change the case of selected text. I suggest you read the full article carefully and practice accordingly. I hope you find this article helpful and informative. Moreover, you are very welcome to comment here if you have any further questions or recommendations. And, visit ExcelDemy to learn about many more Excel problem solutions, tips, and tricks. Thank you!
Get FREE Advanced Excel Exercises with Solutions!
