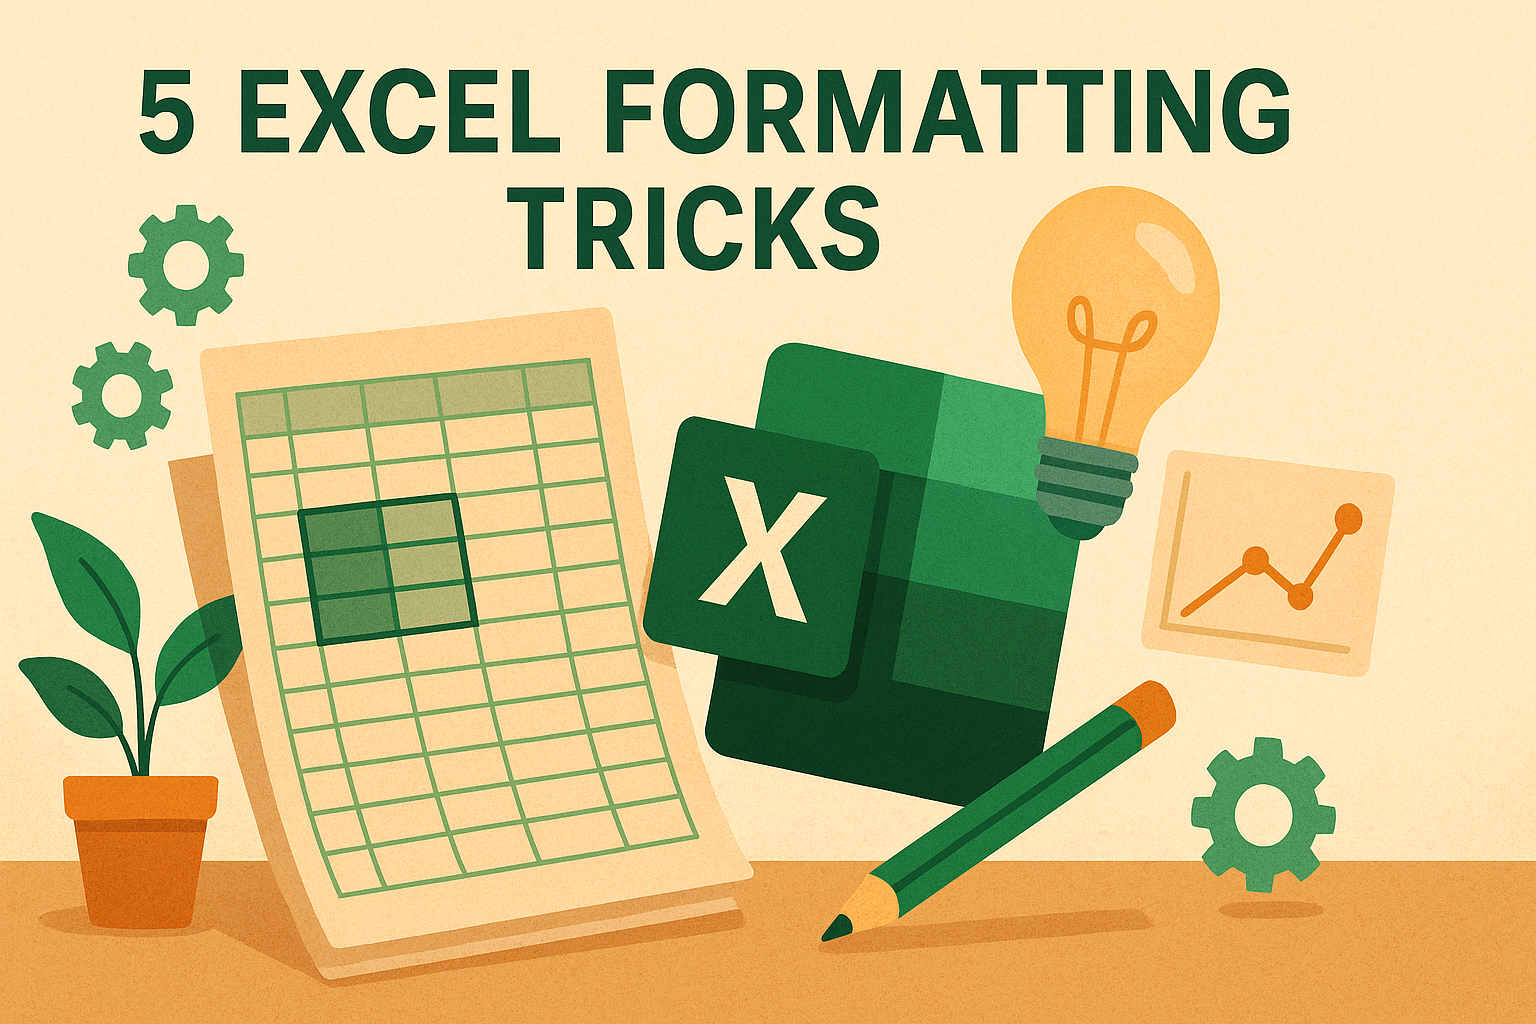
Excel sheets are not always about formulas and features; it is also important to structure the sheet to give a professional look. A well-formatted sheet is easier to understand and use. There are tricks to transform your spreadsheets from amateur to professional with these powerful Excel formatting techniques.
In this article, we will list 5 formatting tricks that instantly make your Excel sheets look professional. These tricks will make your data easier to read, more visually appealing, and give your work that polished, corporate look.
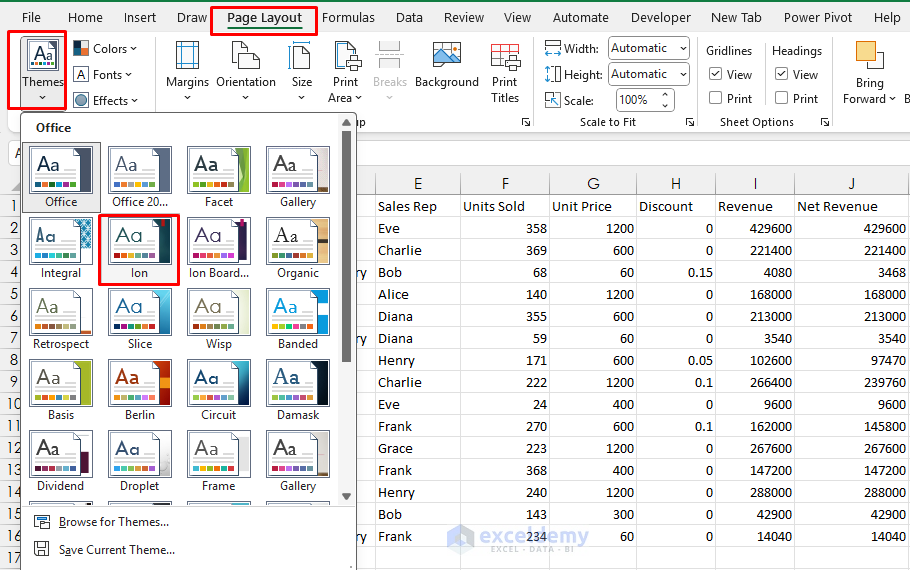
1. Use a Built-in Theme or Set a Theme
It’s quicker and easier to use built-in themes. These themes are designed to give a professional and color contrast look. The theme automatically gives a consistent font pair and color palette across all sheets, charts, and shapes, so nothing looks random.
Steps to do it:
- Go to the Page Layout tab >> select Themes.
- Pick a built-in theme you like (try “Office” or “Ion”).
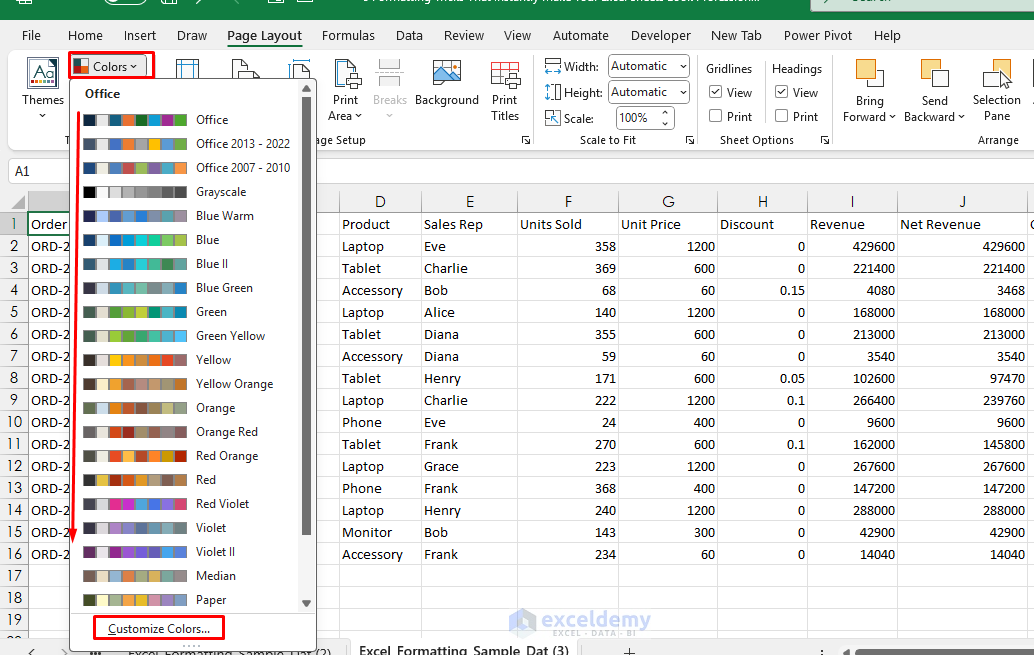
- Click Colors >> pick any Colors or you can Customize Colors…
- Pick one Accent color.
- Pick your brand color plus neutrals for borders/fills.
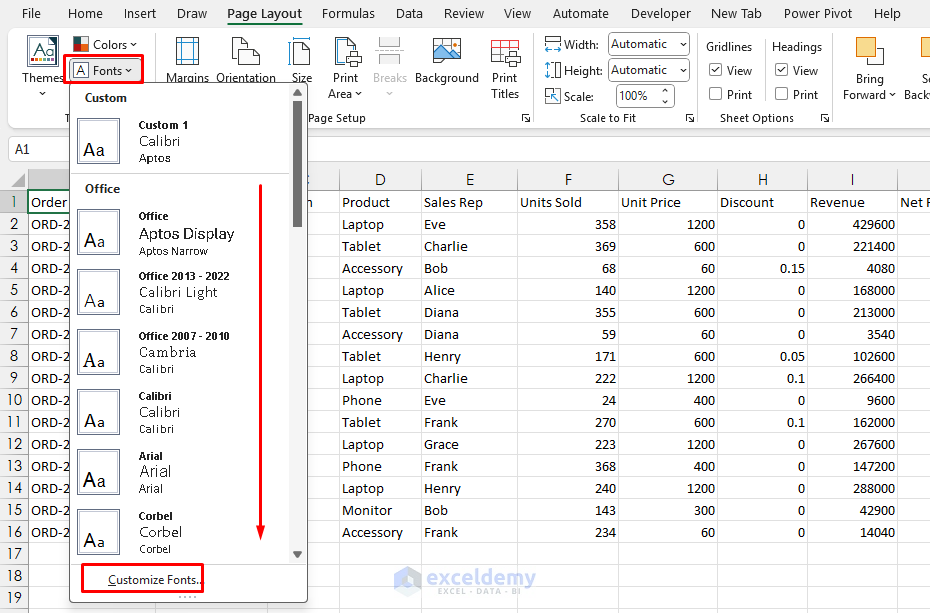
- Click Fonts >> select Customize Fonts…
- e.g., Headings: Segoe UI, Body: Calibri 11.
- Click Themes >> select Save Current Theme to reuse in future files.
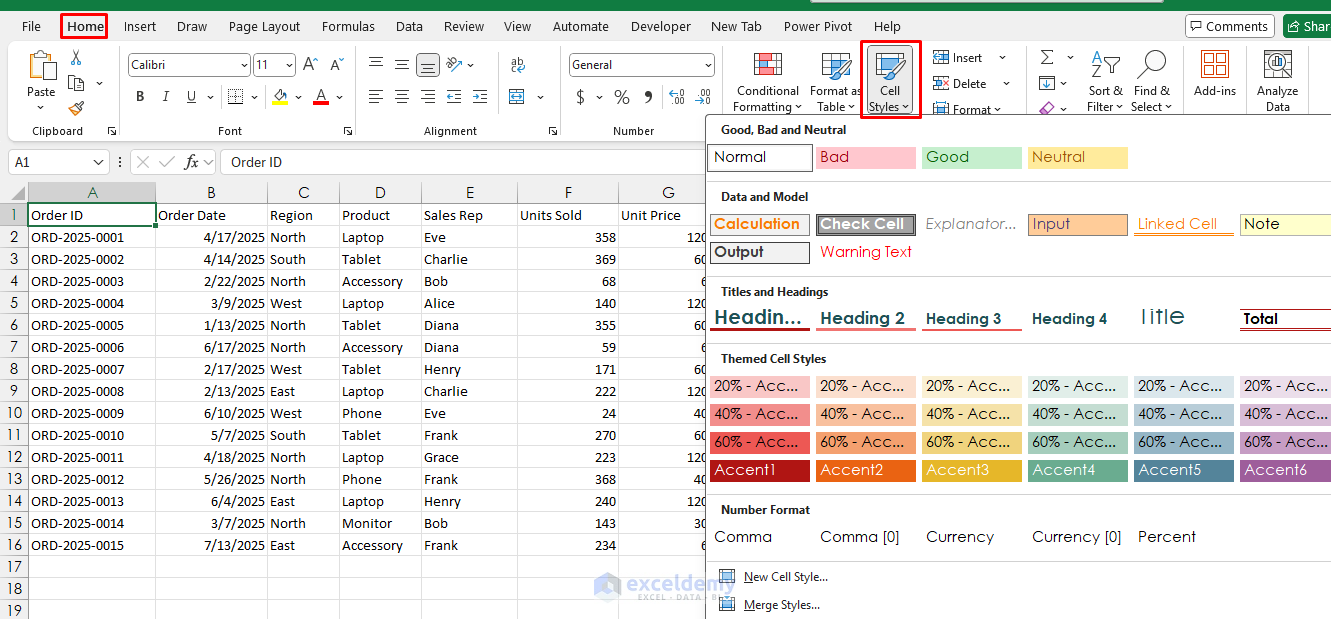
- Now use Cell Styles to apply the theme in an Excel spreadsheet.
- Go to the Home >> select Cell Styles.
- Select Title, Heading 1, Heading 2 for consistent headings.
Tip: Themes automatically set font color, sizes based on your requirements. No manual cell formatting is required.
Use Consistent Fonts and Sizes with Strategic Color and Typography
If you are not comfortable with built-in themes or you want your own customized professional Excel spreadsheet. You can strategically use consistent fonts, size, color, and typography.
Font:
- Select the range (or press Ctrl+A to select the entire sheet).
- Go to the Home tab >> set a clean font like Calibri, Arial, or Segoe UI.
Color Scheme:
- Use dark backgrounds (navy blue, charcoal gray) with white text.
- Or stick with white backgrounds and dark blue text for a clean corporate look.
Typography:
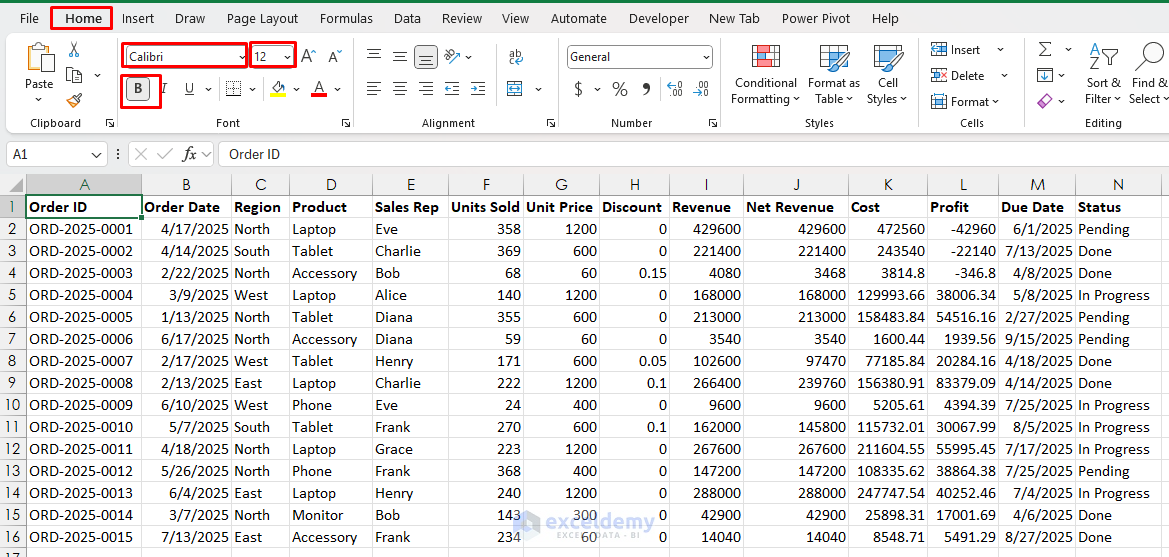
- Make headers bold.
- Go to the Home tab >> select Bold or press Ctrl + B.
- Use 10–12 pt for regular text, and 14–16 pt for headings.
- Increase font size to 11-12pt (one size larger than data).
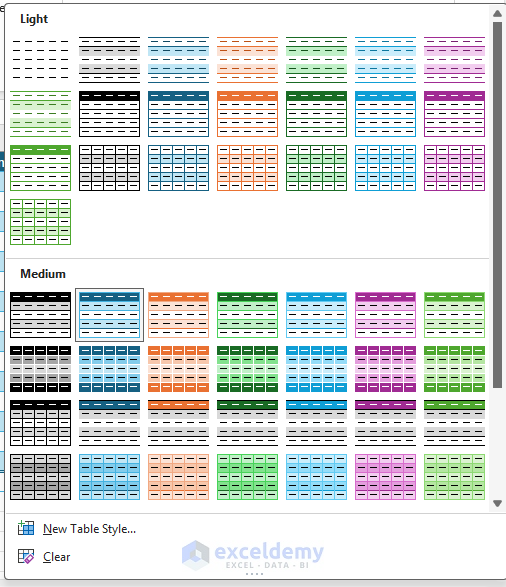
2. Apply Table Styles for Instant Polish & Color Coding
Excel’s built-in Table Styles feature is powerful. It gives a polished look to your data by applying a uniform color theme and making it visually appealing. Table features transform messy data into professional-looking tables with just a few clicks.
Steps to do it:
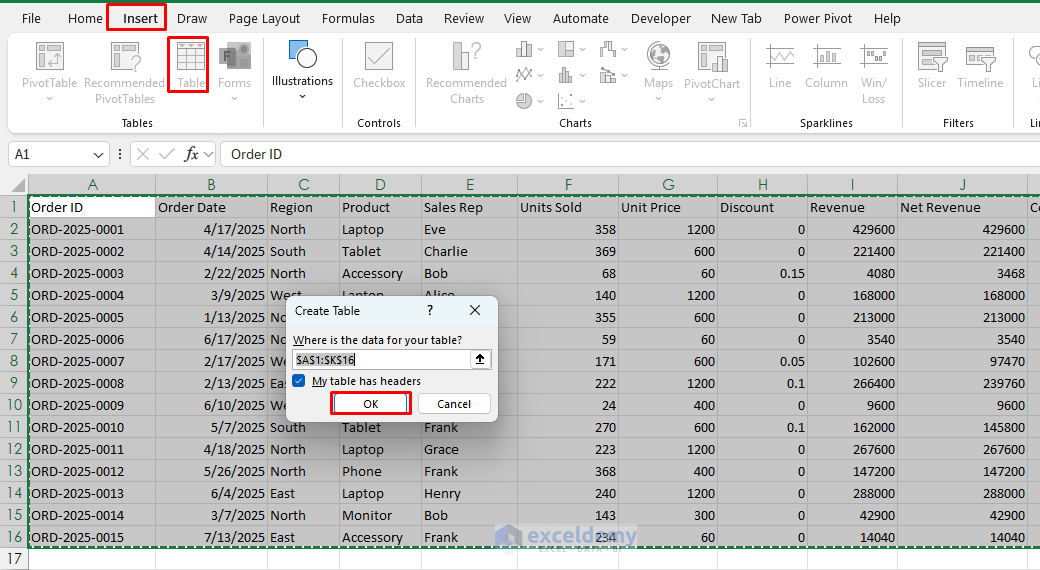
- Select your data (headers in the first row).
- Go to the Insert tab >> select Table or press Ctrl+T.
- Check My table has headers.
- Click OK.
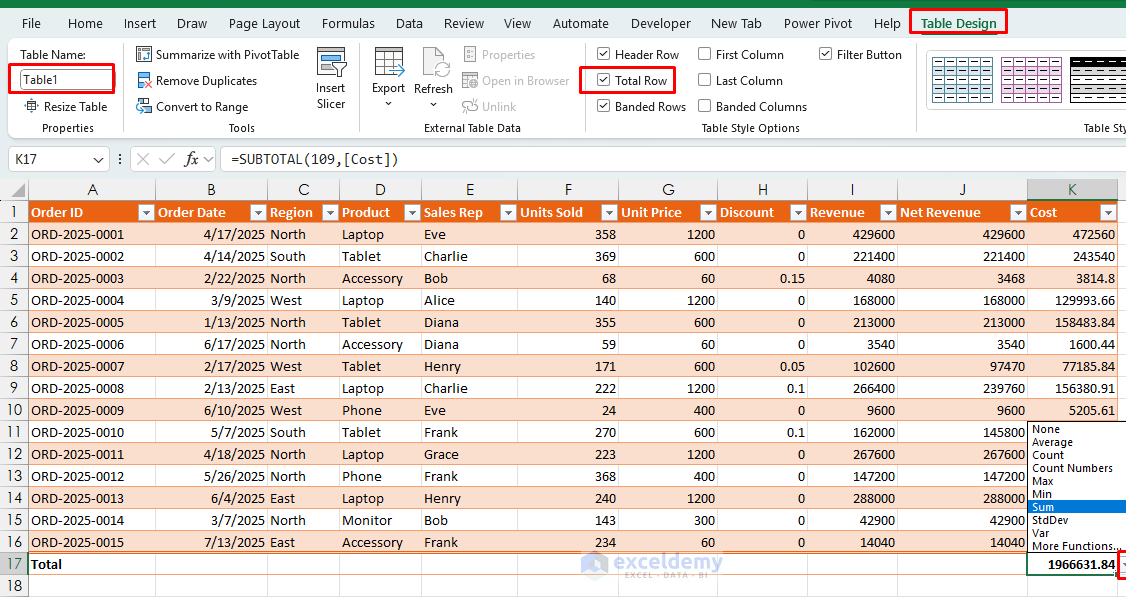
- Click anywhere on the table.
- Go to Table Design tab >> select Table Style to choose a clean banded look.
- Turn on Total Row and choose Sum, Average, etc. from the dropdown.
Professional options:
- Table Style Medium 2 (blue headers, alternating white/light blue rows).
- Table Style Light 9 (subtle gray headers, clean appearance).
- Table Style Dark 1 (for dark theme spreadsheets).
Tip: Rename the table under Table Design → Table Name. Your formulas will read better and update automatically as data grows.
3. Use Number Formats That Tell a Story
An Excel spreadsheet is known for its easy calculation; it is a must to know how to handle numbers. Clean, consistent number formatting reduces cognitive load. Nothing screams “amateur” like inconsistent number formatting. Master these formats for instant credibility.
Steps to do it:
- Select cell.
- Go to the Home tab >> from Number group >> expand the drop-down.
- Apply appropriate formatting for Number, Currency, Accounting, Short Data, Percentage, etc.
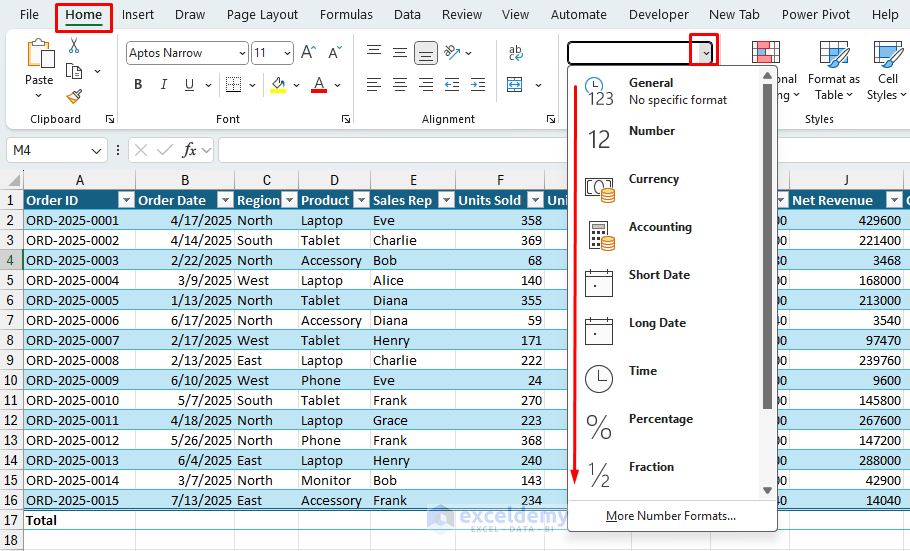
Currency and Financial Data:
- Select cells with currency data.
- Go to the Home tab >> select Currency or Accounting from the Number group.
- Set decimal places to 2.
- Choose your currency symbol.
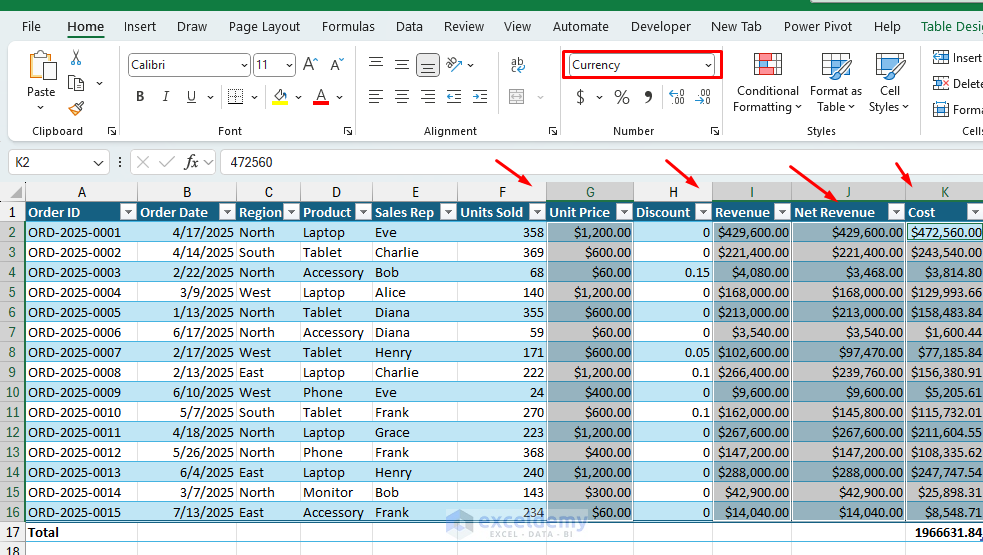
Accounting format vs Currency format:
- Accounting: Aligns currency symbols and decimal points perfectly (use for financial reports).
- Currency: Places symbol directly next to number (use for price lists).
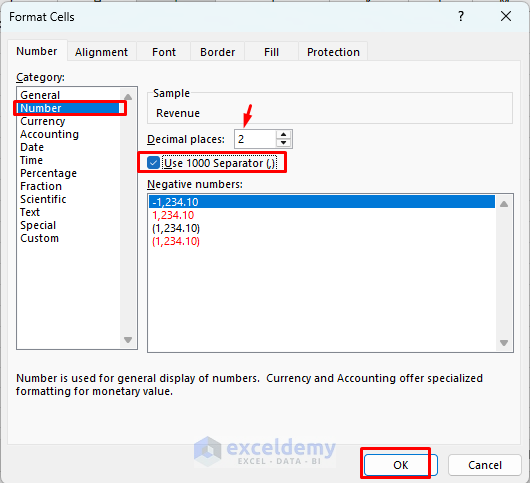
Large Numbers with Thousands Separators:
- Select numbers.
- Right-click >> select Format Cells >> select Number >> select Number.
- Check Use 1000 Separator (,).
- Set appropriate decimal places (usually 0 for whole numbers).
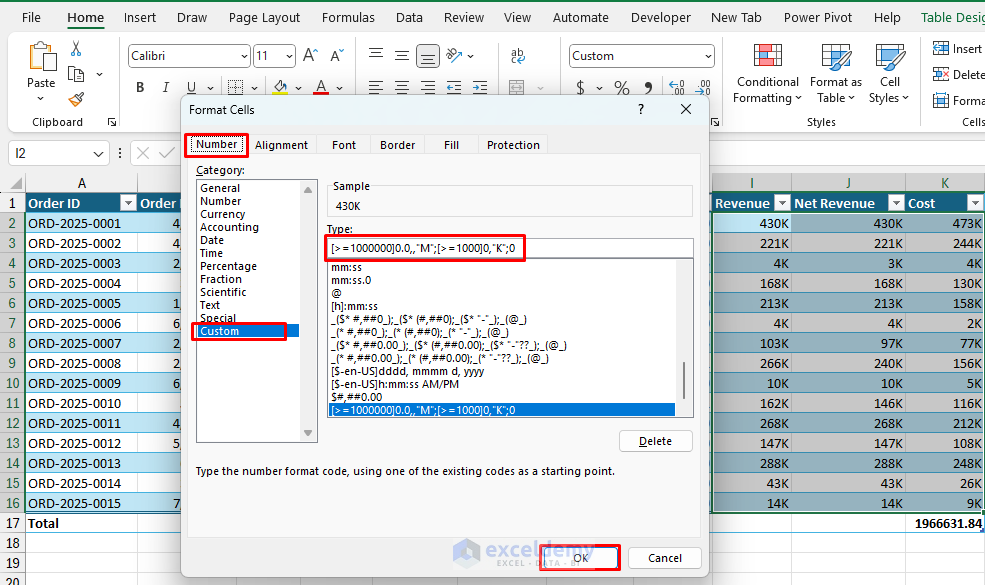
Custom “K/M” format (no formulas):
- Select numbers.
- Right-click >> select Format Cells >> select Number >> select Custom.
- Insert the following custom format.
- Click OK.
[>=1000000]0.0,,"M";[>=1000]0,"K";0
This shows 429,600 as 429K and 2339960 as 2M. Use two decimal places from the Number group.
Tip: Remember to apply professional formatting, like which date format is more readable, which country’s number you are representing, while using a separator, etc.
4. Create Visual Hierarchy with Spacing & Alignment
White space and subtle borders, and perfect alignment guide the eye. Heavy gridlines everywhere make sheets feel busy and cheap. Professional spreadsheets have breathing room and logical organization.
Row and Column Sizing
Optimal row heights:
- Headers: 20-25 pixels.
- Data rows: 15-18 pixels.
- Use Wrap Text on multi-line headers and increase row height slightly.
- Leave some white space; cramped cells look unprofessional.
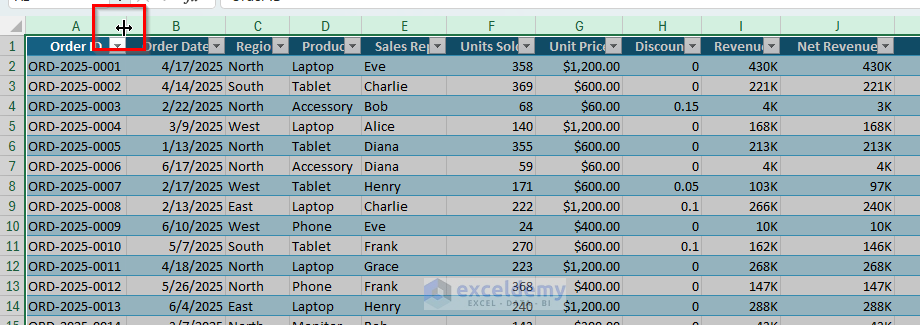
Auto-fit columns:
- Select all columns.
- Double-click any column header edge or press Shift + Ctrl + Right.
- Manually adjust if any column is too wide or narrow.
Cell Alignment Best Practices
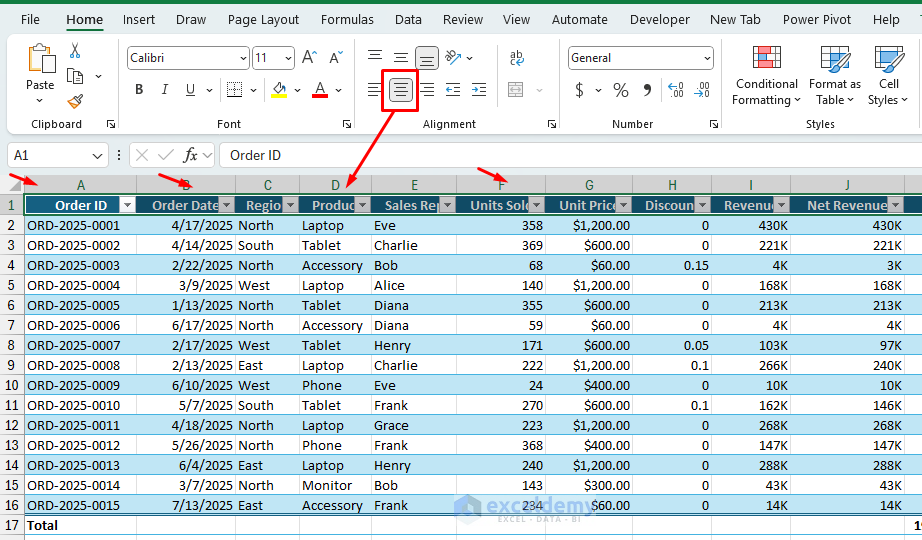
Text alignment rules:
- Headers: Center-aligned
- Text data: Left-aligned
- Numbers: Right-aligned
- Dates: Center or right-aligned
That visual rhythm screams “professional.”
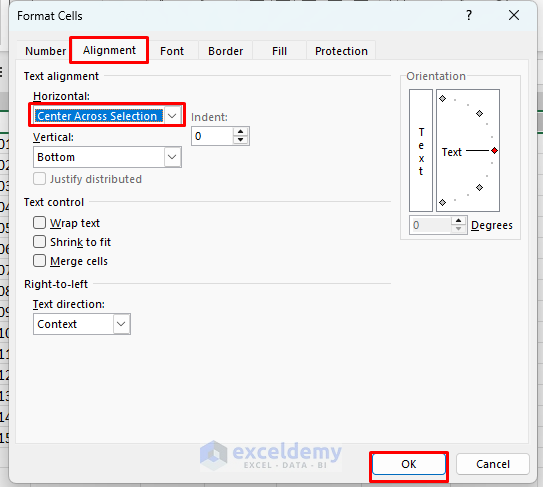
Applying alignment:
- Select cells.
- Use alignment buttons in the Home ribbon.
- To avoid Merge.
- Right-click >> select Format Cells >> select Alignment >> select Horizontal: Center Across Selection.
- Click OK.
Border hierarchy: Use thin, light gray borders for detail, and thick top borders for totals/subtotals only. Avoid boxing every cell.
Tip: Freeze your header row (View → Freeze Panes → Freeze Top Row) so formatting payoff remains visible while scrolling.
5. Master Conditional Formatting for Data Visualization
Conditional formatting automatically highlights cells based on values, making patterns and outliers instantly visible. Be minimal yet meaningful, overdo it, and it will look peculiar.
Steps to do it:
- Select your data range.
- Go to the Home tab >> select Conditional Formatting >> select required highlighting option.

- For quick data analysis >> select Color Scales.
- Choose a color scheme (red-yellow-green works well for performance data).

Smart Uses:
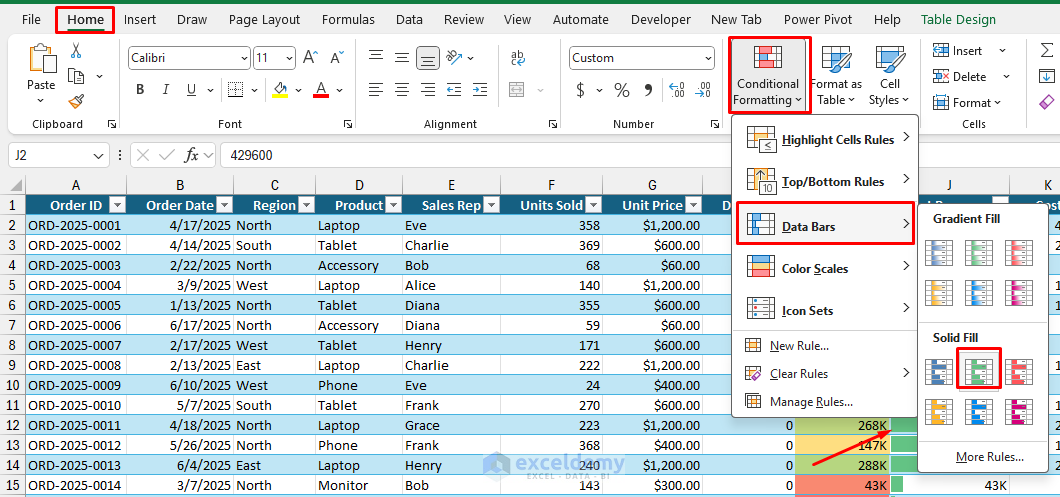
Data Bars for Visual Comparison: This creates mini bar charts within your cells, perfect for comparing values immediately.
- Select your numerical data.
- Go to the Home tab >> select Conditional Formatting >> select Data Bars.
- Choose “Solid Fill” for a cleaner look.
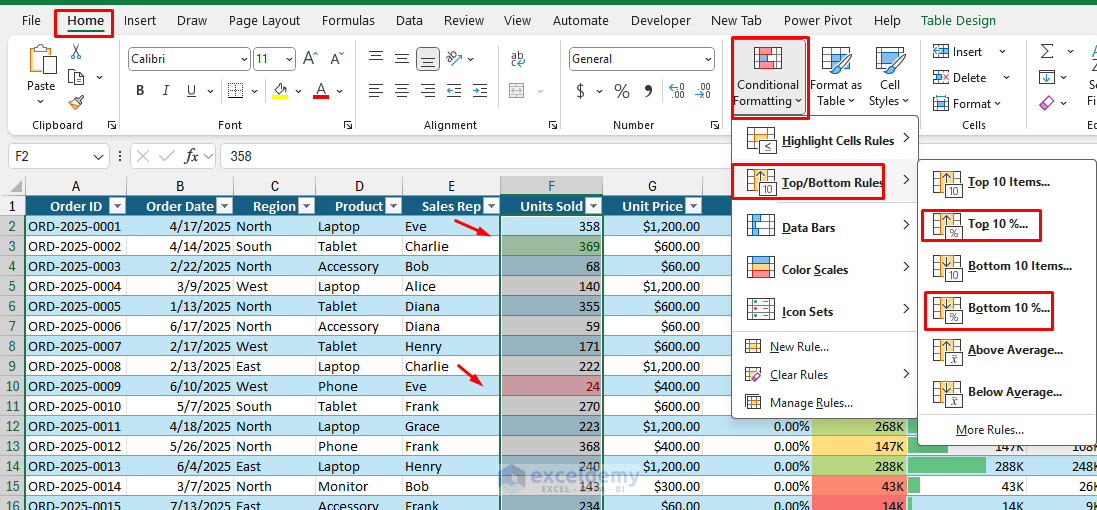
Highlight Top/Bottom Values: Highlights top and bottom values. Spotlight outliers (Top 10%, Below Average)
- Select your data range.
- Go to the Home tab >> select Conditional Formatting >> select Top/Bottom Rules.
- Choose “Top 10%” or “Bottom 10%” and apply bold formatting with colored backgrounds.
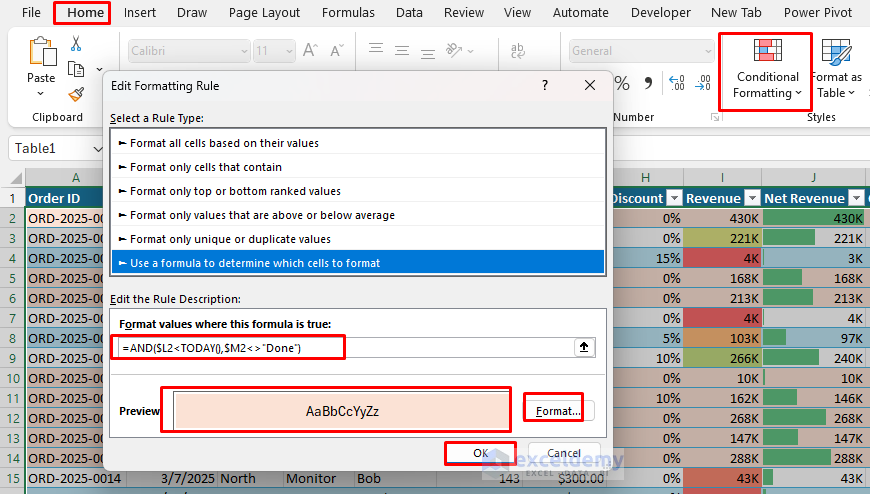
Formula-Based Rules: You can use it for surgical highlights:
- Select your data rows (e.g., A2:H200).
- Go to the Home tab >> select Conditional Formatting >> select New Rule.
- Choose Use a formula to determine which cells to format.
- Like highlight overdue items where Due Date < Today and Status ≠ “Done”:
=AND($L2<TODAY(),$M2<>”Done”)
- Choose a light fill; avoid loud reds unless they truly signal risk.
- Click OK.
Tip: Open Conditional Formatting >> select Manage Rules, set Stop If True for priority rules, and keep “Applies to” ranges tied to your Table columns so highlights expand with new rows.
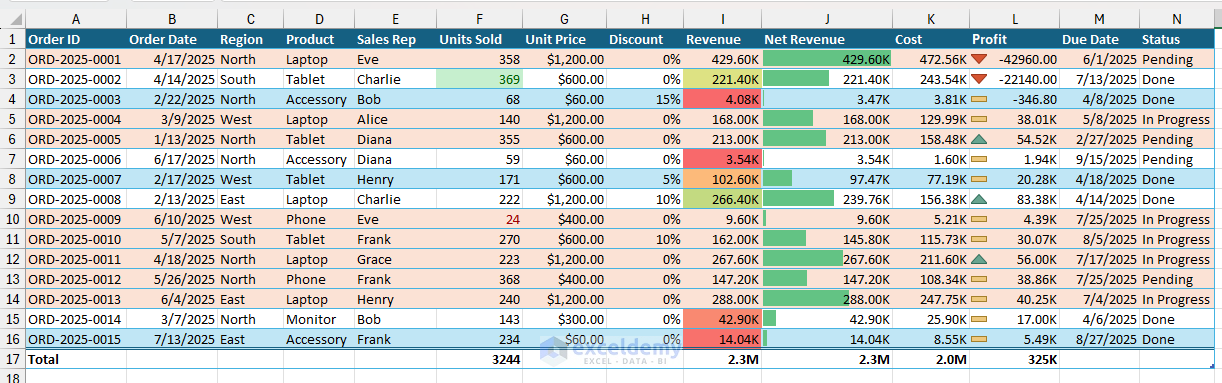
Note: We applied all the tricks in one report just to show the usage. You won’t need to apply all the tricks in one Excel spreadsheet; use them based on necessity, don’t overdo it.
Before You Share or Print
- Remove gridlines for a clean look.
- Go to the View tab >> uncheck Gridlines for a cleaner print, but keep borders where needed.
- Always check Print Preview to ensure your formatting translates well to paper or PDF.
- Go to the Page Layout >> select Print Titles (repeat header row).
- Margins: Narrow
- Scale to Fit: 1 page wide if appropriate
- Add Header/Footer with page number and file name for traceability.
Wrapping Up
Implementing these five formatting tricks will instantly make your Excel sheets go from basic data dumps into professional, easy-to-read business documents that command respect and attention. Always remember the key is consistency, no matter what formatting you apply, but pick a formatting style and stick with it consistently throughout your spreadsheet. Proper formatting will make your Excel sheets look professional, and great formatting makes your data tell its story more effectively.
Remember, when an audience can quickly understand and navigate the spreadsheet, that means you have succeeded in creating truly professional Excel work.
Get FREE Advanced Excel Exercises with Solutions!
