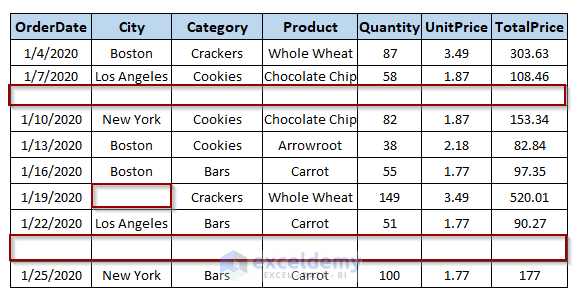
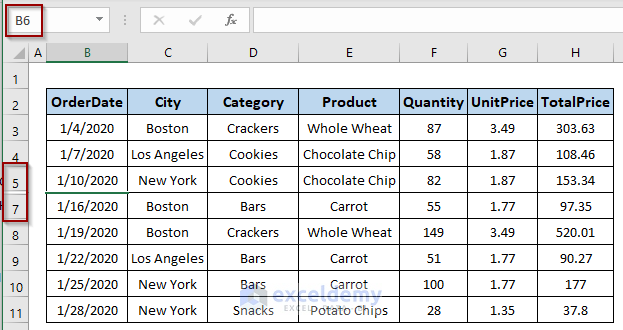
Below is a dataset of the sale details for different products. It contains a couple of blank rows that we will hide using simple VBA code. The Range.EntireRow property of VBA Excel selects an entire row that is entirely blank or has blank cells.
Write Code in Visual Basic Editor
To hide blank rows, we need to open and write VBA code in the Visual Basic Editor. Follow the steps to open the Visual Basic Editor and write code there.
- Go to the Developer tab from the Excel Ribbon.
- Click the Visual Basic option.
![]()
- In the Visual Basic For Applications window, click the Insert dropdown to select the New Module option.
![]()
- Enter your code inside the visual code editor and press F5 to run it.
Method 1 – Hiding Rows That Contain Blank Cells
1.1 Hide Rows Based on Predefined Source Range
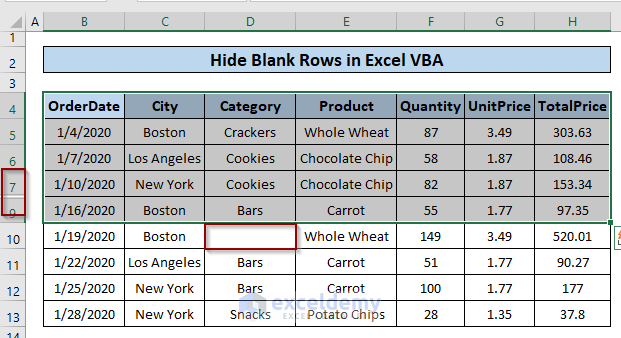
Task: Hide rows that contain blank cells in the following dataset (B4:H13).
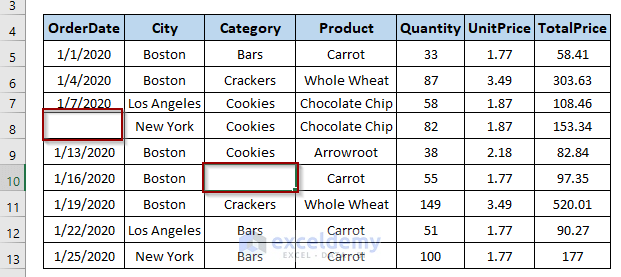
Problem Analysis: Run a loop through all the cells in the dataset (B4:H13) to find the blank cells (B8 and D10). Select the entire rows (rows 8 and 10) corresponding to the blank cells and hide them.
Solution: To check each of the cells in the dataset, we’ll use the For Each…Next loop in the following code. The If…Then…Else statement will check if the cell is blank or not. If the condition is true, it will apply VBA Range.EntireRow property to select the entire row to assign the Hidden property as true.
Code: Insert the following code in the Visual Basic Editor and press F5 to run it.
Sub HideBlankRows()
Dim val As Range
For Each val In Range("B4:H13").Cells
If val .Value = "" Then
    val .EntireRow.Hidden = True
End If
Next
End Sub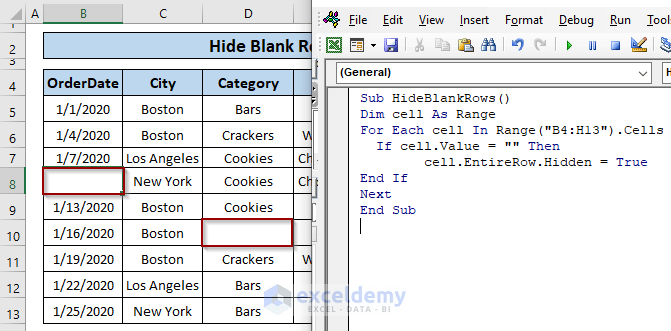
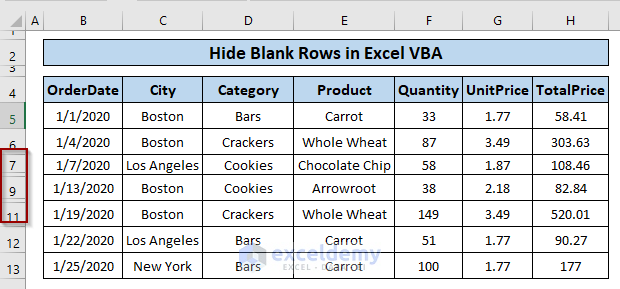
Output: We’ve successfully hidden rows 8 and 10 in the following dataset.
1.2 Hide Rows Based on Selection
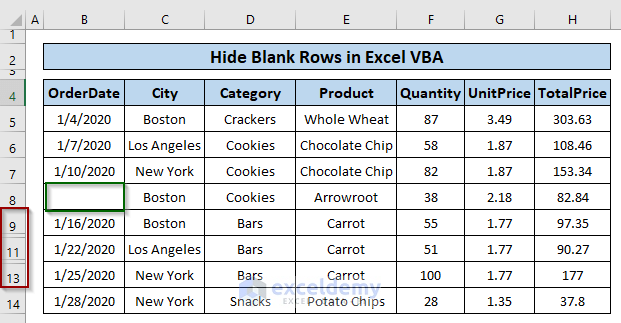
Task: Hide rows that contain blank cells in the selected source range (B4:H9).
![]()
Problem Analysis: Run a loop through all the cells in the selected dataset (B4:H9) to find the blank cells (B8). Select the entire row (row 8) corresponding to the blank cell and hide it.
Solution: Use the Application.Selection property to select our desired portion of the dataset.
Code: Insert the following code in the Visual Basic Editor and press F5 to run it.
Sub HideBlankRows()
Dim val As Range
For Each val In Selection
If val.Value = "" Then
     val.EntireRow.Hidden = True
End If
Next
End SubOutput: We successfully hid row 8 in the following dataset. It didn’t hide row 10, as it was outside the selected range.
Read More: VBA to Hide Rows Based on Criteria in Excel
Method 2 – Selecting a Range and Then Hiding Blank Rows
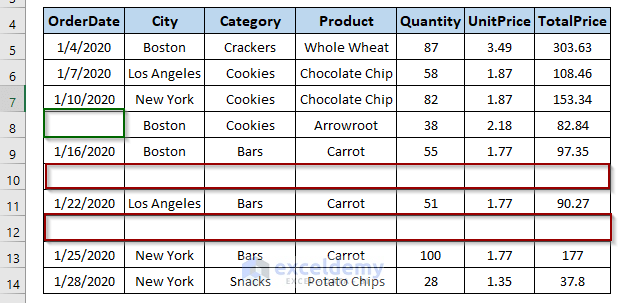
Task: Hide rows that are completely blank in the selected dataset. The code we’ll run should not hide a row that has one or more blank cells but is not completely blank.
Problem Analysis: We’ve selected the whole dataset and want to hide rows 10 and 12. These two rows are entirely blank. But we don’t want to hide row 8 with a blank cell.
Solution: Use the COUNTA function as a worksheet function in the VBA code to check whether each row is blank or not.
![]()
Code: Insert the following code in the Visual Basic editor and press F5 to run it.
Public Sub DeleteBlankRows()
    Dim cellRange As Range
    Dim selectRow As Range
    Set cellRange = Application.Selection
    If Not (cellRange Is Nothing) Then
        Application.ScreenUpdating = False
        For i = cellRange.Rows.Count To 1 Step -1
            Set selectRow = cellRange.Cells(i, 1).EntireRow
            If Application.WorksheetFunction.CountA(selectRow) = 0 Then
                selectRow.Hidden = True
            End If
        Next
        Application.ScreenUpdating = True
    End If
End SubOutput: We’ve successfully hidden rows 10 and 12.
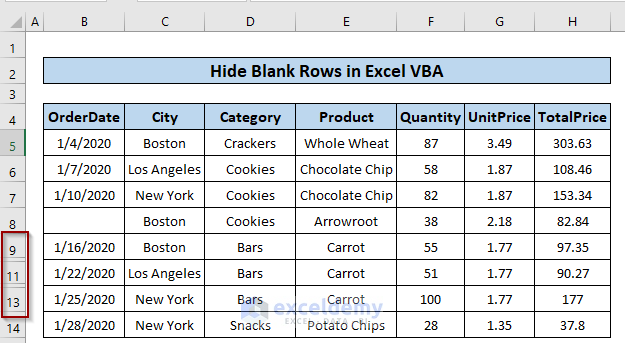
Method 3 – Hiding All Blank Rows in a Worksheet
Task: Hide rows that are completely blank in the whole dataset. The code we’ll run should not hide a row that has one or more blank cells but is not completely blank.
Problem Analysis: Select the whole dataset automatically with our VBA code, not manually, as we did in the previous example.
Solution: Use the Worksheet.UsedRange property to select the whole dataset automatically.
Code: Insert the following code in the Visual Basic Editor and press F5 to run it.
Public Sub DeleteBlankRows()
    Dim cellRange As Range
    Dim selectRow As Range
    Set cellRange = ActiveSheet.UsedRange
    If Not (cellRange Is Nothing) Then
        Application.ScreenUpdating = False
        For i = cellRange.Rows.Count To 1 Step -1
            Set selectRow = cellRange.Cells(i, 1).EntireRow
            If Application.WorksheetFunction.CountA(selectRow) = 0 Then
                selectRow.Hidden = True
            End If
        Next
        Application.ScreenUpdating = True
    End If
End SubOutput: We’ve successfully hidden rows 10 and 12.
Method 4 – Auto Hiding Rows Based on Blank Cells
Task: Hide the entire row whenever a blank cell is created in the dataset.
Code: Right-click the mouse on the sheet name and choose the View Code option.
![]()
Enter the following code in the editor and save it.
Private Sub Worksheet_Change(ByVal Target As Range)
    Dim val As Range
    Application.ScreenUpdating = False
        For Each val In ActiveSheet.UsedRange
            If val.Value = "" Then
                val.EntireRow.Hidden = True
            End If
        Next val
    Application.ScreenUpdating = True
End Sub![]()
Output: If we delete a cell data to make it blank, the entire row containing the blank cell will be hidden. For example, we deleted cell B6 data to make it blank. The VBA code was entirely hidden in row number 6.
Things to Remember
Once we run the VBA code, it loses its history after completing the task. So, we cannot undo what we’ve done. That’s why we should also know how to unhide rows in Excel.
Download the Practice Workbook
Related Articles
- VBA to Hide Rows Based on Cell Value in Excel
- How to Hide Rows with Zero Values in Excel Using Macro

