Method 1 – Sort Smallest to Largest Using the Ascending Order in VBA Autofilter
Step 1:
- Open a Module. From your Developer tab, go to Developer → Visual Basic.
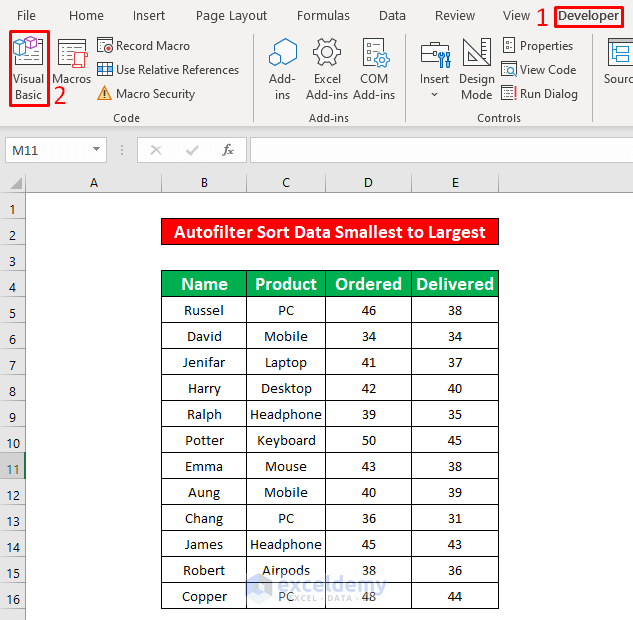
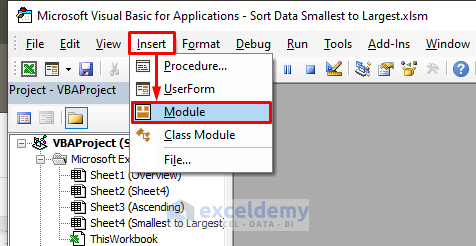
- After clicking on the Visual Basic ribbon, a window named Microsoft Visual Basic for Applications – Sort Data Smallest to Largest will instantly appear. From that window, we will insert a module for applying our VBA code. Go to Insert → Module.
Step 2:
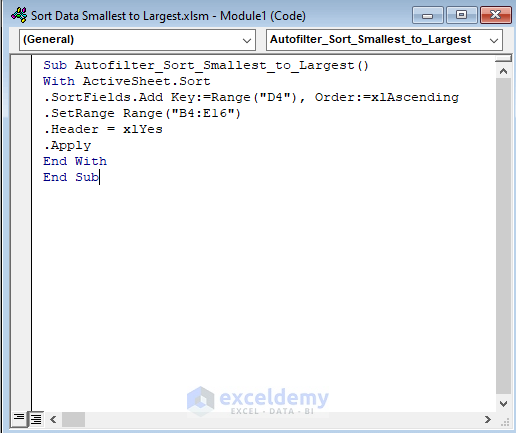
- The Sort Data Smallest to Largest module pops up. In the Sort Data Smallest to Largest module, write down the below VBA code:
Sub Autofilter_Sort_Smallest_to_Largest()
With ActiveSheet.Sort
.SortFields.Add Key:=Range("D4"), Order:=xlAscending
.SetRange Range("B4:E16")
.Header = xlYes
.Apply
End With
End Sub
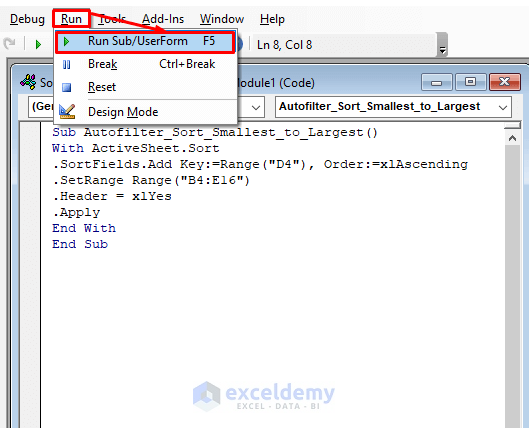
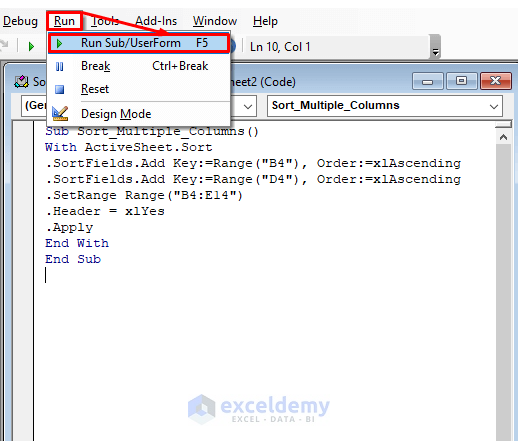
- Run the VBA code. Go to Run → Run Sub/UserForm.
- After running the VBA code, you will be able to sort data from smallest to largest which has been given in the below screenshot.

Method 2 – Use Multiple Columns to Sort Smallest to Largest with Header in Excel VBA
Step 1:
- Insert a new module and type the below VBA code to change the font color. The VBA code is,
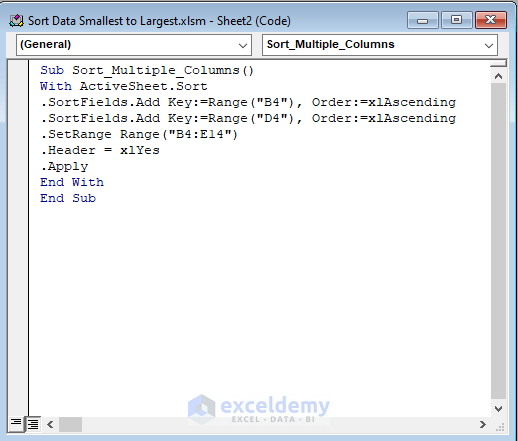
Sub Sort_Multiple_Columns()
With ActiveSheet.Sort
.SortFields.Add Key:=Range("B4"), Order:=xlAscending
.SortFields.Add Key:=Range("D4"), Order:=xlAscending
.SetRange Range("B4:E16")
.Header = xlYes
.Apply
End With
End Sub
- Run the VBA code. Go to Run → Run Sub/UserForm.
Step 2:
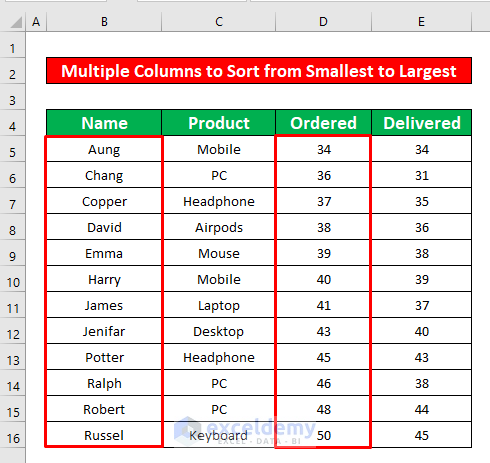
- After running the VBA code, you can sort our data according to the sales representatives’ names and order products from smallest to largest, as shown in the screenshot below.
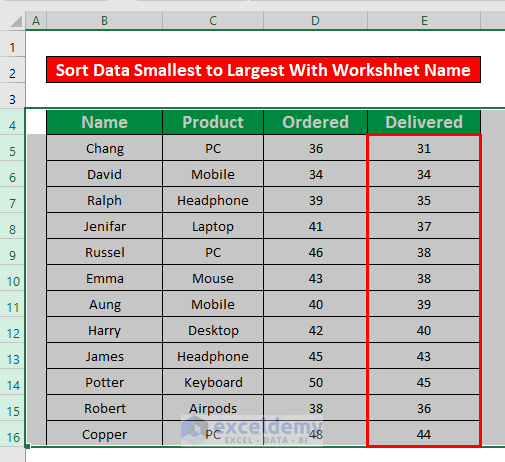
Method 3 – Apply VBA Autofilter to Sort Smallest to Largest with Worksheet Name
Step 1:
- Insert a new module according to method 1 and type the below VBA code to change the font color. The VBA code is,
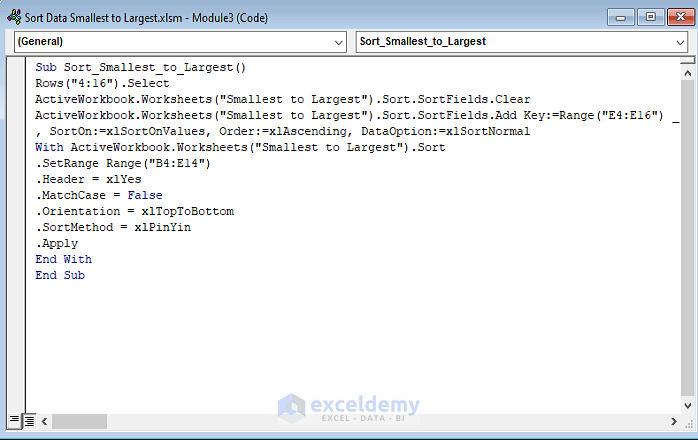
Sub Sort_Smallest_to_Largest()
Rows("4:16").Select
ActiveWorkbook.Worksheets("Smallest to Largest").Sort.SortFields.Clear
ActiveWorkbook.Worksheets("Smallest to Largest").Sort.SortFields.Add Key:=Range("E4:E16") _
, SortOn:=xlSortOnValues, Order:=xlAscending, DataOption:=xlSortNormal
With ActiveWorkbook.Worksheets("Smallest to Largest").Sort
.SetRange Range("B4:E16")
.Header = xlYes
.MatchCase = False
.Orientation = xlTopToBottom
.SortMethod = xlPinYin
.Apply
End With
End Sub
- Run the VBA code. Go to Run → Run Sub/UserForm.

Step 2:
- After running the VBA code, you will be able to sort the data from smallest to largest according to the worksheet name given in the screenshot below.
Things to Remember
You can pop up the Microsoft Visual Basic for Applications window by pressing Alt + F11 simultaneously.
If a Developer tab is not visible in your ribbon, you can make it visible. To do that, go to, File → Option → Customize Ribbon.
Download Practice Workbook
Download this practice workbook to exercise while you are reading this article.
Related Articles
- How to Autofilter Values Not Equal to a Certain Value with VBA in Excel
- Excel VBA: Remove AutoFilter If It Exists
- Excel VBA to Check If AutoFilter is On
- VBA to AutoFilter with Multiple Criteria on Same Field in Excel

